Table of Contents
Advertisement
Advertisement
Table of Contents

Related Manuals for Integra DTM-40.7


Summary of Contents for Integra DTM-40.7
- Page 1 Network Stereo Receiver DTM-40.7 Instruction Manual...
-
Page 2: Table Of Contents
Contents Supplied accessories Names and functions of parts Before use, check the packaging for the main unit and the accessories below. 0 Front 0 Display ∫ Remote control (RC-906S) 0 Remote control ∫ Batteries for remote control (AAA/R03) 0 Rear ∫... -
Page 3: Important Safety Instructions
WARNING: WARNING AVIS TO REDUCE THE RISK OF FIRE OR ELECTRIC RISK OF ELECTRIC SHOCK RISQUE DE CHOC ELECTRIQUE SHOCK, DO NOT EXPOSE THIS APPARATUS TO DO NOT OPEN NE PAS OUVRIR RAIN OR MOISTURE. The lightning flash with arrowhead symbol, within an equilateral triangle, is intended to alert the user to the CAUTION: presence of uninsulated “dangerous voltage”... - Page 4 Product Name: Network Stereo Receiver a weak solution of mild detergent and water. Dry the unit Model Number: DTM-40.7 immediately afterwards with a clean cloth. Don’t use abrasive Responsible Party Name: Onkyo U.S.A. Corporation cloths, thinners, alcohol, or other chemical solvents, because...
- Page 5 – Onkyo Corporation týmto vyhlasuje, že DTM-40.7 a spĺňa základné požiadavky a všetky príslušné ustanovenia Smernice 1999/5/ES. For European Models – Onkyo Corporation izjavlja, da je ta DTM-40.7 v skladu z Declaration of Conformity bistvenimi zahtevami in drugimi relevantnimi določili direktive 1999/5/ES.
-
Page 6: Other Functions
Home Network feature and connection of a USB sources storage device) Integra Remote (smartphone app) You can play high-res sources in formats such as WAV, FLAC, or DSD files (*) distributed over the Internet by using the Home Network feature or connecting a USB storage device. -
Page 7: Names And Functions Of Parts
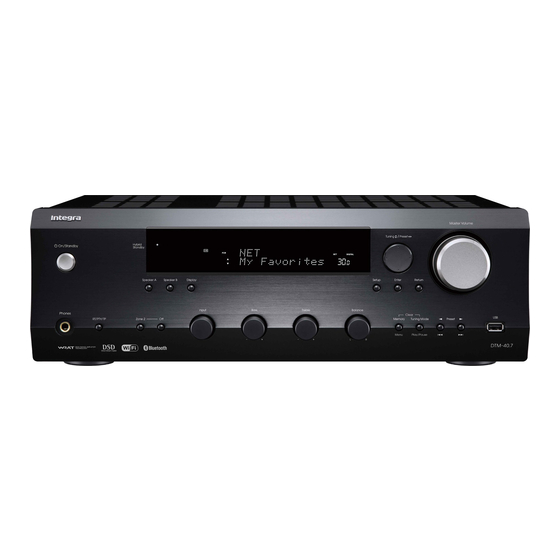
Names and functions of parts (Australian model) Front Í On/Standby button: Press this button to turn the Zone 2/Off buttons: For use when the unit is unit on or put it in standby mode. connected with a pre-main amplifier, a power amplifier Speaker A button: Used to switch between outputting or a subwoofer with built-in amplifier in a separate and turning off output from speakers connected to the... -
Page 8: Display
Names and functions of parts Display DIRECT indicator: This indicator appears when Direct Message display area: Track information and menus of the audio quality setup is on. appear here. -
Page 9: Remote Control
Names and functions of parts Remote control Í button: Press this button to turn the unit on or put it in standby mode. Input Selector buttons: Use these buttons to select the source to playback. Skip (:/9) buttons (*) Search (6/5) buttons (*) Repeat button: Turns repeat play on and off and selects the mode. -
Page 10: Rear
Names and functions of parts Rear REMOTE CONTROL jack: An Onkyo product with AC INLET terminal: The supplied power cord is RI jack can be connected and synchronized with this connected. Always connect the power cord to an AC unit. outlet only after connecting it to the AC INLET terminal FM 75h and AM ANTENNA terminals: The supplied of the unit. -
Page 11: Connections
Connections ¥ The power cord must be connected only after all other cable connections are completed. 12 - 15 mm (1/2” - 5/8”) Connecting speakers Twist the wires of the speaker cable tightly before inserting into the terminals. After inserting the cables, tighten the terminals firmly by turning to the right. -
Page 12: Connecting A Player
Connections Connecting a player When connecting a subwoofer: You can enjoy the audio from players such as televisions, Blu-ray disc players, and game consoles. DIGITAL IN connection If the player has an optical or coaxial digital output terminal, connect using either a digital optical cable or digital coaxial cable to one of the DIGITAL IN terminals. -
Page 13: Am/Fm Antenna Connections
Connections LINE IN connection AM/FM antenna connections Use an RCA cable to connect to the LINE OUT terminal Connect the antennas to listen to AM/FM broadcast. on the player to one of the LINE IN terminal on this unit. 0 You may be unable to receive radio transmissions in To play, select the terminal name with the Input Selector. -
Page 14: Network Connection
Connections ® Network connection Wi-Fi connection Set up the Wi-Fi connection with the access point (a This enables you to enjoy Internet radio services (*), wireless LAN router, for example). Set with the remote AirPlay, Spotify, and the home network features. Connect control while watching the display on the main unit. - Page 15 Connections 5. Use the direction ( ) buttons to select “Wi-Fi Setup”, and then press the Enter button when “Start” is When the access point is not displayed displayed. Use the direction ( ) button to select the “Other...” on the display and press the Enter button.
-
Page 16: Listening To Internet Radio
Listening to Internet radio TuneIn Radio With the radio stations and the on-demand programs Router registered, TuneIn Radio is a service where you can enjoy music, sports and news from all over the world. Menu This unit , , , , Enter Some Internet radio services are registered to the unit by Return... -
Page 17: Listening To Internet Radio
Pandora stations. You can create your stations by entering your favorite tracks and artists when prompted. After you have created your account and stations you can return to your Integra receiver and press the Enter button to begin listening to your personalized Pandora. - Page 18 Listening to Internet radio Create a New Station SiriusXM Internet Radio Enter the name of a track, artist, or genre and Pandora (North American only) will create a unique radio station for you based on the If you want to listen to the service, you must subscribe. To musical qualities of that track, artist, or genre.
- Page 19 Listening to Internet radio direction ( ) buttons to select “Sign out” and then press the Enter button. SiriusXM Internet Radio Menu 7. Use the direction ( ) buttons to select a station If you press the Menu button or Enter button while and then press the Enter button or the playback (1) playing SiriusXM Internet Radio, the following menu button to start playback from the station.
- Page 20 Listening to Internet radio Registering your favorite radio stations 3. Use the direction ( ) buttons to display “IP Address”. (My Favorites) You can listen to your favorite radio stations by registering them to “My Favorites”, which appears when you press the NET button.
- Page 21 Listening to Internet radio 3. Press the direction ( ) buttons to select a number to which a radio station is not registered, and press the Menu button. 4. Use the direction ( ) buttons to select “Create new station” and press the Enter button. 5.
-
Page 22: Playing Music With Bluetooth ® Functions
® Playing music with Bluetooth functions Playback You can wirelessly enjoy music files stored in a smartphone or other Bluetooth enabled device. The coverage area is 48 feet (15 meters). Pairing If the unit is on and the Bluetooth enabled device is connected, the input will be automatically switched to Bluetooth “BLUETOOTH”. -
Page 23: Playing Music With Airplay
® Playing music with AirPlay center, swipe from the bottom of the screen of the iOS device. 0 If the AirPlay icon is not displayed, confirm that this Router unit and the iOS device are both connected to the router correctly. 3. -
Page 24: Playing Music With Spotify
Playing music with Spotify Notes for using the multi-zone feature 0 To enjoy Spotify music in a separate room, select Router Zone 2, and manually select “NET” as the input of the separate room. Also select this unit in the Spotify application. -
Page 25: Playing Tracks Stored On A Usb Storage Device
Playing tracks stored on a USB storage device You can connect a USB storage device to the USB port 5. Use the direction ( ) buttons to select a track and on the front panel and play music files on it. press the playback (1) button. -
Page 26: Home Network Functions
Home network functions Playing music stored on DLNA-compatible ∫ Playing music files by operating the unit devices Router Enter Return PC/NAS You can play music files stored on a server by operating the unit. This unit ® 1. Start the server (Windows Media Player 11, Windows The unit allows you to use DLNA (*) to play music files ®... -
Page 27: Music Streaming From A Shared Folder (Home Media)
Home network functions ∫ Using the Play To feature Music streaming from a shared folder (Home Media) Using a controller device or PC that complies with the DLNA standard, you can play music files stored on a server. In this section, we explain the steps to perform remote ®... - Page 28 Home network functions Creating a shared folder 1. Select and right-click the folder to share. 2. Select “Properties”. 3. Select “Advanced Sharing” on the “Sharing” tab. 4. Select the “Share this folder” check box and click “OK”. 5. Click “Share” for “Network File and Folder Sharing”. 6.
-
Page 29: Listening To The Sound From A Connected Player
Listening to the sound from a connected player By connecting an Onkyo component with RI jack to the unit by using an RI cable and an RCA cable, you can link the unit’s power and input selection and enable operation with this unit’s remote control. For details, refer to the instruction manual of the component with the RI jack. -
Page 30: Listening To Am/Fm Radio
Listening to AM/FM radio Tuning into a radio station When the reception of FM broadcasts is poor: If the radio wave reception is weak or there is excess noise in your location, refer to “Tuning into stations manually” on the next section to change the reception setting to Tuning ... - Page 31 Listening to AM/FM radio Presetting a radio station ∫ Selecting preset stations 1. Press the Tuner button of the remote control repeatedly to select either “AM” or “FM” on the display. Preset 2. Press CH (i/j) buttons to select a preset number. 0 You can also select by directly entering the preset number with the number buttons.
- Page 32 Listening to AM/FM radio Receiving RDS (Australian model) Light M (Light classics) Classics (Serious classics) Other M (Other music) Weather Preset Display Finance Children (Children’s programmes) Social (Social affairs) Religion Phone In Travel Leisure Jazz (Jazz music) RT/PTY/TP Enter Country (Country music) Nation M (National music) RDS stands for Radio Data System and is a method of...
-
Page 33: Multi-Zone Playback
Multi-zone playback Performing multi-zone playback You can listen to audio in a room (called Zone 2) other than the one where this unit is located (called the main room). 0 DSD format files cannot be output to Zone 2. Master Volume 0 With “NET”... - Page 34 Multi-zone playback on the main unit, and while the display is flashing, use the controls to make the adjustments. Alternatively, you can use the Volume 3/4 or Muting buttons on the remote control after pressing the Remote Mode Zone2 button. To control only in the separate room: If you turn the unit to standby during multi-zone playback, the “Z2”...
-
Page 35: Various Settings
Various settings Adjusting sound quality, etc. Sleep timer , , , Audio Sleep 1. Press the Audio button. With the sleep timer, you can set the unit so that it 2. Press the direction ( ) buttons to select the setting automatically turns off after a specified period. -
Page 36: Inputting Characters
Various settings Inputting characters Setup menu , , , , , , , , Enter Enter Return Setup While performing network settings or in the Internet radio The unit allows you to configure advanced settings to menu, etc., when the following appears on the display, provide you with an even better experience. - Page 37 To set, select each Network Standby: you can turn on the power of the unit input source. via network using an application such as Integra Remote. j12 dB to i12 dB (default setting: 0 dB) Off (default setting) Name Edit: Enter a simple name of up to 10 characters 0 When “Network Standby”...
- Page 38 Various settings Address” as well as set information related to your LAN, such as Subnet Mask and Gateway. 0 If the input is not switched automatically, set to “Off” and change the input manually. Wi-Fi: Connect the unit to network via wireless LAN router.
- Page 39 Various settings ∫ 10. 12V TriggerA BD/DVD, CBL/SAT, PC, GAME, TV/TAPE, CD, PHONO, TUNER, NET, BLUETOOTH: Set the 12V trigger output Set when outputting the control signal (maximum 12 V/ setting. 100 mA) through the 12V TRIGGER OUT A jack. Main: 12V trigger is output when this input source is Different settings can be set for each input source.
-
Page 40: Firmware Update
Various settings Firmware update Update procedures 1. Press the Setup button. 2. Use the direction ( ) buttons to select “8. Firmware Update” and press the Enter button. 0 If it is not displayed, wait for a moment until the network feature starts. - Page 41 Various settings ∫ Updating the firmware via USB connection 10. Press the Enter button with “Update” selected to start update. You need a 64 MB or larger capacity USB storage for “Completed!” is displayed when the update is updating. complete. 11.
-
Page 42: Troubleshooting
Troubleshooting 0 If your record player uses an MC cartridge, you must connect an audio equalizer and either an MC head Before starting the procedure Problems may be solved by simply turning the power amp or an MC transformer. on/off or disconnecting/connecting the power cord, which is easier than working on the connection, setting and operating procedure. - Page 43 Troubleshooting Cannot access the network server. 0 When other wireless LAN devices are used near the unit, several issues such as interrupted playback and 0 This unit needs to be connected to the same router as communication may occur. You can avoid these issues the network server.
-
Page 44: Compatible Devices/Media/File Formats
Compatible devices/media/file formats Compatible devices/media Extension .mp3, .MP3 Standard MPEG-1/MPEG-2 Audio Layer-3 ∫ USB storage device Sampling Frequency 8 k/11.025 k/12 k/16 k/22.05 k/24 k/32 k/ The unit supports USB storage devices that support the USB Mass 44.1 k/48 kHz Storage Class. -
Page 45: Specifications
Specifications ∫ Amplifier section ∫ Bluetooth section Rated Output Power (FTC) (North American): Communication system: With 8 ohm loads, both channels driven, from 20- Bluetooth Specification version 2.1 +EDR (Enhanced Data Rate) 20,000 Hz; rated 80 watts per channel minimum RMS Frequency band: 2.4 GHz (2.402 GHz - 2.480 GHz) Modulation method:... - Page 46 License and trademark information PANDORA, the PANDORA logo, and the Pandora trade dress are trademarks or registered trademarks of Pandora Media, Inc. Used with permission. The Wi-Fi CERTIFIED Logo is a certification mark of Wi-Fi ® Alliance SiriusXM Internet Radio subscriptions are sold separately and are ®...
- Page 47 GNU License This option is useful when you wish to copy part of the code of the Library into a program that is not a library. 4. You may copy and distribute the Library (or a portion or derivative of it, under Section 2) in object code or executable form under the terms of Sections 1 and 2 above provided that you accompany it with the complete corresponding machine- readable source code, which must be distributed under the terms of Sections 1 and 2 above on a medium customarily Important Notice Regarding Software...
-
Page 48: Gnu General Public License
This library is free software; you can redistribute it and/or modify it under the terms of the GNU Lesser General Public distributed through that system in reliance on consistent application of that system; it is up to the author/donor to decide if he License as published by the Free Software Foundation;... - Page 49 THE SOFTWARE IS PROVIDED "AS IS", WITHOUT WARRANTY OF ANY KIND, EXPRESS OR IMPLIED, INCLUDING There is no warranty against interference with your enjoyment of the library or against infringement. There is no warranty BUT NOT LIMITED TO THE WARRANTIES OF MERCHANTABILITY, FITNESS FOR A PARTICULAR PURPOSE AND that our efforts or the library will fulfill any of your particular purposes or needs.
- Page 50 5. mailto: michael.barone@lmco.com (12) RSA Data Security, Inc. MD5 Message-Digest Algorithm 6. mailto: Jean-Francois.Boudreault@viagenie.qc.ca Copyright (C) 1991-2, RSA Data Security, Inc. Created 1991. All rights reserved. 7. mailto: karl@owl.HQ.ileaf.com License to copy and use this software is granted provided that it is identified as the "RSA Data Security, Inc. MD5 Message- 8.
- Page 51 9. Accepting Warranty or Additional Liability. their licenses terminated provided such individuals or entities remain in full compliance with those licenses. Sections 1, 2, While redistributing the Work or Derivative Works thereof, You may choose to offer, and charge a fee for, acceptance of 6, 7, 8, 9, 10 and 11 will survive any termination of this License.
- Page 52 18 park Way, Upper Saddle River, N.J. 07458, U.S.A. Tel: 800-225-1946, 201-818-9200 Fax: 201-785-2650 http://www.integrahometheater.com Gutenbergstrasse 3, 82178 Puchheim, GERMANY Tel: +49-8142-4401-0 Fax: +49-8142-4208-213 http://www.integra.eu 302, Building 1, 20 North Chaling Rd., Xuhui District, Shanghai, China 200032 , Tel: 86-21-52131366 Fax: 86-21-52130396 http://www.integra.com.cn F1507-0 SN 29402076 (C) Copyright 2015 Onkyo Corporation Japan.
Need help?
Do you have a question about the DTM-40.7 and is the answer not in the manual?
Questions and answers