Table of Contents
Advertisement
Advertisement
Table of Contents

Subscribe to Our Youtube Channel
Related Manuals for Humminbird Fishin' Buddy MAX


Summary of Contents for Humminbird Fishin' Buddy MAX
- Page 1 PiranhaMAX™ & Fishin’ Buddy® MAX PiranhaMAX™ & Fishin’ Buddy® MAX 532419-1_A...
-
Page 2: Thank You
Thank You! Thank you for choosing Humminbird®, the #1 name in marine electronics. Humminbird has built its reputation by designing and manufacturing top-quality, thoroughly reliable marine equipment. Your Humminbird is designed for trouble-free use in even the harshest marine environment. In the unlikely event that your Humminbird does require repairs, we offer an exclusive Service Policy. - Page 3 ATTENTION INTERNATIONAL CUSTOMERS: Products sold in the U.S. are not intended for use in the international market. Humminbird international units provide international features and are designed to meet country and regional regulations.
-
Page 4: Table Of Contents
Table of Contents Sonar Technology Dual Beam Sonar..........2 Down Imaging Sonar. - Page 5 ........23 (Sonar View only) Maintenance Troubleshooting Dual Beam Fishfinder Specifications Down Imaging Fishfinder Specifications Contacting Humminbird...
-
Page 7: Sonar Technology
Sonar Technology The fishfinder automatically determines depth and makes adjustments to keep the bottom and fish visible on the display. The fishfinder uses sonar technology to send sound waves from the transducer into the water. The returned “echoes” are plotted on the display and represent something that was detected by a sonar return at a particular time. -
Page 8: Dual Beam Sonar
Dual Beam Sonar The Dual Beam sonar fishfinders use a 200/455 kHz dual beam sonar system with a 28° area of coverage. Dual Beam sonar is optimized to show the greatest bottom definition using a narrow (16°) beam yet can still indicate fish found in the wide (28°) beam when the Fish ID+ feature is turned on. -
Page 9: Down Imaging Sonar
Down Imaging Sonar (Down Imaging models only) In addition to Dual Beam sonar, the Down Imaging fishfinder uses Down Imaging sonar technology. The Down Imaging transducer scans the water with a razor-thin 74° beam (455 kHz) that is wide (side to side) and very thin (front to back). Down Imaging View white streaks or clouds... -
Page 10: Powering On And Off
Powering ON and OFF Use the following instructions to turn on your control head. Power on and Start Operation 1. Press and hold the POWER/MENU key until the control head powers on. 2. Press the UP or DOWN Arrow key to select Normal. 3. -
Page 11: The Control Head
The Control Head Your unit interface is easy to use. A combination of keys and special features allows you to control what you see on the display. display POWER/MENU CHECK/ENTER UP and DOWN Arrow keys The Control Head... -
Page 12: Power/Menu Key
POWER/MENU Key The POWER/MENU key is used to power the control head on and off. It is also used to open and close the menu system. • Menus: Press the POWER/MENU key in any view to open the X-Press Menu for that view. Each X-Press Menu provides frequently-used menu settings that correspond with the current view. -
Page 13: Check/Enter Key
CHECK/ENTER Key The CHECK/ENTER Key has multiple functions, which depend on the view, menu, or situation. • Menu Activation: Press the CHECK/ENTER key after selecting a menu option to activate the menu or open a submenu. NOTE: See Using the Menu System for more information. •... -
Page 14: Using The Menu System
Using the Menu System Review the instructions below to understand how to use the menu system. 1. Open the Menu System Press the POWER/MENU key. 2. Select a Menu Option Press the UP or DOWN Arrow key to select a menu option. NOTE: Available menu options are determined by the on-screen view. - Page 15 3. Activate a Menu Option and Adjust Settings Activate a Menu Option: Press the CHECK/ENTER key to activate the selected menu option. The menu option will be highlighted, indicating the menu option is active and changes can be made to the menu setting.
-
Page 16: Setting Up The Control Head (Setup Menu)
CHECK/ENTER key. 3. Select UNITS, and press the CHECK/ENTER key. Menu options are determined by your Humminbird model and the selected view. See the following pages for menu descriptions. Also, see Using the Menu System and Changing the On-Screen View for more information. -
Page 17: Contrast (Down Imaging View Only)
Contrast (Down Imaging View only) Settings: 1 to 10; Default = 5, Setting Saved in Memory Contrast accents the light and dark parts of the sonar data to provide greater definition. Palette (Down Imaging View only) Settings: Amber1, Amber2, Blue, Brown; Default = Amber 1, Setting Saved in Memory Palette allows you to select which color palette you would like to use for the Down Imaging view. -
Page 18: Bottom View (Sonar View Only)
Bottom View (Sonar View only) Settings: Structure ID, WhiteLine; Default = Structure ID, Setting Saved in Memory Bottom View selects the method used to represent the bottom and structure on the display. Structure ID represents weak returns as light pixels and strong returns as dark pixels. -
Page 19: Reset
Reset Settings: Select CONFIRM and press the CHECK/ENTER key to activate. Use this menu choice with caution! Reset restores ALL menu settings to their factory defaults. Language (International Models only) Settings Vary; Default = English, Setting Saved in Memory Language selects the display language for menus. Units - Temperature (International Models only, Units submenu) Settings: ˚C (Celsius), ˚F (Fahrenheit);... -
Page 20: Setting Alarms
Setting Alarms Alarms are based on the limits you set for a device, such as battery voltage, depth, and more. Set the alarms that apply to your unit installation and configuration. Set an Alarm 1. Press the POWER/MENU key. 2. Select SETUP and press the CHECK/ENTER key. 3. - Page 21 Alarm Name Description Range Mute controls the audible On, Off sound made when an alarm is Mute Default = Off triggered. Battery Alarm sounds when the input battery voltage is Off, 8.5V to 13.5V Battery equal to or less than the menu Default = Off setting.
-
Page 22: Changing The On-Screen View
Changing the On-Screen View The sonar information from your fishfinder is displayed on the screen in a variety of easy-to-read views. When you press the POWER/MENU key, you can access the menu options for the on-screen view. Display a View 1. -
Page 23: Status View
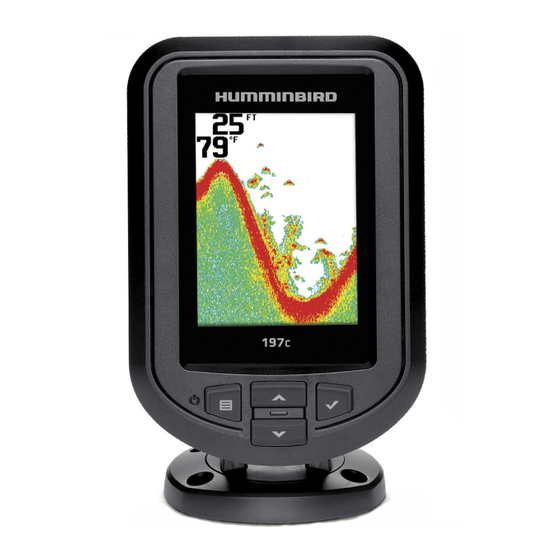
Status View Status View displays current data, including the unit model number, serial number, and battery status. Status View (PiranhaMAX 197c DI) Views... -
Page 24: Down Imaging View (Down Imaging Models Only)
Down Imaging View (Down Imaging Models only) Down Imaging View uses the razor-thin profiling beams to produce the detailed sonar data that you see on the display. See Sonar Technology: Down Imaging Sonar and Opening the X-Press Menu for more information. •... -
Page 25: Sonar View
Sonar View Sonar View presents a historical log of sonar returns. The most recent sonar returns are charted on the right side of the display. As new information is received, the historical information scrolls left across the display. See Sonar Technology: Dual Beam Sonar for more information. -
Page 26: Opening The X-Press Menu
Opening the X-Press Menu The X-Press Menu provides menu options for the on-screen view. Customize the Display: Set the range of data displayed on the view, and adjust the sensitivity, zoom level, chart display speed, and more. Open the Setup Menu Set the Down Imaging View contrast and palette, set the Sonar View filter and Fish ID+, or set the units of measurement for the control head. -
Page 27: View
View Settings: Sonar, Down Imaging (Down Imaging models only), Status View selects a view to be displayed on the screen. See Changing the On-Screen View for more information. Depth Range Settings: Auto, 15 ft to 600 ft (Sonar View only),15 ft to 320 ft (Down Imaging View only);... -
Page 28: Zoom
Zoom Settings: Off, Auto, Manual Ranges; Default = Off Zoom provides a magnified view of the bottom and structure. Auto: Select Auto to magnify the area around the bottom in order to reveal fish and structure close to the bottom that may not be visible during normal operation. -
Page 29: Filter (Sonar View Only)
Light adjusts the brightness of the display. Use a higher backlight setting for night fishing. NOTE: Continuous backlight operation will significantly decrease the battery life for Fishin' Buddy MAX units and PiranhaMAX Portables. Beam Select (Sonar View only) Settings: 200 kHz, 455 kHz; Default = 200 kHz Beam Select sets which sonar returns from the transducer will be displayed on the screen. -
Page 30: Maintenance
Maintenance Your Humminbird fishfinder is designed to provide years of trouble free operation with very little maintenance. Use the following procedures to ensure your Humminbird continues to deliver top performance. Control Head Maintenance It is important to consider the following precautions when using your Humminbird control head: •... -
Page 31: Transducer Maintenance
Transducer Maintenance Use the following information to maintain the transducer operation. • If your boat remains in the water for long periods of time, algae and other marine growth can reduce the effectiveness of the transducer. Periodically clean the face of the transducer with a mild, marine-safe and plastic-safe soap or solution. -
Page 32: Troubleshooting
Repairs should be performed only by authorized Humminbird technicians. Many requests for repair received by Humminbird involve units that do not actually need repair. These units are returned “no problem found.” If you have a problem with your fishfinder, use the following troubleshooting guide before calling Humminbird Customer Service or sending your unit in for repair. - Page 33 transducer that is in the water. (If a trolling motor transducer is selected and the trolling motor is out of the water, no sonar information appears.) If none of these actions solves the problem, inspect the transducer cable from end to end for breaks, kinks, or cuts in the outer casing of the cable.
- Page 34 Fishin' Buddy MAX Troubleshooting 1. Nothing happens when I turn the unit on. Check the power connection to the Fishin’ Buddy MAX. It is possible to force the power cable connector into the cable holder incorrectly. If the connector is reversed, the unit will not work.
-
Page 35: Dual Beam Fishfinder Specifications
Transducer Cable Length ..... . PiranhaMAX: 20 ft (6 m) NOTE: Product specifications and features are subject to change without notice. NOTE: Humminbird verifies maximum stated depth in saltwater conditions, however actual depth performance may vary due to transducer installation, water type, thermal layers, bottom composition, and slope. -
Page 36: Down Imaging Fishfinder Specifications
Transducer Cable Length .....PiranhaMAX DI: 20 ft (6 m) NOTE: Product specifications and features are subject to change without notice. NOTE: Humminbird verifies maximum stated depth in saltwater conditions, however actual depth performance may vary due to transducer installation, water type, thermal layers, bottom composition, and slope. - Page 37 Environmental Compliance Statement: It is the intention of Johnson Outdoors Marine Electronics, Inc. to be a responsible corporate citizen, operating in compliance with known and applicable environmental regulations, and a good neighbor in the communities where we make or sell our products. WEEE Directive: EU Directive 2002/96/EC “Waste of Electrical and Electronic Equipment Directive (WEEE)”...
- Page 38 Notes...
- Page 39 Notes...
-
Page 40: Contacting Humminbird
Contact Humminbird Contact Humminbird Customer Service in any of the following ways: Web site: humminbird.com E-mail: service@humminbird.com Telephone: 1-800-633-1468 Direct Shipping: Humminbird Service Department 678 Humminbird Lane Eufaula, AL 36027 USA Hours of Operation: Monday - Friday 8:00 a.m. to 4:30 p.m. (Central Standard Time)
Need help?
Do you have a question about the Fishin' Buddy MAX and is the answer not in the manual?
Questions and answers