BIXOLON SRP-275II Service Manual
Hide thumbs
Also See for SRP-275II:
- User manual (36 pages) ,
- Windows driver manual (30 pages) ,
- Installation manual (8 pages)
Table of Contents
Advertisement
Quick Links
Advertisement
Table of Contents
Troubleshooting

Related Manuals for BIXOLON SRP-275II


Summary of Contents for BIXOLON SRP-275II
- Page 1 Service Manual SRP-275II Impact Printer Rev. 1.00 http://www.bixolon.com...
-
Page 2: Table Of Contents
SRP-275II ■ Table of Contents 1. Precaution Segment ............................ 6 1-1 Safety Precautions........................... 6 1-2 Servicing Precaution..........................7 1-3 Precaution for Electrostatically Sensitive Devices(ESDs) ............... 7 1-4 Introduction .............................. 8 2. Installation and Operation .......................... 9 2-1 Installation..............................9 2-1-1 AC Adapter Installation ........................9 2-1-2 Interface cable and Cash Drawer cable Installation ................. - Page 3 5-3-6 AC motor sub assy.......................... 71 5-3-7 PCB-AC assy ..........................71 5-3-8 Main assy ............................72 5-4 SRP-275II Whole unit Sub-assembly ....................73 5-4-1 Cover base assy ..........................73 5-4-2 Switch-paper near end assy ......................74 5-4-3 Switch-paper end assy........................74 5-4-4 Cover middle assy ..........................
- Page 4 SRP-275II 6. Adjustments and Maintenance......................... 88 6-1 Adjustment ............................. 88 6-1-1 Adjustment of Head gap ......................... 88 6-1-2 Replacement of Printer-head ......................88 6-2 Maintenance ............................89 6-2-1 Cleaning ............................89 6-2-2 Inspection............................89 6-3 Lubricants and adhesive application ..................... 90 6-3-1 Lubricant requirements ........................
-
Page 5: About This Manual
BIXOLON Co., Ltd. We at BIXOLON maintain ongoing efforts to enhance and upgrade the functions and quality of all our products. In following, product specifications and/or user manual content may be changed without prior notice. -
Page 6: Precaution Segment
SRP-275II 1. Precaution Segment Follow these safety, servicing and ESD precautions to prevent damage and to protect against potential hazards such as electrical shock. 1-1 Safety Precautions 1. Be sure that all built-in protective devices are in place. Restore any missing protective shields. -
Page 7: Servicing Precaution
SRP-275II 1-2 Servicing Precaution WARNING 1 : First read the “Safety Precautions” section of this manual. If some unforeseen circumstance creates a conflict between the servicing and safety precautions, always follow the safety precautions. WARNING 2 : An electrolytic capacitor installed with the wrong polarity might explode. -
Page 8: Introduction
SRP-275II 1-4 Introduction The SRP-275II is a high-quality impact dot matrix POS printer. This one-station printer has the following features. • Compact design and light-weight. • High-speed printing using logic-seeking. • Easy to use : Easy paper loading. • High reliability and long life due to the use of stepping motors for head carriage return and paper feeding. -
Page 9: Installation And Operation
SRP-275II 2. Installation and Operation 2-1 Installation 2-1-1 AC Adapter Installation 1) Make sure the printer is turned off. AC adaptor 2) Before inserting the AC adaptor, connect the Power connector power cord. 3) Insert the AC adaptor as shown. -
Page 10: Ribbon Cartridge Installation
SRP-275II 2-1-3 Ribbon Cartridge Installation 1) Before inserting the ribbon cassette, turn the knob clockwise to prevent twisting the ribbon. 2) Open the front cover of printer. 3) Take out the old ribbon cassette if there is one. 4) Insert the new ribbon cassette as shown and pay particular attention to the placement of the ribbon in front of the Printer Head. -
Page 11: Paper Roll Installation
SRP-275II 2-1-4 Paper Roll Installation 1) To prevent data loss, make sure that the printer is not receiving data. 2) Open the rear cover by pushing the open button and push the arrow mark back. 3) Remove the used paper roll core if there is one. -
Page 12: Wall Mount Installation
SRP-275II 2-1-5 Wall Mount Installation Bracket hanger * Dip switch 1) Turn the Set over and attach the Bracket hanger to the Frame base then tighten four screws. Screw(3x5) (4pieces) 2) Attach the Bracket mount to the wall firmly with the Bracket mount eight screws. -
Page 13: Operation
SRP-275II 2-2 Operation 2-2-1 Using the operation panel Most of the functions of this printer are governed by software, but you can monitor the printer s status by looking at the lights on the control panel and for some procedures you will use the buttons. -
Page 14: Error Led Blinking Pattern
SRP-275II 2-2-2 ERROR LED blinking pattern The printer stops all printer operations for the selected paper section, goes off line, and the ERROR LED blinks when an error is detected. • Errors that automatically recover Error Description ERROR LED blinking pattern... -
Page 15: Hexadecimal Dumping
SRP-275II 2-2-3 Hexadecimal Dumping This feature allows experienced users to see exactly what data is coming to the printer. This can be useful in finding software problems. When you turn on the hexadecimal dump function, the printer prints all commands and other data in hexadecimal format along with a guide section to help you find specific commands. - Page 16 # $ % & ’ ( ) * + , - . / 0 1 2 3 4 5 6 7 8 9 : ; < = > ? @ A B C D E F G H I J <SRP-275II VER. V01.01 STB 110608>...
-
Page 17: Setting The Dip Switches
SRP-275II 2-3 Setting the Dip Switches Although the factory settings are best for almost all users, if you have special requirements, you can change the DIP Switch. Your printer has two sets of DIP Switches. The functions of the switches are shown in the following table. -
Page 18: Dip Switch Setting For Citizen(Idp 3550) Mode
SRP-275II 2-3-1 DIP Switch setting for Citizen(iDP 3550) mode • DIP Switch 1 Switch Function Default Emulation Selection (*1) Refer to the following table Auto cutter Enable Disable CBM2 mode CBM1 mode CBM command (iDP3530 system) (iDP3540 system) International characters (*2) -
Page 19: Dip Switch Setting For Star(Sp500) Mode
SRP-275II 2-3-2 DIP Switch setting for Star(SP500) mode • DIP Switch 1 Switch Function Default Emulation Selection (*1) Refer to the following table Auto cutter Enable Disable Black/Red Printing Enable Disable Reserved • DIP Switch 2 (RS232C serial interface model) -
Page 20: Changing The Dip Switch Setting
SRP-275II 2-3-3 Changing the DIP Switch setting If you need to change settings, follow the steps below to make your changes. CAUTION Turn off the printer before removing the DIP Switch cover to prevent an electric short, which can damage the printer. -
Page 21: Setting The Memory Switches
Switch setting”. Settings of the Memory Switch are stored in the NV memory; therefore, even if the printer is turned off, the settings are maintained. When you replace a SRP-270 with a SRP-275II, you should adjust the MSW 8-5 to OFF. - Page 22 When On is selected, a bit of the “rear cover open / close" in each status that is transmitted from the printer is changed every time the rear cover is open or closed. When you replace a SRP-270 with a SRP-275II, you should adjust the MSW 8-5 to Off. MSW 8-8: When Off is selected, a bit of the “automatic recoverable error”...
- Page 23 SRP-275II • Memory Switch Setup Mode The following items are specified in the Memory Switch setup mode: Basic Serial communication condition (Serial communication) - Transmission speed - Parity - Handshaking - Data length Receive buffer full release condition (MSW 8-7)
- Page 24 SRP-275II • Procedure of Memory Switch setting Entering Memory Switch Setting Mode ① Resetting Basic Serial Interface? Baud rate Handshake Parity Data bit Current Current Current Current setting: setting: setting: setting: 9600 bps DSR/DTR 8 bits 19200bp XON/XOFF Even 7 bits...
-
Page 25: Memory Switch Setting For Star Mode
SRP-275II 2-4-1 Memory Switch setting for Star mode • Settings Memory Switches are from MSW 0 to MSW 8. They are stored in non-volatile memory (flash memory). To change the settings, send the following commands from the host. [Name] Set Memory Switch... - Page 26 SRP-275II • Default Settings The default settings for Memory Switch 0 to Memory Switch 8 are shown below. Settings vary for single byte character countries (standard specifications (SBCS)) and for double-byte character countries (Chinese character specifications (DBCS)). - Standard Specifications (SBCS)
- Page 27 SRP-275II • Function - Memory Switch 0 Function Reserved Red and Black Refer to the following table (inverted black and white) Commands (*3) Reserved SBCS DBCS Country Specifications (*1) (Single Byte countries) (Double Byte countries) <FF> Command (*2) Refer to the following table...
- Page 28 SRP-275II - Memory Switch 1 Function Reserved Zero style Normal Slash zero International Characters (*1) Refer to the following table NOTES (*1) International Characters Default Value Settings MSW1-3 MSW1-2 MSW1-1 MSW1-0 International Characters U.S.A France Germany U.K. Denmark1 Sweden Italy...
- Page 29 SRP-275II - Memory Switch 3 Function Character Table (*2) Refer to the following table <CR> Command Functions (*1) Refer to the following table NOTES (*1) <CR> Command Functions MSW3-1 MSW3-0 <CR> Functions 0 Ignored 1 Ignored Prints and performs a line feed (same as <LF>.)
- Page 30 SRP-275II - Memory Switch 4 Function Automatic Status Function Disabled Enabled Auto-status sent only ESC RS a n command function Only Setting once Data reception error (serial) Prints “?” Ignored - Memory Switch 5 Function Reserved - Memory Switch 6...
-
Page 31: Product Specifications
SRP-275II 3. Product Specifications 3-1 Appearance 3-1-1 Printer Dimensions (mm) • SRP-275IIA Type • SRP-275IIC Type (Approx. wt.: 2.4 kg, Shipping. Wt : 3.9 kg) (Approx. wt.: 2.5 kg, Shipping. Wt : 4.0 kg) 3-1-2 AC Adapter Dimensions (mm) - 31 -... -
Page 32: Feature Locations
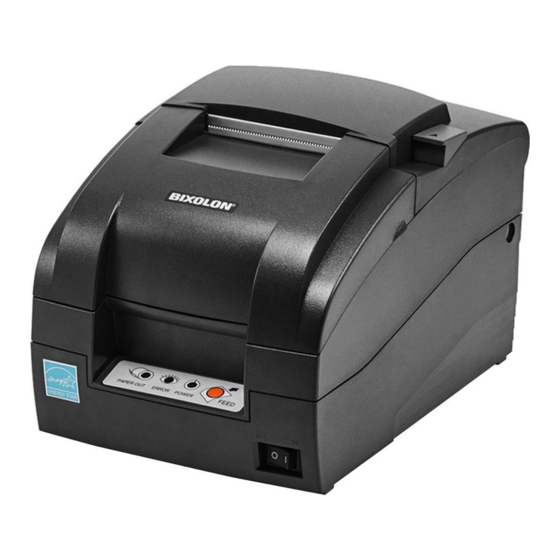
SRP-275II 3-1-3 Feature Locations • SRP-275IIA Type • SRP-275IIC Type - 32 - Rev. 1.00... -
Page 33: General Specifications
SRP-275II 3-2 General Specifications Item Description Remark • SRP-275II : RS-232 Serial communication • SRP-275IIP : IEEE 1284 Parallel communication Product • SRP-275IIU : USB communication • SRP-275IIEP : 10/100 Base-T communication Processor • NEC V850E (32bit) • Flash : 16Mbits (EN29LV160BB) Memory •... -
Page 34: Reference Information
SRP-275II 3-3 Reference information 3-3-1 Printer Mechanism Specification Item Description Remark Model SMP715II Printer method Serial impact type Printer direction Bi-directional with logic seeking Printing speed 5.1 lines/sec (9ⅹ7 font 40 columns) Printing resolution 160(W)ⅹ144(L) DPI Paper feeding Performed by step motor Paper Paper roll : 76±0.5(W)ⅹMax.Ø83 mm... - Page 35 SRP-275II NOTES If the print duty ratio is too high, the operation of the print head is stopped by the duty limit. In such circumstances, the print speeds shown above cannot be guaranteed. - cpi=characters per inch (*1) Dot configuration...
-
Page 36: Character Specification
SRP-275II 3-3-3 Character Specification Item Description Remark 0.3175 mm Dot interval 0.3528 mm Font type ASCII Chinese Print font 9ⅹ9 7ⅹ9 16ⅹ16 Printing columns Character size (mm) (*1) 1.7ⅹ3.2 1.4ⅹ3.2 5.7ⅹ3.0 Column interval (mm) 2.13 1.59 3.19 Line interval 1/6"... -
Page 37: Paper Specification
SRP-275II 3-3-4 Paper Specification Item Description Remark Paper type Paper roll Paper roll width 76±0.5 mm (2.99±0.02”) Paper roll diameter Max. ø83 mm (3.27") • Thickness : 1 sheet 0.06~0.085 mm (0.0024~0.0034") Normal paper • Weight : 52.3~64g/m (0.115~0.1411 lb) Print density of the black mark •... - Page 38 SRP-275II The position of the autocutter can be adjusted to another dimension using the GS (E command). If paper longer than 68.3mm is used, the first receipt cannot be used when exchanging or reloading the roll paper since it has been ejected.
-
Page 39: Ribbon Cassette Specification
SRP-275II C. 59.5mm is the recommended dimension. The position of the manual cutter can be adjusted to another dimension using the GS (E command). If paper longer than 59.5mm is used, the first receipt cannot be used when exchanging or reloading the roll paper since it has been ejected. -
Page 40: Environment Conditions
- Sweep: 10 minutes (half cycle) - Duration: 1 hour - Direction: x, y and z • When packed - Package: SRP-275II standard package - Height: 60cm (23.62") - Directions: 1 corner, 3edges and 6 surfaces Impact resistance • When unpacked - Height: 5cm (1.97") -
Page 41: Reliability
SRP-275II 3-3-7 Reliability Item Description Remark • Mechanism : Approx. 18 million lines • Auto cutter : Approx. 1.5 million cuts Life (End of life is defined as the point at which the printer reaches the beginning of the Wear out Period.) Head Approx. -
Page 42: Printer Head Specification
SRP-275II 3-3-10 Printer Head Specification Item Description Remark Model N09-15KS Type : Ballistic type (Free fight) Number of wire : 9pins Specification Dot pitch : 0.352 (1/72”) Dot wire diameter : 0.28mm (0.01”) Resistance : 22Ω ± 1.5Ω (at 20 ) ℃... -
Page 43: Hf(Head Feed) Motor Specification
SRP-275II 3-3-13 HF(Head Feed) Motor Specification Item Description Remark Model SP-42RD-191M (MOATECH Co., Ltd) MOATECH Voltage 24VDC±10% Current 700mA / Phase (Peak) Resistance 5.2 Ω ± 5% at 25℃ Step angle 7.5° Pull out torque 2650 PPS 300 g·cm(1-2Phase) 3-3-14 Auto Cutter Specification... -
Page 44: Interface Specifications
SRP-275II 3-5 Interface Specifications 3-5-1 RS-232C Serial Interface *Related model: IFA-S 3-5-1(a) Specification Item Description Remark Data transmission Serial Synchronization Asynchronous Handshaking H/W : DTR / DSR XON : ASC code 11 (Flow control) S/W : XON / XOFF XOFF : ASC code 13 •... - Page 45 SRP-275II 3-5-1(c) Cable Connection (F.G) 1 1 (F.G) (TXD) 2 2 (RXD) (RXD) 3 3 (TXD) (RTS) 4 4 (DTR) PRINTER HOST SIDE SIDE (CTS) 5 5 (S.G) (25Pin) (9Pin) (DSR) 6 6 (DSR) (S.G) 7 7 (RTS) (DTR) 20...
-
Page 46: Ieee1284 Parallel Interface
SRP-275II 3-5-2 IEEE1284 Parallel Interface *Related model: IFG-P Bi-directional parallel interface : In accordance with the IEEE 1284 Nibble / Byte mode 3-5-2(a) Forward Mode Specification (Compatibility mode) Data transmission from host computer to printer : Centronics compatible Item Description... -
Page 47: Usb Interface
SRP-275II 3-5-2(d) IEEE1284 I/F Cable 3-5-3 USB Interface *Related model: IFG-U SRP-275II support the USB (Universal Serial Bus) Communication. 3-5-3(a) Specification Item Description Remark Transfer type • BULK • Bi-direction, Half-duplex Data Signal • Differential signal pair (D+ / D-) •... -
Page 48: Ethernet Interface
Function White Orange Transmit + Orange Transmit - White Green Receive + Blue White Blue Green Receive - White Brown Brown * For more information, refer to the Ethernet User Manual in Bixolon Web Site. - 48 - Rev. 1.00... -
Page 49: Drawer Kick-Out Specifications
SRP-275II 3-6 Drawer Kick-Out Specifications 3-6-1 Drawer Cable 3-6-2 Cable Connection Pin No. Description Direction Signal GND Drawer kick-out driver signal #1 Output Drawer Open / Close signal Input +24V Drawer kick-out driver signal #2 Output Signal GND - 49 -... -
Page 50: Hardware
SRP-275II 4. Hardware 4-1 Wiring Diagram 4-1-1 Main board wiring diagram HOST DRAWER I/F-CN2 ASSY INTERFACE I/F-CN1 ASSY PCB MAIN ASSY PCB MECHA SMPS - 50 - Rev. 1.00... -
Page 51: Sub Wiring Diagram
SRP-275II 4-1-2 SUB wiring diagram ASSY MAIN PCB JCN10 ASSY PCB CONNECTOR ASSY PCB BMS ASSY SW PAPER NEAR END ASSY AUTO CUTTER ASSY SW PAPER NEAR END_W ASSY FPC HEAD CN503 ASSY PCB MECHA CN502 CN504 CN505 CN501 SOLENOID... -
Page 52: Block Diagram
SRP-275II 4-2 Block Diagram - 52 - Rev. 1.00... -
Page 53: Disassembly And Assembly
SRP-275II 5. Disassembly and Assembly To disassembly this printer, perform the assembly procedures described in the reverse sequence. First, the main-assembly blocks are disassembled and divided into the sub assembly blocks, then each of the individual blocks is disassembled. When assembling the printer, check each part and its attachment position by referring to PPL(Product Parts List). -
Page 54: Lever-Ribbon-Feeder Assy
SRP-275II 5-1-3 Lever-ribbon-feeder assy Part name Assembly procedure ① Lever-ribbon feed 1. Caulk ② Shaft-reduction B on ① Lever-ribbon feed and then ② Shaft-reduction B grease ② Shaft-reduction B with HG-31S. ③ Spring-tension-RF 2. Insert ③ Spring-tension-RF and ④ Wave washer to ② Shaft- ④... -
Page 55: Carriage Head Assy
SRP-275II 5-1-5 Carriage head assy Part name Assembly procedure ① Head-carriage-(WI) 1. Insert two ② Bearing-metal into ① Head-carriage-(WI) ② Bearing-metal -2ea. 5-1-6 Head-cover assy Part name Assembly procedure ① Cover-head 1. Paste ② Label hot on the left bottom side of ① Cover-head. -
Page 56: Frame Basket-A Assy
SRP-275II 5-1-7 Frame basket-A assy Part name Assembly procedure ① Frame basket 1. Tighten ⑥ Frame-holder basket-L ass’y to ① Frame basket ② Roller holder -2ea. with two ⑨ Screw-taptite (M3×6). ③ Shaft-roller holder 2. Tighten ⑦ Frame-holder basket-R ass’y to ① Frame basket ④... -
Page 57: Frame Basket-C Assy
SRP-275II 5-1-8 Frame basket-C assy Part name Assembly procedure ① Frame basket 1. Tighten ⑥ Frame-holder basket-L ass’y to ① Frame basket ② Roller holder -2ea. with two ⑨ Screw-taptite (M3×6). ③ Shaft-roller holder 2. Tighten ⑦ Frame-holder basket-R ass’y to ① Frame basket ④... -
Page 58: Frame-Holder Basket-L Assy
SRP-275II 5-1-9 Frame-holder basket-L assy Part name Assembly procedure ① Frame-holder basket-L 1. Grease Shaft-reduction of ① Frame-holder basket-L caulking caulking ass’y ass’y with HG-31S. ② Gear-reduction 2. Insert ② Gear-reduction to Shaft-reduction of ① Frame-holder ③ Washer-plain (ø2.6) basket-L caulking ass’y and then assemble ③ Washer-plain (ø2.6). -
Page 59: Frame-Housing Cutter Lower Assy
SRP-275II 5-1-12 Frame-housing cutter lower assy Part name Assembly procedure ① Frame-housing cutter lower 1. Tighten two ② Screw-taptite (M3×4) on ① Frame-housing cutter ② Screw-taptite (M3×4) -2ea. lower. 5-1-13 Cutter lower assy Part name Assembly procedure ① Cutter lower 1. -
Page 60: Frame-Rotator Assy
SRP-275II 5-1-14 Frame-rotator assy Part name Assembly procedure ① Frame rotator 1. Insert two ② Guide spring in two holes of ① Frame rotator. ② Guide spring -2ea. 2. Tighten ③ Frame-pivot locking-L and ④ Frame-pivot locking-R ③ Frame-pivot locking-L to ①... -
Page 61: Bms-B Assy
SRP-275II 5-1-15 BMS-B assy Part name Assembly procedure ① -BMS-B 1. Insert ②Photo-Interrupter to ① -BMS-B.. ② Photo-Interrupter 2. Solder the land on ① -BMS-B bottom side and attach ③ ③ Harness-BMS-B Harness-BMS-B on the land. <Check point> After soldering, check the frozen lead and short. -
Page 62: Holder Platen Assy
SRP-275II 5-1-17 Holder platen assy Part name Assembly procedure ① Holder platen 1. Insert three ③ Rubber platen in ② Platen. ② Platen 2. Attach ② Platen to ① Holder platen. ③ Rubber platen -3ea. 3. Tighten ④ Bar holder platen to ① Holder platen with two ⑤... -
Page 63: Smp715 Printer Mechanism Unit Main-Assembly
SRP-275II 5-2 SMP715 Printer mechanism unit Main-assembly 5-2-1 Main-assembly A Part name Assembly procedure ① Frame-main caulking ass’y 1. Paste ② Label sticker and ③ Plate-insulation on ① Frame-main (Sub-assembly 5-1-1) caulking ass’y. ② Label sticker 2. Grease six shafts on ① Frame-main caulking ass’y with HG-31S. -
Page 64: Main-Assembly B
SRP-275II 5-2-2 Main-assembly B Part name Assembly procedure ① Gear-RE_A 1. Insert ① Gear-RE_A, ② Ribbon-feeder ass’y and ③ Gear-RE_C ② Ribbon-feeder ass’y to three shafts of Frame-main. (Sub-assembly 5-1-2) 2. Insert ④ Cover HF gear train to two shafts. -
Page 65: Main-Assembly C
SRP-275II 5-2-3 Main-assembly C Part name Assembly procedure ① Frame basket ass’y 1. Tighten ① Frame basket ass’y on Frame-main with two ② Screw- ② Screw-taptite (M3×6) -2ea. taptite (M3×6). ③ Shaft-head_guide 2. Insert Carriage head ass’y to ③ Shaft-head_guide and then insert ④... -
Page 66: Main-Assembly D
SRP-275II 5-2-4 Main-assembly D Part name Assembly procedure ① Motor-step (PF motor) 1. Tighten ① Motor-step (PF motor) on Frame-holder basket-L with ② Spring-ribbon two ⑥ Screw-taptite (M3×4). And insert the 4pin connector of ① ③ Frame-ribbon Motor-step (PF motor) to the connector of PCB-head ass’y. -
Page 67: Main-Assembly E (For Smp715A Type)
SRP-275II 5-2-5 Main-assembly E (for SMP715A type) Part name Assembly procedure ① Frame-rotator ass’y 1. Attach ① Frame-rotator ass’y on Frame-main and then insert two ② Shaft-pivot -2ea. ② Shaft-pivot and two ③ Spring-rear open. And assemble two ④ ③ Spring-rear open -2ea. -
Page 68: Main-Assembly E (For Smp715C Type)
SRP-275II 5-2-6 Main-assembly E (for SMP715C type) Part name Assembly procedure ① Frame-rotator ass’y 1. Attach ① Frame-rotator ass’y on Frame-main and then insert two ② Shaft-pivot -2ea. ② Shaft-pivot and two ③ Spring-rear open. And assemble two ④ ③ Spring-rear open Ring-e hole (ø5.0) to two ②... -
Page 69: Auto Cutter Unit Assembly
SRP-275II 5-3 Auto cutter unit assembly 5-3-1 AC timing belt assy Part name Assembly procedure ① Plate-AC belt 1. Attach ② Holder-AC timing belt to ③ Power-AC-timing belt and ② Holder-AC timing belt then insert ① Plate-AC belt to the hole of ② Holder-AC timing ③... -
Page 70: Ac Upper Cutter Guide Assy
SRP-275II 5-3-3 AC upper cutter guide assy Part name Assembly procedure ① Guide-AC upper cutter 1. Insert ④ AC upper cutter ass’y in ① Guide-AC upper cutter and ② Washer-plain (ø2.6) then insert ③ Shaft-AC-upper cutter into ① Guide-AC upper ③... -
Page 71: Ac Motor Assy
SRP-275II 5-3-5 AC motor assy Part name Assembly procedure ① AC motor ass’y 1. Attach the wire of ① AC motor ass’y to ② PCB-AC ass’y and then (Sub-assembly 5-3-6) solder the land on ② PCB-AC ass’y bottom side. ② PCB-AC ass’y <Check point>... -
Page 72: Main Assy
SRP-275II 5-3-8 Main assy Part name Assembly procedure ① AC timing belt ass’y 1. Attach ① AC timing belt ass’y to two ⑥ Gear-AC gear pulley and (Sub-assembly 5-3-1) then insert two ⑥ Gear-AC gear pulley to two Shaft-AC- ② AC upper frame caulking ass’y worm/pulley of ②... -
Page 73: Srp-275Ii Whole Unit Sub-Assembly
SRP-275II 5-4 SRP-275II Whole unit Sub-assembly 5-4-1 Cover base assy Part name Assembly procedure 1. Tighten ② Switch-paper near end ass’y to ① Cover base with two ① Cover base ② Switch-paper near end ass’y ③ Screw-tapping (M2×5). (Sub-assembly 5-4-2) 4. -
Page 74: Switch-Paper Near End Assy
SRP-275II 5-4-2 Switch-paper near end assy Part name Assembly procedure ① -Switch-paper near end 1. Insert ② Switch -micro (5.9gf) to ① -Switch-paper near end. ② Switch -micro (5.9gf) 2. Solder the land on ① -Switch-paper near end bottom side and ③... -
Page 75: Cover Middle Assy
SRP-275II 5-4-4 Cover middle assy Part name Assembly procedure ① Cover middle 1. Paste ② Label-logo-BIXOLON on the back side of ① Cover ② Label-logo-BIXOLON middle. ③ Label-operation 2. Tighten ④ Operation panel ass’y to ① Cover middle with two ⑤... -
Page 76: Switch-Cover Open Assy
SRP-275II 5-4-5 Switch-cover open assy Part name Assembly procedure ① -switch-cover open 1. Insert ② Switch -micro (5.9gf) to ① -Switch-cover open. ② Switch -micro (5.9gf) 2. Solder the land on ① -Switch-cover open bottom side and Harness -switch-cover open ③... -
Page 77: Bracket Pcb Assy
SRP-275II 5-4-7 Bracket PCB assy Part name Assembly procedure ① Bracket PCB 1. Tighten ② -main ass’y to ① Bracket PCB with three ③ ② -main ass’y Screw-taptite (M3×6). Screw -taptite (M3×6) - 3ea. ③ 2. Paste four ④ Foot rubber ①... -
Page 78: Serial Interface Assy
SRP-275II 5-4-8 Serial interface assy Part name Assembly procedure ① I/F bracket serial 1. Tighten ② Serial PCB ass’y ① I/F bracket serial with two ③ ② Serial PCB ass’y Nut-hexagon. -hexagon -2ea. ③ 5-4-9 cover front-A assy Part name Assembly procedure ①... -
Page 79: Srp-275Ii Whole Unit Main-Assembly
SRP-275II 5-5 SRP-275II Whole unit Main-assembly 5-5-1 Main-assembly A (for SRP-275IIA type) Part name Assembly procedure ① SMP715A printer mechanism ass’y 1. Tighten SMP715A printer mechanism ass’y on the boss of ③ ① ② Screw-taptite (M3×12) -4ea. Cover base ass’y with four ② Screw-taptite (M3×12). - Page 80 SRP-275II Part name Assembly procedure ⑤ Switch -paper end ass’y 2. Tighten ⑤ Switch -paper end ass’y on the bottom of Frame paper ⑥ Screw -tapping (M2×5) -2ea. with two ⑥ Screw -tapping (M2×5). - 80 - Rev. 1.00...
-
Page 81: Main-Assembly A (For Srp-275Iic Type)
SRP-275II 5-5-2 Main-assembly A (for SRP-275IIC type) Part name Assembly procedure ① SMP715C printer mechanism ass’y 1. Tighten ① SMP715 C printer mechanism ass’y on the boss of ③ ② Screw -taptite (M3×12) -4ea. Cover base ass’y with four ② Screw-taptite (M3×12). - Page 82 SRP-275II Part name Assembly procedure ⑤ Switch -paper end ass’y 2. Insert the 5pin connector of Harness-AC in the connector of PCB- ⑥ Screw -tapping (M2×5) -2ea. connector sub ass’y. 3. Tighten Switch -paper end ass’y on the bottom of Frame paper ⑤...
-
Page 83: Main-Assembly B
SRP-275II 5-5-3 Main-assembly B Part name Assembly procedure ① Cover middle 1. Tighten ① Cover middle on Cover base with four ② Screw -taptite ② Screw -taptite (M3×10) -4ea. (M3×10). 2. Insert Harness-switch-rear cover open and Harness-switch- paper near end-W to a square hole of Cover base. - Page 84 SRP-275II Part name Assembly procedure 3. Insert 3pin connector of BMS-ass’y, the 2pin connector of Switch- rear cover open ass’y and the 2pin connector of Switch-paper near end-W ass’y in the connectors of PCB-connector sub ass’y. - 84 - Rev. 1.00...
-
Page 85: Main-Assembly C
SRP-275II 5-5-4 Main-assembly C Part name Assembly procedure ① Bracket PCB ass’y 1. Tighten Harness-jumper cable to the side hole of ① Bracket PCB (Sub-assembly D) ass’y with ② Screw -taptite (M3×6). Screw -taptite (M3×6) ② 2. Insert FFC-connector sub (16pin) to ①... -
Page 86: Main-Assembly D
SRP-275II 5-5-5 Main-assembly D Part name Assembly procedure ① Frame -base 1. Tighten ① Frame -base on Bracket PCB ass’y with four ⑥ Screw ② Frame -cover DIP taptite (M3×6). ③ Serial interface ass’y 2. Tighten ② Frame -cover DIP on ①... - Page 87 -A ass’y to Cover base. (Sub-assembly F) (The SRP-275IIC type uses Cover front ass’y instead of ⑦ Cover ⑧ Label-logo-BIXOLON front-A ass’y.) ⑨ Label-rating 6. Paste Label -logo-BIXOLON on the center of Cover front ⑦ ⑦ ass’y. 7. Paste ⑨ Label-rating on Frame -base.
-
Page 88: Adjustments And Maintenance
SRP-275II 6. Adjustments and Maintenance 6-1 Adjustment When assembling this printer, be sure to refer to the required adjustment procedure. To ensure normal operation of the printer after disassembly or replacement of a Component for maintenance or repair. Be sure to perform along to the required method. -
Page 89: Maintenance
SRP-275II 6-2 Maintenance To ensure the maintenance of this printer at its initial performance level throughout a long product life as well as preventing potential troubles, be sure to perform maintenance and management according to the points described in the following subsections. -
Page 90: Lubricants And Adhesive Application
SRP-275II 6-3 Lubricants and adhesive application Lubrication and application adhesive plays an important role in maintaining this printer at its initial performance level, throughout a long product life as well as preventing potential troubles. Make sure to apply the specified lubricants or adhesive in the appropriate amounts at the specified intervals . -
Page 91: Tools, Lubricants And Adhesives
SRP-275II 6-4 Tools, lubricants and adhesives 6-4-1 List of tools Tool designation Availability Brush #1 ○ Brush #2 ○ Cleaning brush ○ Screwdriver (+) No.2 ○ Tweezers ○ Round pliers ○ Diagonal cutting nipper ○ Electric Soldering iron ○ Thickness gauge ○... -
Page 92: Troubleshooting
SRP-275II 7. Troubleshooting Use the following to troubleshoot and repair the printer: • Troubleshooting flow chart When the source of the problem is not clear, use the flowchart to find and replace a defective component. • Troubleshooting tables Follow the steps outlined in these tables to repair a defect whose symptoms are known. -
Page 93: Power Led Does Not Light
SRP-275II A. POWER LED does not light Is SMPS & Power cord connected properly? Connect SMPS & Power cord properly. Does SMPS have proper output voltage rating? (approx. +24V) Replace SMPS. Has fuse F1 on PCB MAIN blown? Replace fuse F1. -
Page 94: Paper Led Is Lit
SRP-275II B. PAPER LED is lit Turn power off, then once again. Is paper roll in paper near-end condition or not inserted? Replace or insert paper roll. Is paper-end switch, paper near-end switch continuity normal? Replace ASSY-PCB SWITCH PAPER END or ASSY-PCB SWITCH PAPER NEAR END. -
Page 95: Error Led Is Blink
SRP-275II C. ERROR LED is blink pattern A pattern B Blinking pattern A? Replace ASSY-AUTO CUT. (AC home position sensor) Blinking pattern B? Replace ASSY-PCB MECHA. (home position sensor) Replace ASSY-PCB MAIN. Replace ASSY-SMP715II. (Printer mechanism) - 95 - Rev. 1.00... -
Page 96: Error Led Is Lit
SRP-275II D. ERROR LED is lit Turn power off, then once again. Is rear cover closed properly? Replace ASSY-PCB SWITCH COVER OPEN. Close rear cover propely. Replace ASSY-PCB MAIN. - 96 - Rev. 1.00... -
Page 97: Self Test Is Not Normal
SRP-275II E. Self test is not normal Does not printer operate at all? Is output voltage of regulator on PCB-MAIN within SPEC?(*1) Replace ASSY-PCB MAIN. Printing is carried out, but print quality is deficient or paper feeding is not normal. -
Page 98: Data From Host Is Not Printed Normally
SRP-275II F. Data from host is not printed normally Send data from host to printer. Are interface parameters set to indentical values at host and printer? Make settings identical Does interface cable match specifications? Replace the interface cable Replace Interface PCB ASSY... -
Page 99: Troubleshooting Flow Tables
SRP-275II 7-2 Troubleshooting flow tables If a problem that can be verified by visual examination has occurred, use the tables below to determine the cause and perform repairs. There are four tables, divided by symptom category : • Initialization Problems •... -
Page 100: Initialization Problems
SRP-275II 7-2-1 Initialization problems Problem Probable Cause Level Checkpoint Action Check 24V input voltage at CN7 Output voltage of internal SMPS or Replace external and output voltage of DC ASSY-PCB MAIN failure (Abnormal Power supply unit +3.3V(U8)/24V control circuit regulator circuit) -
Page 101: Printing Quality Problems
SRP-275II 7-2-2 Printing quality problems Problem Probable Cause Level Checkpoint Action Check if the FPC-head is FPC-head connector is disconnected If is not, securely properly inserted into its with ASSY-PCB MECHA reinsert the FPC- connector of head and its Printer-head... -
Page 102: Printer Mechanism Problems
SRP-275II 7-2-3 Printer mechanism problems Problem Probable Cause Level Checkpoint Action Use paper roll that Check the width, length and corresponds to thickness of the paper specifications Defective paper supply Remove any Check paper roll path for obstacles from paper... -
Page 103: Auto Cut Mechanism Problems
SRP-275II 7-2-4 Auto cut mechanism problems Problem Probable Cause Level Checkpoint Action Paper does not cut despite Reassemble ASSY- No intersection between Cutter AUTO CUTTER or normal Check for intersection and Cutter lower operation of Cutter lower ass’y Motor-DC Defective...
Need help?
Do you have a question about the SRP-275II and is the answer not in the manual?
Questions and answers
I have an SRP-275IIIC that is beeping and showing an error with a red light. The paper has been added and this is still occurring.
A beeping sound and a red ERROR LED on the BIXOLON SRP-275II printer indicate that an error has occurred. If the ERROR LED is blinking, it could be due to a recoverable issue like the rear cover being open during printing or the print head temperature being too high. These errors recover automatically when the condition is resolved. If the ERROR LED is lit continuously, it indicates a different type of error that may require further troubleshooting.
This answer is automatically generated