Stahl HOTRONIX AIR FUSION Operator's Manual
Heat press
Hide thumbs
Also See for HOTRONIX AIR FUSION:
- Operator's manual (24 pages) ,
- Replacement manual (5 pages) ,
- Operator's manual (24 pages)
Table of Contents
Advertisement
Advertisement
Table of Contents

Related Manuals for Stahl HOTRONIX AIR FUSION


Summary of Contents for Stahl HOTRONIX AIR FUSION
- Page 1 O P E R A T O R’ S M A N U A L O P E R A T O R ’ S M A N U A L...
-
Page 2: Safety Instructions
S a f e t y I n s t r u c t i o n s When using your heat press, basic precautions should always be followed, including the following: Read all instructions. Use heat press only for its intended use. To reduce the risk of electric shock, do not immerse the heat press in water or other liquids. -
Page 3: Table Of Contents
HOTRONIX AIR FUSION ® ™ Ta b l e o f C o n t e n t s Safety Instructions Machine View Touch Screen Guide Operating Instructions 6-18 Connecting the System Start Up/Shut Down Print Screen 8-10 Passwords Setup Menu 11-17 Preset Setup 11-12... -
Page 4: Machine View
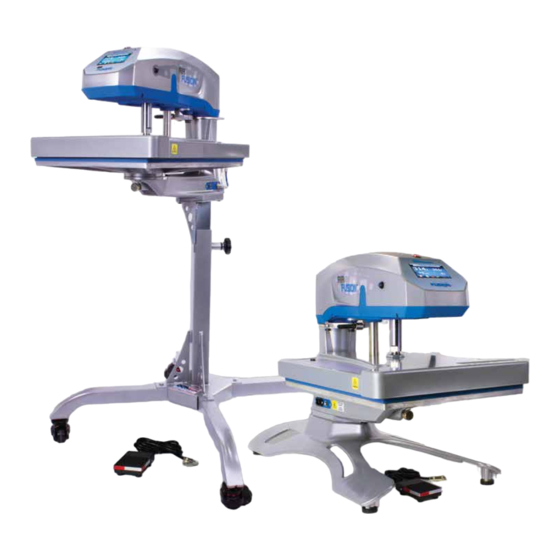
HOTRONIX AIR FUSION ® ™ M a c h i n e V i e w Upper Safety ON/OFF Platen Connect Switch Lower Platen Circuit Breaker Touch Print & IEC Inlet Screen Hose Buttons Stand Height Adjustment Power Quick Cord Release Platen Release Base... -
Page 5: Touch Screen Guide
HOTRONIX AIR FUSION ® ™ To u c h S c r e e n G u i d e Navigation Most screens have a Cancel or Back button to close the current screen without saving any changes and will return the user to the previous screen. (Fig.1) Some screens may present a list of items. -
Page 6: Operating Instructions
HOTRONIX AIR FUSION ® ™ O p e r a t i n g I n s t r u c t i o n s The Hotronix Air Fusion Operating Instructions are designed with the user in mind. Carefully read and follow ®... -
Page 7: Start Up/Shut Down
HOTRONIX AIR FUSION ® ™ Start Up/ Shut Down To start your Air Fusion Heat Press, flip the power switch to the “On” position. ™ The power switch is located on the top of the control housing. (2.1) During the startup, a splash screen is shown for approximately 3 seconds. -
Page 8: Print Screen
HOTRONIX AIR FUSION ® ™ O p e r a t i n g I n s t r u c t i o n s Print Screen The Print Screen is the first screen displayed after the splash screen and start up has completed. - Page 9 HOTRONIX AIR FUSION ® ™ Print Screen Cont. Target Settings Cont. To change your Time Settings, press the Target Timer display located on the right side of your print screen. A pop up menu will be displayed. Press the minus or plus icons to decrease or increase the time (Press and hold to change values faster).
-
Page 10: Passwords
HOTRONIX AIR FUSION ® ™ O p e r a t i n g I n s t r u c t i o n s Print Screen Cont. Tack Mode When Tack Mode is enabled, the platen is lowered as long as both print buttons are pressed and held. -
Page 11: Setup Menu
HOTRONIX AIR FUSION ® ™ S e t u p M e n u Preset Setup After your password is entered in the setup menu, press the Preset Setup icon. (5.1). This option will allow you to edit, delete, and create new Presets. - Page 12 HOTRONIX AIR FUSION ® ™ O p e r a t i n g I n s t r u c t i o n s Preset Setup Cont. To Create a New Preset (Continued): Note: A DELETE button will appear after saving if you do not wish to save.
-
Page 13: Date & Time Setup
HOTRONIX AIR FUSION ® ™ S e t u p M e n u Date & Time Setup The Date and Time Setup feature allows you to program the Month, Day, Year, Hour and Minute (displayed in the lower right corner of the Print Screen). To set the Date and Time, press the Date &... -
Page 14: Auto On And Off Setup
HOTRONIX AIR FUSION ® ™ O p e r a t i n g I n s t r u c t i o n s Display Setup Cont. Press the Pressure field (psi or bar) to toggle between psi and bar. (7.2) Press the SAVE button to save your changes. -
Page 15: Passwords Setup
HOTRONIX AIR FUSION ® ™ S e t u p M e n u Auto On and Off Setup cont. Select the SAVE button to save the settings. (8.6) Note: Selecting another day of the week or exiting the Auto On and Off Setup screen without saving will result in loss of changes. -
Page 16: Language Setup
HOTRONIX AIR FUSION ® ™ O p e r a t i n g I n s t r u c t i o n s Language Setup (Manager Level Only) When logged in at a “Manager Level”, the display Language may be changed in the Setup menu. Choose from eight languages: English, Deutsch, Espanol, Francais, Italiano, Japanese, Pyccko, and Chinese. -
Page 17: System Setup
HOTRONIX AIR FUSION ® ™ S e t u p M e n u System Setup (Manager Level Only) When logged in at the “Manager Level”, system functions such as Internal Temperature, Fan Status, Power Save Status, Auto Swing, and Key Touch Frequency can be turned on, off, or adjusted in the Setup menu. -
Page 18: Prepare To Print
HOTRONIX AIR FUSION ® ™ O p e r a t i n g I n s t r u c t i o n s Prepare to Print To begin Printing/Pressing, start by verifying that you have the proper settings selected in the Print Screen: Do you have the correct preset selected? Note: You may also manually adjust your desired Time, Temperature and Pressure settings (refer to Target Settings on pg 8-9). -
Page 19: Replacing Parts
HOTRONIX AIR FUSION ® ™ P a r t s R e p l a c e m e n t L i s t Item # Part Name Part # Qty. Control Housing 1-2197-1 Switch On/Off Lighted 1-2087 Switch, Quick Release 1-2270 Switch, Print - Blue 1-2319... - Page 20 HOTRONIX AIR FUSION ® ™ P a r t s L o c a t i o n G u i d e S E R V I C E H O T L I N E : 8 0 0 . 7 2 7 . 8 5 2 0...
- Page 21 HOTRONIX AIR FUSION ® ™ H O T R O N I X . C O M...
-
Page 22: Electrical Schematic
HOTRONIX AIR FUSION ® ™ E l e c t r i c a l S c h e m a t i c Control Board Out to Left Print Switch Out to Right Print Switch Triac Out to Air Regulator White Black J4 Mate-N-Lock... -
Page 23: Contact
STAHLS' ASIA No.117, Eopseong 2-gil, Seobuk-gu, Cheonan-si, Chungcheongnam-do, 31076, Rep. of Korea info@stahlsasia.com www.stahlsasia.com Tel: +82 (0)41 622 0936 Fax: +82 (0)41 622 1734 This document includes multiple trademarks and describes equipment covered by many patents that are owned by GroupeSTAHL and/or its subsidiaries. GroupeSTAHL enforces its rights to protect these intellectual properties. - Page 24 Proudly made in the U.S.A. No.117, Eopseong 2-gil,Seobuk-gu, Cheonan-si, Chungcheongnam-do, 31076, Rep. of Korea Tel: +82 (0)41 622 0936 • Fax: +82 (0)41 622 1734 info@stahlsasia.com www.stahlsasia.com...
Need help?
Do you have a question about the HOTRONIX AIR FUSION and is the answer not in the manual?
Questions and answers