Stahl Hotronix DUAL Air Fusion Operator's Manual
2x 40x50 cm heat press
Hide thumbs
Also See for Hotronix DUAL Air Fusion:
- Operator's manual (24 pages) ,
- Replacement manual (5 pages) ,
- Operator's manual (24 pages)
Advertisement
Quick Links
Advertisement

Related Manuals for Stahl Hotronix DUAL Air Fusion


Summary of Contents for Stahl Hotronix DUAL Air Fusion
- Page 1 Hotronix DUAL ® 2x 40x50 cm O P E R A T O R ’ S M A N U A L www.stahls.eu...
- Page 2 Hotronix Air Fusion™ ® Safety Instructions Important Safety Instructions WHEN USING YOUR APPLIANCE, BASIC PRE-CAUTIONS SHOULD ALWAYS BE FOLLOWED, INCLUDING THE FOLLOWING: Read all instructions. Use appliance only for its intended use. To reduce the risk of electric shock, do not immerse the appliance in water or other liquids. Never pull cord to disconnect from outlet, instead grasp plug and pull to disconnect.
- Page 3 Hotronix Dual Air Fusion™ ® Table of Content Safety Instructions Machine View Touch Screen Guide / Connecting the System Air Fusion™ Operating Instructions 6-17 Hotronix ® Start Up / Shut Down Print Screen/Passwords Preset Setup 10-11 Date & Time Setup / Display Setup Auto On nd Off Setup Password Setup Language Setup / Laser Setup...
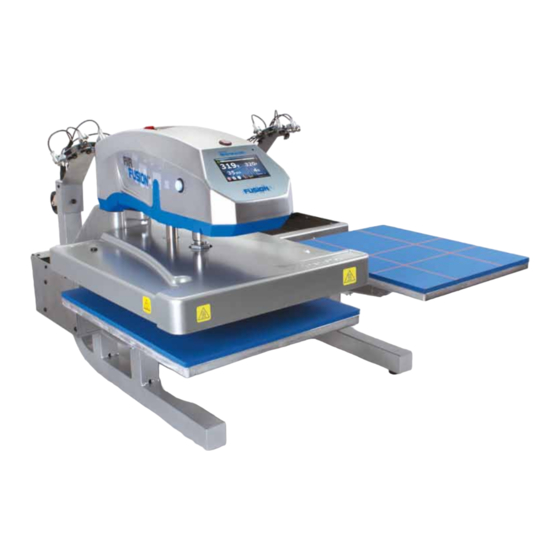
- Page 4 Hotronix ® Dual Air Fusion™ Machine View Print Buttons Casters Alignment Lasers (optional) Bellow Circuit Breakers & IEC Inlet Air Connect Air Hose Foot Pedal Power Cord 10. ON/OFF Switch 11. Quick Release Button 12. Touch Screen 13. Upper Platen 14.
- Page 5 Hotronix Dual Air Fusion™ ® Touch Screen Guide Navigation Most screens have a Cancel or Back button to close the current screen without saving any changes and will return the user to the previous screen. (Fig.1) Some screens may present a list of items. When the list of items is Fig.
- Page 6 Hotronix® Dual Air Fusion™ Operating Instructions The Hotronix® Dual Air Fusion™ Operating Instructions are designed with the user in mind. Carefully read and follow the step-by-step instructions for best results. • To avoid bums, do not touch the heated platen during use. •...
- Page 7 Hotronix Dual Air Fusion™ ® Operating Instructions 2. Start Up / Shut Down To start your Dual Air Fusion™ Heat Press, flip the power switch to the „On“ position. The power switch is located on the top of the control housing (Fig.
- Page 8 Hotronix Dual Air Fusion™ ® Operating Instrucitons 3. Print Screen The Print Screen is the first screen displayed after the splash screen and start up has completed. This screen provides all the printing functions. • Presets Saved Presets are displayed at the top of the Print Screen. These are pre-programmed heat application settings that allow you to quickly Fig.
- Page 9 Hotronix Air Fusion™ ® Operating Instructions 3. Print Screen • Target Settings Cont. To change your Pressure Settings, press the Target Pressure display and a pop up menu will be displayed. Press the down or up arrows to decrease or increase the pressure (Press and hold to change values faster) (Fig.
- Page 10 Hotronix Air Fusion™ ® Operating Instructions 3. Print Screen • Auto Shuttle Mode With Auto Shuttle Mode enabled, your Dual Air Fusion™ will automatically transition from one platen (A & B) to another after each heat application. Press the auto shuttle button to toggle the Auto Shuttle Mode. Fig.
- Page 11 Hotronix Air Fusion™ ® Operating Instructions 5. Preset Setup After your password is entered in the setup menu, press the Preset Setup icon (Fig. 5.1). This option will allow you to edit, delete, and create new Presets. A preset can have: •...
- Page 12 Hotronix Air Fusion™ ® Operating Instructions • To create a new Preset: Note: A DELETE button will appear after saving if you do not want to save (Fig. 5.8). Press the BACK button until you return to the Print Screen. The message „Saving Settings! Please wait...
- Page 13 Hotronix Air Fusion™ ® Operating Instructions 6. Date & Time Setup The Date and Time Setup feature allows you to program the Month, Day, Year, Hour and Minute (displayed in the lower right corner of the Print Screen). To set the Date and Time, press the Date & Time button in the Setup Fig.
- Page 14 Hotronix Air Fusion™ ® Operating Instructions 8. Auto On and Off Setup The system can turn On or Off automatically when configuered. The Auto On and Off feature is configured for each day of the week. In the Setup Menu, Select the Auto On/Off Button (Fig. 8.1). Fig.
- Page 15 Hotronix Air Fusion™ ® Operating Instructions 9. Passwords Setup (Manager Level Only) When logged in at a “Manager Level” , Passwords may be changed In the Setup menu. This will allow you to control who can access additional features in the Setup menu such as Passwords, Language, System, and Laser Setup.
- Page 16 Hotronix Air Fusion™ ® Operating Instructions 10. Language Setup (Manager Level Only) When logged in at a “Manager Level” , the display Language may be changed in the Setup menu. Choose from eight languages: English, Deutsch, Espanol, Francais, Italiano, Japanese, Pyccko, and Chinese. Fig.
- Page 17 Hotronix Air Fusion™ ® Operating Instructions 12. System Setup When logged in at the “Manager Level” , system functions such as Power Save Status, Auto Shuttle, Foot Switch, and Key Touch Frequency can be turned on, off, or adjusted in the Setup menu. Press the System icon in the Setup menu (Fig.
- Page 18 Hotronix Air Fusion™ ® Operating Instructions 13. Prepare to Print To begin Printing/Pressing, start by verifying that you have the proper settings selected in the Print Screen (Fig. 13.1). • Do you have the correct preset selected? Fig. 13.1 Note: You may also manually adjust your desired Time, Temperature and Pressure settings (refer to Target Settings on pg 8-9).
- Page 19 Hotronix Air Fusion™ ® Parts Replacement List Item # Part Name Part # Control Housing 1-2197-1 Switch On/Off Lighted 1-2087 Quick Release Button 1-2270 Switch, Print, Canada 1-2319 2 each Touch Screen Controller 1-2266 Control Housing Overlay 1-2198 Power Cord 2-1013-1 Print Valve 1-2298...
- Page 20 Hotronix Air Fusion™ ® Parts Location Guide...
- Page 21 Hotronix Air Fusion™ ® Parts Location Guide...
- Page 22 Hotronix Air Fusion™ ® Electrical Schematic Control Board Out to Left Print Switch 220V Version Out to Right Print Switch Triac Out to Air Regulator White Black Out to Quick Release Out to Laser B J4 Mate-N-Lock 9 Pin Power Connector Power ON/OFF Switch Out to Laser A...
- Page 23 Hotronix Air Fusion™ ® CE-Certification EC conformance explanation: For the purposes of the EC-Machine Guideline 98/37EU, Appendix 2A and the EC Low Voltage directive to 73/23 European Economic Community as well as the EC EMV-guideline 89/336. For the manufacturer STAHLS’ Hotronix Division, we state as European Commissioners, that our product: A Transfer Press for ironing of thermo application.
- Page 24 Hotronix Air Fusion™ ® Terms of Guarantee Warranty Policy STAHLS’ Europe GmbH provides the following warranty for the Hotronix Fusion, subject to the ® following terms: Duration The warranty period of 2 years commences from the date of receipt by the buyer of the heat press machine, which can be verified by the invoice or similar documents.
Need help?
Do you have a question about the Hotronix DUAL Air Fusion and is the answer not in the manual?
Questions and answers