Advertisement
Quick Links
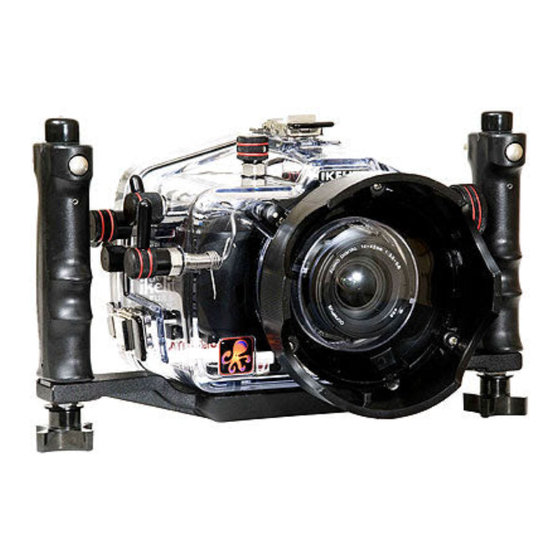
Ikelite SLR-DC Housing
i n s t r u c t i o n
#6855.10 for Olympus E-510 / E-520
Congratulations on your purchase of an Ikelite Digital Camera
Housing. Ikelite has over 45 years of experience in the underwater
photographic and lighting market. Our products are designed and
built in the USA by Ikelite for both the professional and amateur
photographer.
The clear housing permits instant visual inspection of the camera
and all sealing surfaces as well as complete monitoring of controls
and camera LCD screens.
Ikelite Digital Housings are slightly negative in salt water for
stability. This housing has been water pressure tested at the
factory. Housing is pressure tested to 200' (60m).
Lid
Snap
Back O'ring
Fn/
AF frame Shutter
Camera
Tray
Camera
Mounting
Bolt
O O p p e e n n i i n n g g t t h h e e H H o o u u s s i i n n g g
1 . Lid Snaps have a L L o o c c k k .
To open, push Lid Snap Lock
forward and lift as shown.
Keep pressure on the Lid
Snap so it does not fly open
quickly.
Some lid snaps have a lot of
spring tension once they go over center, have a firm grip on the
lid snap. Lid Snaps may be opened one at a time.
m a n u a l
On/Off
Gear
Sleeve
AEL/AFL
Exposure
Comp
Release
Port
O'ring
SIDE VIEW
Push Forward
Lid Snap Lock
Lift
3
AEL/AFL
Shutter
Release
AF frame
Lid
Snap
FRONT VIEW
Self-timer/
Remote Control
Quick
Release
Button
BACK VIEW
I I n n s s t t a a l l l l i i n n g g t t h h e e C C a a m m e e r r a a
Remove the back from
the housing. The
mounting tray for the
camera is secured to
the housing back.
Position the camera
Optional
Port
with lens on the tray
and secure it with the
mounting bolt which
threads into the
camera's tripod socket.
Use a tool or coin to
tighten the mounting
bolt so the camera
bottom is flush against
the tray.
S S e e t t t t i i n n g g t t h h e e C C o o n n v v e e r r s s i i o o n n C C i i r r c c u u i i t t r r y y S S t t r r o o b b e e I I D D S S w w i i t t c c h h . .
Inside the housing back on the black panel housing (see
illustration next page) the conversion circuitry is a switch for
setting the DS Substrobe ID.
Set the switch to the Model
of DS Substrobe being used,
SD1 25/DS200 or DS51 .
• When using dual strobes
of different models such as
a DS51 and a DS1 25, set the
ID switch to DS51 .
Lid
Exposure
On/Off
Snap
Compensation
Remote Control
Port Lock
Gear Sleeve
Drive Gear
Fn/
Port
Opening
Aluminum Tray
Viewfinder Port
Flash/
Zoom
E
A
G
F
B
H
C
D
I
Lens
K
Release
External Strobe Connector
and Waterproof Cap
[G] White Balance
[A] Playback
[D] Info Display
[B] Erase
[E] Image Stabilizer
[H] Metering
2
[C] Menu
[F] Live View
[ I ] OK
O'ring
Camera Tray
DS
125
200
4
Quick-Release
Flash/
Zoom
Strobe
Self-timer/
Control
Mount
Lens
Release
Rubber
Handle
Strobe
Mount
Mode Dial
Control Dial
Shutter
Exposure
Release
Compensation
AEL/
AFL
J
Fn/
AF frame
DIAL
L
[J] AF (Focus mode)
[K] ISO
[L] TTL Dial
Mounting Bolt
DS
50/51
80
DS50 / DS51 / DS80
DS125 / DS200
Advertisement

Related Manuals for Ikelite SLR-DC 6855.10


Summary of Contents for Ikelite SLR-DC 6855.10
- Page 1 Our products are designed and AF frame DIAL Lens built in the USA by Ikelite for both the professional and amateur Release photographer. The clear housing permits instant visual inspection of the camera and all sealing surfaces as well as complete monitoring of controls and camera LCD screens.
- Page 2 F F l l a a s s h h C C o o n n n n e e c c t t i i o o n n f f o o r r E E x x t t e e r r n n a a l l S S t t r r o o b b e e s s C C l l o o s s i i n n g g t t h h e e H H o o u u s s i i n n g g When using an external strobe connect the housings Hot Shoe 1 .
- Page 3 I I n n s s t t a a l l l l i i n n g g t t h h e e Z Z o o o o m m C C l l a a m m p p & & G G e e a a r r S S l l e e e e v v e e O O n n t t h h e e T T y y p p e e 1 1 L L e e n n s s e e s s I I n n s s t t a a l l l l t t h h e e G G e e a a r r S S l l e e e e v v e e After the Zoom Clamp is installed, lower the appropriate Gear I I n n s s t t a a l l l l i i n n g g t t h h e e Z Z o o o o m m C C l l a a m m p p...
- Page 4 3 f-stops of under-exposure control in 1 /2 stop increments. update to provide optimum performance. The Conversion Circuitry is powered by the Ikelite DS Substrobe • DS50 Substrobe with a Serial Number of 70,000 or higher or when connected to the housing with the #41 03.51 single or with one of the two following labels in the battery compartment #41 03.52 dual sync cord.
- Page 5 U U s s i i n n g g N N o o n n I I k k e e l l i i t t e e S S t t r r o o b b e e s s w w i i t t h h t t h h i i s s H H o o u u s s i i n n g g . . The Conversion Circuitry is automatically disabled when used with a Non Ikelite Strobe. These strobes can be used in their manual mode utilizing any power settings provided on the strobe.
- Page 6 C C o o n n t t r r o o l l M M a a i i n n t t e e n n a a n n c c e e The Ikelite Housing should be given the same care and attention Ikelite controls are designed to provide years of reliable service as your other photographic equipment.
- Page 7 R R e e t t u u r r n n i i n n g g P P r r o o d d u u c c t t s s f f o o r r S S e e r r v v i i c c e e harder on the shutter control as you may damage the camera. Ikelite is most interested in preforming any service to assure that Hold the camera steady a second or two after pressing the all products perform as intended.
Need help?
Do you have a question about the SLR-DC 6855.10 and is the answer not in the manual?
Questions and answers