Table of Contents
Advertisement
Quick Links
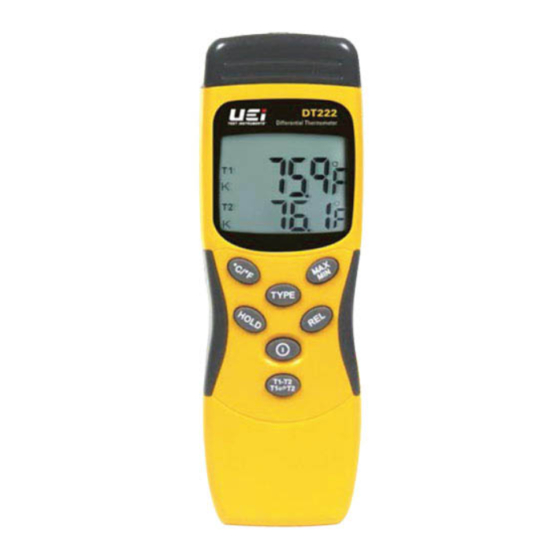
Digital Thermometer
7
75.9
7
5.
5 .
5
. 9 . . .
T1
T1
T1
K
K
K
1-800-547-5740 • Fax: (503) 643-6322
www.ueitest.com • Etmail: info@ueitest.com
INSTRUCTION MANUAL
DT221
9 9
9
f
f
f
f
°
°
°
DT221/222
DT222
Digital Thermometer
7
75.9
7
5.
5 .
5
. 9 . . .
9 9
9
f
f
f
f
T1
T1
T1
°
°
°
K
K
K
76.1
7
7
6.1
6.1
f
f
f
f
T2
T2
T2
°
°
°
K
K
K
Advertisement
Table of Contents

Related Manuals for UEi DT221


Summary of Contents for UEi DT221
- Page 1 INSTRUCTION MANUAL DT221/222 DT221 DT222 Digital Thermometer Digital Thermometer 75.9 . 9 . . . 75.9 . 9 . . . ° ° ° ° ° ° 76.1 ° ° ° 1-800-547-5740 • Fax: (503) 643-6322 www.ueitest.com • Etmail: info@ueitest.com...
-
Page 2: Table Of Contents
1. Introduction ................1 2. Features ................1 3. Material supplied ..............1 4. LCD display ................2 5. Warning ................2 6. Keypad (Controls) ...............2 7. Operation ................4 (1) Power On / Off ..............4 (2) Auto power off ..............4 (3) Set thermocouple type ............4 (4) Taking measurement ............5 (5) Change unit (°C/°F ) ............5 (6) Change mode (T1-T2/REL or K / J) ........6... -
Page 3: Introduction
INTRODUCTION Thank you for purchasing the UEi DT221 single input DT222 dual input K and J type digital thermometer. This thermometer features a built-in microprocessor and high resolution analog to digital converter chip. The thermocouple probe responds very quickly to a wide range of temperature measurements. -
Page 4: Lcd Display
LCD DISPLAY 1. Primary LCD: Display T1 (1st thermocouple reading) 2. Secondary LCD: Display T2 (2nd thermocouple on differential or intitial valve for relative mode.) WARNING 1. Always connect thermocouple before turning the unit on for most accurate readings 2. - Page 5 Press “MODE” to change operation mode T1, T1-T2 MODE or REL. The corresponding reading will display on the primary LCD. The secondary LCD will always display T2 reading in differiential (DT222). It will display the initial value when using “REL” mode. Press and hold “PWR”...
-
Page 6: Operation
OPERATION (1) POWER ON / OFF Note: Make sure you have plugged in the thermocouple probe before turning on. Press and hold PWR button to turn on the meter. While the meter is on, press PWR button to turn off the meter. (2) SLEEP MODE (AUTO POWER OFF) The meter will turn off automatically after 60 minutes if no buttons are pressed. -
Page 7: Taking Measurement
Verify thermocouple type is set correctly (see page 4) shows”---” on the display. Single input model shows T1, dual input model shows T1 and T2 Single Input: (DT221) Dual Input: (DT222) (5) CHANGE UNIT Press UNIT button to change unit ˚C or ˚F. The meter default temperature unit is ˚F. -
Page 8: Change Mode (T1-T2/Rel Or K / J)
(6) T1-T2/RELATIVE Press MODE button to change operation, options include T1-T2 (DT222 only), T1-REL, T2-REL (DT222). The corresponding reading will display on the primary and secondary LCD. Press MODE Press MODE Press MODE Press MODE T2 REL T1 REL T1 INITIAL T2 INITIAL Change Thermocouple Type: Press SET button for 2 seconds to change thermocouple type K or J. -
Page 9: Max/Min/Avg
(7) MAX/MIN/AVG Press MAX/MIN button to change operation mode from live Make sure you have plugged in K or J type sensore probe on the top of the meter, if the probe is not plugged appropriate, LCD data ->MAX -> MIN -> AVG -> back to live data. Corresponding shows”---”... -
Page 10: Backlight
(9) BACKLIGHT Press BKLT to turn on the back light in any function. Back light function will turn off automatically after 30 seconds. SPECIFICATIONS DT221 DT222 SPECIFICATION ˚C or ˚F Selectable TEMPERATURE UNIT Single Input Dual Input SENSOR INPUT TEMPERATURE K-Type: -328˚F ~ 2498˚F (-200˚C ~ 1370˚C) -
Page 11: Troubleshooting
TROUBLESHOOTING Thermocouple 1 circuit error or over range Thermocouple 2 circuit error or over range Over/ under operation temperature Hardware error * LCD display “---” disconnected or open thermocouple. BATTERY REPLACEMENT WARNING If the symbol “ “ appears on the LCD, , , , please replace the battery immediately •... -
Page 12: Warranty
Limited Warranty The DT221 and DT222 are warranted to be free from defects in materials and workmanship for a period of three years from the date of purchase. If within the warranty period your instrument should become inoperative from such defects, the unit will be repaired or replaced at UEi’s option.
Need help?
Do you have a question about the DT221 and is the answer not in the manual?
Questions and answers