Table of Contents
Advertisement
Quick Links
Advertisement
Table of Contents

Related Manuals for Akai KS800-BT


Summary of Contents for Akai KS800-BT
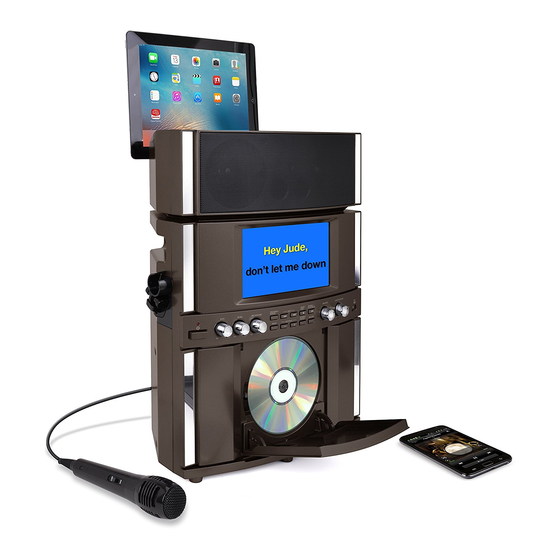
- Page 1 CD+G/MP3+G Karaoke System with Bluetooth INSTRUCTION MANUAL KS800-BT Thank you for purchasing this Karaoke System. Please read this instruction manual carefully before using this product to ensure proper use. Keep this manual in a safe place for future reference.
-
Page 2: Fcc Radiation Exposure Statement
WARNINGS Warning: Changes or modifications to this unit not WARNING: TO REDUCE THE RISK OF expressly approved by the party responsible for compliance could void the user’s authority to FIRE OR SHOCK HAZARD, DO NOT EXPOSE operate the equipment. THIS PRODUCT TO RAIN OR MOISTURE. FCC RADIATION EXPOSURE CAUTION STATEMENT... -
Page 3: Important Safety Instructions
FCC AND CANADIAN ICES NOTE: This equipment has been tested and found to comply with the limits for a Class B digital device, pursuant to part 15 of the FCC Rules. These limits are designed to provide reasonable protection against harmful interference in a residential installation. - Page 4 IMPORTANT SAFETY INSTRUCTIONS WARNINGS: To reduce the risk of fire or electric shock, do not expose this apparatus to rain or moisture. Avertissement: pour réduire le risque d’incendie ou de choc électrique, ne pas exposer cet appareil sous la pluie et l’humidité. The apparatus shall not be exposed to dripping or splashing and that no objects filled with liquids, such as vases, shall be placed on apparatus.
-
Page 5: What's In The Box
WHAT’S IN THE BOX Contents 1. Karaoke System 2. Tablet Cradle 3. Mic Holder x 2 4. Mic Holder Screw x 4 5. AV Cable 6. Pre-recorded Karaoke CD+G Disc 7. Dynamic Microphone 8. AC-DC Power Adaptor 9. Instruction Manual 10. -
Page 6: Control Location
CONTROL LOCATION FRONT SIDE CRADLE RIGHT SIDE SPEAKER LEFT SIDE SPEAKER TFT SCREEN MIC HOLDER PROGRAM / MODE / A.V.C. EHCO MIC VOLUME REPEAT SKIP STOP PLAY/PAUSE BALANCE MASTER VOLUME SCREEN / TRACK KEY/PAGE ON/OFF RECORD LINE IN CD DOOR OPEN AREA OPEN CD DOOR CONTROL PANEL... -
Page 7: Playing Mode
TFT DISPLAY ICON TRK 10/10 PROG 00:16:04 PLAYING TIME REPEAT MODE PROGRAM MODE PLAY / PAUSE / STOP INDICATOR PLAYING MODE PAUSE MODE STOP MODE PLAYING TRACK NUMBER AND TOTAL TRACK NUMBER CDG= CD+G DISC PLAYING PLAYING CD/ CDR/ USB EN - 6... -
Page 8: Making The Connections
MAKING THE CONNECTIONS CONNECTING POWER Plug the supplied power adapter small end into the DC jack located on the rear panel, plug the adapter into the standard AC wall socket. CAUTION: The unit is designed to operate from a mains supply of AC 100-240V~50/60Hz. If the adapter does not fit properly, turn it over and try again. -
Page 9: Audio Connection
MAKING THE CONNECTIONS SELECTING YOUR KARAOKE MACHINE AS YOUR SOURCE/INPUT Selecting your Karaoke Machine as a source / input on your TV is very similar to connecting a VCR/DVD or Satellite system. We’ve listed below the most common ways of selecting the source from your TV or VCR / Home Theater: 1. - Page 10 MAKING THE CONNECTIONS Line-out connection Except the RCA connection, there is another audio line-out with 3.5mm jack on the unit. User can use a 3.5mm to RCA cable (not included) to connect the audio signal from the unit to your TV/ Home theater and other stereo audio system. 1.
- Page 11 INSTALLATION GUIDE FOR MIC HOLDERS 1. Take microphone holders and screws from polybag. 2. Put one microphone holder to one side. You need to match its orientation just like the picture shown. 3. Use screwdriver to tighten the microphone holder just like the picture shown. You need two screws for each microphone holder.
-
Page 12: Turning Power On/Off
MAKING THE CONNECTIONS SETTING UP YOUR MICROPHONE 1. Plug a microphone into the MIC1 or MIC2 jack at the rear of your Karaoke Machine. Their output is mixed with playback from CD/CD+G. 2. Located on the microphone, there is an ON/OFF switch. 3. - Page 13 CD OR CD+G / MP3+G OPERATION PLAY/PAUSE 1. To start playing, press the PLAY/PAUSE button once, the currently track number and PLAY indicator will appear on the screen. 2. To temporarily stop playing, press the PLAY/PAUSE button, the PAUSE indicator will be shown on the screen.
- Page 14 CD OR CD+G / MP3+G OPERATION REPEAT PLAY (For both CD and CD+G/MP3+G discs) 1. During playback, press PROGRAM/REPEAT button once, the REP ONE indicator will appear on the TFT screen, it can keep repeat the current track. 2. To repeat the Directory/Folder, press PROGRAM/REPEAT button twice, the REP FOLDER indicator will appear on the TFT screen.
- Page 15 CD OR CD+G / MP3+G OPERATION BALANCE Adjust the BALANCE control between the pre-recorded singer’s voice and the music when using a multiplex karaoke disc. AUTO VOICE CONTROL control knob. AUTO VOICE CONTROL can be activated and adjusted by the AVC The vocals on the Multiplex recording will be muted when the singer starts to sing through the microphone.
-
Page 16: Usb Operation
USB OPERATION INSERTING USB FLASH DRIVE 1. Insert a USB flash driver into the USB socket on the front of your karaoke system. 2. Make sure that USB is selected as the audio source. See "SELECTING THE AUDIO SOURCE” 3. Press PLAY/PAUSE to start playback. PLAY/PAUSE 1. -
Page 17: Repeat Play
USB OPERATION REPEAT PLAY 1. During playback, press PROGRAM/REPEAT button once,the REP ONE indicator will appear on the TFT screen, it can keep repeat the current track. 2. To repeat the Directory/Folder, press PROGRAM/REPEAT button twice, the REP FOLDER indicator will appear on the TFT screen. 3. -
Page 18: Bluetooth Setup
PAIRING button. 3. Using the native controls on your Bluetooth Device, select the " KS800-BT" in your Bluetooth setting to pair. 4. When successfully paired, the Bluetooth indicator will stop flashing. After initial pairing, the unit will stay paired unless unpaired manually by the user or erased due to a reset of the devices. -
Page 19: Care And Maintenance
CARE AND MAINTENANCE *Carrying for Compact Discs 1. Treat the disc carefully. Handle the disc only by its edges. Never allow your fingers to come in contact with the shiny, unprinted side of the disc. 2. Do not attach adhesive tape, stickers, etc. to the disc label. 3. -
Page 20: Troubleshooting
TROUBLE SHOOTING PROBLEM POSSIBLE CAUSE SOLUTION AC adaptor is not plugged Plug the AC adaptor into a No power when POWER into a wall outlet or the wall outlet and plug the is on. connector is not plugged connector into the supply into the power supply jack jack on the unit. - Page 21 TROUBLE SHOOTING PROBLEM POSSIBLE CAUSE SOLUTION • Select AUX IN as the No sound - when audio is • Source Selection on your connected to a home source for your home stereo stereo is not set properly stereo. • Improper Connection to •...
-
Page 22: Specification
TROUBLE SHOOTING No sound when playing Your Bluetooth device hasn’t Pairing your Bluetooth device audio via Bluetooth. been paired properly. according to the "Bluetooth setup" section. The volume control of your Increase the volume of your Bluetooth Bluetooth device is set too device. - Page 23 THE KARAOKE MACHINE (GLOSSARY OF TERMS) Following are some brief descriptions of karaoke terms you may need: Echo: By adding some minor feedback to your voice the Echo feature adds depth and resonance to a singer's voice. Echo affects only your voice and not the music. It will make you sound like you are singing in a big concert hall.
Need help?
Do you have a question about the KS800-BT and is the answer not in the manual?
Questions and answers