Table of Contents
Advertisement
Quick Links
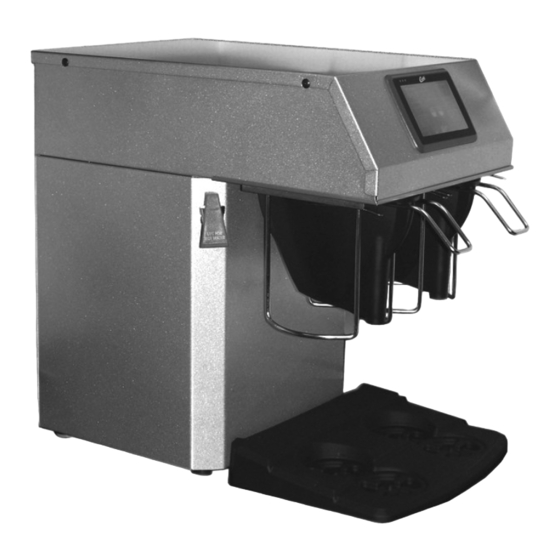
Model
CGC
CAUTION: Please use
this setup procedure
before attempting to use
this brewer. Failure to follow the
instructions can result in injury or the
voiding of the warranty.
IMPORTANT: Equipment
to be installed to comply
with applicable govern-
mental plumbing/electrical codes
having jurisdiction.
CAUTION: DO NOT
connect this brewer to hot
water. The inlet valve is
not rated for hot water.
ISO 9001:2008 REGISTERED
WILBUR CURTIS CO., INC.
6913 West Acco Street
Montebello, CA 90640-5403
For the latest information go to
www.wilburcurtis.com
Tel: 800-421-6150
Fax: 323-837-2410
Service Manual – Curtis Gold Cup
Important Safeguards/Symbols
This equipment is designed for commercial use. Any servicing other than cleaning and
routine maintenance should be performed by an authorized Wilbur Curtis Company Ser-
vice Technician.
• DO NOT immerse the unit in water or any other liquid
• To reduce the risk of fire or electric shock, DO NOT open service panels. There
are no user serviceable parts inside.
• Keep hands and other items away from hot areas of the unit during operation.
• Never clean with scouring powders or harsh chemicals.
Symbols:
WARNINGS – To help avoid personal injury
Important Notes/Cautions – from the factory
Sanitation Requirements
This Curtis Gold Cup Unit is Factory Pre-Set and Ready to Go Right from the Box.
Following are the Factory Settings for your Coffee Brewing System:
• Brew Temperature = 200°F
• Brew Volume = Set to Vessel Requirement.
System Requirements:
• Water Source 20 – 90 PSI (Minimum Flow Rate of ½ GPM)
• Electrical: See attached schematic for standard model or visit www.wilburcurtis.com
for your model.
SETUP STEPS
1. The unit should be level (left to right - front to back), on a secure surface.
2. Connect the water line to the water inlet fitting on the rear of the unit. Water volume flow to the machine
should be consistent. Use tubing sized sufficiently to provide a minimum flow rate of one gallon per minute.
NOTE: A water filtration system must be used to help maintain trouble-free operation. In areas with
extremely hard water, we highly recommend the use of a Curtis approved water filter. For our full
line of filters, please log on to www.wilburcurtis.com. A water filtration system will greatly prolong
the life of the unit and enhance the quality and taste of the product.
NSF International requires the following water connection:
1. A quick disconnect or additional coiled tubing (at least 2x the depth of the unit) is required so
that the unit can be moved for cleaning.
2. This unit must be installed with adequate backflow protection to comply with applicable federal,
state and local codes.
3. Water pipe connections and fixtures directly connected to a potable water supply shall be sized,
installed and maintained in accordance with federal, state, and local codes.
3. Connect the unit to electrical outlet with appropriate amperage rating (see serial tag on machine).
4. Once power has been supplied to the unit, flip the toggle switch to the 'ON' position (located on the rear of
the unit), the water tank will begin to fill. When the water level in the tank reaches the probe, the heating
element(s) will turn on.
5. Water in the heating tank will require approximately a half hour before reaching operating temperature
(factory setting of 200°F). Where applicable, turn on the Universal Control Module (UCM). When the unit
reaches operating temperature, it will display "READY TO BREW".
For the latest specifications and information go to www.wilburcurtis.com
W
C
C
ilbur
urtis
ompany
, i
.
nC
1
Advertisement
Table of Contents

Related Manuals for Wilbur Curtis Company Curtis CGC


Summary of Contents for Wilbur Curtis Company Curtis CGC
- Page 1 ilbur urtis ompany Service Manual – Curtis Gold Cup Important Safeguards/Symbols This equipment is designed for commercial use. Any servicing other than cleaning and routine maintenance should be performed by an authorized Wilbur Curtis Company Ser- vice Technician. • DO NOT immerse the unit in water or any other liquid • To reduce the risk of fire or electric shock, DO NOT open service panels. There are no user serviceable parts inside. • Keep hands and other items away from hot areas of the unit during operation. • Never clean with scouring powders or harsh chemicals. Symbols: WARNINGS – To help avoid personal injury Important Notes/Cautions – from the factory Model Sanitation Requirements This Curtis Gold Cup Unit is Factory Pre-Set and Ready to Go Right from the Box.
- Page 2 Your Curtis Gold Cup Series is Factory Pre-Set for Optimum Performance. After connection to water and power; turn on the brewer at the rear toggle switch. You will hear a beep and the status lights will come on for a moment. MODEL NUMBER The screen will display .
- Page 3 Programming ACCESS CODE MAIN MENU SCREEN: screen. Default is 1 RECIPES 2 3 4. Once the code CONTROL SETTINGS is entered, press OK. The Main Menu BREW SETTINGS screen will appear. MODEL SELECT SUMMARY EXIT. Menu Tree This chart explains how to enter the program mode and menu selections available from the MAIN MENU. Single Twin Single...
- Page 4 Programming...
- Page 5 Programming...
- Page 6 Important Screen Messages...
-
Page 7: Programming Recipes
Coffee Recipe Selections When coffee recipes are offered, the recipe selection will be shown BEFORE a brew size button can be pressed. Pressing a recipe button will show the size selection (left brew head is shown at this stage). Selecting a size will start the brew. Pressing the Cancel button will return the screen to recipe selection. -
Page 8: Edit Recipe
Programming – Recipes Recipes will be (by default) shown in the order they were created. Up/down buttons will change order of recipes. Right/left arrow buttons will go to next/previous screens of recipes. ‘New’ and ‘Copy’ buttons will create new recipe (or copy of selected recipe) AFTER the selected recipe. ‘Rename’... -
Page 9: Enter Name
Enter Name The New screen is for entering recipe name when creating a new recipe or for copying an existing recipe. When naming a recipe, it can be up to approximately 15-20 characters, limited by character width. Undo button will operate as for existing screens. All changes are saved automatically upon exiting. - Page 10 USB – Easy Programming There are two methods that can be used to change the default settings on G4 brewers. They can be programmed at the brewer by the touch screen universal control module (UCM) or the settings can be changed using the USB (Universal Serial Bus) data port on the side of the brewer.
-
Page 11: Usb - File Transfer
USB – File Transfer This screen will be presented whenever the USB flash is inserted, as long ss UCM is showing main brew screen and is not cur- rently brewing. The default action is ‘No action’. The UCM will always create a backup on the USB flash drive before downloading settings/recipes or screensaver. If a firmware update file is present on the USB flash, the firmware update procedure will be started BEFORE this screen is shown. - Page 12 Illustrated Parts Main View ITEM NO. PART NO. DESCRIPTION WC-10000* CONTROL MODULE, TOUCH SCREEN G4 WC-66081 FRONT BEZEL WC-4868 SCREW, 8-32x3/8 SOCKET HEAD HD SS WC-1809* FAUCET, PS/HSP SERIES HOT WATER 1/2-20 UNF WC-3411 BREW CONE ASSY, OPEN BREW CGC WC-66082 FLAVOR CLIP, BREW CONE WC-66070 DRIP TRAY...
- Page 13 Illustrated Parts Top Wrap ITEM NO. PART NO. DESCRIPTION WC- 589-101 TRANSFORMER, 120/230VAC - 24VAC 4.8VA w/LEADS & TRMNLS WC- 817* VALVE, DUMP RIGHT 120V-12W WC- 889* VALVE, DUMP LEFT 120V-12W WC-2962-101K KIT, FITTING SPRAYHEAD KYNAR WC-29025* SPRAYHEAD, ASSY AFS-PURPLE WC-66087 FILTER HOLSTER WC-66090 SCOOP ASSEMBLY CGC...
- Page 14 Illustrated Parts Heating Tank ITEM NO. PART NO. DESCRIPTION WC-5853-102 COVER, TOP HEATING TANK WC-43062* GASKET, TANK LID WC-5502* PROBE, WATER LEVEL WC-5310 TUBE, 5/16 ID x 1/8W SILICONE GEN USE WC-4394 GUARD, SHOCK/HEATING ELEMENT WC- 522* THERMOSTAT, HI LIMIT HEATER DPST 277V-40A WC-1438-101* SENSOR, TEMPERATURE TANK WC-43055...
- Page 15 Electrical Schematic Curtis Gold Cup Brewer...
- Page 16 Cleaning the Gold Cup Brewer Regular cleaning and preventive maintenance is essential in keeping your coffee brewer looking and working like new. CAUTION – Do not use cleansers, bleach liquids, powders or any other substance containing chlorine. These products promote corrosion and will pit the stainless steel. USE OF THESE PRODUCTS WILL VOID THE WARRANTY. 1. Mix dish washing liquid in warm water to make a mild cleaning solution. 2. Drain the drip tray. Wash the tray and screen. Dry these parts. 3. Wipe exterior surfaces with a cloth moistened with cleaning solution. Clean off dried cof- fee, spills or debris. 4. Wipe exterior surfaces with a cloth soaked in clean water to remove all traces of cleaner. 5. Slide the brew cones out and clean with detergent solution and a soft brush. 6. With the brew cones removed, clean the sprayhead area with cleaning solution. Clean the brew rails with a brush to remove any coffee residue. 7. Wipe the sprayhead area with a cloth soaked in clean water to remove any traces of cleaning solution. 8. Rinse and dry the brew cones. Return them onto the brew rails. 9. Dry exterior surfaces with a clean soft cloth. Liquid Level Probe Cleaning intervals for the probe are to be determined by the user or the service tech, based on water conditions. The use of water filters, or the type of water filter that is being used can impact the service interval. Intervals can be from one month to several years, however, replacing rather than cleaning the probe is preferable. WARNING: Disconnect electrical power before removing access panels! CAUTION: This procedure involves working with hot water and hot surfaces! 1.
-
Page 17: Rough-In Drawing
Cleaning the Brew Cones Clean the dispensing spout of the brew cone once a month or more often in locations where the unit gets heavy use. 1. Look into the brew cone to locate the cap covering the spout tube. Remove this cap by grasping the top portion and pulling it straight up. 2. Clean the inside orifice of the spout tube. For better cleaning, you can mix a mild dish washing solution to use while cleaning. Insert a small brush through the spout tube from the outside of the brew cone. Spin the brush a few times to remove any coffee residue. Look inside the brew cone and verify that the brush has gone completely through the spout. 3. Clean the small opening on the side of the spout tube. Insert the brush into the side opening and spin it a few times. Run the brush completely through the side opening. 4. Rinse the brew cone with clear water. Observe the flow of water from the dis- pensing spout to make sure you have a good flow. Cover the spout tube with the cap. Rough-In Drawing... - Page 18 Product Warranty Information The Wilbur Curtis Company certifies that its products are free from defects in material and workmanship under normal use. The following limited warranties and conditions apply: 3 Years, Parts and Labor, from Original Date of Purchase on digital control boards.
Need help?
Do you have a question about the Curtis CGC and is the answer not in the manual?
Questions and answers