Table of Contents
Advertisement
Quick Links
website http://biz.LGservice.com
e-mail http://www.LGEservice.com/techsup.html
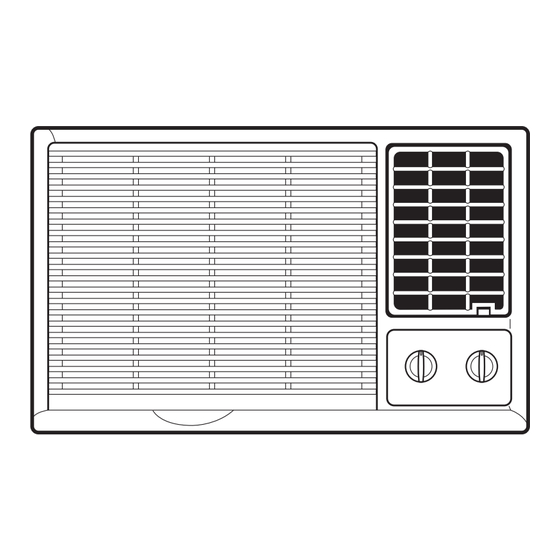
Room Air Conditioner
SERVICE MANUAL
CAUTION
-BEFORE SERVICING THE UNIT, READ THE SAFETY
PRECAUTIONS IN THIS MANUAL.
-ONLY FOR AUTHORIZED SERVICE PERSONNEL.
MODEL: BWC076GBAA0
BWC096GBAA0
BWC126CBAA0
(Applied to new refrigerant R-410A)
Advertisement
Table of Contents

Subscribe to Our Youtube Channel
Related Manuals for LG BWC076GBAA0


Summary of Contents for LG BWC076GBAA0
-
Page 1: Room Air Conditioner
Room Air Conditioner SERVICE MANUAL CAUTION -BEFORE SERVICING THE UNIT, READ THE SAFETY PRECAUTIONS IN THIS MANUAL. -ONLY FOR AUTHORIZED SERVICE PERSONNEL. MODEL: BWC076GBAA0 BWC096GBAA0 BWC126CBAA0 (Applied to new refrigerant R-410A) -
Page 2: Table Of Contents
CONTENTS 1. PREFACE 2.4 REFRIGERATING CYCLE ......9 1.1 SAFETY PRECAUTIONS........2 2.4.1 CONDENSER.........9 1.2 INSULATION RESISTANCE TEST ....2 2.4.2 EVAPORATOR........9 1.3 SPECIFICATIONS...........3 2.4.3 CAPILLARY TUBE .........9 1.4 FEATURES............4 3. INSTALLATION 1.5 CONTROL LOCATIONS .........4 2. DISASSEMBLY INSTRUCTIONS 3.1 SELECT THE BEST LOCATION....12 3.2 CHECK OF INSTALLATION......12 2.1 MECHANICAL PARTS ........5 3.3 HOW TO DRAIN..........12... -
Page 3: Specifications
1.3 SPECIFICATIONS MODELS BWC076GBAA0 BWC096GBAA0 BWC126CBAA0 ITEMS 1ø, 220-240V~, 50Hz POWER SUPPLY 7,000 9,000 12,000 COOLING CAPACITY (Btu/h) 1,000 1,340 INPUT RUNNING CURRENT E.E.R (Btu/h.W) 27(DB) * 19(WB)** OPERATING INDOOR (°C) 35(DB) * 24(WB)** CONDITION OUTDOOR (°C) 350g 500g 450g... -
Page 4: Features
1.4 FEATURES • Built-in adjustable THERMOSTAT • Designed for COOLING ONLY. • Washable one-touch filter • Powerful and whisper cooling. • Compact size • Slide-in and slide-out chassis for the simple • Reliable and efficient rotary compressor is equipped. installation and service. •... -
Page 5: Disassembly Instructions
2. DISASSEMBLY INSTRUCTIONS — Before the following disassembly, POWER SWITCH set to OFF and disconnect the power cord. 2.1 MECHANICAL PARTS 2.1.1 FRONT GRILLE 1. Open the lnlet grille upward or downward. (See Figure 1) 2. Remove the screw which fastens the front grille. 3. -
Page 6: Air Handling Parts
2.2 AIR HANDLING PARTS 2.2.1 AIR GUIDE AND BLOWER 1. Remove the front grille. (Refer to section 2.1.1) 2. Remove the cabinet. (Refer to section 2.1.2) 3. Remove the control box. (Refer to section 2.1.3) 4. Remove the 4 screws which fasten the brace. 5. -
Page 7: Shroud
2.2.3 SHROUD 1. Remove the fan. (Refer to section 2.2.2) 2. Remove the screw which fastens the shroud. 3. Remove the shroud. (See Figure 7) 4. Re-install the component by referring to the removal procedure, above. Figure 7 2.3 ELECTRICAL PARTS 2.3.1 COMPRESSOR 1. -
Page 8: Power Cord
2.3.3 POWER CORD 1. Remove the control box. (Refer to section 2.1.3) 2. Open the control box. (Refer to section 2.3.2) 3. Disconnect the grounding screw from the control box. 4. Disconnect the 2 receptacles. 5. Remove a screw which fastens the clip cord. (See Figure 10) 6. -
Page 9: Refrigerating Cycle
2.4 REFRIGERATING CYCLE CAUTION • This unit is charged with R-410A, pay attention not to charge R-22. 2.4.1 CONDENSER 1. Remove the cabinet. (Refer to section 2.1.2) 2. Remove the 4 screws which fasten the brace.(Refer to section 2.2.1) 3. Remove the 5 screws which fasten the condenser and shroud. - Page 10 NOTES — Replacement of the refrigeration cycle. 6. Recharge as follows : CAUTION 1) Refrigeration cycle systems are charged from the Do not use the existing charge set for R-22. High-side. If the total charge cannot be put It is necessary to use new charge set for R-410A. in the High-side, the balance will be put in the The pressure of R-410A is 1.6 times higher than suction line through the access valve which you...
- Page 11 Equipment needed: • The tools must be used according to the type of refrigerant. Never use the gauge manifold, charge hose, charge cylinder or vacuum pump with other refrigerants. Always carry out the work with dedicated tools.(Failure to do so could lead to trouble.) •...
-
Page 12: Installation
3. INSTALLATION 3.1 SELECT THE BEST LOCATION 1.To prevent vibration and noise, make sure the unit in installed securely and firmly. FENCE AWNING 2.Install the unit where the sunlight does not shine FOAM directly on the unit. HEAT 3.There should be no obstacle, such as a RADIATION COOLED fence or wall, within 50cm from the back of the... -
Page 13: How To Install
3.4 HOW TO INSTALL SCREWDRIVER(+, -), RULER, KNIFE, HAMMER, PENCIL, LEVEL PREPARATION OF CHASSIS 1. Before installing the room air conditioner, please install the knob. (If it is not fixed on the unit.) Shipping 2. Remove the screws which fasten the cabinet at Screws both sides and at the back. -
Page 14: How To Use The Reversible Inlet Grille
7. Attach the front grille to the case by inserting the tabs on the grille into the slots on the front of the case. Push the grille in until it snaps into place. When you detach the front grille from the case, push the grille to your right side and pull it toward you. -
Page 15: Outside Dimensions
4. TROUBLESHOOTING GUIDE 4.1 OUTSIDE DIMENSIONS unit: mm(inch) BWC076GBAA0 BWC126CBAA0 BWC096GBAA0 469 x 353 x 525 600 x 380 x 555 W x D x H (18.46 x 13.90 x 20.67) (23.62 x 14.96 x 21.85) mm(inch) 4.2 PIPING SYSTEM... -
Page 16: Troubleshooting Guide
4.3 TROUBLESHOOTING GUIDE In general, possible trouble is classified in two kinds. The one is called Starting Failure which is caused from an electrical defect, and the other is Ineffective Air Conditioning caused by a defect in the refrigeration circuit and improper application. Unit runs but poor cooling. - Page 17 Fails to Start Check of power source. Check of circuit breaker. Check of control switch Gas leakage of feeler bulb setting. of thermostat Check of control switch. Compressor only fails to Fan only fails to start. start. Improper wiring. Drop of power voltage. Improper thermostat setting.
- Page 18 COMPLAINT CAUSE REMEDY Fan motor will not run. No power Check voltage at outlet. Correct if none. Power supply cord Check voltage to rotary switch. If none, check power supply cord. Replace cord if circuit is open. Rotary switch Check switch continuity. Refer to wiring diagram for terminal identification.
- Page 19 COMPLAINT CAUSE REMEDY Compressor will not run, Rotary Check for continuity, refer to the wiring diagram for terminal identification. Replace the switch if circuit is but fan motor runs. open. Thermostat Check the position of knob If not at the coldest setting, advance the knob to this setting and restart unit.
-
Page 20: Schematic Diagram
5. SCHEMATIC DIAGRAM 5.1 CIRCUIT DIAGRAM • MODEL :BWC076GBAA0, BWC096GBAA0 POWER INPUT BK(BR) WH(BL) (Plain) (Ribbed) ROTARY SWITCH GN(GN/YL) MOTOR OR(BR) CAPACITOR OR(BR) COMP. BR(YL) THERMOSTAT P.T.C WIRING DIAGRAM 3854A20966B S: Service Parts N: Non Service Parts Q'TY LOCATION REMARKS... -
Page 21: Wiring Diagram
5. SCHEMATIC DIAGRAM 5.1 CIRCUIT DIAGRAM • MODEL : BWC126CBAA0 POWER INPUT BK(BR) WH(BL) (Plain) (Ribbed) ROTARY SWITCH GN(GN/YL) MOTOR OR(BR) CAPACITOR OR(BR) COMP. BR(YL) THERMOSTAT P.T.C WIRING DIAGRAM 3854AR3563A S: Service Parts N: Non Service Parts Q'TY LOCATION REMARKS DESCRIPTION PER SET POWER CORD... -
Page 22: Exploded View And Replacement Parts List
6. EXPLODED VIEW AND REPLACEMENT PARTS LIST 152302 135312 135313 147582 147581 269310 266003 249950 W0CZZ 135500 130910 264110 149410 148000 554030 346811 559011 149980 349600 W48602 359012 354210 W48602 349480 567502 554160 550140 349001 W52106-2 W52106-1 552102 352115 552113 352113 35211A 352390... - Page 23 R:Service Parts PART NO. LOCATION DESCRIPTION REMARK BWC076GBAA0 BWC096GBAA0 BWC126CBAA0 135312 GRILLE ASSY, FRONT(SINGLE) 3531A29013C AEB32446201 135313 GRILLE, INLET 3530A10186A 3530A10182A 152302 FILTER ASSY, A/C 5231A20004A 5231AR1152A 147582 LOUVER VERTICAL 4758A30008A 4758AR7308A 147581 LOUVER, HORIZONTAL 4758A20051A 4758A20054A 130910 CABINET ASSY, SINGLE...
- Page 24 March, 2007 P/No.: 3828A20529E Printed in Thailand...
Need help?
Do you have a question about the BWC076GBAA0 and is the answer not in the manual?
Questions and answers