
Related Manuals for ActionTec T3200M


Summary of Contents for ActionTec T3200M
-
Page 1: User Guide
Wireless 11ac Bonded VDSL2 Modem Gateway with MoCA 2.0 Model # T3200M User Guide 0535-0043-000 rev. 1... -
Page 2: Table Of Contents
Table of Contents 1 Getting Started With the Gateway Package Contents Minimum System Requirements Features Getting to Know the Gateway Connecting the Gateway 2 Accessing the Home Screen Accessing the Home Screen Icon Bar Connection Status 3 Configuring Wireless Settings Accessing Wireless Settings Basic Settings Advanced Settings... - Page 3 Table of Contents 5 Configuring Firewall Settings Accessing Firewall Settings Firewall IPv6 Firewall Port Forwarding Applications DMZ Hosting IPv6 DMZ Hosting UPnP 6 Advanced Settings Accessing the Advanced Setup Screens Services Blocking Website Blocking Scheduling Access Parental Controls WAN IP Addressing IPv6 WAN Settings LAN IP Settings IPv6 LAN Settings...
- Page 4 Table of Contents DNS Cache IGMP Setting Upgrade History Tool Box DLNA xDSL Diagnostics User’s Manual A Specifications General Wireless Operating Range LED Indicators Power Adapter Environmental Notices Warranty Important Safety Instructions FCC Class B Equipment Important Note on Wi-Fi Additional Information Contact Info...
-
Page 5: Getting Started With The Gateway
Getting Started With the Gateway Congratulations on purchasing the T3200M Wireless 11ac Bonded VDSL2 Modem Gateway with MoCA 2.0. The Gateway is a single platform device that supports universal WAN access, FTTN, FTTdp, FTTB, or FTTP. With support for advanced 802.11ac 4x4 WiFi and bonded MoCA 2.0, the Gateway enables blazing fast HD... -
Page 6: Package Contents
Introduction Package Contents • Black Power adapter • Yellow cable (Ethernet, 6 ft.) • White cable (Ethernet, 10 ft.) • Quick Start Guide • Installation Guide • Wall-mount template • Vertical stand Minimum System Requirements • Active ADSL2+ service • Computer with an 10 Mbps or 10/100/1000 Mbps Ethernet connection •... -
Page 7: Getting To Know The Gateway
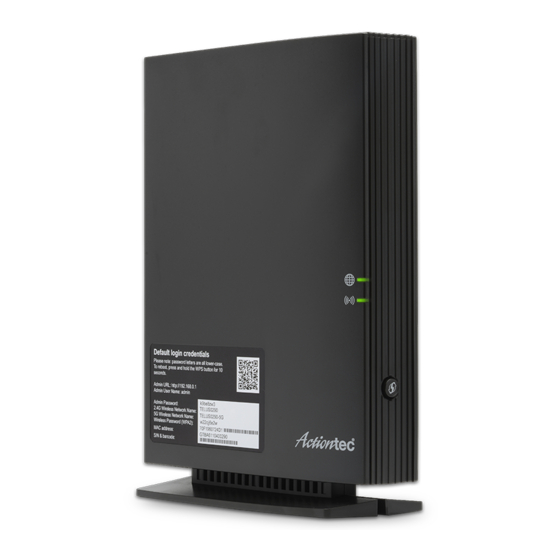
Telus T3200M Gateway Getting to Know the Gateway This section contains a quick description of the Gateway’s lights, ports, and other features. The Gateway has several indicator lights ( s) and a button on its front panel, and a series of ports and switches on its rear panel. - Page 8 Introduction Rear Panel The rear panel of the Gateway features 11 ports, and a Reset button. Power Port The Power port is used to connect the Power cord (Model No. CDS036-W120U, made by Actiontec) to the Gateway.
- Page 9 Telus T3200M Gateway Reset Button Depressing the Reset button for 10 seconds will restore the Gateway’s factory default settings. The reset process will start after releasing the button. WARNING! Do not unplug the Power cord from the Gateway during the reset process. Doing so may result in permanent damage to the Gateway.
-
Page 10: Connecting Computer To Gateway
Connecting the Gateway There are many variables involved when connecting the Gateway, depending on the type of Internet service available. The figure below shows all of the possible connec- tions available for the Gateway. Ethernet T3200M Port (Rear Panel) WAN Ethernet Cable... - Page 11 Telus T3200M Gateway 5. Make sure that the LED on the LAN port into which the Ethernet cable is plugged glows steadily green. This may take a few moments. 6. The computer should either be configured with a statically defined IP address and DNS address, or instructed to automatically obtain an IP address using the Network DHCP server.
-
Page 12: Accessing The Home Screen
Accessing the Home Screen This chapter gives a short overview of the Home screen of the Gateway’s graphical user interface (GUI). Accessing the Home Screen To access the Home screen: 1. Open a Web browser on computer connected, via Ethernet cable, to one of the Gateway’s LAN ports. - Page 13 Telus T3200M Gateway 2. The Gateway’s Home screen appears. 3. Enter the username admin and the password found on the sticker on the side of the Gateway in the Username and Password text boxes at the top right side of the screen, then click Login.
-
Page 14: Icon Bar
Home Screen Icon Bar At the top of the Home screen is the Icon Bar. Here, you can quickly access the other four main sections of the Gateway’s GUI by clicking on the appropriate icon: Status (see chapter 3 for more details); Wireless Setup (see chapter 4 for more details);... -
Page 15: Configuring Wireless Settings
Configuring Wireless Settings This chapter explains the options provided in the Wireless Settings section of the Gateway’s firmware, including basic and advanced settings, and WPS. Accessing Wireless Settings To access the Wireless Settings screens: 1. Open a Web browser. In the Address text box, type: http://192.168.1.254 then press Enter on the keyboard. -
Page 16: Basic Settings
Wireless 2. The Gateway’s Main screen appears. Enter the user name and password, then click Wireless Settings from the row of icons at the top of the screen. 3. The Basic Settings screen appears, with a menu of other wireless options listed on the left side of the screen. -
Page 17: Advanced Settings
Telus T3200M Gateway Advanced Settings Click Advanced Settings from any Wireless Settings screen to generate the Advanced Settings screen. This screen displays a series of settings relating to the advanced capabilities of the Gateway’s wireless network, including compatibility mode, channel width, and WMM power save. -
Page 18: Wps
Wireless Click WPS from any Wireless Settings screen to generate the WPS (Wi-Fi Protected Setup) screen, which allows the user to configure WPS by following the onscreen instructions. -
Page 19: Mac Address Control
Telus T3200M Gateway MAC Address Control Click MAC Address Control from any Wireless Settings screen to generate the Wireless MAC Authentication screen, which allows the user to configure allow or deny access to the Gateway’s wireless network using the MAC address of the... -
Page 20: Band Steering
Telus T3200M Gateway Band Steering Click Band Steering from any Wireless Settings screen to generate the Band Steering Configuration screen, which allows the user to configure the Gateway to automatically connect 2.4GHz and 5GHz wireless devices to the appropriate wire- less network bandwidth. -
Page 21: Checking The Gateway's Status
Checking the Gateway’s Status This chapter explains the options available on the Status screens, which display information about the Gateway’s network connections. Accessing the Status Screens To access the Gateway’s Status screens: 1. Open a Web browser. In the Address text box, type: http://192.168.1.254 then press Enter on the keyboard. -
Page 22: Connection Status
Status 3. The Connection Status screen appears. From here, all the Status screens can be accessed from the menu on the left. Connection Status Clicking Connection Status from any Status screen generates the Connection Status (see figure, above). Information concerning the devices connected to the Gateway’s network, whether wired or wireless, is displayed here, along with the connected device’s IP address, MAC address, and (if applicable) IPv6 address. -
Page 23: Line 1/Line 2 Status
Telus T3200M Gateway Line 1/Line 2 Status Click Line 1 Status from any Status screen to generate the Line 1 Status screen. This screen displays the Gateway’s DSL connection parameters for DSL Line 1 port. Clicking Line 2 Status genreates the Line 2 Status screen, which displays the con-... -
Page 24: Wan Ethernet
Status WAN Ethernet Click WAN Ethernet from any Status screen to generate the WAN Ethernet Status screen. This screen displays the Gateway’s WAN (wide area network) parameters. Routing Table Click Routing Table from any Status screen to generate the Routing Table screen. This screen displays the Gateway’s routes. -
Page 25: Firewall Status
Telus T3200M Gateway Firewall Status Click Firewall Status from any Status screen to generate the Firewall Status screen. This screen displays parameters concerning the Gateway’s firewall. NAT Table Click NAT Table from any Status screen to generate the NAT Table screen. This... -
Page 26: Wireless Status
Status Wireless Status Click Wireless Status from any Status screen to generate the Wireless Status screen. This screen displays the Gateway’s wireless network parameters. - Page 27 Telus T3200M Gateway Advanced Wireless Status Click Advanced Wireless Statistics from the bottom of the Wireless Status screen to generate the Advanced Wireless Statistics screen. This screen displays the Gateway’s additional wireless network parameters. Wireless Monitor Click Modemstatus Wireless Monitor from the bottom of the Wireless Status screen to generate the Wireless Monitor screen.
-
Page 28: Modem Utilization
Status Modem Utilization Click Modem Utilization from any Status screen to generate the Modem Utilization screen. This screen displays statistics related to the Gateway’s modem operation. -
Page 29: Lan Status
Telus T3200M Gateway LAN Status Click LAN Status from any Status screen to generate the LAN Status screen. This screen displays the Gateway’s LAN (local area network) parameters. ARP Table Click ARP Table from any Status screen to generate the ARP Table screen. This... -
Page 30: Network Devices
Status Network Devices Click Network Devices from any Status screen to generate the Network - Devices screen. This screen allows the user to scan the Gateway’s networks for new devices at a selected time interval. Interface Statistics Click Interface Statistics from any Status screen to generate the Estimated Interface Statistics screen. -
Page 31: Multicast Statistics
Telus T3200M Gateway Multicast Statistics Click Multicast Statistics from any Status screen to generate the Multicast Statistics screen. This screen displays the Gateway’s multicast statistics. System Log Click System Log from any Status screen to generate the System Log screen. This screen displays the Gateway’s system log, which keeps track of all events that occur... -
Page 32: Configuring Firewall Settings
Configuring Firewall Settings This chapter explains the options provided in the Firewall section of the Gateway’s firmware, including setting up port forwarding and static NAT. Accessing Firewall Settings To access the Firewall screens: 1. Open a Web browser. In the Address text box, type: http://192.168.1.254 then press Enter on the keyboard. -
Page 33: Firewall
Telus T3200M Gateway 2. The Firewall screen appears, with a menu of other wireless options listed on the left side of the screen. Firewall Click General from any Firewall Settings screen to generate the Firewall screen, as shown in the figure above. To configure basic settings of the Gateway’s firewall,... -
Page 34: Ipv6 Firewall
Firewall IPv6 Firewall Click IPv6 Firewall from any Firewall Settings screen to generate the IPv6 Firewall screen. To set up, follow the onscreen instructions. -
Page 35: Port Forwarding
Telus T3200M Gateway Port Forwarding Click Port Forwarding from any Firewall screen to generate the Port Forwarding screen. Activating port forwarding allows the network to be exposed to the Internet in certain limited and controlled ways, enabling some applications to work from the local network (game, voice, and chat applications, for example), as well as allowing Internet access to servers in the local network. -
Page 36: Applications
Firewall Applications Click Applications from any Firewall screen to generate the Applications screen. This screen allows the user to designate certain applications to be forwarded, cir- cumventing the usual firewall security settings. If changes are made in this screen, click Apply at the bottom of the screen to save them. -
Page 37: Dmz Hosting
Telus T3200M Gateway DMZ Hosting Click DMZ Hosting from any Firewall screen to generate the DMZ Hosting screen. The DMZ host feature allows one device on the network to operate outside the firewall to use an Internet service that otherwise would be blocked, or to expose a networked device to all services without restriction or security. -
Page 38: Ipv6 Dmz Hosting
Firewall IPv6 DMZ Hosting Click IPv6 DMZ Hosting from any Firewall screen to generate the IPv6 DMZ Hosting screen. The DMZ host feature allows one device on the network to operate outside the firewall to use an Internet service that otherwise would be blocked, or to expose a networked device to all services without restriction or security. -
Page 39: Upnp
Telus T3200M Gateway UPnP Click UPnP from any Firewall screen to generate the UPnP screen, which activates UPnP (Universal Plug and Play). To activate, set the preferred UPnP options, then click Apply. -
Page 40: Advanced Settings
Advanced Settings This chapter explains the options available with the Advanced Setup screens, which configure some of the more complex settings on the Gateway. Accessing the Advanced Setup Screens To access the Gateway’s Advanced Setup screens: Open a Web browser. In the Address text box, type: http://192.168.1.254 then press Enter on the keyboard. -
Page 41: Services Blocking
Telus T3200M Gateway The Services Blocking screen appears. From here, all the Advanced Setup screens can be accessed from the menu on the left. Services Blocking Click Services Blocking from any Advanced Setup screen to generate the Services Blocking screen (see the figure, above). This feature allows the user to block certain services from accessing the Gateway’s network(s). -
Page 42: Website Blocking
Advanced Website Blocking Click Website Blocking from any Advanced Setup screen to generate the Website Blocking screen. This feature allows the user to block certain websites from access- ing the Gateway’s network(s). Follow the onscreen instructions to configure. Scheduling Access Click Scheduling Access from any Advanced Setup screen to generate the Scheduling Access screen. -
Page 43: Parental Controls
Telus T3200M Gateway Parental Controls Click Parental Controls from any Advanced Setup screen to generate the Parental Controls Configuration screen. This feature allows the user to allow or prevent access to certain websites for devices on the Gateway’s network. Follow the onscreen... -
Page 44: Wan Ip Addressing
Advanced WAN IP Addressing Click WAN IP Addressing from any Advanced Setup screen to generate the WAN IP Address screen. This feature allows the user to set the protocol used by the ISP for Internet access. Follow the onscreen instructions to configure. -
Page 45: Ipv6 Wan Settings
Telus T3200M Gateway IPv6 WAN Settings Click IPv6 WAN Settings from any Advanced Setup screen to generate the IPv6 WAN Settings screen. This feature allows the user to set the IPv6 protocol used by the ISP for Internet access. Follow the onscreen instructions to configure. -
Page 46: Lan Ip Settings
Advanced LAN IP Settings Click LAN IP Settings from any Advanced Setup screen to generate the LAN IP and DHCP Settings screen. This feature allows the user to set LAN IP and DHCP server settings on the Gateway. Follow the onscreen instructions to configure. -
Page 47: Ipv6 Lan Settings
Telus T3200M Gateway IPv6 LAN Settings Click IPv6 LAN Settings from any Advanced Setup screen to generate the IPv6 LAN Settings screen. This feature allows the user to set the IPv6 LAN IP settings on the Gateway. Follow the onscreen instructions to configure. -
Page 48: Dhcp Reservation
Advanced DHCP Reservation Click DHCP Reservation from any Advanced Setup screen to generate the DHCP Reservation screen. This feature allows the user to lease a permanent DHCP- allocated address to a client on the Gateway’s network. Follow the onscreen instructions to configure. -
Page 49: Dynamic Dns
Telus T3200M Gateway Dynamic DNS Click Dynamic DNS from any Advanced Setup screen to generate the Dynamic DNS screen. This feature allows the user to associate the WAN IP address of the Gateway with a host name. Follow the onscreen instructions to configure. -
Page 50: Dns Host Mapping
Advanced DNS Host Mapping Click DNS Host Mapping from any Advanced Setup screen to generate the DNS Host Mapping screen. This feature allows the user to create a static host name for a specified IP address. Follow the onscreen instructions to configure. Port Bridging Click Port Bridging from any Advanced Setup screen to generate the Port1 Bridge screen. -
Page 51: Moca Lan Setup
Telus T3200M Gateway MoCA LAN Setup Click MoCA LAN Setup from any Advanced Setup screen to generate the MoCA LAN Setup - Basic screen. This feature allows the user to enable privacy settings on the Gateway’s MoCA LAN. Follow the onscreen instructions to configure. - Page 52 Advanced Advanced MoCA LAN Click Advanced from the MoCA LAN Setup - Basic screen to generate the MoCA LAN Setup - Advanced screen. This screen allows the user to modify additional MoCA LAN settings. Follow the onscreen instructions to configure. WARNING: Enabling or modifying MoCA Privacy Settings will result in the loss of connectivity to all other MoCA devices on the network.
-
Page 53: Admin Password
Telus T3200M Gateway Admin Password Click Admin Password from any Advanced Setup screen to generate the Admin Password screen. This feature allows the user to change the password for accessing the Gateway’s graphical user interface. Follow the onscreen instructions to configure. -
Page 54: Samba Configuration
Advanced Samba Configuration Click Samba Configuration from any Advanced Setup screen to generate the Samba Configuration screen. This feature allows the user to set up a Samba environment. Follow the onscreen instructions to configure. Reboot Click Reboot from any Advanced Setup screen to generate the Reboot screen. Reboot the Gateway by clicking Reboot. -
Page 55: Restore Defaults
Telus T3200M Gateway Restore Defaults Click Restore Defaults from any Advanced Setup screen to generate the Restore Defaults screen. To restore certain settings on the Gateway, click the appropriate Restore button. Speed Test Click Speed Test from any Advanced Setup screen to generate the Speed Test screen. -
Page 56: Ping Test
Advanced Ping Test Click Ping Test from any Advanced Setup screen to generate the Ping Test screen. To perform a ping test on the Gateway, follow the onscreen instructions. -
Page 57: Iperf Test
Telus T3200M Gateway Iperf Test Click Iperf Test from any Advanced Setup screen to generate the Iperf Test screen. To perform an iperf test on the Gateway, follow the onscreen instructions. -
Page 58: Ipv6 Ping Test
Advanced IPv6 Ping Test Click IPv6 Ping Test from any Advanced Setup screen to generate the IPv6 PingTest screen. To perform an IPv6 ping test on the Gateway, follow the onscreen instructions. -
Page 59: Traceroute
Telus T3200M Gateway Traceroute Click Traceroute from any Advanced Setup screen to generate the Traceroute screen. To perform an route trace on the Gateway, follow the onscreen instructions. IPv6 Traceroute Click IPv6 Traceroute from any Advanced Setup screen to generate the IPv6 Traceroute screen. -
Page 60: Time Zone
Advanced Time Zone Click Time Zone from any Advanced Setup screen to generate the Time Zone screen. Use this screen to set the time zone on the Gateway. Language Settings Click Language Settings from any Advanced Setup screen to generate the Language Settings screen. -
Page 61: Dns Cache
Telus T3200M Gateway DNS Cache Click DNS Cache from any Advanced Setup screen to generate the DNS Cache screen. Use this screen to set up a DNS cache on the Gateway. -
Page 62: Igmp Setting
Advanced IGMP Setting Click IGMP Setting from any Advanced Setup screen to generate the IGMP Configuration screen. Use this screen to set up IGMP processes on the Gateway. Upgrade History Click Upgrade History from any Advanced Setup screen to generate the Upgrade History screen. -
Page 63: Alg
Telus T3200M Gateway Click ALG from any Advanced Setup screen to generate the Firwall - ALG / Pass- Through screen. This screen allows the user to configure ALG settings on the Gateway. Tool Box Click Tool Box from any Advanced Setup screen to generate the Tool Box screen. This... -
Page 64: Dlna
Advanced DLNA Click DLNA from any Advanced Setup screen to generate the DLNA screen. This screen allows the user to configure DLNA settings on the Gateway. xDSL Diagnostics Click xDSL diagnostics from any Advanced Setup screen to generate the xDSL Diagnostics screen. -
Page 65: A Specifications
Specifications General Model Number(s) T3200M (Wireless 11ac Bonded VDSL2 Modem Gateway with MoCA 2.0) Standards IEEE 802.3 (10BaseT) IEEE 802.3u (100BaseTX) IEEE 802.11 b, g, n, ac (Wireless) G.dmt G.lite t1.413 RFC 1483, 2364, 2516 Protocol LAN - CSMA WAN -... -
Page 66: Wireless Operating Range
Up to 91M (300 ft.) @ 300 Mbps Outdoors Up to 457M (1500 ft.) @ 300 Mbps Topology Star (Ethernet) LED Indicators WAN, Wireless, and WPS Push Button Power Adapter Model No. - CDS036-W120U Input - 100-240V~, 50/60Hz, 1.0A Output - 12.0V === 3.0A Manufacturer - Actiontec... -
Page 67: Environmental
Telus T3200M Gateway Environmental Power External, 12V DC, 3A Certifications FCC Part 15 Class B, Class C and E, FCC Part 68, UL Operating Temperature 0º C to 45º C (32ºF to 113ºF) Storage Temperature -20ºC to 70ºC (-4ºF to 158ºF) -
Page 68: Notices
Under such local law, certain disclaimers and limitations of this Warranty Statement may not apply to the customer. Go to http://www.actiontec.com/products/warranty.php for more information. Important Safety Instructions Basic safety precautions should always be followed to reduce the risk of fire, electri- cal shock, and personal injury, including the following: •... -
Page 69: Fcc Class B Equipment
• Consult the dealer or an experienced radio or television technician for help. Modifications The FCC requires the user to be notified that any changes or modifications made to this device that are not expressly approved by Actiontec Electronics, Inc, may void the user’s authority to operate the equipment. -
Page 70: Important Note On Wi-Fi
Notices Declaration of Conformity for Products Marked With the FCC Logo or Industry Canada (IC)–North America only This device complies with part 15 of the FCC and with Industry Canada license- exempt RSS standard(s). Operation is subject to the following two conditions: 1. -
Page 71: Additional Information
Telus T3200M Gateway Additional Information This product meets the applicable Innovation, Science, and Economic Development Canada technical specifications. The Ringer Equivalence Number (REN) indicates the maximum number of devices allowed to be connected to a telephone interface. The termination of an interface may consist of any combination of devices subject only to the requirement that the sum of the RENs of all the devices not exceed five.
Need help?
Do you have a question about the T3200M and is the answer not in the manual?
Questions and answers
Where does the power plug go into the modem
The power plug connects to the Power port on the rear panel of the ActionTec T3200M modem.
This answer is automatically generated
I connected USB storage and it is listed as accessible. How do I access it?
To access USB storage connected to an ActionTec T3200M router, you need to:
1. Share the USB drive through the router's settings.
2. Check the router’s security settings, as it may require a username and password to access the drive.
3. Make sure the SAMBA settings are properly configured.
4. Verify that the file system of the USB drive (such as FAT32) is supported.
5. Use the correct network path (like SMB protocol) on your device to connect to the shared drive.
You may need to refer to the Actiontec user guide for detailed instructions on sharing connected USB drives.
This answer is automatically generated
Should I reset this modem
Resetting the Actiontec T3200M modem depends on your specific needs. If you want to erase all custom settings and return the modem to its factory defaults, a reset is appropriate. However, be aware that resetting will delete the following settings:
- Login username and password.
- Wi-Fi SSID (network name) and password.
- ISP username and password (for DSL modems, which must be re-entered after a reset).
- Any custom configurations like port forwarding, scheduling, or IP address changes.
You will need to fully reconfigure the modem after the reset. If you're unsure about reconfiguring or if the modem is functioning correctly without a reset, you might consider troubleshooting or consulting your ISP instead of resetting.
This answer is automatically generated
How do I disconnect the modem from the wall mount