
Related Manuals for ActionTec T1200H


Summary of Contents for ActionTec T1200H
-
Page 1: User Manual
VDSL2/GigE Wireless 11n Gateway Model #: T1200H, T2200H User Manual Ver 1.0 Solutions for the Digital Life ™... -
Page 2: Table Of Contents
Table of Contents Introduction Minimum System Requirements Features Getting to Know the Router Using the Home Screen Accessing the Home Screen Icon Bar General Information Connection Status Home Network Firewall/Diagnostics Configuring Wireless Settings Accessing Wireless Settings Basic Settings Advanced Settings Wireless MAC Authentication Configuring Firewall Settings Accessing Firewall Settings... - Page 3 Table of Contents Viewing the Gateway’s Status Accessing Status Tables Connection Status xDSL Status WAN Ethernet Status Routing Table Firewall Status NAT Table Wireless Status Modem Utilization LAN Status Specifications General Wireless Operating Range LED Indicators Environmental Notices Regulatory Compliance Notices Modifications GPL (General Public License) Limited Warranty...
-
Page 4: Introduction
Introduction Thank you for choosing the VDSL2/GigE Wireless 11n Gateway. With its powerful wireless N radio, gigabit Ethernet switch, and WAN port, as well as its dual-core processor and support for HPNA, the Gateway will propel you to new speeds as you traverse the Internet. - Page 5 VDSL2/GigE Wireless 11n Gateway • TR-064 local management • 64-, 128-, and 256-bit WEP/WPA/WPA2 wireless LAN security • IEEE 802.3 Ethernet standard compliance • Four 10/100/1000 Base-T Ethernet ports (LAN) • One 10/100/1000 Base-T Ethernet ports (WAN) • DHCP server option •...
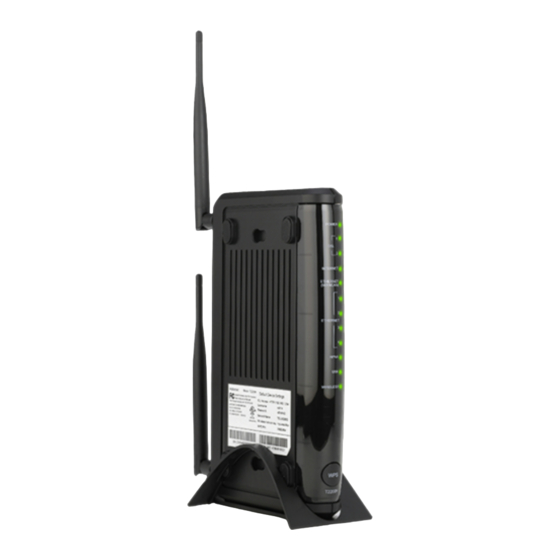
- Page 6 Chapter 1 Introduction Getting to Know the Gateway This section contains a quick description of the Gateway’s lights, ports, etc. The Gateway has several indicator lights ( s) and a button on its front panel, and a series of ports and switches on its rear panel. Front Panel The front panel of the Gateway features 11 LEDs: Power, DSL, Internet, WAN Ethernet, Internet, Ethernet (4), Wireless, USB, and WPS Push Button.
- Page 7 VDSL2/GigE Wireless 11n Gateway Power The Power LED displays the Gateway’s current status. If the Power LED glows steadily green, the Gateway is receiving power and fully operational. When the Power LED is rapidly flashing, the Gateway is initializing. If the Power LED is glows red when the Power cord is plugged in, the Gateway has suffered a critical error and technical support should be contacted.
-
Page 8: Chapter 1 Introduction
Chapter 1 Introduction The USB LED illuminates when a USB device is connected via the Gateway’s USB port. This port is not currently operational, but may be enabled in a future firmware update. Wireless The Wireless LED illuminates when the Gateway is connected wirelessly, assum- ing the Gateway’s Wireless feature is turned on. - Page 9 VDSL2/GigE Wireless 11n Gateway Phone Port The Phone port is used to connect the Gateway to a telephone line connection. HPNA Port The HPNA port is used to connect the Gateway to an HPNA connection via coaxial cable. LAN Ethernet Ports (4) The LAN Ethernet ports are used to connect computers to the Gateway via Ethernet cable.
-
Page 10: Using The Home Screen
Using the Home Screen This chapter gives a short overview of the Home screen of the Gateway’s firmware, including explanations of the Home screen’s sections and links. Accessing the Home Screen To access the Home screen: 1. Open a Web browser. In the “Address” text box, type: http://192.168.1.254 then press Enter on the keyboard. - Page 11 Chapter 2 Home Screen 2. The Gateway’s Home screen appears. 3. Enter the username “admin” and the password “telus” in the Username and Password text boxes at the top right side of the screen, then click Login.
-
Page 12: Icon Bar
VDSL2/GigE Wireless 11n Gateway 4. You can now access all of the Home screen’s options Icon Bar At the top of the Home screen is the Icon Bar. Here, you can quickly access the other four main sections of the Gateway’s firmware by clicking on the appropriate icon: Status (see chapter 6 for more details);... -
Page 13: General Information
Chapter 2 Home Screen General Information The next section of the Home screen is the General Information section. This section is divided into three subsections: Summary, Product Info, and Login Status. Summary The Summary subsection contains four status lines. Broadband displays the status of the Gateway’s broadband connection (connected or disconnected). -
Page 14: Connection Status
VDSL2/GigE Wireless 11n Gateway Connection Status This subsection of the Home screen displays the status of various parameters regarding the Gateway’s wired and wireless networks. This section contains two subsections: WAN Connection Status and Wireless. WAN Connection Status The WAN Connection Status subsection contains a number of status lines that pertain to the Gateway’s WAN (Internet) connection: WAN Type, Dynamic/Static (type of IP address used), Modem IP Address, Subnet Mask, Default Gateway, Lease Time Remaining, DNS Address #1, and DNS Address #2. -
Page 15: Home Network
VDSL2/GigE Wireless 11n Gateway Home Network This section of the Home screen details the devices connected to the Gateway’s networks (either wired or wireless). Information provided includes the device’s IP address and the speed of the connection. -
Page 16: Firewall/Diagnostics
Chapter 2 Home Screen Firewall/Diagnostics This subsection of the Home screen displays the status of various parameters regarding the Gateway’s firewall, as well as list of diagnostics tests. This section contains two subsections: Firewall and Diagnostics. Firewall The Firewall subsection contains a number of status lines that pertain to the Gateway’s firewall security: UPnP Setting, Firewall (type of firewall used), and Blocking/Filtering. -
Page 17: Configuring Wireless Settings
Configuring Wireless Settings This chapter explains the options provided in the Wireless section of the Gateway’s firmware, including setting up wireless security and WPS. Accessing Wireless Settings To access the Wireless screens: 1. Open a Web browser. In the “Address” text box, type: http://192.168.1.254 then press Enter on the keyboard. - Page 18 VDSL2/GigE Wireless 11n Gateway 2. The Gateway’s Home screen appears. Enter your user name and password, then click the Wireless Setup icon from the row of icons at the top of the screen. 3. The Wireless Settings screen appears, with various options listed in the menu on the left side of the screen.
-
Page 19: Basic Settings
Chapter 3 Wireless Settings Basic Settings Click Basic Settings from any Wireless screen to generate the Basic Settings screen. This screen displays a series of settings relating to the core functionality of the Gateway’s wireless capabilities. Wireless Radio Click in the Enable radio button to activate the Gateway’s wireless radio. Clicking in the Disable radio button turns off the wireless radio. - Page 20 VDSL2/GigE Wireless 11n Gateway SSID Broadcast Click in the Enable radio button to activate SSID broadcasting, which allows any computer searching for available wireless networks to detect this network (how- ever, if this network is protected with some form of wireless security, they will not be able to join the network unless they know the security password).
- Page 21 VDSL2/GigE Wireless 11n Gateway WEP stands for Wired Equivalent Privacy. To use WEP, select it from the Security drop-down list, then select the Authentication Type (Open or Shared). Finally, select whether to use the Gateway’s automatically generated default key/ passphrase, or create one of your own (the more keys used, the stronger the security), then click Apply to save your changes.
-
Page 22: Advanced Settings
Chapter 3 Wireless Settings 3. Enter the RADIUS server’s shared secret in the Radius Key text box. 4. Enter the group key interval in the Group Key Interval text box. 5. Click Apply to save your changes. Selecting Off from the Security drop-down list leaves the Gateway’s wireless net- work completely open, allowing anyone to join the network. - Page 23 Chapter 3 Wireless Settings Compatibility Mode Allows you to modify the Gateway’s wireless network to allow certain devices to join, based on the device’s compatibility. Choices include Compatible Mode (802.11b, 802.11g, and 802.11n), Balanced Mode (802.11g + n only), Performance Mode (802.11n only), Legacy Mode (802.11 b + g only), 802.11g only, and 802.11b only.
-
Page 24: Wps
VDSL2/GigE Wireless 11n Gateway Channel Select the channel at which the Gateway’s wireless network operates. Choices include channels 1 through 11, and Auto Detect, which allows devices on the net- work to automatically detect the channel. Wireless Power Level Adjust the power of the Gateway’s wireless network signal by selecting a percentage from 10% to 100% from the drop-down list Click WPS in any Wireless screen to generate the WPS (Wi-Fi Protected Setup) screen. - Page 25 Chapter 3 Wireless Settings To set up WPS: 1. Enable WPS by clicking in the Enable radio button. 2. Click Apply to save your changes. 3. If connecting a device to the wireless network with a WPS AP PIN, write down the PIN displayed after Current WPS AP Pin, then enter the PIN in the device’s WPS AP PIN configuration.
-
Page 26: Wireless Mac Authentication
VDSL2/GigE Wireless 11n Gateway Wireless MAC Authentication Click MAC address control in any Wireless screen to generate the Wireless MAC Authentication screen. MAC addresses are alphanumeric designations provided to every networkable device that act as unique identifiers. Using MAC addresses, you can allow or deny access to the Gateway’s wireless network to the wireless devices of your choice. - Page 27 Chapter 3 Wireless Settings 4. Enter the device’s MAC address by either selecting it from the Select MAC Address drop-down list, or manually entering it in the Manually Add MAC Address text box. 5. Click Apply to save your changes. 6.
-
Page 28: Configuring Firewall Settings
Configuring Firewall Settings This chapter will explain the options provided in the Firewall section of the Gateway’s firmware, including various firewall options, port forwarding, and DMZ hosting. Accessing Firewall Settings To access the Firewall screens: 1. Open a Web browser. In the Address text box, type: http://192.168.1.254 then press Enter on the keyboard. - Page 29 Chapter 4 Firewall 2. The Gateway’s Home screen appears. Enter your user name and password, then click Firewall from the row of icons at the top of the screen. 3. The Firewall screen appears, with various firewall options listed in the menu on the left side of the screen.
-
Page 30: Firewall
VDSL2/GigE Wireless 11n Gateway Firewall Click Firewall from any Firewall screen to generate the Firewall screen. This screen allows you to configure the firewall settings of the Gateway. If you make changes in this screen, click Apply at the bottom of the screen to save them. WAN Ping Block Mode Click in the Enable radio button next to WAN PING block mode to activate the WAN Ping Block Mode. -
Page 31: Port Forwarding
Chapter 4 Firewall Firewall Security Level Select the level of firewall security level here, by clicking in the appropriate radio but- ton. None provides no firewall security, while Low, Medium, and High provide differ- ent levels of security, as displayed in the Firewall table in the lower part of the screen. Additionally, after choosing a level of firewall security, you can manually allow (by clicking in a check box to generate a check mark) or deny (by clicking in a check box to delete a check mark) selected Internet services listed in the Firewall table. -
Page 32: Applications
VDSL2/GigE Wireless 11n Gateway To set up port forwarding 1. Enter the LAN starting port in the Starting Port text box. 2. Enter the LAN ending port in the Ending Port text box. 3. Select a protocol from the Protocol drop-down list box 4. - Page 33 VDSL2/GigE Wireless 11n Gateway To set up a forwarded application: 1. Select a networked device by selecting it from Select Device drop-down list, or enter its IP address in the Enter IP Address text box. 2. Select the application’s category from the Application Category drop- down list, or select All to see all the applications provided.
-
Page 34: Dmz Hosting
Chapter 4 Firewall DMZ Hosting Click DMZ Hosting from any Firewall screen to generate the DMZ Hosting screen. The DMZ (De-Militarized Zone) host feature allows one device on the network to operate outside the firewall to use an Internet service that otherwise would be blocked, or to expose a networked device to all services without restriction or security. -
Page 35: Upnp
Chapter 4 Firewall UPnP Click UPnP from any Firewall screen to generate the UPnP screen. UPnP (Universal Plug and Play) allows all supported devices on the Gateway’s network to discover and interface with each other without additional configuration. To enable UPnP on the Gateway’s network, click in the Enable radio button, then click Apply. -
Page 36: Configuring Advanced Setup Options
Configuring Advanced Setup This chapter will explain the options provided in the Advanced Setup section of the Gateway’s firmware, including services blocking, restoring the Gateway to fac- tory default settings, and performing a ping test. Accessing Advanced Setup To access the Advanced Setup screens: 1. - Page 37 Chapter 5 Advanced Setup 2. The Gateway’s Home screen appears. Enter your user name and password, then click Advanced Setup from the row of icons at the top of the screen. 3. The Advanced Setup screen appears, with various options listed in the menu on the left side of the screen.
-
Page 38: Services Blocking
VDSL2/GigE Wireless 11n Gateway Services Blocking Services blocking is used to prevent a device on the Gateway’s network from accessing particular services available on the Internet, such as receiving email or downloading files from FTP sites. To set up services blocking on a networked device: 1. -
Page 39: Website Blocking
VDSL2/GigE Wireless 11n Gateway Website Blocking Web site blocking is used to prevent all devices on the Gateway’s network from accessing particular web sites on the Internet. To set up web site blocking on the Gateway’s network: 1. Click Website Blocking from the menu on the left side of any Advanced Setup screen. -
Page 40: Scheduling Access
Chapter 5 Advanced Setup Scheduling Access Scheduling access is used to allow a device on the Gateway’s network to access the Internet at certain times of the day, or certain days of the week, only. During times not configured in the Scheduling Access screen, the device will not be able to access the Internet. -
Page 41: Dhcp Reservation
Chapter 5 Advanced Setup 5. Click Add to create a schedule access. 6. Repeat steps 1-5 to create multiple access schedules for other devices on the Gateway’s network. The devices that are configured with an access schedule are listed at the bottom of the screen. -
Page 42: Admin Password
VDSL2/GigE Wireless 11n Gateway 4. Click Apply to save your changes. 5. Repeat steps 1-4 to reserve IP addresses for other devices on the Gateway’s network. The devices with DHCP reserved IP addresses are listed at the bottom of the screen. Admin Password To change the password that allow access to the Gateway’s firmware screens: 1. -
Page 43: Rebooting The Gateway
Chapter 5 Advanced Setup Rebooting the Gateway To reboot the Gateway: 1. Click Reboot from the menu on the left side of any Advanced Setup screen. The Reboot Modem screen appears. 2. Click Reboot to reboot the Gateway. This may take up to one minute. To reenter the Gateway’s firmware after restarting the Gateway, click the web browser’s Refresh button. - Page 44 VDSL2/GigE Wireless 11n Gateway 2. If you want to restore only the Gateway’s default wireless settings, click Restore across from Restore Default Wireless Settings. The Gateway’s current wireless settings will be deleted, and the factory default wireless settings restored. 3. If you want to restore only the Gateway’s default firewall settings, click Restore across from Restore Default Firewall Settings.
-
Page 45: Ping Test
Chapter 5 Advanced Setup Ping Test Selecting Ping Test from any Advanced Setup screen generates the Ping Test screen, which is used to check whether the Gateway is properly connected to the Internet. Follow the on-screen instructions to perform the test. The results will be displayed at the bottom of the screen. -
Page 46: Traceroute
VDSL2/GigE Wireless 11n Gateway Traceroute Selecting Traceroute from any Advanced Setup screen generates the Traceroute screen, which is used to determine the route taken by packets across a network. Follow the on-screen instructions to perform the test. The results will be displayed at the bottom of the screen. -
Page 47: Time Zone
Chapter 5 Advanced Setup Time Zone To set the correct time zone on the Gateway: 1. Click Time Zone from the left side of any Advanced Setup screen. The Time Zone screen appears. 2. Click in the appropriate radio button for your time zone. 3. -
Page 48: Viewing The Gateway's Status
Viewing the Gateway’s Status This chapter gives an overview of the various Status tables provided by the Gateway, which allow you check on various parameters, including xDSL connec- tions, WAN Etherent connection, and wireless status. Accessing Status Tables To access the Status screens: 1. - Page 49 Chapter 6 Status 2. The Gateway’s Home screen appears. Enter your user name and password, then click Status from the row of icons at the top of the screen. 3. The Status screen appears, with various options for checking the Gateway’s status listed in the menu on the left side of the screen.
-
Page 50: Connection Status
VDSL2/GigE Wireless 11n Gateway Connection Status Click Connection Status from any Status screen to generate the Connection Status screen. This table displays various parameters regarding the Internet con- nection of the Gateway, including broadband and ISP connection status, upstream rate, least time remaining, and DNS addresses. The only user-configurable option in the screen is the Release/Renew button, which, when clicked, releases and renews the Gateway’s IP address. -
Page 51: Xdsl Status
VDSL2/GigE Wireless 11n Gateway xDSL Status Click xDSL Status from any Status screen to generate the xDSL Status screen. This table displays various parameters relating to the xDSL connection of the Gateway, including VPI, downstream speed, and attenuation. There are no user-configurable options in this screen, but there is a Clear button at the bottom of the screen (not shown) that resets all of the statistics back to zero, at which time the statistics will begin accumulating again. -
Page 52: Wan Ethernet Status
Chapter 6 Status WAN Ethernet Status Click WAN Ethernet Status from any Status screen to generate the WAN Ethernet Status screen. This table displays various parameters relating to the WAN Ethernet connection of the Gateway, including subnet mask, default gateway, and sent pack- ets. -
Page 53: Firewall Status
Chapter 6 Status Firewall Status Click Firewall Status from any Status screen to generate the Firewall Status screen. This table displays the status of the Gateway’s firewall. There are no user-configu- rable options in this screen. For more details, see chapter 4, Configuring Firewall Settings. -
Page 54: Wireless Status
VDSL2/GigE Wireless 11n Gateway Wireless Status Click Wireless Status from any Status screen to generate the Wireless Status screen. This table displays the Gateway’s wireless network statistics, including wireless secu- rity type, wireless mode, and packets received. If the Gateway is set to use multiple SSIDs, select the SSID from the drop-down list at the top of the screen. -
Page 55: Modem Utilization
Chapter 6 Status Modem Utilization Click Modem Utilizations from any Status screen to generate the Modem Utilization screen. This table displays the Gateway’s modem statistics, including wireless memory used, LAN TCP settings, and, at the bottom of the screen, a LAN device session log. There are no user-configurable options in this screen. -
Page 56: Lan Status
VDSL2/GigE Wireless 11n Gateway LAN Status Click LAN Status from any Status screen to generate the LAN Status screen. This table displays the Gateway’s LAN (local network) statistics, including Ethernet con- nections, HPNA link status, and various networked device details. There are no user- configurable options in this screen. -
Page 57: Specifications
Specifications General Model Number V1000H (VDSL2/GigE Wireless 11n Gateway) Standards IEEE 802.3 (10BaseT) IEEE 802.3u (100BaseTX) IEEE 802.11 b, g, n (Wireless) G.dmt G.lite t1.413 RFC 1483, 2364, 2516 Protocol LAN - CSMA WAN - , Static DHCP VDSL2 interface 10/100/1000 RJ-45 switched ports Speed LAN Ethernet: 10/100/1000 Mbps auto-sensing... -
Page 58: Wireless Operating Range
Appendix A Specifications Wireless Operating Range Indoors Up to 91M (300 ft.) @ 300 Mbps Outdoors Up to 457M (1500 ft.) @ 300 Mbps Topology Star (Ethernet) LED Indicators Power, DSL, Internet, WAN Ethernet, Internet, Ethernet (4), Wireless, USB, and WPS Push Button Environmental Power... -
Page 59: Notices
Consult the dealer or an experienced radio or television technician for help. Modifications The FCC requires the user to be notified that any changes or modifications made to this device that are not expressly approved by Actiontec Electronics, Inc., may void the user’s authority to operate the equipment. -
Page 60: Gpl (General Public License)
20 cm from all persons and must not be co-located or operating in conjunction with any other antenna or transmitter. For questions regarding your product or the FCC declaration, contact: Actiontec Electronics, Inc. 760 North Mary Ave. Sunnyvale, CA 94086 United States... -
Page 61: Limited Warranty
Software: Actiontec Electronics warrants to Customer that each software pro- gram licensed from it will perform in substantial conformance to its program spec- ifications, for a period of ninety (90) days from the date of purchase from Actiontec Electronics or its authorized reseller. Actiontec Electronics warrants the media con- taining software against failure during the warranty period. - Page 62 VDSL2/GigE Wireless 11n Gateway the non-compatibility is caused by a “bug” or defect in the third party’s product or from use of the software product not in accordance with Actiontec Electronics published specifications or user guide. THIS ACTIONTEC ELECTRONICS PRODUCT MAY INCLUDE OR BE BUNDLED WITH THIRD-PARTY SOFTWARE, THE USE OF WHICH IS GOVERNED BY A SEPARATE END-USER LICENSE AGREEMENT.
- Page 63 VDSL2/GigE Wireless 11n Gateway Actiontec Electronics shall not be responsible for any software, firmware, informa- tion, memory data, or Customer data contained in, stored on, or integrated with any products returned to Actiontec Electronics for repair, whether under warranty or not.
- Page 64 Dispute Resolution: The customer may contact the Director of Technical Support in the event the Customer is not satisfied with Actiontec Electronics’ response to the complaint. In the event that the Customer is still not satisfied with the response of the Director of Technical Support, the Customer is instructed to contact the Director of Marketing.
Need help?
Do you have a question about the T1200H and is the answer not in the manual?
Questions and answers