Table of Contents
Advertisement
Quick Links
Operating Instructions
DVD Recorder
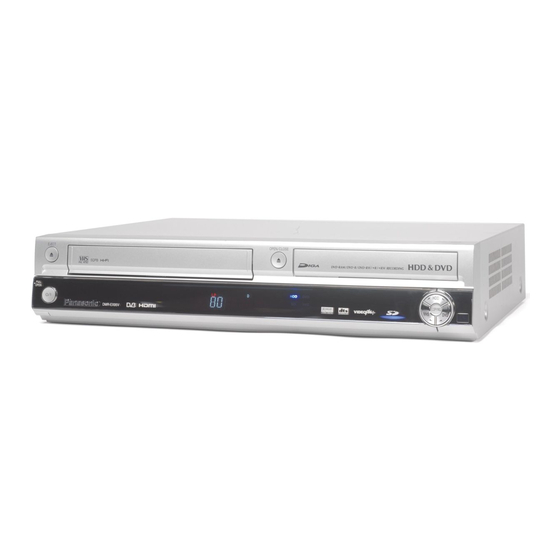
Model No. DMR-EX95V
PAL NTSC
TM
Downloaded From DvDPlayer-Manual.com Panasonic Manuals
This DVD Recorder is for viewing and recording free to view channels
only, not pay TV or encrypted channels.
Read the operating instructions, the safety precautions, and the
information on setting up the unit on page 3 thoroughly before you
connect, operate or adjust any settings on the unit.
Trademark of the DVB Digital Video Broadcasting Project (1991 to 1996)
Declaration of Conformity No.3955, 12 January 2006
th
Advertisement
Table of Contents

Subscribe to Our Youtube Channel
Related Manuals for Panasonic DMR-EX95V


Summary of Contents for Panasonic DMR-EX95V
-
Page 1: Operating Instructions
3 thoroughly before you connect, operate or adjust any settings on the unit. Trademark of the DVB Digital Video Broadcasting Project (1991 to 1996) Declaration of Conformity No.3955, 12 January 2006 Downloaded From DvDPlayer-Manual.com Panasonic Manuals... -
Page 2: Table Of Contents
Prog. Type Display according to topic areas 47 76-77 Skipping, MANUAL SKIP Display according to Category If you need help 78-82 Frame playback Programming the timer in the TV Guide Specifications TIME SLIP Deleting a Timer Recording Index last page Downloaded From DvDPlayer-Manual.com Panasonic Manuals... -
Page 3: Safety Precautions
If you see this symbol, The model and serial number of this product can be found on the back of the unit. read page 4. Please note them and keep for future reference. Model No. Serial No. Downloaded From DvDPlayer-Manual.com Panasonic Manuals... -
Page 4: Information About The Unit
Information on Disposal in other Countries outside the European Union This symbol is only valid in the European Union. If you wish to discard this product, please contact your local authorities or dealer and ask for the correct method of disposal. Downloaded From DvDPlayer-Manual.com Panasonic Manuals... -
Page 5: Before You Start
Dear customer Thank you for your trust and your decision to purchase this top-quality unit. Panasonic is one of the leading manufacturers of entertainment electronics units. We are sure that you will be completely satisfied with this unit. Matsushita Electric Industrial Co., Ltd. -
Page 6: Remote Control
Switches between TV reception and AV input each time the button is pressed. Setting up the remote control If you are using another Panasonic unit at the same location, change the setting of the remote control so that you can operate the units independently of each other. -
Page 7: Remote Control
JET REW VHS: JET REW = Jet rewind to the beginning of the tape. You can also switch on the unit from Standby mode using the PLAY , GUIDE, DIRECT NAVIGATOR, PROG/CHECK and ShowView buttons. Downloaded From DvDPlayer-Manual.com Panasonic Manuals... -
Page 8: Front Panel, Display
The recording time is set to 30 minutes. Finalization not possible during the recording REPEAT HDMI Repeat playback is on. HDMI unit is connected START A function (copying) is beginning. To DVD Error messages Copying from VHS to DVD-RAM. Downloaded From DvDPlayer-Manual.com Panasonic Manuals... -
Page 9: Rear Panel
For a conventional tube television, we recommend using the Scart terminal. You retain a high-quality RGB video picture with an RGB-compatible television. If you want to use a progressive-capable LCD/plasma television or LCD projector, connect it to COMPONENT VIDEO OUT to get a high quality progressive video picture. Downloaded From DvDPlayer-Manual.com Panasonic Manuals... -
Page 10: Connections
Fully wired 21-pin RF coaxial cable Scart cable (included) AC mains lead (For Q Link functions) (included) Connect only after all other connections are complete. RF IN AV IN To household mains socket Television’s rear panel Downloaded From DvDPlayer-Manual.com Panasonic Manuals... -
Page 11: Dvb Auto-Setup (Tuning Digital Channels)
Letterbox SELECT ENTER RETURN Auto setup for your unit is complete. The availability of stations may differ regionally. You can now select your favourite stations and store them in the required order in the profiles. Downloaded From DvDPlayer-Manual.com Panasonic Manuals... -
Page 12: Connecting To A Television And Satellite Receiver
(AC 220 V to 240 V, 50 Hz) AC mains lead (included) Connect only after all other connections are complete. Fully wired 21-pin Scart cable LNB IN AV OUT To household mains socket Satellite receiver’s rear panel Downloaded From DvDPlayer-Manual.com Panasonic Manuals... -
Page 13: Satellite Receiver
Press INPUT SELECT to select the input channel AV2 or put this unit in standby mode. The TV Guide does not show any information if you have connected the unit to a satellite receiver only. Downloaded From DvDPlayer-Manual.com Panasonic Manuals... -
Page 14: Connection With Audio/Video Cable
(AC 220 V to 240 V, 50 Hz) Audio/Video cable (included) AC mains lead Video Yellow White RF coaxial cable (included) (included) Connect only after all other connections are complete. To household mains socket RF IN Audio/Video Television’s rear panel Downloaded From DvDPlayer-Manual.com Panasonic Manuals... -
Page 15: Connection With S Video Cable
RF coaxial cable Audio cable S VIDEO cable AC mains lead (included) White (included) Connect only after all other connections are complete. To household mains socket RF IN Audio IN S Video Television’s rear panel Downloaded From DvDPlayer-Manual.com Panasonic Manuals... -
Page 16: Connection With Hdmi Cable
Connect only after all other HDMI logo. Use cable of max. 5 m in length to avoid interference with the video signal. connections are complete. To household mains socket HDMI IN RF IN Television’s rear panel Downloaded From DvDPlayer-Manual.com Panasonic Manuals... -
Page 17: Connections
If you connect this unit with an HDMI cable to Recorder. a Panasonic television set with HDAVI control If you are recording on the DVD drive, the TV does not automatically change to function, then both units can be controlled. -
Page 18: External Units
The DV input of this unit is only intended for DV units. For example, a computer It is not possible to copy to a VHS cassette cannot be connected. Some DV units do not allow for proper input of the picture via DV input. and sound signal. Downloaded From DvDPlayer-Manual.com Panasonic Manuals... -
Page 19: Component Video Out
- Off] setting. television. Select the [Progressive - On] setting. COMPONENT COMPONENT VIDEO OUT VIDEO OUT COMPONENT VIDEO OUT COMPONENT VIDEO OUT Progressive output Progressive output COMPONENT COMPONENT DVD Recorder DVD Recorder VIDEO IN VIDEO IN Downloaded From DvDPlayer-Manual.com Panasonic Manuals... -
Page 20: Profiles
Use the YELLOW button to delete the station from the profile. Press ENTER to save the profile. Delete All Use the BLUE button to delete all stations from the profile. Press ENTER to save the profile. Downloaded From DvDPlayer-Manual.com Panasonic Manuals... -
Page 21: Status Displays
Remaining tape time: The display depends on the correct REMAIN: 0:24 0:21.29 setting of the tape length. Tape counter: It is automatically set to 0:00.00 when a video 0:21.29 cassette is inserted. RESET to reset the counter to 0:00.00. 0:21.29 Repeat Downloaded From DvDPlayer-Manual.com Panasonic Manuals... -
Page 22: Banner
No banners with information are displayed for analogue stations. All Services Change Category Press to launch a banner to change the category. Press the BLUE button to change the category. The banner disappears after 5 seconds. Downloaded From DvDPlayer-Manual.com Panasonic Manuals... -
Page 23: Hdd
2 minutes), because the hard disk runs on for a brief period after switching off. Panasonic does not assume any liability for direct or indirect problems resulting in the loss of recordings or edited contents (data) and does not guarantee that the recorded or edited contents will work perfectly. -
Page 24: Disc Formats
This recording format is the standard DVD-Video. Digital programmes that are limited to "one-time recording" cannot be recorded. Not for recording and playback of still pictures. +VR format Digital programmes limited to "one-time recording" can not be recorded. Not for recording and playback of still pictures. Downloaded From DvDPlayer-Manual.com Panasonic Manuals... -
Page 25: Playback Discs
Compatible models: Only for Panasonic's DVD recorders. Remove the 8-cm disc from the Do NOT use this cleaner with any other Panasonic DVD products or with the DVD cartridge before using it with this unit. products of any other companies since doing so may damage the products. -
Page 26: Sd Card
XXXX .TIF to HDD or DVD-RAM disc. After Video Recording conversion and transfer to HDD or DVD-RAM disc, the playback is possible. This unit can display the following folders: ***: Numbers / XXX : Letterrs Downloaded From DvDPlayer-Manual.com Panasonic Manuals... -
Page 27: Playback (Dvd/Hdd)
It can now be played on any DVD unit. This disc cannot be played on other DVD players without finalizing. If you do not want to finalize the disc, press OPEN/CLOSE on the unit again. Downloaded From DvDPlayer-Manual.com Panasonic Manuals... -
Page 28: Pausing Playback
Playback jumps forward approx. 30 seconds. Frame playback Press in PAUSE mode. Each time the button is pressed, the next or the previous frame is displayed. Press PLAY to resume playback. DVD-A Forwards only. Moving pictures only. Downloaded From DvDPlayer-Manual.com Panasonic Manuals... -
Page 29: Delayed Playback
AUDIO For disc formats RAM, -RW(VR), -R(DivX), CD(DivX), VCD Press AUDIO during playback. DISPLAY For disc formats DVD-A, DVD-V Press DISPLAY during playback. Depending on the disc, select the audio channel or the sound track. Downloaded From DvDPlayer-Manual.com Panasonic Manuals... -
Page 30: Preparation
With each push of the button, the number of jumps is increased. STOP to end the search. Press If the index signals are too close together, the feature may fail. The recordings should be at least 5 minutes long. Downloaded From DvDPlayer-Manual.com Panasonic Manuals... -
Page 31: S-Vhs Quasi Playback (Sqpb)
Do not open the housing or the protective flap on the front side of the cassette and do not touch the tape. Use high-quality name-brand cassettes, such as those made by Panasonic. When playing cassettes recorded on another VHS-Recorder, there may be a slight decrease in picture quality. -
Page 32: Recording
* Only if Recording time in EP mode is set to [EP ( 6 Hours )] in the Setup menu. The available storage space is used optimally in FR mode. The title is recorded in the best possible quality. Downloaded From DvDPlayer-Manual.com Panasonic Manuals... -
Page 33: Changing The Recording Mode
DVD/HDD playback during recording During the recording, you can the playback from the beginning of the programme. Press PLAY during recording or Timer Recording. At least 2 second must have elapsed since the beginning of the recording. Downloaded From DvDPlayer-Manual.com Panasonic Manuals... -
Page 34: Timer Recording With The Television Set
If the output signal of the external unit is an NTSC signal, set the TV System to programme in dual-channel sound are [NTSC] in the Setup menu. recorded. Use AUDIO to switch between the two Digital channels Press DISPLAY and select Audio setting [DVB Multi Audio]. recorded sound tracks. Downloaded From DvDPlayer-Manual.com Panasonic Manuals... -
Page 35: Functions
Functions such as Copy, Set up Protection or Delete are marked with the symbol . Select the desired title with and press PAUSE . A check appears. Repeat this process to select other titles. Press PAUSE again to clear the selection. Downloaded From DvDPlayer-Manual.com Panasonic Manuals... -
Page 36: Entering Text / Symbols
The title or the playlist was recorded with a TV system other than the one NTSC currently selected. Title and playlists with these markings possibly cannot be played back. To playback this title/playlist, switch your TV system. Downloaded From DvDPlayer-Manual.com Panasonic Manuals... -
Page 37: Overview Of Direct Navigator
ENTER. Editing several elements Select the desired title with and press PAUSE . A check appears. Repeat this process to select other titles. Press PAUSE again to clear the selection. Downloaded From DvDPlayer-Manual.com Panasonic Manuals... -
Page 38: Editing Titles In The Sub Menu
You can jump between set markers with SKIP ENTER RETURN Editing several elements Select the desired title with and press PAUSE . A check appears. Repeat this process to select other titles. Press PAUSE again to clear the selection. Downloaded From DvDPlayer-Manual.com Panasonic Manuals... -
Page 39: Direct Navigator
You can jump between set markers with SKIP Editing several elements Select the desired title with and press PAUSE . A check appears. Repeat this process to select other titles. Press PAUSE again to clear the selection. Downloaded From DvDPlayer-Manual.com Panasonic Manuals... -
Page 40: Divx Playback
Plays DivX®5, DivX®4, DivX®3, and DivX® VOD video content (in MP3, JPEG, DivX and other type of files is compliance with DivX CertifiedTM technical requirements). 4000. DivX, DivX Certified, and associated logos are trademarks of DivXNetworks, Inc. and are used under license. Downloaded From DvDPlayer-Manual.com Panasonic Manuals... -
Page 41: Mp3 Playback
3000 Recognizable MP3 files per disc on this unit* Playback sequence This unit is compatible with multi-session. This unit is not compatible with packet writing. *Total number of recognizable files including MP3, JPEG, DivX and other type of files is 4000. Downloaded From DvDPlayer-Manual.com Panasonic Manuals... -
Page 42: Picture Playback
Despite strong compression, there is only a slight loss of picture quality. TIFF (Tag Image File Format), a system for compressing/decoding colour still pictures. It enables digital cameras and other units to save high-quality pictures. Downloaded From DvDPlayer-Manual.com Panasonic Manuals... - Page 43 If you select [No], then the date is saved as name of the Album. Editing several elements Select the desired title with and press PAUSE . A check appears. Repeat this process to select other titles. Press PAUSE again to clear the selection. Downloaded From DvDPlayer-Manual.com Panasonic Manuals...
- Page 44 Album View Return to Album View. Editing several elements Select the desired title with and press PAUSE . A check appears. Repeat this process to select other titles. Press PAUSE again to clear the selection. Downloaded From DvDPlayer-Manual.com Panasonic Manuals...
-
Page 45: Jpeg/Tiff Playback Of Cd/Dvd-R
Maximum number of JPEG files 3000 Recognizable JPEG files per disc on this unit* P0000007.jpg P0000008.jpg This unit is compatible with multi-session. This unit is not compatible with packet writing. Playback sequence *Total number of recognizable files including MP3, JPEG, DivX and other type of files is 4000. Downloaded From DvDPlayer-Manual.com Panasonic Manuals... -
Page 46: Tv Guide
Howard Shore (Saturday Night Live's musical director), who was also there, suggested the name 'The SELECT Return to List Changing between the views TIMER REC Page - RETURN Press GUIDE to change between Landscape view and Portrait view. Downloaded From DvDPlayer-Manual.com Panasonic Manuals... -
Page 47: Portrait View
Press the YELLOW button to select the Category function. Return Prog. Type SELECT Select the required Category or Profile with ENTER RETURN Choose between: All Services, TV, Radio, Profile 1, Profile 2, Profile 3, Profile 4. Press ENTER to confirm. Downloaded From DvDPlayer-Manual.com Panasonic Manuals... -
Page 48: Programming The Timer In The Tv Guide
Title page setting has been entered correctly in the station table. It can take approx. 10 minutes to find the title with this unit, and sometimes this fails. Downloaded From DvDPlayer-Manual.com Panasonic Manuals... -
Page 49: Delete (Delete Navigator)
It will take approximately 1 min. Cannot stop finalizing. Editing several elements Select the desired title with and press PAUSE . Percent complete A check appears. Repeat this process to select other titles. Press PAUSE again to clear the selection. Downloaded From DvDPlayer-Manual.com Panasonic Manuals... -
Page 50: Timer Recording
The unit automatically switches over to HDD if the selected DVD does not have sufficient storage space for the programmed recording. If a Timer Recording starts on DVD while the COPYING function is active, the unit automatically saves the recording on HDD. Downloaded From DvDPlayer-Manual.com Panasonic Manuals... -
Page 51: Checking Or Changing Timer Recordings
(Date): The existing storage space is displayed for daily or weekly recordings. The display indicates whether there is enough storage space on the disc. : The disc was not inserted, it is write-protected or there is insufficient storage space available. Relief: Backup recording Downloaded From DvDPlayer-Manual.com Panasonic Manuals... -
Page 52: Showview Record
EXT-L disappears from the display. Playback during Ext Link mode Press DIRECT NAVIGATOR. Select a title with and start playback with ENTER. Press STOP or DIRECT NAVIGATOR to end playback. Press RETURN to leave the DIRECT NAVIGATOR. Downloaded From DvDPlayer-Manual.com Panasonic Manuals... -
Page 53: Advanced Copy
3 min. 1 min.15 3 min.45 3 min.45 2 min.25 6 min.15 7.2x 3 min.45 EP(6 Hr) 2 min. 52 sec. 2 min.30 2 min.30 EP(8 Hr) 1.5 min. 42 sec. 1 min.53 1 min.53 Downloaded From DvDPlayer-Manual.com Panasonic Manuals... -
Page 54: Copy Titles And Playlists With A Copy List
You can sort the titles or playlists according to No., Name, Date, Day, Sort Time or Name of title. ENTER Thumbnail Display SUB MENU RETURN Select the required setting with and press ENTER to confirm. Other View The setting is marked with a coloured bar. Downloaded From DvDPlayer-Manual.com Panasonic Manuals... - Page 55 Press and hold RETURN for 3 sec to cancel. Completes in 0:04 Transfer chapters when copying in High Speed Mode: yes Percent complete Transfer chapters when copying in Normal Speed Mode: no Press ENTER to record or play back. Copying continues. Downloaded From DvDPlayer-Manual.com Panasonic Manuals...
-
Page 56: Time-Triggered Copying
ENTER. Press RETURN for 3 seconds to end copying. The screen displays are also recorded during copying. In the case of a DVD-Video, the original picture and sound quality may not be fully achieved. Downloaded From DvDPlayer-Manual.com Panasonic Manuals... -
Page 57: Copy Pictures
Press ENTER to finish copying. Select the desired title with and press PAUSE . Press RETURN to continue copying. A check appears. Repeat this process to select other titles. Press PAUSE again to clear the selection. Downloaded From DvDPlayer-Manual.com Panasonic Manuals... -
Page 58: Copying (Front Of Unit)
Press REC to start finalizing after Press REC if the disc needs to be finalized after copying. copying completes. Finalization cannot be cancelled. Press PLAY to start copying only. Press STOP to stop copying. Press STOP to cancel copying. Downloaded From DvDPlayer-Manual.com Panasonic Manuals... -
Page 59: Playlists
ENTER. Jump to the beginning/end of a title/chapter with PAUSE and SKIP Locate the position for a marker with SKIP , SLOW/SEARCH TIME SLIP, MANUAL SKIP or You can jump between set markers with SKIP Downloaded From DvDPlayer-Manual.com Panasonic Manuals... -
Page 60: Launching The Playlists Menu
You can jump between set markers with SKIP Editing several elements Select the desired title with and press PAUSE . A check appears. Repeat this process to select other titles. Press PAUSE again to clear the selection. Downloaded From DvDPlayer-Manual.com Panasonic Manuals... -
Page 61: Editing Chapters In The Sub Menu
You can jump between set markers with SKIP Editing several elements Select the desired title with and press PAUSE . A check appears. Repeat this process to select other titles. Press PAUSE again to clear the selection. Downloaded From DvDPlayer-Manual.com Panasonic Manuals... -
Page 62: Copy All Pictures
MPEG2 videos directly from the SD Card. First copy the MPEG2 videos to DVD-RAM or HDD. Moving pictures coded in MPEG2 format recorded with a Panasonic SD video camera, digital video camera etc. Can be saved on HDD or DVD-RAM (all recordings on one day are saved as one title). -
Page 63: Flexible Rec (Fr)
End the recording on the DVD Recorder with STOP time information on the tape in the DV End playback on the DV unit. unit is not recorded. Simultaneous recording and playback is not possible. Recording cannot be cancelled with PAUSE Downloaded From DvDPlayer-Manual.com Panasonic Manuals... -
Page 64: Setup
The display for signal strength is grey. 0 means signal strength = 0 %, 10 means signal strength = 100%. The signal strength can also be 100 % (> 10). In this case, the display is red. Downloaded From DvDPlayer-Manual.com Panasonic Manuals... - Page 65 !! Select [Yes] with and confirm with ENTER. Data transfer begins. To cancel the procedure, use to select [No] with and confirm with ENTER or press RETURN. To prematurely end the data transfer, press RETURN. Downloaded From DvDPlayer-Manual.com Panasonic Manuals...
-
Page 66: Disc
When using high-speed compatible DVD-RAM 5x, DVD-R-, +R 8x or +RW 4x discs. In the [Normal (Silent)] setting, this unit generates less noise than in the [Maximum] setting. The time required for copying is doubled. Downloaded From DvDPlayer-Manual.com Panasonic Manuals... -
Page 67: List Of Language Codes
Malayalam 7776 Russian 8285 Tamil 8465 7473 Samoan Breton 6682 Finnish 7073 Italian 7384 Maltese 7784 8377 Tatar 8484 Yoruba 8979 Japanese Zulu Bulgarian 6671 French 7082 7465 Maori 7773 Sanskrit 8365 Telugo 8469 9085 Downloaded From DvDPlayer-Manual.com Panasonic Manuals... -
Page 68: Sound
On: The grey background is displayed when there is no analogue television reception. [Bright] [Dim] FL Display Dim: The display goes dark during playback. It lights up again when a button is pushed. If the unit is switched off, the display turns off. Downloaded From DvDPlayer-Manual.com Panasonic Manuals... -
Page 69: Connection, Av-Link Function
RGB / Video, S Video, Ext Link 1, Ext Link 2 [On] [Off] Active Antenna On: when connecting an aerial supplied via the power circuit of the DVD Recorder. Start the Auto-Setup again after making the adjustment and check the Signal Condition. Downloaded From DvDPlayer-Manual.com Panasonic Manuals... -
Page 70: Vhs
MESECAM: If the MESECAM system is used. [Automatic] [On] [Off] SQPB Automatic: The unit detects the recording type. On: Playback of an S-VHS cassette in quasi S-VHS format. Off: Playback of recordings in VHS format. Downloaded From DvDPlayer-Manual.com Panasonic Manuals... - Page 71 [DVD 1] [DVD 2] [DVD 3] Remote Control Power Save Disc Picture Quick Start Change the code of the remote control so that you can simultaneously Sound DivX Registration operate another Panasonic DVD unit. Display System Update Connection Initialize Clock SELECT Others RETURN...
-
Page 72: Others
This could result in the loss of data. A message shows that the update has finished. If a new software version is not going to be broadcast until the next few days, a corresponding message also appears. Downloaded From DvDPlayer-Manual.com Panasonic Manuals... -
Page 73: Hdd Management
Select [Yes] with and confirm with ENTER. All folders and files will be Select [Start] with and confirm with ENTER. The formatting process begins. completely deleted. Start formatting ? A message appears upon completion. Press ENTER. Downloaded From DvDPlayer-Manual.com Panasonic Manuals... - Page 74 Start Cancel A message appears upon completion. Press ENTER. Do not unplug the unit while the disc is being The formatting process deletes all data, including the recordings created with this formatted or finalized. unit. Downloaded From DvDPlayer-Manual.com Panasonic Manuals...
-
Page 75: Dvd Management
Create Top Menu Select [Start] with and confirm with ENTER. The Top Menu is created. SELECT Format Disc The procedure concludes with the message: Top Menu was created. ENTER Return to DVD Management with ENTER. RETURN Downloaded From DvDPlayer-Manual.com Panasonic Manuals... -
Page 76: Picture And Sound Settings
Disc playback in the original sequence. [Page] Select the still image number and playback. RANDOM: Playback in random order. Return to the standard page: Select [Return] and press ENTER. VCD DivX PBC shows whether the menu playback control is on/off. Downloaded From DvDPlayer-Manual.com Panasonic Manuals... -
Page 77: Picture And Sound Settings
Dolby Digital, only with 3 or more channels, including a center channel. The volume is increased so that dialogue is easier to understand. Option Setting Setting Other Position [1 - 5] Position of the OSD displays on the screen. Downloaded From DvDPlayer-Manual.com Panasonic Manuals... -
Page 78: If You Need Help
The above procedure cannot be executed if the child protection feature is activated. Switch off child protection. Access to the HDD is slow. The HDD is in SLEEP mode. (“HDD SLP” appears in the display of the unit.) Downloaded From DvDPlayer-Manual.com Panasonic Manuals... - Page 79 An incorrect remote control code was selected. DISPLAY The display light is weak. Change the [FL Display] setting in the Display Setup menu. "0:00" blinks on the unit display. No time. Set the time in the Others [Clock] Setup menu. Downloaded From DvDPlayer-Manual.com Panasonic Manuals...
- Page 80 When are the software updates The unit shows automatically when a software update has been broadcast, and broadcast ? also automatically updates the software if thIs function has not been switched off in the Setup menu. Downloaded From DvDPlayer-Manual.com Panasonic Manuals...
- Page 81 EXTERNAL INPUT Video or audio is not recorded The external unit is not connected correctly. from an external unit. The incorrect input channel AV2, AV3 or DV IN was selected. Downloaded From DvDPlayer-Manual.com Panasonic Manuals...
-
Page 82: If You Need Help
DVD-R etc. in high-speed mode. in the SETUP menu to [On]. Copying even takes a relatively Depending on the condition of the disc, even high-speedcompatible discs may not long time in high-speed mode. allow recording at maximum speed. Downloaded From DvDPlayer-Manual.com Panasonic Manuals... -
Page 83: Specifications
1 sec. after the REC button is pressed. If the GUIDE button is pressed while the unit is off, the EPG is displayed in about 1sec. Note: The values given for weight and dimension are approximate values. The technical data can be changed without advanced notice. Downloaded From DvDPlayer-Manual.com Panasonic Manuals... -
Page 84: Index
DivX Video on Demand 40,71 Portrait View VHS Index Search System (VISS) Dolby Digital 4,18,68,76 Position Video Double Layer DVD Power Save Download from TV 11,65 Profile 20,64 DPOF Prog Type 4,18,68,76 Progressive 19,69,77 Dual-channel audio RQTD0203_A_en_F13D06_0 Downloaded From DvDPlayer-Manual.com Panasonic Manuals...
Need help?
Do you have a question about the DMR-EX95V and is the answer not in the manual?
Questions and answers