Table of Contents
Advertisement
Advertisement
Table of Contents

Related Manuals for Gigaset SL550


Summary of Contents for Gigaset SL550
- Page 1 Issued by Siemens Home and Office Communication Devices GmbH & Co. KG Schlavenhorst 66 D-46395 Bocholt Gigaset SL550 © Siemens Home and Office Communication Devices GmbH & Co. KG 2005 All rights reserved. Subject to availability. Rights of modification reserved.
-
Page 2: Handset At A Glance
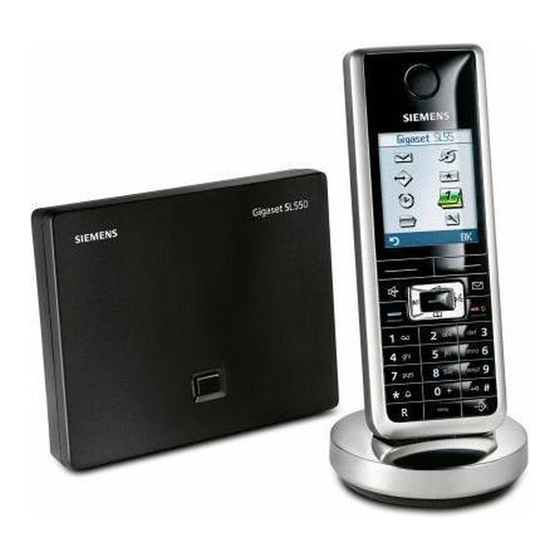
Handset at a glance Handset at a glance 1 Display in idle status 2 Battery pack charge status = e V U (flat to full) flashes: battery pack almost flat e V U flashes: battery pack charging 3 Display keys (page 13) 4 Message key Access to calls and message lists;... -
Page 3: Base Station At A Glance
Base station at a glance Base station at a glance Registration/ Paging key (page 33) -
Page 4: Table Of Contents
Using the network mailbox ..32 Configuring the network mailbox Gigaset SL550 – for fast access ....32 more than just a telephone ..6 Viewing the network mailbox First Steps . - Page 5 Contents Repeater support ....43 Restoring default settings to base station ....44 Connecting the base station to the PABX .
-
Page 6: Safety Precautions
Do not use the phone in environments with a potential explosion hazard, e.g. auto paint shops. If you give your Gigaset to someone else, make sure you also give them the user guide. Dispose of unusable batteries and telephones in accordance with statutory... -
Page 7: Gigaset Sl550 - More Than Just A Telephone
Gigaset SL550 – more than just a telephone Gigaset SL550 – one belt clip, one user guide. more than just a telephone Installing the base station Your telephone has a clearly laid out and charging cradle colour display (65K colours) and not only... -
Page 8: Setting Up The Handset For Use
First Steps Setting up the handset for use Connecting the base station ¤ First connect the mains adapter and then the phone jack as shown below- Fitting the battery pack and place the cables in the cable recesses. Caution: Use only the rechargeable Siemens Original battery pack (page 49). - Page 9 First Steps ¤ Placing the handset in the charging Then close the cover so that it clicks into place. cradle ¤ Plug the charging cradle mains adapter into a mains power socket. ¤ Place the handset in the charger with the display facing forward.
- Page 10 First Steps back again until the battery pack is fully Once the phone is registered and the time discharged. set, the idle display looks as shown here (example): Note: Ð After the initial charge and discharge you may replace your handset in the charging cradle INT 1 after every call.
-
Page 11: Menu Tree
Menu tree Menu tree Instead of scrolling to locate a menu function, you can select a menu function faster by opening the menu and keying in the digit combination ("shortcut"). Example: w N 2 11 for "Set ringtone for external calls". With the telephone in idle status, press w (open main menu): î... - Page 12 Menu tree Ï Resource Dir. Screensavers (page 37) Caller Pictures (page 40) Sounds (page 40) Capacity (page 40) Ð Settings Date/Time (page 9) Audio Settings 8-2-1 Ringer Settings (page 38) 8-2-2 Advisory Tones (page 40) 8-2-3 Silent Alert (page 39) Display 8-3-1 Screen Saver...
-
Page 13: Making Calls
Making calls Making calls If the ringtone is intrusive, press the dis- play key . You can take the call as §Silence§ long as it is displayed on the screen. Making an external call Calling Line Identification External calls are calls using the public tel- When you receive a call, the caller's ephone network. -
Page 14: Handsfree Operation
Operating the handset Operating the handset Handsfree operation In handsfree mode, instead of holding the handset to your ear you can put it down Activating/deactivating the handset e.g. on the table in front of you to allow Press and hold the end call others to participate in the call. -
Page 15: Display Keys
Operating the handset Initiate voice dialling, press Delete key: deletes one char- and hold (page 20); acter at a time from right to Main menu, press briefly. left. Î Go back one menu level or In the main menu and in input fields cancel operation. -
Page 16: Correcting Incorrect Entries
Operating the handset Submenus The functions in the submenus are dis- played as lists. To access a function: ¤ Scroll to the function with the control key q and press §OK§ ¤ Enter the corresponding digit combina- tion (page 10). Pressing briefly on the end call key a returns you to the previous menu level / cancels the operation. -
Page 17: Network Services
Network services Network services Network services are functions that your network provider makes available to you. You have to request these services from your network provider. ¤ If you require assistance, please con- tact your network provider. Setting functions for the next call ¢... -
Page 18: Using The Directory And Lists
Using the directory and lists Using the directory and lists Call-by-Call list In the Call-by-Call list you can store prefi- The options are: xes for network providers ("call-by-call numbers"). Directory, ¤ Open the call-by-call list in idle status Call-by-Call list, by pressing the C key. - Page 19 Using the directory and lists Selecting entries in the directory and Delete Entry Delete selected entry. call-by-call list VIP Entry (directory only) s / C Open directory or call-by-call Mark a directory entry as VIP (Very list. Important Person) and assign it a speci- You have the following options: fic ringtone.
- Page 20 Using the directory and lists ¢ s / C s (select entry) Storing anniversaries in the directory ¢ ¢ (open menu) Copy §Options§ ¢ You can store an anniversary for every Entry Copy List to Internal number in the directory and specify a time Enter the internal number of when you will receive a reminder call on the receiver handset.
- Page 21 Using the directory and lists Viewing missed anniversaries Record Pattern Select. When an anniversary has elapsed without Press the display key to start being acknowledged, you will be remin- §OK§ the recording. ded once by the display icon when Appoint. the handset is in idle status.
-
Page 22: Last Number Redial List
Using the directory and lists Last number redial list Opening lists with the message key The last number redial list contains the ten numbers last dialled with the handset You can use the message key f to (max. 32 numbers). If one of the numbers open the following list options: is in the directory, then the corresponding SMS list... -
Page 23: Making Cost-Effective Calls
Making cost-effective calls If entries are only available from one list, You can add the number of the caller to the other list options are not needed and the directory (page 19). only the relevant list will be shown. Date and time of call (if set, page 9) Type of entry: SMS incoming message list ‰... -
Page 24: Automatic Network Provider Code (Preselection)
Making cost-effective calls Automatic network provider Saving/editing entries in the preselection lists code (preselection) Each of the two lists can contain You can specify a call-by-call number 20 entries, each with 6 digits. (preselection number), which is automat- Numbers may be prefixed according to the ically placed in front of numbers accord- country in the "with preselection"... -
Page 25: Sms (Text Messages)
SMS (text messages) SMS (text messages) Please remember: Each incoming SMS is signalled by a single ring (ringtone as for external Your unit is supplied ready for you to send calls). If you accept such an SMS "call" text messages immediately. on the first ring, the SMS will be lost. - Page 26 SMS (text messages) Select and press Reading/deleting a status report §OK§ ¤ s / C Open the incoming message list (page 26) and then: Select number with area code (even if you are in that area) Select SMS with the status from the directory or call-by- State OK State not...
-
Page 27: Receiving An Sms
(page 29), enter New text messages are signalled on all Gigaset SL55 handsets by the À icon in the number of the e-mail serv- ice. the display, the flashing message key f and an advisory tone. - Page 28 SMS (text messages) The incoming message list is displayed as Edit follows (example): Edit the text in the SMS and then send it (page 24). Attachments SMS: (e.g. pictures, melodies) are not sent. Forwarding an SMS 1 bold: number of new entries ¤...
-
Page 29: Notification By Sms
SMS (text messages) ¤ SMS mailboxes Save the number with the area code (dialling code) in the directory. The General Mailbox is the default set- Changing the character set ting. Anyone can access this mailbox and ¤ Read the SMS (page 27): it cannot be protected by a PIN. -
Page 30: Setting Sms Centre
SMS (text messages) ‰ Setting SMS centre Active mailboxes are marked with the mailbox list. They are shown in the SMS list and can, if necessary, be displayed by pressing the message key f. Entering/changing SMS centres ¤ You should find out about the services Deactivating a mailbox ¤... -
Page 31: Sms To A Pabx
(CLIP). The CLIP of the phone number Identification not activated. for the SMS centre is evaluated in your FE Error occurred during SMS transfer. Gigaset. If required, you must prefix the number FD Connection to SMS centre failed, see self- help. - Page 32 SMS (text messages) The message is played back. 1. The "display call number" service is not acti- vated. ¥ Have your service provider enable this service (there is a charge for this). 2. Mobile phone operator and network SMS service provider have not agreed on a cooperation.
-
Page 33: Using The Network Mailbox
§OK§ Enter the number for the network mailbox. Press the display key. Options Select and press . The entry Save Entry §OK§ is stored. Press and hold (idle status). The setting for fast access applies to all Gigaset SL55 handsets. -
Page 34: Using Several Handsets
You can register up to a total of six hand- using is indicated by < . sets on your base station. Select the internal user you A Gigaset SL55 handset can be registered wish to de-register. on up to four base stations. Open menu. -
Page 35: Making Internal Calls
Using several handsets Making internal calls Then, if the internal participant does not answer or is busy, the call will automati- cally return to you (the display will show Internal calls to other handsets registered Recall). on the same base station are free. Calling a specific handset Internal consultation calls Initiate internal call. -
Page 36: Listening To An External Call
Using several handsets Listening to an external call Changing the name of a handset Note: Important: The function must Listening In Change the automatically assigned name of be activated. the handset, before changing the display lan- You are conducting an external call. An guage, e.g. -
Page 37: Handset Settings
Handset settings You will hear the error tone (descending Calendar tone sequence) if you assign an internal Open the calendar/enter new appoint- number twice. ments. ¤ Repeat the process with an unused Alarm Clock number. Assign key with the menu for setting and activating the alarm clock (page 41): ì... -
Page 38: Setting Emergency Numbers
Handset settings Setting emergency numbers Press and hold (idle status). When the auto key lock is activated, only Setting the screensaver emergency numbers can be called. You can set emergency numbers. In idle status you can select a picture from ¢... -
Page 39: Setting Display Illumination
Handset settings Setting display illumination Press the control key. Select volume. Depending on whether the handset is in Press display key if necessary §Save§ the charging cradle or not, you can acti- to save the setting perma- vate or deactivate the display illumination. nently. -
Page 40: Activating/Deactivating First Ring Muting
Handset settings Activate or deactivate Press the display key. A call is §Beep§§ Announce. Requirement: Cal- now signalled by one brief ling Line Identification alert tone. You will now see º in the display. (page 16). In idle status, you can also open the menu Vibration alarm by pressing t briefly. -
Page 41: Activating/Deactivating
Handset settings You can download sounds in .mid format Rename and pictures from a PC (page 51). Rename (max. 16 characters) and press . The entry is stored with the new §OK§ In My stuff you can listen to the existing name. -
Page 42: Setting The Alarm Clock
Handset settings ¢ ¢ Ð twice at five minute intervals and then Audio Settings ¢ switched off. Advisory Tones ¤ Change multiple line input: During a call, the wake-up call is signalled by a short tone. Key Tones: Select or Off. Deactivating the wake-up call/ Confirm.: repeating after a pause (slumber... -
Page 43: Displaying Missed Appointments, Anniversaries
Handset settings Date: Activate / Deactivate Enter the day/month in 4-digit format. Activate/deactivate selected appoint- ment. Time: Enter hours/minutes in 4-digit format. Delete List Delete all appointments. Notes: Enter the text (max. 16 characters) . Switching off or answering an The text appears as the appointment appointment reminder name in the list and will be displayed... -
Page 44: Restoring The Handset Default
Base station settings Repeater support The base station settings are carried out using a registered Gigaset SL55 handset. With a repeater you can increase the range and reception strength of your base sta- tion. First you must activate the repeater Protecting against unauthorised mode. -
Page 45: Restoring Default Settings To Base Station
Base station settings Restoring default settings to base station When resetting, the handsets remain reg- istered. The following settings are not reset: System PIN Setting "First ringtone suppressed" ¢ ¢ ¢ Ð Base Base Reset Enter the system PIN and press §OK§... -
Page 46: Connecting The Base Station
Connecting the base station to the PABX Connecting the base station If an access code is stored: The access code is prefixed automati- to the PABX cally when you select from the follo- wing lists: numbers of the SMScentres, calls list, answering machine list. The following settings are only needed You must enter the access code when when your PABX requires them. -
Page 47: Switching Temporarily To Tone Dialling (Dtmf)
Connecting the base station to the PABX Changing a dialling pause (pause after access code) Requirement: You have saved an access code (page 45). Open menu. N 5 O 1 1 Press keys. Enter a digit for the length of the pause (1 = 1 sec.;... -
Page 48: Appendix
Appendix Appendix The keypad lock is activated. ¥ Press and hold the hash key (page 13). Care "Base station x" is flashing in the display. 1. The handset is outside the range of the base ¤ Wipe the base station, charging cradle station. -
Page 49: Service (Customer Care)
Appendix Service (Customer Care) You can get assistance easily when you have technical questions or questions about how to use your device by using our online support service on the Internet at: www.siemens.com/gigasetcustomercare or by referring to the section entitled Questions and answers in this manual (page 47). If the device needs to be repaired, please contact one of our Customer Care Centers: Abu Dhabi. -
Page 50: Specifications
Appendix Specifications General specifications DECT standard is supported Recommended battery pack GAP standard is supported (Valid at the time of going to press) No. of channels 60 duplex channels Lithium-Ion (Li-Ion): 700 mAh Radio frequency V30145-K1310-X250 range 1880–1900 MHz The handset is supplied with the recom- Duplex method Time multiplex, 10 ms frame length... -
Page 51: Notes On The Operating Instructions
Notes on the operating instructions Notes on the ¢ ¢ Ð Display operating instructions ¤ When the handset is in idle status press the control key in the middle This section explains the meaning of cer- (w) to open the main menu. ¤... -
Page 52: Example: Multiple Line Input
Notes on the operating instructions Example: multiple line input PC Interface There are many situations in which you You can connect your handset to your can change the settings of a display or computer using the supplied data cable enter data in several lines. (page 54). - Page 53 Notes on the operating instructions (upper case: 1st letter upper case, all oth- Deactivating/activating predictive text ers lower case). Press the hash key # Requirement: You are writing an SMS. before entering the letter. Press the display key. §Options§ You can see in the display whether upper Predictive Text case, lower case or digits are selected.
-
Page 54: Accessories
Accessories Accessories Gigaset Handsets Turn your Gigaset into a cordless telephone system: Gigaset handset SL55 Illuminated graphical colour display (65k colours) Illuminated keypad Handsfree operation Polyphonic ringer melodies Directory for around 250 entries Picture CLIP SMS (CLIP must be enabled) Voice dialling PC interface, e.g. - Page 55 Headset socket Room monitor www.siemens.com/gigasete45 Gigaset repeater The Gigaset repeater can be used to increase the reception range of your Gigaset handset to the base station. www.siemens.com/gigasetrepeater Mobile handsfree set with PTT key With the mobile handsfree set you can make a call while kee- ping your hands free.
- Page 56 Accessories Voice and data adapter Gigaset M34 USB Use the Gigaset M34 USB for wireless connections between your PC and your Gigaset. Then you can: Make low-cost calls via the Internet (ADSL) on your Gigaset handset (Voice-over-IP) Enjoy wireless surfing on the Internet from your PC (ISDN) Write, send and receive text messages on your PC Have Internet messages (e.g.
-
Page 57: Index
Index Index range ..... . . restoring to factory settings ..setting ..... . system PIN . - Page 58 Index Character set table, see in idle status ....Special characters internet call ....Charge status display .
- Page 59 Index changing name ....Internet call ....changing number .
- Page 60 Index Memory ..... . My stuff ..... PABX Menu connecting base station...
- Page 61 Index Sound deleting ..... Saving (access code) ... . . renaming .
-
Page 62: Mounting The Base On The Wall
Mounting the base on the wall approx. 9 mm...
Need help?
Do you have a question about the SL550 and is the answer not in the manual?
Questions and answers