Sennheiser ew100 g2 Instructions For Use Manual
Wireless lavalier microphone system
Hide thumbs
Also See for ew100 g2:
- Operating instructions (1 page) ,
- Instructions for use manual (188 pages)
Table of Contents
Advertisement
Advertisement
Table of Contents

Related Manuals for Sennheiser ew100 g2


Summary of Contents for Sennheiser ew100 g2
- Page 1 W 100 Instructions for use...
-
Page 2: Safety Instructions
Senn- heiser a world-leading company in this field. Please take a few moments to read these instructions carefully, as we want you to enjoy your new Sennheiser products quickly and to the fullest. -
Page 3: Table Of Contents
Contents Safety instructions ....................50 The evolution wireless series ew 100 G2 ............52 The channel bank system ..................... 52 System variants ...................... 53 Overview of operating controls ................54 EM 100 G2 rack-mount receiver .................. 54 EK 100 G2 bodypack receiver ..................55 SK 100 G2 bodypack transmitter ................ -
Page 4: The Evolution Wireless Series Ew 100 G2
The ew 100 G2 systems are available in five UHF frequency ranges with 1440 transmission/receiving frequencies per frequency range. Please note: Fre- quency usage is different for each country. Your Sennheiser agent will have all the necessary details on the available legal frequencies for your area:... -
Page 5: System Variants
System variants Areas of application System Areas of application Theater, presentation (omni-directional) w 112 EM 100 G2 Theater, presentation (high feedback w 122 rejection) Sports (aerobic), vocals w 152 EK 100 G2 Instruments w 172 SKM 100 G2 Speech, vocals w 135 Vocals (high feedback rejection) w 145... -
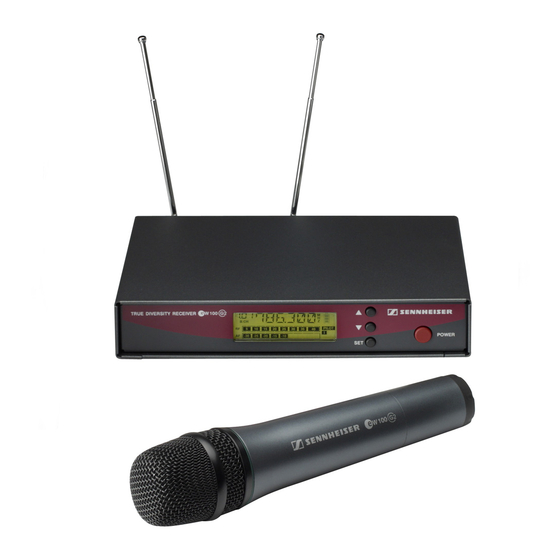
Page 6: Overview Of Operating Controls
Overview of operating controls EM 100 G2 rack-mount receiver ³ · » ¿ ´ ² ¶ º ¾ µ ¸ ¹ Operating controls LC display panel LC display Display for the current channel bank “1 ... 8, U” ³ button (UP) Display for the current channel number “1 ... -
Page 7: Ek 100 G2 Bodypack Receiver
EK 100 G2 bodypack receiver · · ³ » ¸ ¿ µ ´ ² ¶ º ¾ Operating controls LC display panel Audio output (AF OUT), 3.5 mm jack socket Alphanumeric display ³ (unbalanced) “B.CH“ – appears when the channel bank and Antenna the channel number are displayed ·... -
Page 8: Sk 100 G2 Bodypack Transmitter
SK 100 G2 bodypack transmitter · · ³ » ¹ ¸ ¿ µ ´ ² ¶ º ¾ Operating controls LC display panel Microphone/line input (MIC/LINE), Alphanumeric display ³ 3.5 mm jack socket “B.CH“ – appears when the channel bank and the Antenna channel number are displayed ·... -
Page 9: Skp 100 G2 Plug-On Transmitter
SKP 100 G2 plug-on transmitter ³ · » ¿ ´ ² ¶ º ¾ µ Operating controls LC display panel Microphone input, XLR-3F socket (unbalanced) Alphanumeric display ³ Mechanical locking ring of XLR-3 socket “B.CH“ – appears when the channel bank and ·... -
Page 10: Skm 100 G2 Radiomicrophone
SKM 100 G2 radiomicrophone ³ · » ¿ ´ ² ¶ º ¾ µ ¸ ¹ ¶ Operating controls LC display panel Sound inlet basket Alphanumeric display ³ Color-coded identification ring for “B.CH“ – appears when the channel bank and ·... -
Page 11: Indications And Displays On The Receivers
Indications and displays on the receivers Operation and battery status indication (EK 100 G2 only) The red LED (LOW BAT/ON) provides information on the current operating state of the EK 100 G2: Red LED lit up: The receiver is switched on and the capacity of the bat- teries/accupack BA 2015 is sufficient. - Page 12 Modulation display of the receiving transmitter The level display for audio signal “AF” shows the modulation of the transmit- ter. When the transmitter’s audio input level is excessively high (AF peak), the receiver’s level display for audio signal “AF” shows full deflection. EM 100 G2 EK 100 G2 “PILOT”...
-
Page 13: Indications And Displays On The Transmitters
Indications and displays on the transmitters Operation and battery status indication The red LED (LOW BAT/ON) provides information on the current operating state of the transmitter: Red LED lit up: The transmitter is switched on and the capacity of the batteries/accupack BA 2015 is sufficient. -
Page 14: Preparing The Components For Use
Preparing the components for use EM 100 G2 rack-mount receiver Mounting the receiver feet To ensure that the receiver cannot slip on the surface on which it is placed, four self-adhesive soft rubber feet are supplied. Ensure that the base of the receiver is clean before mounting the rubber feet. - Page 15 Connecting the amplifier/mixing console The EM 100 G2’s audio outputs are available as an XLR-3M socket and a ¼” (6.3 mm) jack socket , allowing you to simultaneously connect two units (e.g. amplifier, mixing console). The adjusted audio output level is com- mon for both sockets.
- Page 16 To mount two EM 100 G2 into a rack: Place the two receivers side by side onto a flat sur- face, their bottom sides facing upwards. Align the connecting plate over the holes in the bottom sides of the receivers. Secure the connecting plate to the receivers using eight of the supplied recessed head screws...
-
Page 17: Ek 100 G2 Bodypack Receiver
Inserting and replacing the batteries For powering the EK 100 G2 bodypack receiver, you can either use two 1.5 V º ¾ AA size batteries or the rechargeable Sennheiser BA 2015 accupack. Press the two unlocking buttons and open the battery compartment cover Insert the two batteries or the BA 2015 accupack as shown in the diagram on the left. -
Page 18: Sk 100 G2 Bodypack Transmitter
Inserting and replacing the batteries For powering the SK 100 G2 bodypack transmitter, you can either use two º ¾ 1.5 V AA size batteries or the rechargeable Sennheiser BA 2015 accupack. Press the two unlocking buttons and open the battery compartment cover Insert the two batteries or the BA 2015 accupack as shown in the diagram on the left. -
Page 19: Skp 100 G2 Plug-On Transmitter
Inserting and replacing the batteries For powering the SKP 100 G2 plug-on transmitter, you can either use two 1.5 V AA size batteries or the rechargeable Sennheiser BA 2015 accupack. Slide the battery compartment cover in the direction of the embossed ¾... -
Page 20: Skm 100 G2 Radiomicrophone
Inserting and replacing the batteries ´ » For powering the SKM 100 G2 radiomicrophone, you can either use two 1.5 V AA size batteries or the rechargeable Sennheiser BA 2015 accupack. Unscrew the display section from the radiomicrophone’s body turning it counterclockwise. - Page 21 Changing the microphone head First remove the batteries/accupack as described above and leave the radiomicrophone open. Unscrew the sound inlet basket. Loosen the screw and put it to one side. Gently ease the capsule out of the contacts and then pull it out of the hou- sing as shown.
-
Page 22: Using The Components
Using the components Switching the components on/off The ew 100 G2 transmitters and receivers can only be switched off when the standard display is shown on the display panel. Within the operating menu, ON/OFF button or the POWER button (EM 100 G2 only) serves as the ESC (cancel) key, i.e you cancel your entry and return to the standard display. -
Page 23: Muting The Transmitters
Switching the radiomicrophone on/off Turn the protective cap at the bottom of the radiomicrophone so that ¸ ON/OFF button becomes accessible. ¹ Press the ON/OFF button to switch the radiomicrophone on. The red LED lights up. ¸ To switch the radiomicrophone off, press the ON/OFF button until... -
Page 24: Attaching The Components To Clothing
Attaching the components to clothing Attaching the bodypack receiver/transmitter to clothing The bodypack receiver/transmitter is attached to clothing (e.g. belt, waist- band) with the supplied belt clip. The clip is detachable so that you can also attach the bodypack receiver/ transmitter with the antenna pointing downwards. -
Page 25: The Operating Menu
The operating menu A special feature of the Sennheiser ew 100 G2 series is the similar, intuitive operation. As a result, the units are easy to operate and adjustments to the settings can be made quickly and “without looking” – even in stressful situati- ons, for example on stage or during a live show or presentation. -
Page 26: Working With The Operating Menu
Working with the operating menu By way of example of the “TUNE” menu, this section describes how to use the operating menu. After switching the unit on, the standard display is shown on the display panel. EM 100 G2 EK 100 G2 Getting into the operating menu Press the button to get from the standard display into the operating... -
Page 27: Operating Menu Of The Receivers
Operating menu of the receivers EXIT BANK BANK BANK 1...8, U (User Changing the channel Current channel bank bank Bank) Stores the setting STORED 790.025 790.100 CHAN B . CH B . CH Changing the channel Current channel (display Channel 01...04 depends on "DISPLY"... - Page 28 S Q ELC H FREQ FREQ NAME NAME DISPLY Switching between the Current standard display : Select standard standard displays display EM 100 G2: FREQ, NAME EK 100 G2: FREQ, NAME, CHAN STORED Stores the setting NAME VOCAL GUCAL Assigning the receiver Current receiver name Enter a name a name...
-
Page 29: Operating Menu Of The Transmitters
Operating menu of the transmitters EXIT BANK BANK BANK Current channel bank 1...8, U (User Changing the channel bank Bank) Stores the setting STORED 1.03 1.02 CHAN B.CH B.CH Current channel (display Channel 01...04 Changing the channel depends on "DISPLY" Stores the setting setting) STORED... - Page 30 DISPLY NAME VOCAL GUCAL Assigning the Current transmitter name Transmitter name transmitter a name (6 characters) Letters w/o pronounciation marks, numbers from 0...9, special characters, spaces STORED SET: 5 x next character, then store RST. RST. RESET Security check OK, NO Loading the factory- preset default settings "reset"...
-
Page 31: Adjustment Tips For The Operating Menu
Adjustment tips for the operating menu Switching between channel banks BANK Via the “BANK” menu, you can switch between the nine channel banks of the transmitters and receivers. The channel banks “1” to “8” have four switchable channels that are factory-preset to a transmission/receiving fre- quency (see: „The channel bank system“... -
Page 32: Multi-Channel Operation
Starting the scan and storing the scan result Before starting the scan, switch all transmitters of your system off, since channels used by switched-on transmitters will not be displayed as “free channels”. Select the “SCAN” menu. Select “START” and confirm your selection by pressing the button. -
Page 33: Adjusting The Audio Output Level (Receivers Only)
The following figures are a guide to the best settings: ! Loud music/vocals: –30 to –20 dB ! Presentations: –20 to –10 dB ! Interviews: –10 to 0 dB ! Musical instruments: – electric guitars with single coil pickups: –10 to 0 dB –... -
Page 34: Selecting The Standard Display
IMPORTANT! Notes: If the squelch threshold is adjusted too high, the transmission range will be reduced. Therefore, always adjust the squelch threshold to the lowest possible setting. The squelch threshold is factory-preset to “LO”. When in the setting mode of the “SQELCH” menu, pressing the button (DOWN) for more than three seconds will switch the squelch off. -
Page 35: Loading The Factory-Preset Default Settings
Loading the factory-preset default settings RESET Via the “RESET” menu, you can load the factory-preset default settings. Only the selected setting for the pilot tone remains unchanged. After the reset, the unit is restarted and the standard display is shown on the display panel. Activating/deactivating the pilot tone transmission or pilot tone evaluation PILOT... -
Page 36: If Problems Occur
80 not been switched off If problems occur that are not listed in the above table or if the problems cannot be solved with the proposed solu- tions, please contact your local Sennheiser agent for assistance. -
Page 37: Recommendations And Tips
Recommendations and tips ... for the ME 2 and ME 4 clip-on microphones ! To reduce level variations to a minimum when the user turns his or her head away from the microphone, attach the microphone as centrally as possible. ! To protect the microphone against excessive sweat/moisture, avoid direct skin contact. -
Page 38: Care And Maintenance
... for multi-channel operation ! For multi-channel operation, you can only use the channels in a channel bank. Each of the channel banks “1” to “8” accommodates four factory- preset frequencies which are intermodulation-free. For alternative fre- quency combinations, please refer to the enclosed frequency table. The fre- ely selectable frequencies can be selected via the “TUNE”... -
Page 39: Additional Information
Receiver Transmitter Progress you can hear: The evolution wireless G2 series is equipped with HDX, the Sennheiser noise reduction system that reduces RF interference. It increases the signal-to- noise ratio in wireless audio transmission to more than 110 dB. is a wideband compander system which compresses the audio signal in the transmitter in a 2:1 ratio (related to dB) to lift it above the inherent noise floor of the RF link. -
Page 40: Wireless Transmission Systems
Wireless transmission systems With the ew 100 G2 series, Sennheiser puts an end to cable tangles and enab- les complete freedom of movement. The systems operate exclusively in the UHF band. UHF transmission is extremely reliable and is far less prone to interference than the overcrowded VHF band –... -
Page 41: Diversity Reception
Diversity reception The EM 100 G2 receiver operates on the “true diversity” principle: A receiving antenna receives not only the electromagnetic waves which reach it by a direct path, but also the reflections of these waves which are created in the room by walls, windows, ceilings and fittings. When these waves are superimposed, destructive interference occurs, which can also be called “field strength gaps”. -
Page 42: Specifications
36 MHz Nominal/peak deviation ±24 kHz/±48 kHz '!±15 ppm Frequency stability AF characteristics Noise reduction system Sennheiser AF frequency response 40–18,000 Hz S/N ratio (at 1 mV and peak deviation) 110 dB(A) '!0.9 % THD (at nominal deviation and 1 kHz) -
Page 43: Connector Assignment
Transmitters RF characteristics SK 100 G2 SKP 100 G2 SKM 100 G2 RF output power at 50 * typ. 30 mW AF characteristics Max. input voltage (at peak deviation) Microphone 1.8 V , unbalanced 1.2 V , unbalanced – Line 2.4 V –... -
Page 44: Polar Diagrams And Frequency Response Curves
Polar diagrams and frequency response curves of microphones/microphone heads Polar diagrams of microphones/microphone heads MD 835 ME 865 ME 3 MD 845 ME 4 Frequency response curves of microphones/microphone heads MD 835 ME 2 MD 845 ME 3 ME 865 ME 4... -
Page 45: Accessories
Accessories MD 835 Microphone head for SKM 100 G2 (green identification ring), dynamic, cardioid MD 845 Microphone head for SKM 100 G2 (blue identification ring), dynamic, super-cardioid ME 865 Microphone head for SKM 100 G2 (red identification ring), condenser, super-cardioid MZW 1 Wind- and popshield for SKM 100 G2 MZQ 1... - Page 46 FRANÇAIS La période de garantie pour ce produit Sennheiser est de 24 mois à compter de la date d'achat. Sont exclues, les bat- teries rechargeables ou jetables livrées avec le produit. En raison de leurs caractéristiques ces produits ont une durée de vie plus courte liée princi-palement a la fréquence d'utilisation.
- Page 47 ITALIANO La Sennheiser garantisce il prodotto da voi acquistato per una durata di 24 mesi. Sono esclusi da questa garanzia gli accessori in dotazione con il prodotto, gli accumulatori e le batterie perché questi prodotti hanno un ciclo di vita più...
- Page 48 EG-Konformitäts-Erklärung / EC Certificate of Conformity / Déclaration de conformité pour la CEE Certificato di conformitá comunitario / Declaración de Conformidad / EG-Conformiteitsverklaring SENNHEISER electronic GmbH & Co. KG Am Labor 1, D-30900 Wedemark erklären, dass die Produkte / declare that these devices / déclarons que ces appareils...
- Page 49 Bemerkung: Vor Inbetriebnahme sind die jeweiligen länderspezifischen Vorschriften zu beachten! Important: Before putting the device into operation, please observe the respective country-specific regulations! Important: Avant d’utiliser l’appareil, veuillez observer les dispositions légales en vigueur dans votre pays. Nota: Prima della messa in funzione seguite le prescrizioni vigenti nel paese nel quale viene utilizzato! Observación: !Anterior a la puesta en funcionamiento deberán observarse las correspondientes ordenanzas nacionales! Opmerking:...
- Page 50 Sennheiser electronic GmbH & Co. KG 30900 Wedemark, Germany Phone +49 (5130) 600 0 Fax +49 (5130) 600 300 www.sennheiser.com Printed in Germany Publ.12/03 90608/A01...
Need help?
Do you have a question about the ew100 g2 and is the answer not in the manual?
Questions and answers