Table of Contents
Advertisement
Quick Links
Advertisement
Table of Contents

Related Manuals for Sitecom WLX-2100


Summary of Contents for Sitecom WLX-2100
-
Page 1: User Manual
N300 Wi-Fi Outdoor Range Extender User Manual WLX-2100... -
Page 2: Introduction
WLX-2100 | User Manual Introduction Congratulations on your purchase of the N300 Wi-Fi Range Extender Outdoor. With this range extemder you can easily extend the signal of a Wi-Fi hotspot and enjoy a stable Internet connection for all your devices. Ideal for camping grounds and harbors, you can use a single code or voucher to login to the Wi-Fi network and share Internet with friends and family. -
Page 3: Table Of Contents
WLX-2100 | User Manual Table of Contents Introduction ........................2 Table of Contents ......................3 Get to know your range extender ..................5 Features ................................. 5 Technical Specifications ..........................6 What you get ..............................8 What you need .............................. 9 Safety precautions ............................ - Page 4 WLX-2100 | User Manual Wireless Advanced Settings ........................40 Administration ............................42 SNMP ............................... 44 Backup/Restore Settings ......................... 46 Auto Reboot SettingS ..........................47 Firmware Upgrade ........................... 48 Time Settings ............................49 CLI Settings .............................. 50 Log ................................51 Diagnostics ............................... 52 Device Discovery ............................
-
Page 5: Get To Know Your Range Extender
WLX-2100 | User Manual Get to know your range extender Features • Extend the signal of a Wi-Fi hotspot • Ideal for camping grounds & harbours • Use a single login account & share internet access • Wi-Fi speeds: 300 Mbps (2.4 GHz)* •... -
Page 6: Technical Specifications
WLX-2100 | User Manual Technical Specifications Hardware Specification Physical Interface: • 2 x RJ-45 for 10/100 Fast Ethernet; one port is compatible with PoE • 1 x Reset button • 2x detachable 5 dBI antennas with SMA connector Power Requirements: •... - Page 7 WLX-2100 | User Manual • CLI Supported • 802.1x Supplicant (CB Mode) • 4 SSIDs • WDS AP / WDS Bridge / WDS Station • Multicast Supported • RADIUS Accounting • VLAN Tag / VLAN Pass-through • Auto Reboot •...
-
Page 8: What You Get
Open the package carefully, and make sure that none of the items listed below are missing. Do not discard the packing materials, in case of return; the unit must be shipped back in its original package. • WLX-2100 N300 Wi-Fi Range Extender Outdoor • 5m network cable •... -
Page 9: What You Need
WLX-2100 | User Manual What you need To use this range extender, you will need the following things: • A Wi-Fi network or a wired Internet connection • A device with a web browser (Internet Explorer, Safari, Firefox, Opera) -
Page 10: Safety Precautions
WLX-2100 | User Manual Safety precautions The range extender is designed and manufactured with your safety in mind. In order to safely and effectively use the range extender, please read the following before usage. Usage Cautions • The range extender can operate in temperatures ranging from -20°C to 70°C. It can be stored in temperatures ranging from -30°C to 80°C. -
Page 11: Product Layout
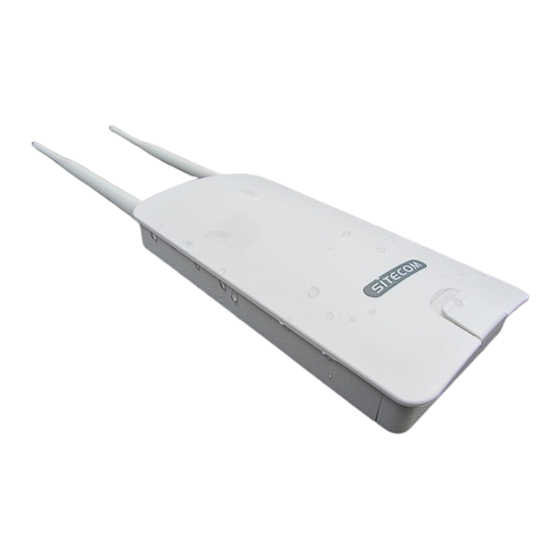
WLX-2100 | User Manual Product layout Back Letter Description Power LED: Shows the device is turned on. LAN LED: Shows that a network cable is connected. WLAN LED: Shows WLAN activity of the extender. Signal LED: This LED shows the quality of the signal it receives from the existing network. -
Page 12: Network Detail Flyer
WLX-2100 | User Manual Network Detail Flyer On the Network Detail Flyer, you can find all the information about your network such as network name and Wi-Fi password and how to reach the user interface of the range extender. -
Page 13: Install Your Range Extender
WLX-2100 | User Manual Install your range extender Choose a position for your range extender For optimal performance, place your Range Extender in a location that is away from any potential source of interference. This location must be within a good signal range from the existing network, preferably above 50% signal strength. - Page 14 WLX-2100 | User Manual Step 2: Plug the network cable into the PoE injector Step 3: Plug the other end of the network cable into the PoE port of the range extender...
- Page 15 WLX-2100 | User Manual Step 4: Place the cover back onto the range extender Step 5: Connect the power cable to the PoE injector and a wall socket.
-
Page 16: Prepare Your Computer
Click on the icon for wireless connectivity. This is usually located in the System Tray, next to the clock. • Select the Sitecom network. The correct network name can be found in the Network Detail Flyer. Fill in the password for the wireless network. The correct password can be found in the Network Detail Flyer. - Page 17 Click on the icon for wireless connectivity. This is usually located in the System Tray, next to the clock. • Select the Sitecom network. The correct network name can be found in the Network Detail Flyer. Fill in the password for the wireless network. The correct password can be found in the Network Detail Flyer.
-
Page 18: Prepare Your Phone / Tablet
Go to your Wi-Fi settings and turn Wi-Fi on. • Select the Sitecom network. The correct network name can be found in the Network Detail Flyer. • Fill in the password for the wireless network. The correct password can be found in the Network Detail Flyer. -
Page 19: Login To The Range Extender
Login to the range extender • Open your web browser (e.g. Internet Explorer, Safari, Google Chrome or Firefox). • Type http://sitecom.ext in the address bar and press [Enter]. • Type the user name and password. Both are “admin”. • Click “Login”. -
Page 20: Install The Range Extender With The Wizard
WLX-2100 | User Manual Install the range extender with the wizard • After login, you will see the user interface of your range extender • Select “Wizard” in the bottom left corner. Your range extender will start to scan the wireless... - Page 21 WLX-2100 | User Manual • Select the Wi-Fi network you wish to extend and make sure the signal strength is at least 50% or more. Tip: If you are on a camp ground, vacation park or similar, it is possible, that you see several Wi-Fi networks with the same name, this is a so called “Multi-Access Point-Network”.
-
Page 22: Get To Know The Range Extender's User Interface
WLX-2100 | User Manual Get to know the range extender’s user interface Status SAVE/RELOAD On this screen you can save and apply the settings shown in the “Unsaved changes list”, or cancel the unsaved changes and revert to the previous settings that were in effect. -
Page 23: Wireless Client List
WLX-2100 | User Manual WIRELESS CLIENT LIST On this screen, you can see a list of wireless devices (clients) connected to the range extender along with the MAC addresses and signal strength for each client. • To remove a wireless device from the list and terminate their connection to the range extender, click the button in the “Kick and Ban”... -
Page 24: Connection Status
WLX-2100 | User Manual CONNECTION STATUS On this screen, you can see the current status of the network. Wireless: • The information shown includes network type, Wi-Fi network names (SSID & BSSID), connection status, wireless mode, current channel, security, data-rate, noise level, and signal strength. -
Page 25: System Log
WLX-2100 | User Manual SYSTEM LOG On this screen, you can see the events that the range extender logged to the internal memory. Note: The oldest events are deleted from the log when memory is full. Click the “Save” button to save the log information to a text file, click the “Refresh” button to update the... -
Page 26: Settings
WLX-2100 | User Manual Settings OPERATION MODE (SYSTEM PROPERTIES) On this screen, you can set the primary function of the device. The function that is selected affects which items are available in the main menu. Device Name • Enter a name for the range extender. This name appears in SNMP management, it is not the Wi-Fi network name (SSID) and is not broadcasted to other devices. -
Page 27: Wan Settings
Click the radio button to set up the Primary DNS and Secondary DNS servers manually. Discard Ping on WAN • Keep it checked to recognize pings on the WLX-2100 WAN interface • Disable to block pings on the WLX-2100 WAN interface Tip: Pinging IP addresses is a common method used by hackers to test whether the IP address is valid. - Page 28 Enter the secondary DNS server address. Discard Ping on WAN • Keep it checked to recognize pings on the WLX-2100 WAN interface • Disable to block pings on the WLX-2100 WAN interface Tip: Pinging IP addresses is a common method used by hackers to test whether the IP address is valid.
- Page 29 Click the radio button to set up the Primary DNS and Secondary DNS servers manually. Discard Ping on WAN • Keep it checked to recognize pings on the WLX-2100 WAN interface • Disable to block pings on the WLX-2100 WAN interface Tip: Pinging IP addresses is a common method used by hackers to test whether the IP address is valid.
- Page 30 Connect on Demand • If you want the WLX-2100 to end the Internet connection after it has been inactive for a period of time, select this option and enter the number of minutes you want that period of inactivity to last.
- Page 31 WLX-2100 | User Manual Tip: Pinging IP addresses is a common method used by hackers to test whether the IP address is valid. Blocking pings provides some extra security from hackers. Click Accept to save the settings or Cancel to discard the changes.
-
Page 32: Lan Settings
Enter the LAN IP subnet mask. Use Router as DHCP Server • Check this option to enable the WLX-2100 internal DHCP server. Starting IP Address • Specify the starting IP address range for the pool of allocated for private IP addresses. The starting IP address must be on the same subnet as the ending IP address;... -
Page 33: Vpn Pass-Through
WLX-2100 | User Manual VPN PASS-THROUGH VPN Pass-through allows a secure virtual private network (VPN) connection between two computers. Enabling the options on this page opens a VPN port and enables connections to pass through the WLX-2100 without interruption. PPTP Pass-through •... -
Page 34: Port Forwarding
WLX-2100 | User Manual PORT FORWARDING On this screen, you can configure port forwarding. Port forwarding enables multiple server applications on a LAN to serve clients on a WAN over a single WAN IP address. The router accepts incoming client packets, filters them based on the destination WAN, or public, port and protocol and forwards the packets to the appropriate LAN, or local, port. - Page 35 WLX-2100 | User Manual Delete • Click to delete the forwarded port profile. Adding port-forwarding rules • Click Add Entry to add port forwarding rules. • Click Accept to confirm the changes. Service Name • Enter a name for the port forwarding rule.
-
Page 36: Dmz
WLX-2100 | User Manual On this screen, you can configure a DMZ. Configuring a device on the LAN as a demilitarized zone (DMZ) host allows unrestricted two-way Internet access for Internet applications, such as online video games, to run from behind the NAT firewall. The DMZ function allows the router to redirect all packets going to the WAN port IP address to a particular IP address on the LAN. -
Page 37: Wireless Settings
WLX-2100 | User Manual WIRELESS SETTINGS On this screen, you can configure the wireless and security settings for the range extender. Hotspot Client Network Wireless Mode • Wireless mode supports 802.11b/g/n mixed modes. Hotspot SSID • Specify the SSID (network-name) of the network you are connecting the range extender with. - Page 38 WLX-2100 | User Manual • Select Open System or Shared. Input Type • Select an input type of Hex or ASCII. Key Length • Level of WEP encryption applied to all WEP keys. Select a 64/128/152-bit password lengths. Default Key •...
- Page 39 WLX-2100 | User Manual Passphrase • Specify the security password. For security, each typed character is masked by a dot. Note: 802.11n does not allow WEP/WPA-PSK TKIP/WPA2-PSK TKIP security mode. The connection mode will change from 802.11n to 802.11g. Extender Network Enable / Disable the extender network, if you disable this feature you will not be able to connect wirelessly with the device.
-
Page 40: Wireless Advanced Settings
WLX-2100 | User Manual WIRELESS ADVANCED SETTINGS On this screen, you can configure the advanced wireless settings for your access point using the screens in this section. Leave these settings to their default values if you are not sure what values to enter. - Page 41 WLX-2100 | User Manual • Defines the maximum number of devices which are able to connect (default value 64)
-
Page 42: Administration
WLX-2100 | User Manual ADMINISTRATION Login Settings New Name • Enter a new username for logging in to this User Interface. New Password • Enter a new password for logging in to this User Interface. Confirm Password • Re-enter the new password for confirmation. - Page 43 Click Accept to confirm the changes or Cancel to cancel and return previous settings. Note: If you reconfigure the Management VLAN ID, you may lose your connection to the WLX-2100. Verify that the DHCP server supports the reconfigured VLAN ID and then reconnect to the WLX-2100 using the new IP address.
-
Page 44: Snmp
WLX-2100 | User Manual SNMP SNMP is used in network management systems to monitor network-attached devices for conditions that warrant administrative attention. SNMP • Enable or disable the WLX-2100 SNMP function. Contact • Enter the contact details of the device. Location •... - Page 45 WLX-2100 | User Manual Auth Protocol • Select the authentication protocol type: MD5 or SHA. Auth Key (8-32 Characters) • Specify the authentication key for authentication. Priv Protocol • Select the privacy protocol type: DES. Priv Key (8-32 Characters) •...
-
Page 46: Backup/Restore Settings
On this page, you can backup and restore settings. Click the Backup/Restore Setting link under the Management menu to save the WLX-2100’s current settings in a file on your local disk or load settings onto the device from a local disk. -
Page 47: Auto Reboot Settings
WLX-2100 | User Manual AUTO REBOOT SETTINGS On this page, you can configure the auto reboot function. It allows you to reboot the device automatically based on a specific time setting. Click “Save/Apply” to apply the changes or “Cancel” to return to previous settings. -
Page 48: Firmware Upgrade
Ethernet (LAN port) with all other clients disconnected. The firmware upgrade procedure can take several minutes. Do not power off the WLX-2100 during the firmware upgrade, as it can cause the device to crash or become unusable. -
Page 49: Time Settings
WLX-2100 | User Manual TIME SETTINGS On this page, you can change the system time of the WLX-2100 by manually entering the information, synchronizing the device with a PC, or setup automatic updates through a network time (NTP) protocol server. -
Page 50: Cli Settings
WLX-2100 | User Manual CLI SETTINGS On this page, you can configure the WLX-2100 through the command line interface (CLI). The CLI can be access through a command console, modem or Telnet connection. • Select to enable or disable the ability to modify the WLX-2100 via a command line interface (CLI). -
Page 51: Log
WLX-2100 | User Manual On this page, you can display a list of events that are triggered on the WLX-2100 Ethernet and wireless interfaces. You can consult this log if an unknown error occurs on the system or when a report needs to be sent to the technical support department for debugging purposes. -
Page 52: Diagnostics
WLX-2100 | User Manual DIAGNOSTICS On this page, you can access the diagnostics feature. It allows the administrator to verify that another device is available on the network and is accepting request packets. If the ping result returns alive, it means a device is on line. - Page 53 WLX-2100 | User Manual • Enter the interval for the speed test. Start Speed Test • Click Start Speed Test to begin the speed test operation. IPv4 Port • Displays the IPv4 port number of the WLX-2100.
-
Page 54: Device Discovery
• Displays the name of the devices connected to the network. Operation Mode • Displays the operation mode of other WLX-2100’s connected to the network. IP Address • Displays the IP address of other WLX-2100’s connected to the network. System MAC Address •... -
Page 55: Denial Of Service Protection
WLX-2100 | User Manual DENIAL OF SERVICE PROTECTION On this page, you can configure the DOS protection. A denial-of-service (DoS) attack is an attempt to make a machine or network resource unavailable to its intended users, such as to temporarily or indefinitely... -
Page 56: Addendum A: Gnu Gpl
WLX-2100 | User Manual Addendum A: GNU GPL Parts of the firmware of the WLX-2100 v1-001 are subject to the GNU general public license. Licensing Information GNU General Public License This product includes third-party software licensed under the terms of the... -
Page 57: Addendum B: Declaration Of Conformity
WLX-2100 | User Manual Addendum B: Declaration of Conformity...
Need help?
Do you have a question about the WLX-2100 and is the answer not in the manual?
Questions and answers