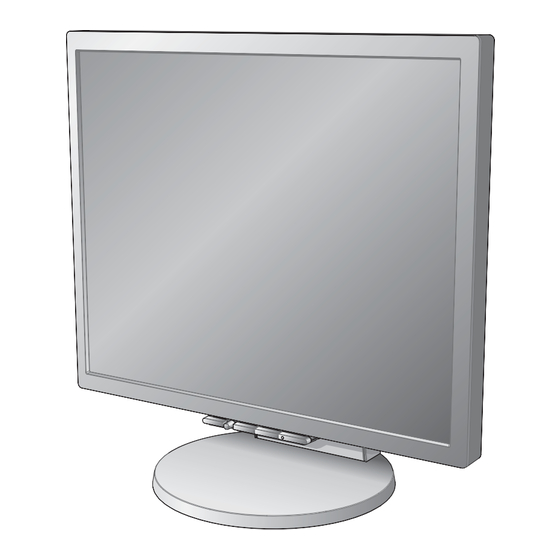
NEC MultiSync LCD2070NX User Manual
Hide thumbs
Also See for MultiSync LCD2070NX:
- User manual (122 pages) ,
- Brochure & specs (4 pages) ,
- Specification sheet (2 pages)
Table of Contents
Advertisement
Advertisement
Table of Contents

Subscribe to Our Youtube Channel
Related Manuals for NEC MultiSync LCD2070NX


Summary of Contents for NEC MultiSync LCD2070NX
-
Page 2: Table Of Contents
Index Warning ........................1 Contents ......................... 2 Display Setup ......................3 Mounting ......................... 7 Flexible Arm Installation ..................9 Controls ......................... 11 Recommended Use ....................14 Specifications ....................... 16 Features .........................18 Troubleshooting ....................19 Advanced Menu (2170NX only) ................20 References ...................... -
Page 3: Warning
WARNING TO PREVENT FIRE OR SHOCK HAZARDS, DO NOT EXPOSE THIS UNIT TO RAIN OR MOISTURE. ALSO, DO NOT USE THIS UNIT'S POLARIZED PLUG WITH AN EXTENSION CORD RECEPTACLE OR OTHER OUTLETS UNLESS THE PRONGS CAN BE FULLY INSERTED. REFRAIN FROM OPENING THE CABINET AS THERE ARE HIGH VOLTAGE COMPONENTS INSIDE. REFER SERVICING TO QUALIFIED SERVICE PERSONNEL. -
Page 4: Contents
Contents Your new NEC MultiSync LCD monitor box* should contain the ® following: • MultiSync LCD monitor with height adjustable stand • Power Cord • User’s Manual • USB Cable • Cable Management Cover • Video Signal Cable (mini D-SUB 15 pin to mini D-SUB 15 pin) •... -
Page 5: Display Setup
15-pin mini D-SUB signal cable to the Macintosh cable adapter (Figure 3). Tighten all screws. NOTE: To obtain the MultiSync Macintosh cable adapter, call NEC Display Solutions of America, Inc. at (800) 632-4662. 3. Place hands on each side of the monitor to tilt the LCD panel 30-degree angle and lift up to the highest position (Figure 4). - Page 6 Figure 5 DVI Cable (Top) Power Cable Highest (Bottom) Stand Position Input2( D-Sub) DVI Cable Input1(DVI) Power cord DC-OUT NEC optional product atttachment. Do not use this connector unless specified. D-SUB Cable Figure 6 USB Cable LCD2x70NXmanual070605.pmd 7/12/05, 3:30 PM...
- Page 7 Display Setup –continued Figure 7 Figure 8 Figure 9 Figure 11 Figure 10 OFF Position Vacation Switch ON Position Power Button LCD2x70NXmanual070605.pmd 7/12/05, 3:30 PM...
- Page 8 Display Setup –continued Raise and Lower Monitor Screen The monitor may be raised or lowered. To raise or lower screen, place hands on each side of the monitor and lift or lower to the desired height (Figure RL.1). NOTE: Handle with care when raising or lowering the monitor screen. Figure RL.1 Tilt and Swivel Grasp both sides of the monitor screen with your hands and adjust the tilt and...
-
Page 9: Mounting
Mounting –LCD2070NX Remove Monitor Stand for Mounting To prepare the monitor for alternate mounting method: 1. Place hands on each side of the monitor and lift up to the highest position. Remove the cable cover (Figure M.1). NOTE: If you have difficulty removing the cable cover, please push the the cover up (towards the top of the monitor) in order to unhook the cover from the stand, then remove, as shown in (Figure). - Page 10 Mounting –LCD2170NX Remove Monitor Stand for Mounting To prepare the monitor for alternate mounting method: 1. Place hands on each side of the monitor and lift up to the highest position. Remove the cable cover (Figure M.1). NOTE: If you have difficulty removing the cable cover, please push the the cover up (towards the top of the monitor) in order to unhook the cover from the stand, then remove, as shown in (Figure).
-
Page 11: Flexible Arm Installation
Flexible Arm Installation –LCD2070NX This LCD monitor is designed for use with a flexible arm. To mount the monitor to a flexible arm: 1. Follow the instructions on how to Remove Monitor Stand for Mounting to remove the stand. 2. Using the 4 screws from the stand removal and attach the arm to the monitor (Figure F.1). - Page 12 Flexible Arm Installation –LCD2170NX This LCD monitor is designed for use with a flexible arm. To mount the monitor to a flexible arm: 1. Follow the instructions on how to Remove Monitor Stand for Mounting to remove the stand. 2. Use the 4 screws from the stand removal and attach the arm to the monitor (Figure F.1).
-
Page 13: Controls
Controls (On-Screen Manager) control buttons on the front of the monitor function ® as follows: To access OSM menu, press any of the control buttons ( Left, Right, Down, Up). MENU/EXIT, To change signal input, press the SELECT button. NOTE: OSM must be closed in order to change signal input. Button Menu MENU/EXIT... -
Page 14: Menu Tools
Controls –continued AccuColor ® Control Systems Control Systems: Six color presets select the desired color setting (sRGB AccuColor ® and NATIVE color presets are standard and cannot be changed). R,G,B: Increases or decreases Red, Green or Blue color depending upon which is selected. - Page 15 RESOLUTION NOTIFIER: If this option is ON, a message will appear on the screen after 30 seconds notifying the user that the optimal resolution is not being used. The optimal resolution is 1600 x 1200. Information The Information menu indicates the current input, display resolution, horizontal and vertical frequency, and polarity settings of the monitor.
-
Page 16: Recommended Use
As with all personal display devices, NEC DISPLAY SOLUTIONS recommends displaying moving images and using a moving screen saver at regular intervals whenever the screen is idle or turning off the monitor when not in use. - Page 17 Recommended Use –continued CORRECT PLACEMENT AND ADJUSTMENT OF THE MONITOR CAN REDUCE EYE, SHOULDER AND NECK FATIGUE. CHECK THE FOLLOWING WHEN YOU POSITION THE MONITOR: • For optimum performance, allow 20 minutes for warm-up. • Adjust the monitor height so that the top of the screen is at or slightly below eye level.
-
Page 18: Specifications
@ 75 Hz 1280 x 960 @* @ 75 Hz 1280 x 1024* @ 60 Hz to 85 Hz 1600 x 1200 @ 60 Hz.......NEC DISPLAY SOLUTIONS cites recommended resolution at 60 Hz for optimal display performance. Active Display Area Horizontal : 408 mm/16.1 inches... - Page 19 1280 x 960 @* @ 60 Hz to 85 Hz 1280 x 1024* @ 60 Hz to 85 Hz 1600 x 1200 @ 60 Hz.......NEC DISPLAY SOLUTIONS cites recommended resolution at 60 Hz for optimal display performance. Active Display Area Horizontal : 432 mm/17.0 inches...
-
Page 20: Features
Features Thin-frame design creates more desktop space for you to work and play, while the flat screen’s crisp, bright images and crystal-clear text deliver a comfortable viewing experience. No Touch Auto Adjust™ automatically adjusts your optimal image settings upon initial power-on. -
Page 21: Troubleshooting
As with all personal display devices, NEC DISPLAY SOLUTIONS recommends displaying moving images and using a moving screen saver at regular intervals whenever the screen is idle or turning off the monitor when not in use. -
Page 22: Advanced Menu (2170Nx Only)
Advanced Menu – LCD2170NX only If you need detailed information about the controls, please use the advanced menu. To use the Advanced Menu • Turn off your monitor. • Turn on your monitor by pressing the “POWER” and “SELECT” buttons simultaneously for a few seconds. -
Page 23: References
References NEC Monitor Customer Service & Support Customer Service and Technical Support: (800) 632-4662 Fax: (800) 695-3044 Parts and Accessories/Macintosh Cable Adapter: (800) 632-4662 Warranty Information: www.necdisplay.com Online Technical Support www.necdisplay.com Sales and Product Information Sales Information Line: (888) 632-6487... -
Page 24: Limited Warranty
Product to be free from defects in material and workmanship and, subject to the conditions set forth below, agrees to repair or replace (at NEC DISPLAY SOLUTIONS’ sole option) any part of the enclosed unit which proves defective for a period of three (3) years from the date of first consumer purchase. -
Page 25: Tco'99
TCO’99 (LCD2070NX-Black Model, LCD2170NX) Congratulations! You have just purchased a TCO’99 approved and labelled product! Your choice has provided you with a product developed for professional use. Your purchase has also contributed to reducing the burden on the environment and also to the further development of environmentally adapted electronics products. - Page 26 TCO’99 –continued accumulative* processes. Flame retardants have been found in human blood and researchers fear that disturbances in foetus development may occur. TCO’99 demand requires that plastic components weighing more than 25 grams must not contain flame retardants with organically bound chlorine and bromine. Flame retardants are allowed in the printed circuit boards since no substitutes are available.
-
Page 27: Tco'03
TCO’03 (LCD2070NX-White Model) Congratulations! The display you have just purchased carries the TCO’03 Displays label. This means that your display is designed, manufactured and tested according to some of the strictest quality and environmental requirements in the world. This makes for a high performance product, designed with the user in focus that also minimizes the impact on our natural environment. -
Page 28: Manufacturer's Recycling And Energy Information
ISO (International Organization for Standardization) and TCO (Swedish Trades Union). For more information, and for help in recycling your old NEC monitors, please visit our website at: USA: http://www.necdisplay.com... -
Page 29: Declaration Of The Manufacturer
When you need to dispose of your NEC display products, please follow the guidance of your local authority, or ask the shop where you purchased the product, or if applicable, follow any agreements made between yourself and NEC. -
Page 30: Avertissement
PROPRIETARY NOTICE AND LIABILITY DISCLAIMER The information disclosed in this document, including all designs and related materials, is the valuable property of NEC Display Solutions of America, Inc. and/or its licensors, as appropriate, reserve all patent, copyright and other proprietary rights to this document, including all design, manufacturing, reproduction, use and sales rights thereto, except to the extent said rights are expressly granted to others.
Need help?
Do you have a question about the MultiSync LCD2070NX and is the answer not in the manual?
Questions and answers