Saeco SG200E Operation & Maintenance Manual
Vending machine
Hide thumbs
Also See for SG200E:
- Operation and maintenance manual (69 pages) ,
- Operation and maintenance manual (68 pages)

Related Manuals for Saeco SG200E


Summary of Contents for Saeco SG200E
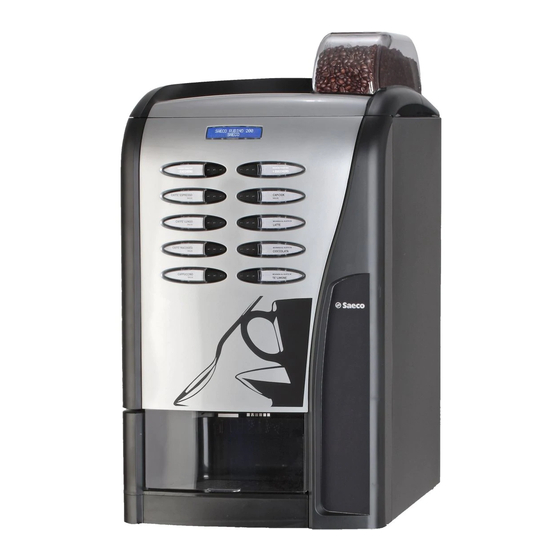
- Page 1 Hot beverage vending Machine Saeco Group 200 Model: ESPRESSO TYPE: SG200E This instruction manual is intended exclusively for specialized personnel. WARNING:...
-
Page 2: Main Parts
English MAIN PARTS Brew group and coffee grinder Brewing hopper group Sugar and stirrer dispensing group CPU card Cup dispenser Payment system area POWER card Water circuit equipped with air-break device Pump Tray socket Data plate Data plate showing the minimum and maximum water pressure Water mains connection... -
Page 3: Table Of Contents
English PAYMENT SYSTEM INSTALLATION ....24 TABLE OF CONTENTS Payment system installation on the machine ..........24 Payment system installation on the cabinet ..........25 INTRODUCTION TO THE MANUAL ......4 PROGRAMMING AND MAINTENANCE MENU ..26 Foreword ..........4 Symbols used ........ -
Page 4: Introduction To The Manual
SG200E correctly. User Always consult this publication before carrying out any operation. This symbol indicates the machine user, who is... -
Page 5: General Instructions
Saeco International Group either to intervene requiring special instruments for their removal. on the previously supplied machine or... - Page 6 - improper use of the vending machine Data Plate - non-original spare parts • The Saeco International Group will not be obliged in any case to indemnify any damage caused as a result of the forced inactivity of the machine due to failure.
-
Page 7: Operator Requirements
English 2 - TECHNICAL Operators requirements SPECIFICATIONS To guarantee safety, three different machine users are to be distinguished, each having specific characteristics: Weight 40 Kg Overall dimensions See fig. 3 User Access to the inside of the machine is forbidden to the user. -
Page 8: Safety Standards
Foreword In compliance with the Machine Directive 98/37/ EEC, Low Tension Directive 73/23/EEC and CE Marking Directive 93/68/EEC, the Saeco International Group has drawn up a technical file on D.A. SG200 E vending machine at its plants, acknowledging during the design phase the regulations listed in the Declaration of Conformity fig. -
Page 9: Handling And Storage
Important - The Saeco International Group declines all responsibility for injuries to people or damage Avoid: to things as a consequence of: - lifting the vending machine with ropes or - Use individual protection devices during presses;... -
Page 10: Packaging
English Packaging 5- GENERAL TECHNICAL The vending machine is protected by polystyrene/cardboard angles and by a DESCRIPTION transparent polypropylene film. The automatic vending machine will be packaged so as to ensure protection against any Permitted use mechanical and environmental agents. The vending machine is to be used exclusively Labels are applied on the packaging, indicating: for the dispensing of beverages, prepared by... - Page 11 English • the available credit is sufficient or the vending CUP , SUGAR AND STIRRER machine has been set in free mode. If this is DISPENSING not the case, the display shows the message ‘INSERT ...’; This is the first operation that the vending •...
- Page 12 English • the unit rotation gear motor activates, thus ”1” moving the unit to the brewing position. The coffee tablet is pressed simultaneously. • the pump brewing the set quantity of water activates, under the control of an appropriate electronic device (volumetric meter) (ref. ‘3’ fig.
-
Page 13: Installation
English 6 - INSTALLATION Positioning The vending machine is not suitable for outdoor installation. It must be installed in dry places, with temperatures not below 1°C and it should not be installed in places subject to explosion or fire hazards, or where cleaning is done with water jets. -
Page 14: Receipt
- Power cord. - Safety switch key (Technical engineer). - Declaration of conformity fig. 9 The Saeco International Group declines all fig. 10 responsibility for troubles due to the failure in observing the assembly rules. If installation takes place in safety evacuation... -
Page 15: Unpacking
English Open the door of the vending machine and Unpacking remove the adhesive tape from the components concerned. - Free the vending machine from the package. - Remove polystyrene securing internal components (fig. 13) - Remove the vending machine from the transport pallet. -
Page 16: Water Mains Connection
English - connect the tap to the vending machine, using Water system connection a copper or nylon hose, suitable for foodstuff and resistant to the supply pressure. Should a flexible hose be used, it is necessary to Before connecting the vending machine to the assemble the reinforcement bearing inside, water mains, make sure that the water is: supplied with the machine. -
Page 17: Machine Start-Up
English - The sockets that are not compatible with the Warning plug of the machine should be replaced. - The use of extensions, adapters and/or During the setting-up phase, before powering up multiple plugs is forbidden (fig 17). the machine, make sure you have connected it to the hydraulic system and opened the water tap. -
Page 18: Installation
English - fill up the water softener and let the water flow Installation out of the drain hose until it is clear (fig.20). IMPORTANT: When switched on, the machine automatically fills the water circuit and the related boilers. For a correct automatic installation in case of a water softener system being used, it is necessary that the latter is completely filled with water and properly relieved of any air... -
Page 19: Water Circuit Filling
English During the setting-up phase: 6.7.2 Water circuit filling - the coffee boiler and the water tank are filled The machine automatically activates the pump and starts filling the espresso coffee boiler. - once the water circuit is filled, the heating IMPORTANT: phase starts up, thus switching on Before powering the machine, thus starting the... -
Page 20: Cleaning The Parts In Contact With Foodstuff
English 6.7.3 Cleaning the parts in contact with foodstuffs Clean all the parts of the vending machine which are in contact with foodstuffs. - wash your hands carefully. - prepare a chlorine-based anti-bacterial cleaning solution - they can be purchased at chemists - following the concentrations given on the product instruction label. -
Page 21: Product Loading
English - clean also the mixer bases with a cloth soaked in the solution (fig.24) fig.25 - lift the container cover and fill with the product. fig.24 - make sure there is no lump, avoid pressing the product and using too much of it, so as to - leave all parts in the solution for the time prevent it from ageing. -
Page 22: Label Insertion
English 6.8.2 Label insertion - Selection labels are to be placed in the proper seat, under the transparent plastic plates, following the order set in the Programming and Maintenance Menu. Perform the operation as follows: - remove the cup holder (fig. 27) fig.29/30 - reassemble the cup holder 6.8.3... -
Page 23: Stirrer Loading
English - Introduce stirrers tightened with the band into - insert the key into the cover switch (see fig.18) the column; once they are on the bottom, cut and wait for the column to position itself into the band and remove it (fig.34) the dispensing hole. -
Page 24: Payment System Installation
English 7 - PAYMENT SYSTEM INSTALLATION Payment system installation on the machine The vending machine has no payment system. The responsibility for possible damages to the machine and other objects and for personal injuries caused by an incorrect installation of the fig.37 payment system falls on the person who installed the system. -
Page 25: Payment System Installation On The Cabinet
English - connect the coiner to the CPU card Payment system installation on the base cabinet NOTE: Executive, MDB and BDV serial systems are connected to the CPU card using a cable and an interface in necessary, both included in The base cabinet has no payment system. -
Page 26: Maintenance Menu
English 8- PROGRAMMING Important This chapter illustrates how to set up or modify the machine programming and maintenance MAINTENANCE parameters. It should therefore be read carefully, to fully MENU understand the correct sequence of operations to be performed. Important Fig. 39 shows the standard position of keys on the door keypad;... -
Page 27: Programming Menu
English Description of programming 8.2.1 Entering the programming and maintenance phase keys menu To surf inside the menu of the vending machine Open the door, insert the key into the safety use the keys described below. switch (fig.18) and press key P1, located on the CPU card (fig.40, ref. - Page 28 English SYSTEM VM CODE VM CODE MANAGEMENT 0000 >0000< STOP STOP COFFEE With 00000 LIM:00321 complete menu only BEVERAGE STOP BEVERAGE 00000 LIM. 000111 BEVERAGE 00000 LIM. 000222 STOP GROUNDS BEVERAGE 00000 LIM:0090 00000 LIM. 000333 BEVERAGE 00000 LIM. 000444 With complete BEVERAGE...
- Page 29 MANAGEMENT COUNTER COUNTER With complete menu only COFFEE PULSE COUNTER TEXT STAND-BY TEXT STAND-BY *SAECO GROUP 200* SAECO GROUP TEXT DISPENSING TEXT DISPENSING WAIT FOR PRODUCT BREWING... With the option “Instant key = preselection” only TEXT PRESELECTION TEXT PRESELECTION PRESELECTION...
- Page 30 English INSTANT PRODUCT 1 INSTANT PRODUCT 1 PRODUCT BEFORE SYSTEM >Y< N MANAGEMENT INSTANT PRODUCT 3 INSTANT PRODUCT 1 >Y< N MULTIPLE BEVERAGE MULTIPLE BEVERAGE MULTIPLE BEVERAGE ON/off: ABCdefGHI BEVERAGE VALIDATION BEVERAGE 01 BEVERAGE 15 complete menus only FREE VEND BUTTON FREE VEND BUTTON >Y<...
- Page 31 BANKNOTE 01: 1000 BANKNOTE VALUE BANKNOTE 04: 1000 SAECO CARD RECHARGE RECHARGE >Y< CARD PRICES CARD PRICES >Y< MAX CARD LOAD MAX CARD LOAD With Saeco Card 65000 only 60000 REJECT CARD REJECT CARD 70000 65000 FREE CARD FREE CARD >Y< PROTOCOL...
- Page 32 BEVERAGE PRICES IMPOSTAZIONE GLOBALE SINGLE PRICE DIFF. 1 001: 200 INDIVIDUAL PRICE BEVERAGE PRICE A 001: 200 With time-keeper BEVERAGE PRICE only A 001: 200 BEVERAGE PRICES With Card Prices SAECO CARD enabled only CUP PRICE CUP PRICE 001: 200...
- Page 33 English TIMETABLE SETTING NEVER NEVER FREE FREE ALWAYS FREE FREE FREE TIME RANGE ON1: MTWtfss 00:15 FREE OFF1: MTWtfss 07:15 With time-keeper and complete menu only FREE ON2: mtwTFss 19:15 FREE OFF2: mtwTFss 20:15 TIMETABLE SETTING TIMETABLE ON/OFF TIMETABLE ON/OFF TIMETABLE ON/OFF >Y<...
-
Page 34: Structure Of The Programming Menu
English 8.2.2 Structure of the programming - Stop coffee menu It allows to set the maximum number of coffee cups to be brewed before the stop. Example of parameter setting To set the PRICE level 3 at 0.3 €: - Stop beverage It allows you to set the maximum number of - access the programming menu as indicated individual beverages to be brewed before the... - Page 35 English - Maximum temperature Example: the settings shown in the figure validate It allows you to assign the temperature to which preheating for instant product 1 with 10 units of the vending machine is brought after a certain water and do not validate preheating for instant time from the last dispensing, so that the natural product 2.
- Page 36 English - Stirrer It allows to select which beverages will be It allows you to select the stirrer dispensing mode enabled for multiple dispensing and the number STIRRER ALWAYS: the stirrer is dispensed of dispensing. anyway; The upper line will remain the same for all following operations, while the lower one will STIRRER SUGAR: the stirrer is dispensed only show the number of consecutive beverages.
- Page 37 English - Cup key PAYMENT SYSTEMS It allows to enable or disable the key ‘beverage The entries of the PAYMENT SYSTEMS are: 01’ (fig. 39) as: - Parallel coiner 1 - ‘No cup’: By pressing the No-CUP key before It allows you to enable the parameters of the choosing a beverage allows to have it brewed parallel coiner, of the mechanical coiner, the without the cup.
- Page 38 English - Banknote Value BEVERAGE BREWING Sets the value of banknotes transferred to the machine from the parallel reader. The vending machine can brew 8 beverages in direct mode, or up to 16, 8 of which by means of - Protocol the preselection.
- Page 39 English - Instant product: - Sugar It defines the quantity of instant product to be It defines the quantity of sugar to be brewed with dispensed. the beverage. The following table shows the result of the BEVANDA Example: different settings. SOLUBILE 3: ‘005’...
-
Page 40: Maintenance Menu
English PRICE MANAGEMENT Beverage Final Counters The items of the PRICE MANAGEMENT are: Price Price Cost increased Beverage Level 1 0.55 Level 1 Beverage - Price table with cup counter and 99 price levels can be set. cup counter - Beverage prices Beverage Level 2 Level 2... - Page 41 English This message is displayed only in case of error, otherwise “ERROR LOG” is displayed MAINTENANCE ERROR MESSAGE ERROR LOG ERROR LOG /03 ERROR LOG Mxx Eyy dd/mmm hh:mm RINSING ERROR LOG RESET ERROR LOG RESET >Y< BOILER EMPTYING BOILER EMPTYING >Y<...
-
Page 42: Description Of Maintenance Menu Messages
English 8.3.2 Description of maintenance This mode does not eliminate all error conditions, menu messages but only those caused by operational defects. Errors are divided into two groups (defect and failures) according to their criticality and therefore according to the easiness of removing the MAINTENANCE causes that determined them. - Page 43 English - Automatic Error Reset The VM tries, in sequential order, to remove the Simplified mode (for technical unskilled errors automatically. During this phase the error personnel) for error reset that, when subject to the reset procedure is displayed; implemented, tries to remove any non-critical In the second line of the display there is a ‘status error condition in the VM operation.
- Page 44 English The following menu displays the LOG: MAINTENANCE ERROR LOG ERROR LOG ERROR LOG 03/03 Mxx Eyy dd/mmm hh:mm ERROR LOG RESET ERROR LOG RESET >Y< BOILER EMPTYING Ways of accessing stored information: OPERATION METHOD DISPLAY MESSAGE Accessing log Using the Maintenance/ LOG MONITOR Yxx Cyy dd/mmm LOG MONITOR menu...
-
Page 45: Software Updating (Machine Re-Programming)
English Washing It allows to rinse the brewing circuits of instant products. By pressing the ENTER key the automatic cycle starts, thus activating in sequence each instant product circuit. Recommended solutions Strip 16x2 for SW updating To wash the circuit of a single instant product you need to keep the beverage keys pressed: - Beverage key 2: instant 1 wash - Beverage key 3: instant 2 wash... -
Page 46: Maintenance And Inactivity
English 9 - MAINTENANCE Cleaning and loading Important Some operations should be carried out regularly in order to guarantee the correct operation of the machine; some of these operations are essential so as to comply with sanitary rules in force. These operations should be executed with the vending machine off and open;... - Page 47 English - empty and clean the dump box (fig.47) or moisten a cloth and wipe carefully: clean the conveyor. - all the visible parts of the brewing area (fig.49 and 50). fig.49 fig.47 - empty and clean the coffee residue drawer (fig.48) fig.48 Fig.50...
-
Page 48: Weekly Cleaning
English - the drain channel of the coffee group (fig.51). 9.1.2 Weekly cleaning Remove all containers and wipe with a damp cloth all container supporting areas, the bottom and outside of the machine and above all the brewing area (fig. 53). Fig.51 - silicon drain hoses (fig.52) Fig.52... -
Page 49: Product Loading
English 9.1.3 Product loading Load products and/or consumable stores when necessary. For these operations refer to the first-installation procedure, described in section 6.8. Maintenance EVERY EVERY EVERY EVERY EVERY MONTH 10,000 WEEK MONTHS STROKES Remove and rinse all the visible parts of the brewing area. -
Page 50: Scheduled And Unscheduled Maintenance
English 9.2.1 Scheduled and unscheduled - lower filter rod (1). maintenance - connecting rod (2) - rails (3) Replace gaskets and filters every 10,000 strokes. The operations described in this section are intended as an example as they depend on - gaskets different variables, such as: water hardness, humidity, products used, conditions and quantity... -
Page 51: Adjustments
English - manually rotate using the wrench supplied with the machine until the lower filter is flush with the cup (fig. 57). - unscrew screw (1) and replace filter (2) (fig.57). - reassemble all the parts following the reverse order. fig.57 Important fig.58... -
Page 52: Cup Releasing Device Cleaning And Adjustment
English Cup releasing device cleaning Important and adjustment Carefully blow all the inner parts with compressed air before assembling the ring, making sure that the cup bracket is in the brewing position - that is the fork that holds the cup is positioned under the brewing nozzles. - Page 53 English ALIGN THE TWO ALIGN THE FIVE SCROLLS’ ARROWS REFERENCES fig.62...
-
Page 54: Resin Regeneration - Where The Water
English Resin regeneration (where - remove the cover and introduce 1.5 kg salt the water softener is provided) - refit the cover - turn the machine on and drain the water until it is no longer salty Resin regeneration is to be carried out according - power the machine off and close the tap. -
Page 55: 10 - Inactivity
English 10 - INACTIVITY 11 - DISMANTLING If the automatic vending machine remains inactive for a long time it is necessary to take Empty the products and water as described in certain preventive measures: the previous section. For dismantling, it is advisable to disassemble the machine parts - with the machine on, start the automatic according to their composition - plastic, metal... -
Page 56: Failures Or Errors
The table below shows a list of messages displayed during the standard operating phases. Cure Error code Messaggio Cause The vending machine is waiting SAECO SG200 SAECO Beverage dispensing in WAIT FOR PRODUCT progress SUGAR 1-X SUGAR QUANTITY to be SUGAR 2-XX dispensed with the beverage. - Page 57 English Out of service/Failure conditions In particular situations, the VM can be fully or partially out of service. There are 3 categories (classified by severity): A. failures due to scheduled maintenance conditions which partially block the VM. By these failures (out of coffee, too many dump in the box, out of cups –...
- Page 58 VM (timekeeper) payment system decimal stop VM point not in line with the VM settings (credit handler signal) signal only...
- Page 59 English Description Failure/ Error Effect on the Reset to normal operation error code - if category Self-reset Reset M a n u a l S i m p l i f i e d start-up r e s e t r e s e t voluntary VM stop stop VM...
-
Page 60: Visual Signals (Leds)
English 13 - VISUAL SIGNALS (LED) On the CPU card State Function Flashing Data transmission from the CPU to serial payment systems (EXEC, BDV,MDB) Flashing Data reception from serial payment systems (EXEC, BDV,MDB) Flashing Program on the CPU is running – fast flashing while starting up the VM or by any error/failure —... - Page 61 = optional feeder kit for payment systems CN20 = POWER card connection CN15 = display CN17 = keyboard = Saeco Card module CN18 = auxiliary buttons = copy key CN16 = external buzzer = external I2C devices = product releasing control (spirals)
- Page 62 English On the Power card (I/O) State Function Power 24 V Cup empty microswitch (cups available) Cup release microswitch Cup bracket microswitch Drain tank microswitch Brew group presence microswitch House group microswitch Coffee dosing unit microswitch Auxiliary microswitch DL10 Auxiliary microswitch DL11 Air-break microswitch DL12...
- Page 63 English Notes:...
- Page 64 English Notes:...
- Page 65 English Notes:...
- Page 66 English Notes:...
- Page 67 English Notes:...
- Page 68 Cod. 1813-956-ED 01...