Advertisement
Advertisement

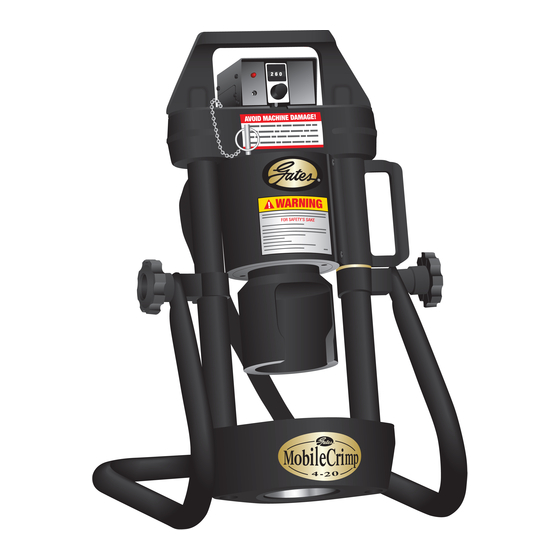
Related Manuals for Gates MobileCrimp 4-20


Summary of Contents for Gates MobileCrimp 4-20
- Page 2 1. Receive hands-on TRAINING with the MobileCrimp 4-20 and Gates assemblies. ® 2. Follow current GATES OPERATING MANUAL AND CRIMP DATA for the MobileCrimp 4-20. 3. Use only NEW (UNUSED) GATES hose and fittings. 4. Wear SAFETY GLASSES. 5. KEEP HANDS CLEAR OF MOVING PARTS. Support hose with one hand while activating pump with other hand.
-
Page 3: Table Of Contents
Serial No. _______________ (Located on front top of cylinder) Date of Purchase ___ ______ Contents Identification List ...................2 Setup ......................3 Hose Preparation ....................7 Operating Instructions ..................9 Measuring and Adjusting the Crimp Diameter ..........13 Maintenance ....................14 Troubleshooting ....................15 Replacement Parts List ..................16 Warranty ................inside back cover ®... -
Page 4: Identification List
Identification List Molykote and Brush Stand Pressure Plate Crimper Hose Assembly Clamps Literature Packet .05 Allen Wrench Magnet ® leC ri ®... -
Page 5: Setup
Setup • Replace spacer, flat washers and knobs. Unpack carton. Do not tighten knobs. • Remove crimper, pressure plate (1), nylon-covered hose assembly (1), literature envelope (1), stand (2 pieces), magnet (1) .05 Allen wrench (1) and Molykote lubricant (1) from shipping carton. - Page 6 • Position crimper so that mounting holes may be used to seal connection. (For are approximately 7" to 8" from the best connection, use Gates’ Quick edge of the work surface. Disconnect couplings, G95311-0606 • Mark the drilling location using the and G95321-0606, sold separately.)
- Page 7 CAUTION Bleed air from system. • Tilt crimper forward so adapter is at Keep away from all moving parts! its highest point. If bodily contact with a moving part occurs, immediately release the pump power “on“ switch. • When the light comes on and buzzer sounds, immediately release “on”...
- Page 8 • If the crimp diameter is within this range, no Calibrate. adjustment is necessary. • Before crimping a hose assembly, • If the crimp diameter is not within this range, check calibration. the crimper must be calibrated. Calibration is the proper relationship between •...
-
Page 9: Hose Preparation
Cut hose to desired length. Using Gates crimp data chart # 35019 (Ind) , 428-7365 (Auto), select the correct coupling or visit our website to download our electronic program Hose and coupling are now ready at www.gates.com/ecrimp. - Page 10 Cut hose to desired length. Using Gates crimp data chart # 35019 (Ind) , 428-7365 (Auto), select the correct stem and ferrule or visit our website to download our electronic program at www.gates.com/ecrimp.
-
Page 11: Operating Instructions
Failure to do this reduces the life of * Use only Gates Molykote lube for proper operation the dies and cone. Excessive wear on or Gates-recommended grease. these components produces poorly performing hose assemblies that ®... - Page 12 Select correct setting. Dial in setting and install pressure plate. • Using Gates crimp data chart # 35019 (Ind) , 428-7365 (Auto) or ecrimp, select • Turn the knob on the controller to correct setting for the hose and coupling the selected setting.
- Page 13 • When crimping bent tube and block-style Insert hose assembly. couplings, keep thread end aligned with • Insert assembly from the bottom of the notch in pressure plate. die cone up through the die set. . Swing cylinder into crimping •...
- Page 14 • Make sure cylinder is locked into posi- CAUTION tion by placing lock pin into hole on top of cylinder. Keep away from all moving parts! If bodily contact with a moving part occurs, immediately release the pump power “on“ switch. lock pin IMPORTANT Incorrect...
-
Page 15: Measuring And Adjusting The Crimp Diameter
FIG. 2 can be made. When NOT using 21 and 22 Dies • To get a smaller crimp diameter, • Using Gates dial calipers (Product No. change the setting to a smaller number. 7369-0320, Part No. 78215) which are • To get a larger crimp diameter, notched to clear ridges, change the setting to a larger number. -
Page 16: Maintenance
Maintenance This crimper requires minimal maintenance. • Inspect the die links, springs and However, the following practices are shoulder screws monthly to see if they recommended to ensure maximum are broken, cracked or missing. These reliability and service. conditions may affect crimp quality. Replace if necessary. -
Page 17: Troubleshooting
Troubleshooting All equipment is tested for proper perfor- check the list below to help restore equip- mance before it is shipped from the factory. ment to proper operating standards. However, if you experience any difficulties, Problem Correction • Ram will not fully extend. •... -
Page 18: Replacement Parts List
Replacement Parts List * Not shown ® leC ri ®... - Page 19 Notes ® leC ri ®...
- Page 20 Notes ® leC ri ®...
- Page 21 Notes ® leC ri ®...
- Page 22 Notes ® leC ri ®...
- Page 23 Two-Year Limited Warranty on Equipment For two years from the date of shipment of the equipment to the original user, The Gates Rubber Company will, at its option, replace or repair any unit which proves to be defective in material or workmanship, or both, at no cost to the original user of the equipment. This is the exclusive remedy.
- Page 24 ® The world’s most trusted name in belts, hose and hydraulics. The Gates Rubber Company P.O. Box 5887 428-7560 (Auto) 35032-DD (Ind) Denver, Colorado 80217-5887 9/02...
Need help?
Do you have a question about the MobileCrimp 4-20 and is the answer not in the manual?
Questions and answers