Table of Contents
Advertisement
Advertisement
Table of Contents

Subscribe to Our Youtube Channel
Related Manuals for IKONNIK KA-6


Summary of Contents for IKONNIK KA-6
- Page 1 Owner’s Manual & Technical Information...
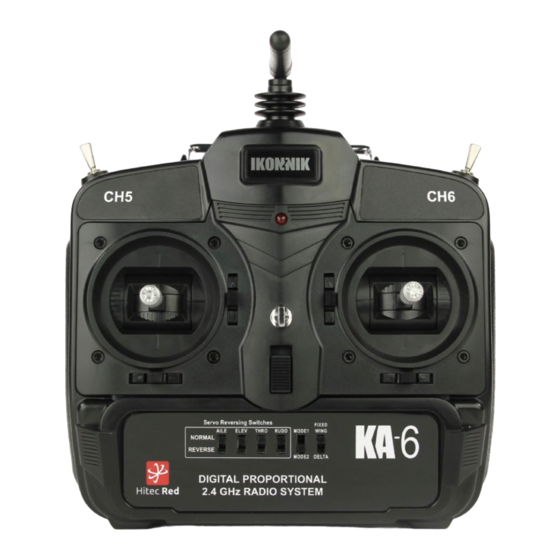
- Page 2 Specification • Advanced 2.4GHz 6-channel transmitter • Lightweight, full-range 6 channel receiver • Uses the acclaimed Hitec Red protocol • Simple, auto-pairing • Servo reverse on all four primary channels • Switched channel 5 and 6 • Mode 1 / Mode 2 selectable •...
-
Page 3: Table Of Contents
Vibration ..................5 Receiver antenna installation ........... 5 Handling connectors ..............5 Installing batteries in the transmitter ........6 Turning on the KA-6 transmitter ..........6 Transmitter aerial orientation ............ 7 Stick length adjustment ............. 7 Stick lever tension adjustment ..........7 Pairing .................. -
Page 4: Introduction
Introduction Thank you for purchasing the advanced IKONNIK KA-6 2.4GHz radio control system. It is designed for operating small to medium size model aircraft and features a lightweight, full-range receiver. Its uncomplicated design makes it the perfect first or second radio system for the sport modeller. -
Page 5: Vibration
Receiver antenna Installation The KA-6 receiver has two aerials for maximum security. Please install as shown: 90°... -
Page 6: Installing Batteries In The Transmitter
Remove the transmitter battery cover and insert four AA alkaline cells (not included) taking care to observe the correct polarity. Re-fit the battery cover You can use rechargeable batteries in the KA-6 transmitter. Ensure that you maintain the correct polarity. If using rechargeable batteries, they may be charged using a suitable, compatible charger and the factory-installed charging socket on the right-hand side of the transmitter. -
Page 7: Transmitter Aerial Orientation
Do not point the aerial directly at the model. Stick length adjustment As everyone’s hand size is different, the KA-6 transmitter uses a two-piece stick top that can be adjusted in length to suit a variety of different users’ hand size. - Page 8 When you are happy with the stick spring tension, you may carefully reinstall the rear cover ensuring that you haven’t trapped any wires. Replace the six self-tapping screws taking care not to over-tighten. Changing the transmitter to Mode 1 As standard, the transmitter is factory-configured to Mode 2 (with the throttle on the left hand stick).
- Page 9 1. Remove the six self-tapping screws that retain the rear of the transmitter case. 2. Place the transmitter face down on a soft surface. 3. Gentle ease off the rear of the transmitter case. 4. Remove the throttle ratchet from the back of the right hand stick unit by removing the two retaining screws.
- Page 10 9. Re-fit the six self-tapping screws taking care not to over-tighten. 10. Now move the mode selection switch to the Mode 1 position. Switch to MODE 1 Connection Diagram Use these diagrams to connect the KA-6 for I.C. and electric powered aircraft. 2.4GHz 6-Channel Receiver 2.4GHz 6-Channel Receiver...
-
Page 11: Pairing
You can check the pairing operation by plugging a servo into a spare channel and operating the respective control. Note: Always switch your KA-6 transmitter ON before powering up your model and only switch the transmitter OFF after... -
Page 12: Failsafe
Failsafe In the event of signal loss the KA-6 is equipped with a fail-safe function which operates across all 6 channels and must be set independent of the pairing process. To activate the fail safe setting, turn ON the transmitter and receiver and ensure they are paired. -
Page 13: Trim Adjustment
Trim Elevon (Delta) mix The KA-6 transmitter can be used to control a delta aircraft (or a flying wing). This pre-programmed mix combines channels 1 and 2. In this way, the ailerons can be operated as ailerons using the aileron joystick and as elevators using the elevator joystick. -
Page 14: Warranty, Support And Service
Warranty, support and service 30-Day Limited Warranty Term Period: We warranty that the Product(s) purchased (the ‘Product’) will be free from defects in materials and workmanship when the product is new (before being used) for the limited warranty term period, 30 days, from the date of purchase by the Purchaser. - Page 16 IKONNIK-RC.com...
Need help?
Do you have a question about the KA-6 and is the answer not in the manual?
Questions and answers