Table of Contents
Advertisement
Quick Links
Advertisement
Table of Contents

Subscribe to Our Youtube Channel
Related Manuals for Small HD DP1


Summary of Contents for Small HD DP1
- Page 1 SmallHD DP1 User Manual DP1 User Manual...
-
Page 2: Table Of Contents
SmallHD DP1 User Manual Table of Contents Overview • Key Features • Key Specifications Monitor Diagram • Front • Top • Back • Dimensions Getting Started • Powering the DP1 AC Power Battery Specifics (v1.0) • Menu/Button Interface Basics Button Contexts... - Page 3 SmallHD DP1 User Manual Using Overscan and Setting Presets Additional Advanced Menu Options • Power Modes • Logo Show • ADC Adjust Various Calibration / Setups • Configuration Settings for RED • Crop Specifications • General • Display • Connectivity •...
-
Page 4: Overview
For years, field monitoring has been far behind the capabilities of the video camera, creating uncertainty for the operator. Introducing the DP1. Finally, a bridge between your eye and the cameraʼs lens. Itʼs small, itʼs rugged, its Hi-Def, and itʼs affordable so everyone can take advantage of the new generation of HD equipment. -
Page 5: Monitor Diagram
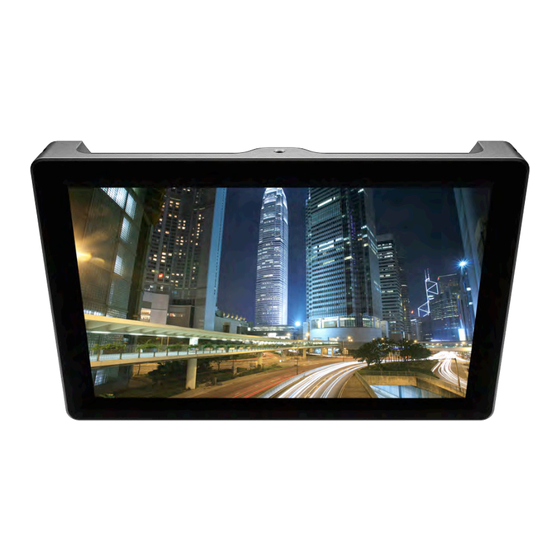
SmallHD DP1 User Manual Monitor Diagram Front Top 1/4-20 Mounting Point Sunhood Mounting Port Single bodied anodized aluminum enclosure 8.9” 1280x768 LCD Display Side 1/4-20 Mounting Point... -
Page 6: Top
SmallHD DP1 User Manual Monitor Diagram YPbPr (Component) Composite S-video HDMI Top 1/4-20 Mounting Point 12vDC Power In 5.5mm OD 2.1mm ID Barrel Power Plug Sunhood mounting ports... -
Page 7: Back
Menu/Toggle Right/Select Power Left/Select Exit/Input Menu Button DP1 On and Functioning Properly DP1 in Standby Mode *Still consumes small amounts of power in Standby mode DP1 malfunctioning (Try rebooting or call service dept.) For a full guide on button usage, refer to the... -
Page 8: Dimensions
SmallHD DP1 User Manual Monitor Diagram Dimensions 9”... -
Page 9: Getting Started
This happens by default, but can be changed in the advanced settings menu if you so desire. The LED in the center of the power button is the indicator of the DP1ʼs power ✦ status. Refer to page 6 for details. - Page 10 USB connection will damage the battery and VOID the Warranty. Always use the supplied charger to charge the SmallHD battery. • NOTE: Unplug the battery from the DP1 (and interconnect cable) when not in use to avoid unwanted battery drain. Status LED Indicator Regulated 12vDC OUTPUT...
-
Page 11: Menu/Button Interface Basics
In order for this user guide to communicate effectively, the buttons will be numbered and referred to from left to right, given a front-on view of the DP1. The “x-ray” diagram below reveals the location, function and reference number of each button on the back of the DP1 when viewing it from the front. - Page 12 • They will select the highlighted input in the Input Menu. Button 3 (Power On/Off) This button powers the DP1 on and off. The DP1ʼs power status is indicated in the center of this button (see the bottom of page 7 for more details).
-
Page 13: The Input Menu
SmallHD DP1 User Manual The Input Menu The input menu is accessed by pressing the far left button (from the front). This is how to select the appropriate input to display your deviceʼs signal. • Press the Input Menu/Exit button (button 1) once to bring up the input select dialog. -
Page 14: Introduction To The Main Menu
SmallHD DP1 User Manual Introduction to the Main Menu The Main Menu is where all the image and menu controls reside. This is where you will come to change aspect ratios, calibrate colors, adjust image controls like sharpness, saturation, scale and more. To start off, here is just a basic introduction of the main menu, and how to manipulate it. -
Page 15: Connecting A Source
3. Power on the DP1. 4. If you see a blue or black screen, then either your camera is not connected properly, your camera is not powered on, or the DP1 is set to the wrong input. 5. To change to the proper input: a. -
Page 16: The Menu
SmallHD DP1 User Manual The Menu Picture Control Menu Access the Picture Control Menu by pressing Button 5 one time. This is where you will change and adjust basic picture/color settings and access saved color and picture presets. This is also how you access the Advanced Menu, which is where you setup color and picture presets, as well as control the custom overscan presets. - Page 17 This option cycles through each customized preset. See page 23 for details. Scale This toggles between the different scale options available. The scale options are: • Full (tries to fill the entire screen of the DP1 no matter what signal) • 16x9 • 4x3 • 2.35:1...
-
Page 18: Osd Menu
SmallHD DP1 User Manual • RED (specifically for RED camera users, used on conjunction with the RED overscan preset) Advanced Opens the advanced menu. (Details begin on page 21). OSD Menu The OSD Menu is a simple menu that controls the functionality of the menu itself. It also contains the factory reset option. -
Page 19: Pip Menu
first received it. PIP Menu The DP1 is PIP capable. Which means it can display any 1 HD signal and 1 SD signal simultaneously. The menu below is how the PIP function is configured. -
Page 20: Setting Color Temp Presets
SmallHD DP1 User Manual Setting Color Temp Presets The Color Temp preset menu is accessed by going to the advanced menu through the main menu. (Button Sequence: 5 - 4 - 5 - 4) Open the main menu and select the ADVANCED menu. - Page 21 SmallHD DP1 User Manual In this menu, you will see individual settings for Red, Green and Blue and their offsets. The RGB values range from 0-100, and the Offset values range from 1-20. RGB Values All colors can be derived from a combination of Red Green and Blue (light). By adjusting these values, you effectively add and subtract the corresponding color from the mix.
-
Page 22: Setting Picture Mode Presets
SmallHD DP1 User Manual Setting Picture Mode Presets The “Picture Mode” differs from Color Temp because Picture Modes are presets for only the basic image control values. The button sequence that navigates to the Picture Mode settings sub-menu is 5 - 4 - 5 - 4. - Page 23 “monochrome” preset. Example below: Setting a “Focus Assist” preset If the SHARPNESS value is raised to 100, the DP1 gives the image an effect identical to the “sharpen” filter in Photoshop. It attempts to “sharpen” the edges of objects on-screen by enhancing the contrast around those edges.
-
Page 24: Using Overscan And Setting Presets
OVERSCANNED IMAGE Not only does the DP1 allow custom scaling of any image, but it allows you to set multiple presets for this image scaling. Because different cameras behave differently in terms of how they output their images, it may be convenient to have multiple presets if... - Page 25 It will only work if an image is being supplied to the DP1. It will not affect a blank screen with no signal. There are 3 customizable presets for the DP1. They are:...
- Page 26 (donʼt worry) scale the image back in to the left and get the right side of the image to match up to the right side of the DP1. The exact same process is used for Vstart and Vsize. Vstart...
- Page 27 For an example, refer to the “Crop” chapter of this manual. If anything ever goes wrong, just click the “Reset” button at the bottom. If problems persist, click the “MEM-RECALL” button in the Main Menu to reset the DP1 to itʼs factory default. (Page 18)
-
Page 28: Additional Advanced Menu Options
Additional Advanced Menu Options Power Modes This is a basic setting that controls how the DP1 behaves when power is plugged in. Note: The DP1ʼs “Standby” Mode still consumes small amounts of power. Standby mode is designated by the RED LED light on the back of the DP1. -
Page 29: Adc Adjust
SmallHD DP1 User Manual ADC Adjust ADC Adjust is a function that only applies to the YPbPr (component) input. It will attempt to automatically color calibrate the incoming signal for you. You can always readjust the resulting RGB values at your discretion. -
Page 30: Various Calibration / Setups
HDMI port takes bottom priority. So if you have a RED EVF, a RED LCD and a DP1 all plugged in simultaneously, the RED menu data will not display on the DP1. -
Page 31: Crop
SmallHD DP1 User Manual Crop The DP1 does not have on-screen markers at the time of this writing. Some people however wish to shoot in 16x9 or 4x3 intending to eventually crop to a cinema aspect ratio (2.35:1 or 1.85:1) in post. Using a combination of the overscan function and the scale function, you can essentially “crop”... - Page 32 “cropped” version of what youʼll see in the viewfinder of the camera). NOTE: The DP1 is now “hiding” part of the image behind the black bars on the top and bottom of the screen. This has no effect on what the camera will actually record.
-
Page 33: Specifications
SmallHD DP1 User Manual Specifications General Operating Voltage 12v (regulated) Power Consumption <12W Operating Temperature 0° – 60° C / 32° – 160° F Display Display Type TFT-LCD Size (Diagonal) 8.9 in. / 226mm Resolution 1280 x 768 pixels (WXGA) -
Page 34: Connectivity
SmallHD DP1 User Manual Connectivity 1 x HDMI (Type A) Female 1 x Component (3 x RCA Female) 1 x VGA 15-pin D-Sub Female Connection Types 1 x S-Video 4-pin mini-DIN Female 1 x Composite/CVBS (1 x RCA Female) 1 x Power (Barrel: 5.5mm OD / 2.1mm ID) HDMI 1.3... -
Page 35: Smallhd Battery Specifications
5 volts. This will damage the battery and VOID the warranty. **Max 2 Amps. ***Battery Drain Time varies slightly depending on use with the DP1 and is typically on the lower end of the spectrum when using HD sources due to an increase in processing. -
Page 36: Warrantee
2-Year Manufacturer Guarantee SmallHD electronic devices come with a limited hardware warranty. The limited hardware warranty covers defects in materials and workmanship of our products. • DP1 Warranty – 2 Years • SmallHD Battery – 6 Months Warranty specifics: • Warranty period begins on date of shipment •...
Need help?
Do you have a question about the DP1 and is the answer not in the manual?
Questions and answers