Table of Contents
Advertisement
Available languages
Available languages
Quick Links
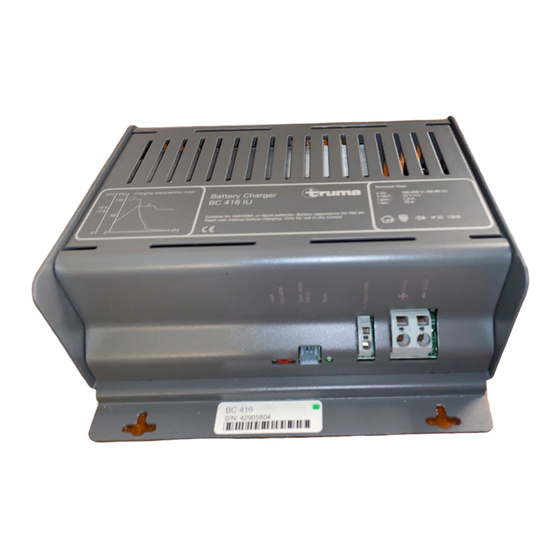
Batterie Charger BC 416 IU
(Mover®)
Gebrauchsanweisung
Einbauanweisung
Im Fahrzeug mitzuführen!
Operating instructions
Installation instructions
To be kept in the vehicle!
Mode d'emploi
Instructions de montage
À garder dans le véhicule !
Istruzioni per l'uso
Istruzioni di montaggio
Da tenere nel veicolo!
Seite 2
Seite 10
Page 16
Page 25
Page 31
Page 39
Pagina 45
Pagina 54
Advertisement
Chapters
Table of Contents

Related Manuals for Truma BC 416 IU


Summary of Contents for Truma BC 416 IU
- Page 1 Batterie Charger BC 416 IU (Mover®) Gebrauchsanweisung Seite 2 Einbauanweisung Seite 10 Im Fahrzeug mitzuführen! Operating instructions Page 16 Installation instructions Page 25 To be kept in the vehicle! Mode d‘emploi Page 31 Instructions de montage Page 39 À garder dans le véhicule ! Istruzioni per l‘uso...
-
Page 2: Table Of Contents
Wartung ................6 Batteriepflege ............... 6 Verwendete Symbole Entsorgung ................6 Technische Daten ............... 6 Abmessungen / Gewicht (BC 416 IU) ........7 Ladekennlinie ................ 7 Symbol weist auf mögliche Gefahren hin. Fehlersuchanleitung ............8 Zubehör ................9 Truma Hersteller Garantieerklärung ....... 9... -
Page 3: Gebrauchsanweisung
Nehmen Sie keine Instandsetzungsarbeiten oder Verände- Sicherheitshinweise rungen am Gerät vor. Wenden Sie sich an Ihren Händler oder an den Truma Service (siehe Serviceheft oder www.truma.com). Beim Gebrauch von elektrischen Geräten sind zum Schutz vor elektrischem Schlag, Verletzung und Brand- Zubehör... -
Page 4: Bestimmungswidriger Gebrauch
Bestimmungswidriger Gebrauch Beschreibung Nicht für 6 V Batterien, oder nichtaufladbare Batterien Der Ladeautomat ist ein Produkt modernster, mikroprozes- verwenden! sorgesteuerter Ladetechnik. Diese Technik ermöglicht hohe Leistung bei geringem Gewicht und kleinen Abmessungen. Der Ladeautomat darf nicht zum Laden von 6 V Bleiakkumu- Durch Verwendung hochwertiger Elektronik arbeitet er mit latoren verwendet werden. -
Page 5: Anschlüsse
Anschlüsse Hauptladephase (alle Spannungswerte bezogen auf 20 °C Batterietemperatur) Ladung mit maximalem konstanten Ladestrom bis annähernd 14,4 V Batteriespannung erreicht sind. Sinkt in diesem Bereich der Hauptladephase der Ladestrom bedingt durch den Batte- rieinnenwiderstand und Leitungswiderstände unter 90 % des Nennstromes ab, wird die Nachladephase gestartet. -
Page 6: Wartung
Wartung Technische Daten Vor allen Wartungsarbeiten am Gerät unbedingt die Spannungsversorgung Stromzufuhr unterbrechen. Wechselspannung 230 V / 50 Hz, einphasig Bereich ca. 180 V – 250 V / 50 – 60 Hz Reinigen Sie das Gerät und die Lüftungsschlitze mit einem Ausgangsstrom (Ladestrom Batterie) trockenen, fusselfreien Tuch. -
Page 7: Abmessungen / Gewicht (Bc 416 Iu)
Zum Laden von Batterien mit 12 V Nennspannung und einer EL = Erhaltungsladung Kapazität von 50 – 160 Ah. U[V] I[%] 14,4 13,8 Abmessungen / Gewicht (BC 416 IU) Gehäuse Aluminium, lackiert, belüftet Länge 220 mm Breite t[h] 210 mm Höhe... -
Page 8: Fehlersuchanleitung
Batterie nicht angeschlossen Batterie anschließen, ggf. oder defekt Batterie tauschen Sollten diese Maßnahmen nicht zur Störungsbehebung führen, wenden Sie sich bitte an den Truma Service. LED blinkt* 2 x Gerät wird zu heiß > 72 °C Für ausreichende Belüftung sorgen... -
Page 9: Zubehör
SAE Der Garantieanspruch besteht nicht (Art.-Nr. C11000-02100). – für Verschleißteile und bei natürlicher Abnutzung, – infolge Verwendung von anderen als Truma Originalteilen in den Geräten, – bei Gasdruck-Regelanlagen infolge Schäden durch Fremdstoffe Mover® FuseSet (z. B. Öle, Weichmacher) im Gas, Zwei Sicherungshalter –... -
Page 10: Einbauanweisung
85640 Putzbrunn, Deutschland Benutzen Sie zum Anschluss des Gerätes nur die mitgeliefer- ten Teile sowie die vorgeschriebenen Leitungsquerschnitte Bei Störungen wenden Sie sich bitte an das Truma Servicezentrum und Sicherungen! oder an einen unserer autorisierten Servicepartner (siehe Truma Ser- viceheft oder www.truma.com). Bezeichnen Sie bitte Ihre Beanstan- Benutzen Sie nur geeignetes und einwandfreies Werkzeug. -
Page 11: Aufstellen
Aufstellen Achten sie darauf, dass die Lüftungsschlitze frei bleiben! Der Mindestabstand muss rundum 100 mm betragen! Un- Den im Umkarton befindlichen Beipack (Zubehör) entnehmen zureichende Belüftung kann zur Überhitzung des Gerätes führen! und auf Vollständigkeit prüfen: Das Gerät ist für den Betrieb in einer Umgebungstemperatur 1 Gebrauchs- und Einbauanweisung bis 35 °C ausgelegt. -
Page 12: Anschluss
Anschluss Wird das Mover® PowerSet / PowerSet Plus mit der autarken Elektroinstallation des Fahrzeugs verschaltet, muss der Minuspol Vor dem Anschließen oder Trennen von Leitungen der Batterie mit dem Fahrzeugchassis verbunden werden – sind die Versorgungsleitungen von Batterie und Netz Mindestquerschnitt 10 mm². -
Page 13: Einbau Des Batterietrennschalters Und Anschluss Der Batterie
Temperaturfühler Netzanschluss Bringen Sie den beiliegenden Temperaturfühler mittig im Be- Der Anschluss des Versorgungsnetzes an das Gerät muss in reich des Pluspols, am Gehäuse der Batterie an. Hierzu entfer- Übereinstimmung mit den jeweils geltenden nationalen Instal- nen Sie die Schutzfolie des selbstklebenden Klettbandes (mit lationsvorschriften vorgenommen werden. -
Page 14: Anschlussplan
Anschlussplan – Den Schlüssel wieder einstecken und auf „OFF“ stellen. Die Kabel mit den Kabelschuhen am Batterietrennschalter anschrauben. Anschlussreihenfolge: Kabelschuh, Federring, Sicherungen unbedingt nahe der Pluspole der Batterien Mutter. anbringen! Nehmen Sie die weitere Montage gemäß der, jeweils den Geräten beigelegten, Einbauanweisungen vor. Ø... -
Page 15: Inbetriebnahme
Inbetriebnahme Netzbetrieb auf Fähren Der Ladeautomat ist in Betrieb sobald die Netzverbindung Die Netzspannung auf Fähren kann starken Schwankungen hergestellt ist. unterworfen sein. Verbinden Sie daher das Gerät nicht mit dieser Spannung. Vor dem Unterbrechen oder Schließen von Gleichstromver- bindungen, z. B. Ladestromkabel an der Batterie, ist das Gerät Generatorbetrieb netzseitig abzuschalten. -
Page 16: Symbols Used
Maintenance ..............19 Battery care ................ 19 Symbols used Disposal ................19 Technical Data ..............20 Dimensions / weight (BC 416 IU) ........20 Charging reference line ............21 Symbol indicates a possible hazard. Troubleshooting ............... 21 Accessories ............... 22 Manufacturer’s terms of warranty ........ -
Page 17: Operating Instructions
Repairs Glossary Do not repair or modify the device. Please contact your dealer or the Truma Service (see service manual or www.truma.com). AGM-battery Lead acid battery, in which the elec- trolyte is set in an Absorbed Glass Mat. -
Page 18: Description
Connections The automatic charger may not be used to charge non- chargeable batteries and / or nickel-cadmium batteries. If the automatic charger is used to charge these batteries, the case can burst explosively. Description The automatic charger contains state-of-the-art microproces- sor-controlled charging technology. -
Page 19: Maintenance
Maintenance Main charging phase (all voltage values relate to a battery temperature of 20 °C) Charging with maximum constant charging current until a bat- The power supply must always be disconnected before tery voltage of approximately 14.4 V is reached. If in this range performing any maintenance work on the device. -
Page 20: Technical Data
IUoU charging reference line Output voltage DC voltage 12 V Charging process Automatic Dimensions / weight (BC 416 IU) Automatic switching (main charging process) OFF at a battery voltage of 14.4 V, charging current < 14.5 A Automatic switching (afterloading phase) Casing 10 hours constant 14.4 V for gel batteries / AGM. -
Page 21: Charging Reference Line
Charging reference line Troubleshooting HL = Main charging phase Error Rectification NL = Afterloading phase EL = Trickle charging The battery does not charge. Check all connections are tight. U[V] I[%] Pull out the female device plug to disconnect the de- vice from the 230 V AC volt- age mains. -
Page 22: Accessories
(approx. 1 minute). Flashing frequency: 0.2 s on, 0.2 s off, period between the flashing sequence 2 s. If this does not solve the problem, please contact the Truma Service. -
Page 23: Manufacturer's Terms Of Warranty
(e.g. oils, plasticisers) in the gas, Always notify the Truma Service Centre or one of our author- – as a consequence of failure to respect Truma instructions... -
Page 24: Installation Instructions
Installation Installation instructions Remove the equipment pack (accessories) and check it is complete: Safety instructions 1 instructions for installation and use This device contains parts that could cause sparks or a 1 connection cable 230 V, 1 m light arc! 1 connection cable 12 V, 1 m –... -
Page 25: Handling Of The Cage Tension Spring Clamps
Connection Ensure that the ventilation slits remain free! There should be a minimum clearance of 100 mm all round! Inadequate ventilation can cause the device to overheat! Disconnect the power cables from the battery and from the mains before connecting or disconnecting any cables! The device is designed for operation in an ambient tempera- Only use the specified cross-sections and fuses with the cor- ture of up to 35 °C. - Page 26 pole of the battery needs to be connected to the vehicle‘s Temperature sensor chassis – minimum cross-section 10 mm². Attach the temperature sensor supplied to the battery casing, near the positive terminal. To do this, remove the protective Snap ferrite film from the self-adhesive Velcro strip (with the recess) and Install the snap ferrite near the device to achieve optimum press this firmly onto the desired position on the battery.
-
Page 27: Installing The Battery Isolating Switch And Connecting The Battery
Installing the battery isolating switch and Main supply connection The device must be connected to the mains power supply connecting the battery in accordance with the respective valid national installation regulations. Install the battery isolating switch at a suitable position (near The 230 V electrical connection must always be made by the battery) in the positive line between the battery and the an expert (in accordance with VDE 0100, part 721 or... -
Page 28: Wiring Diagram
Wiring diagram Perform the rest of the installation as shown in the instal- lation instructions supplied with your device. Always install the fuses close to the positive terminal of Ø 25 mm the battery! Remove / insert key + Control unit Mover®... -
Page 29: Commissioning
Commissioning Mains supply mode on ferries The automatic charger is operational as soon as it is connect- The main supply voltage on ferries can be prone to heavy fluc- ed to the mains supply. tuations. Therefore do not connect the device to this voltage. Before disconnecting or interrupting the DC voltage connec- Generator mode tions, e. -
Page 30: Symboles Utilisés
Entretien de la batterie ............34 Symboles utilisés Élimination ................34 Caractéristiques techniques .......... 34 Dimensions / poids (BC 416 IU) ........... 35 Courbe caractéristique de charge ........35 Ce symbole indique des risques possibles. Diagnostic des dérangements ........36 Accessoires ............... -
Page 31: Mode D'emploi
(Absorbed Glass Mat). Réparation Batterie OPTIMA® YT S correspond à une batterie AGM. N‘effectuez aucune réparation ou modification sur l‘appareil. Contactez votre revendeur ou le service Truma (voir carnet d‘entretien ou www.truma.com). Consignes de sécurité Accessoires Lors de l‘utilisation d‘appareils électriques, les consignes Utilisez uniquement des accessoires fournis ou recommandés... -
Page 32: Utilisation Non Conforme
Utilisation non conforme Description Ne pas utiliser pour des batteries de 6 V ou des batte- Le chargeur automatique est un produit intégrant une tech- ries non rechargeables ! nologie de recharge ultramoderne commandée par micro- processeurs. Cette technologie permet une puissance élevée Le chargeur automatique ne peut être utilisé... -
Page 33: Raccordements
Raccordements à la courbe caractéristique de charge avec une perte de puis- sance minimale (courbe caractéristique de charge voir fig. 2). Phase de charge principale (toutes les valeurs de tension sont valables pour une tempéra- ture de batterie de 20 °C) Recharge avec courant de charge maximum jusqu‘à... -
Page 34: Entretien
Élimination Fonctionnement en parallèle Si les appareils électriques utilisent du courant durant la phase de post-charge ou la phase de charge de maintien, celui-ci est L‘appareil doit être éliminé conformément aux règles adminis- immédiatement rechargé. tratives du pays d‘utilisation. Les prescriptions et lois nationa- les doivent être respectées (en Allemagne, il s’agit par exem- ple du décret sur les véhicules hors d’usage). -
Page 35: Dimensions / Poids (Bc 416 Iu)
Utilisation Recharge de batteries d‘une tension nominale de 12 V et 14,4 d‘une capacité de 50 – 160 Ah. 13,8 Dimensions / poids (BC 416 IU) t[h] Boîtier Aluminium, laqué, aéré Longueur Fig. 2 : Courbe caractéristique (tracé théorique) -
Page 36: Diagnostic Des Dérangements
2 s. Batterie pas raccordée ou Raccorder la batterie, Si ces démarches ne permettent pas d’éliminer la défectueuse. remplacer la batterie le cas défaillance, adressez-vous au SAV Truma. échéant. DEL clignote* 2 x L‘appareil est trop chaud. Assurer une aération suffisante. -
Page 37: Accessoires
Les dispositions de la législation sur la responsabilité sur le produit ne sont pas mises en cause. Les frais de mise à contribution du service après-vente usine Truma pour remédier à une carence couverte par la garantie, en particulier les frais de transport, de manutention, de main-d´oeuvre et de matériel,... -
Page 38: Instructions De Montage
être effectué en accord avec les directives d‘installation natio- 85640 Putzbrunn, Allemagne nales en vigueur. Veuillez vous adresser au centre de service clientèle de Truma ou à Le montage et le raccordement d‘appareils électriques doivent un de nos services après-vente agréés en cas de dysfonctionnements toujours être réalisés par du personnel qualifié... -
Page 39: Installation
Installation Les batteries à électrolyte liquide doivent être installées dans une boîte séparée avec un système de ventilation vers l‘exté- Sortez les pièces (accessoires) fournies dans le carton d‘em- rieur. Une boîte séparée n‘est pas nécessaire pour les batte- ballage et vérifiez si elles sont au complet : ries au gel et AGM. -
Page 40: Raccordement
Insérez le câble jusqu’à la gaine isolante dans la borne à Raccordement de la batterie ressort (ouverture inférieure, ronde) et retirez le tournevis pour Branchez le chargeur à la batterie conformément au plan de vis à tête fendue. La borne à ressort de tension se referme et câblage (fig. - Page 41 Ferrite à charnière Capteur de température Fixer la ferrite à charnière près de l‘appareil afin d‘obtenir un Installez le capteur de température fourni au milieu dans la zo- blindage optimal. Poser à cet effet le câble positif et le câble ne du pôle positif sur le boîtier de la batterie.
-
Page 42: Montage Du Disjoncteur De Batterie Et Branchement De La Batterie
Montage du disjoncteur de batterie et Raccordement au réseau Le raccordement du réseau d‘alimentation à l‘appareil doit branchement de la batterie être effectué en accord avec les directives d‘installation natio- nales en vigueur. Montez le disjoncteur de batterie au bon endroit (à proximité Seul un spécialiste est autorisé... -
Page 43: Schéma De Câblage
Schéma de câblage Procédez au reste du montage conformément aux ins- tructions de montage fournies avec les appareils. Installez impérativement les fusibles près des pôles po- sitifs des batteries ! Ø 25 mm Retirer / introduire la clé + Commande Mover®... -
Page 44: Mise En Service
Mise en service Fonctionnement sur réseau sur des ferrys Le chargeur automatique est opérationnel dès que le branche- La tension du réseau des ferrys peut être soumise à de fortes ment au secteur est effectué. variations. L‘appareil ne doit donc pas être branché à ce courant. Avant de couper ou de fermer des raccords de courant continu, Fonctionnement sur générateur par ex. -
Page 45: Simboli Utilizzati
Cura della batteria .............. 49 Simboli utilizzati Smaltimento ................ 49 Dati tecnici ................ 49 Misure / Peso (BC 416 IU) ........... 50 Linea caratteristica di carica ..........50 Il simbolo richiama l‘attenzione su possibili pericoli. Istruzioni per la ricerca degli errori ....... 51 Accessori ................ -
Page 46: Istruzioni Per L'uso
Non eseguire lavori di riparazione o modifiche all‘apparecchio. Rivolgersi al rivenditore di fiducia o al servizio d‘assistenza Indicazioni di sicurezza Truma (vedi libretto d‘assistenza o www.truma.com). Durante l‘utilizzo di apparecchiature elettriche è asso- Accessori lutamente necessario osservare le seguenti misure di Utilizzare soltanto accessori e apparecchiature supplementari sicurezza per evitare scosse elettriche, infortuni e rischi d‘in-... -
Page 47: Utilizzo Non Conforme Alle Disposizioni
Utilizzo non conforme alle disposizioni Descrizione Il caricabatterie è un prodotto della tecnica di caricamento Non adatto per batterie 6 V, o per quelle non ricaricabili! più moderna ed azionato da microprocessori. Questa tecnica consente altissime prestazioni nonostante il peso minimo e le Il caricabatterie non deve essere impiegato per la carica di piccole misure. -
Page 48: Collegamenti
Collegamenti ha luogo secondo la linea caratteristica di carica con la perdita minima di potenza (linea caratteristica di carica vedi figura 2). Fase di carica principale (tutti i valori di tensione si riferiscono ad una temperatura batteria di 20 °C) Carica con una corrente di carica massima costante fino a rag- giungere una tensione batteria all‘incirca di 14,4 V. -
Page 49: Manutenzione
Smaltimento Funzionamento in parallelo Se durante la fase di post-carica o fase di carica di manteni- mento viene assorbita corrente da un‘utenza, questa viene L‘apparecchio deve essere smaltito secondo le disposizioni immediatamente ricaricata. amministrative del rispettivo paese d‘utilizzo. Rispettare le leg- gi e le normative nazionali (in Germania, ad esempio, la legge sulla rottamazione di veicoli usati). -
Page 50: Misure / Peso (Bc 416 Iu)
Per la carica di batterie con tensione di rete 12 V e una capaci- 14,4 tà di 50 – 160 Ah. 13,8 Misure / Peso (BC 416 IU) t[h] Scatola Alluminio, verniciato, aerato Figura 2: linea di carica caratteristica (decorso principale) -
Page 51: Istruzioni Per La Ricerca Degli Errori
2 s. aerazione dello stesso. Se questi rimedi non dovessere funzionare per eliminare LED lampeggia* 1 x i disturbi, rivolgetevi al servizio assistenza di Truma. Batteria non collegata o Collegare batteria, event. difettosa. sostituire la batteria. -
Page 52: Accessori
Restano salve le norme della legge sulla responsabilità di prodotto. I costi del servizio di assistenza Truma, intervenuto per eliminare il di- fetto in garanzia, – in particolar modo i costi di trasporto, di percorso, di lavoro e di materiale –... -
Page 53: Istruzioni Di Montaggio
Truma in Germa- nia o con il rispettivo partner di assistenza autorizzato. Altrimenti, tutti i rischi dovuti ad eventuali danni di trasporto, sono completamente a carico dello spedizioniere. -
Page 54: Installazione
Installazione L‘apparecchio deve essere fissato con quattro viti di fissaggio fornite con lo stesso. Prelevare la confezione supplementare contenuta nella scatola (accessori) e controllare la sua integrità: Prestare attenzione che le feritoie di ventilaizone siano libere. La distanza minima deve essere di circa 100 mm! 1 Istruzione per l‘uso e di montaggio Un‘aerazione insufficiente può... -
Page 55: Collegamento
Ripetere il procedimento per tutte le connessioni: – Collegare il circuito di misura (rosso 0,75 mm²) all’ingresso B+ Battery sense, + Battery, - Battery. B+ dell’apparecchio e al polo positivo della batteria. Proteg- gere questo cavo, vicino al polo positivo della batteria, con Assicurarsi che le estremità... - Page 56 Ferrite con chiusura a clip Sensore temperatura Avvicinare la ferrite con chiusura a clip al dispositivo per otte- Applicare la sonda termica acclusa al corpo della batteria al nere una soppressione ottimale delle interferenze. Collocare centro della zona del polo positivo. A questo scopo togliere i cavi positivo e negativo dei connettori da 12 V nella ferrite la pellicola di protezione dal nastro di velcro autoadesivo (con aperta, chiudere quest’ultima e fare pressione su di essa fino...
-
Page 57: Installazione Del Sezionatore Della Batteria E Collegamento Della Batteria
Installazione del sezionatore della batteria e Allacciamento alla rete Il collegamento della rete di alimentazione dell‘apparecchio collegamento della batteria deve essere effettuato in conformità alle rispettive disposizio- ne d‘installazione nazionali in vigore. Installare il sezionatore in un punto adatto (vicino alla batteria) Il collegamento elettrico a 230 V deve essere eseguito del cavo positivo tra batteria e comando. -
Page 58: Schema Dei Collegamenti
Schema dei collegamenti Eseguire l’ulteriore montaggio seguendo le relative istru- zioni accluse di volta in volta agli apparecchi. Applicare assolutamente i fusibili vicino al polo positivo Ø 25 mm delle batterie! Togliere / inserire la chiave + Comando Mover® + Batteria Comando Mover®... -
Page 59: Messa In Funzione
Messa in funzione Funzionamento della rete su traghetti Il caricabatterie è in funzione non appena è stato effettuato il La tensione di rete su traghetti può essere soggetta a forti collegamento alla rete. oscillazioni. Per questo motivo non collegare l‘apparecchio con questa tensione. - Page 60 In Deutschland ist bei Störungen grundsätzlich das Truma En Allemagne, toujours appeler le centre de SAV Truma en cas Servicezentrum zu benachrichtigen; in anderen Ländern stehen de dysfonctionnement. Dans les autres pays, les partenaires de die jeweiligen Servicepartner zur Verfügung (siehe Truma service après-vente correspondants se tiennent à...
Need help?
Do you have a question about the BC 416 IU and is the answer not in the manual?
Questions and answers