Table of Contents
Advertisement
Available languages
Available languages
Quick Links
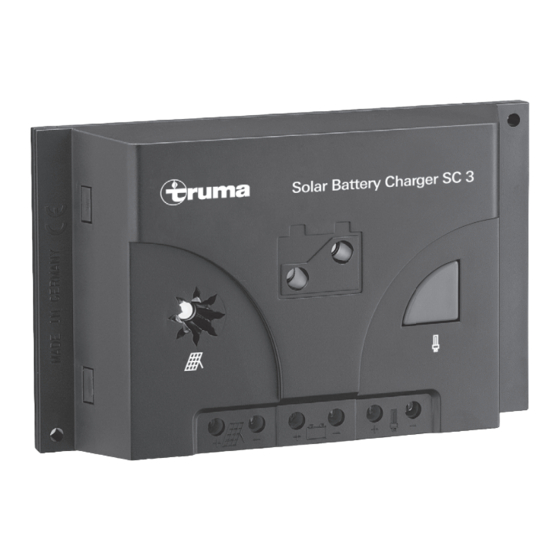
Solar Battery Charger SC 3
Gebrauchsanweisung
Einbauanweisung
Im Fahrzeug mitzuführen!
Operating instructions
Installation instructions
To be kept in the vehicle!
Mode d'emploi
Instructions de montage
À garder dans le véhicule !
Istruzioni per l'uso
Istruzioni di montaggio
Da tenere nel veicolo!
Seite 4
Seite 13
Page 15
Page 25
Page 26
Page 36
Pagina 37
Pagina 47
Advertisement
Chapters
Table of Contents

Related Manuals for Truma SC 3


Summary of Contents for Truma SC 3
- Page 1 Solar Battery Charger SC 3 Gebrauchsanweisung Seite 4 Einbauanweisung Seite 13 Im Fahrzeug mitzuführen! Operating instructions Page 15 Installation instructions Page 25 To be kept in the vehicle! Mode d‘emploi Page 26 Instructions de montage Page 36 À garder dans le véhicule ! Istruzioni per l‘uso...
- Page 2 12 V X1 - X3 max Ø 6 mm² * > 10 mm²...
- Page 3 Ø 4...
-
Page 4: Table Of Contents
Wartung ................9 Technische Daten ............. 10 Ladediagramm ..............11 Entsorgung ................ 11 Symbol weist auf mögliche Gefahren hin. Konformitätserklärung ............ 11 Truma Hersteller Garantieerklärung ......12 Hinweis mit Informationen und Tipps. Einbauanweisung Sicherheitshinweise ............13 Lieferumfang ..............13 Montage ................13 Anschluss ................ -
Page 5: Sicherheitshinweise
Umgebung. Betreiben Sie gen am Gerät vor. Wenden Sie sich an Ihren Händler oder an Elektrogeräte nicht in der Nähe von brennbaren Flüssigkeiten den Truma Service (siehe Serviceheft oder www.truma.com). oder Gasen. Zubehör Schutz vor elektrischem Schlag Benutzen Sie nur Zubehörteile und Zusatzgeräte die vom... -
Page 6: Verwendungszweck
Kapazität von 30 – 75 Ah. Das Gerät wurde für den Anschluss von Solarmodulen entwickelt. Nur geeignete – 6 V-Batterien oder 6 V-Bleiakkumulatoren, Module z. B. Truma SM 23 verwenden. Die maximalen Span- – nicht-aufladbaren Batterien, nungs- und Stromaufnahmewerte beachten. Das bevorzugte –... -
Page 7: Geräteelemente
Geräteelemente Funktion Das Gerät ist mit moderner pulsbreiten modulierter drei Pha- sen Ladetechnik ausgestattet. Diese Technik ermöglicht hohe Leistung bei geringem Gewicht und kleinen Abmessungen. Durch Verwendung hochwertiger Elektronik arbeitet es mit einem hohen Wirkungsgrad. Das automatische Laden erfolgt schonend und ohne schädliches Überladen der Batterien. So wird die Lebensdauer der Batterien wesentlich verlängert. -
Page 8: Ladevorgang
Ladevorgang Gasungsregelung Die Ladeendspannung wird in Abhängigkeit der Entladetiefe Das Gerät besitzt einen elektronischen Verpolungs-, Rück- verändert. Wenn eine Batterie lange Zeit ohne jede Gasent- strom- und Solarkurzschlussschutz. Nur wenn die Batterie wicklung betrieben wird, besteht die Gefahr, dass sich eine richtig angeschlossen ist und ausreichend Leistung aus Son- schädliche Säureschichtung ausbildet. -
Page 9: Schalten Des Optionalen Verbraucherausganges
Schalten des optionalen Ladeanzeige Ursache Verbraucherausganges gelbe LED (H1) aus Nicht ausreichend Solarener- gie vorhanden. Die Batterie wird nicht geladen. Durch Drücken der Taste (T) wird der Verbraucherausgang gelbe LED (H1) leuchtet Batterie wird geladen eingeschaltet. Durch nochmaliges Drücken der Taste (T) wird der Verbraucherausgang abgeschaltet. -
Page 10: Technische Daten
Technische Daten Ladespannungen Nachladephase 14,4 V Angaben gelten bei einer Umgebungstemperatur von 25 °C Erhaltungsladephase 13,7 V Hauptladephase 12,5 V Elektrische Werte Umschaltspannung Betriebsspannung 12 V Maximale Ladespannung 15,6 V max. Eingangsspannung 47 V Temperaturkompensation -24 mV / K Spannungsbereich 8 – 15 V Abschaltschwelle optionaler 11 –... -
Page 11: Ladediagramm
Ladediagramm Konformitätserklärung HL = Hauptladephase 1. Stammdaten des Herstellers NL = Nachladephase EL = Erhaltungsladung Name: Truma Gerätetechnik GmbH & Co. KG Anschrift: Wernher-von-Braun-Str. 12, D-85640 Putzbrunn U[V] 2. Identifikation des Gerätes Typ / Ausführung: Solar-Ladeautomat SC 3 3. Erfüllt die Anforderungen folgender EG-Richtlinien t[h] 3.1 EMV-Richtlinie 2004/108/EG... -
Page 12: Truma Hersteller Garantieerklärung
Der Garantieanspruch besteht nicht: Die Anschrift des Herstellers lautet: – für Verschleißteile und bei natürlicher Abnutzung, Truma Gerätetechnik GmbH & Co. KG, – infolge Verwendung von anderen als Truma Originalteilen in den Wernher-von-Braun-Straße 12, Geräten, 85640 Putzbrunn, Deutschland – bei Gasdruck-Regelanlagen infolge Schäden durch Fremdstoffe (z. -
Page 13: Einbauanweisung
Unzureichende Belüftung kann zur Überhitzung Das Gerät wurde für den Anschluss von Solarmodulen ent- des Gerätes führen! wickelt. Nur geeignete Module z. B. Truma SM 23 verwen- den. Die maximalen Spannungs- und Stromaufnahmewerte Der Einbauraum für das Gerät muss oben und seitlich mit beachten. -
Page 14: Anschluss
Anschluss der Pole. Verschalten Sie mehrere Solarmodule immer parallel. Ver- wenden Sie hierzu nur Module gleicher typischer Spannungs- werte (ca. 18 V). Fragen Sie Ihren Händler nach dem Truma Kabelset Erweiterung. Anschlussreihenfolge beachten. Schließen Sie die Verbraucher des Wohnwagens (Bild A, a) direkt an die Batterie an. -
Page 15: Glossary
Solar Battery Charger SC 3 Contents Operating instructions Operating instructions Glossary ................15 Before connecting and starting up the device, please be sure Symbols used ..............15 to read the installation and operating instructions! Safety instructions ............16 Intended use ..............17 Glossary Use for incorrect purpose ............ -
Page 16: Safety Instructions
Do not operate electrical devices in a damp or wet Do not make any repairs or modifications to the device. environment. Do not operate electrical devices in the vicinity Please contact your dealer or Truma Service (see service book of flammable liquids or gases. or www.truma.com). -
Page 17: Intended Use
30 – 75 Ah. The device has been developed for connecting solar modules. Only suitable modules may – 6 V batteries or 6 V lead batteries, be used, e.g. Truma SM 23. Please pay attention to the max- – non-rechargeable batteries, imum voltage and power consumption values. The preferred –... -
Page 18: Device Components
Device components Operation The device is equipped with modern pulse width modulated three-phase charging technology. This technology makes it possible to have high power with light weight and compact dimensions. It uses high-quality electronics to achieve a high degree of efficiency. Automatic charging takes place in a pro- tective way without damaging the batteries by overcharging them. -
Page 19: Charging Procedure
Charging procedure Gassing control The charging end voltage is modified depending on the dis- The device has electronic polarity reversal protection, return charge depth. If a battery is operated for a long time without current protection and solar short circuit protection. The any gas development, there is a risk of damaging acid strat- charge current is only enabled if the the battery is correctly ification building up. -
Page 20: Switching The Optional Consumer Output
Switching the optional consumer output Charge indicator Cause Yellow LED off Insufficient solar energy Pressing the button (T) enables the consumer output. Pressing available. Battery is not the button (T) again disables the consumer output. being charged. Yellow LED illuminated Battery is being charged Operating indicator Yellow LED (H1) flashing... -
Page 21: Technical Data
Technical data Charge voltages Post-charging phase 14.4 V The information applies at an ambient temperature of 25 °C Trickle charge phase 13.7 V Main charging phase 12.5 V Electrical values changeover voltage Operating voltage 12 V Maximum charge voltage 15.6 V Max. input voltage 47 V Temperature compensation -24 mV / K... -
Page 22: Charge Diagram
Declaration of conformity HL = Main charging phase 1. Information about the manufacturer NL = Post-charging phase EL = Trickle charge Name: Truma Gerätetechnik GmbH & Co. KG Address: Wernher-von-Braun-Str. 12, D-85640 Putzbrunn U[V] 2. Device identification Type / model: Solar Battery Charger SC 3 3. -
Page 23: Truma Manufacturer Warranty Declaration
– to gas pressure regulation systems as a result of damage by for- eign substances (e.g. oils, plasticisers) in the gas, Always notify the Truma Service Centre or one of our authorised ser- – as a consequence of failure to respect Truma instructions for install-... -
Page 24: Installation Instructions
The device has been developed for connecting solar mod- The installation room the the device must have ventilation ules. Only suitable modules may be used, e.g. Truma SM 23. openings at the top and the sides with a total opening size Please pay attention to the maximum voltage and power con- of 100 cm². -
Page 25: Connection
For this purpose, only use modules with the same typical voltage values (approx. 18 V). Ask your dealer about the Truma wiring loom extension. Pay attention to the connecting order. Connect the con- sumers of the caravan (fig. A, a) directly to the battery, The optional consumer output must only be used for non- earthed small consumers (e.g. -
Page 26: Glossaire
Diagramme de charge ............33 Mise au rebut ..............33 Déclaration de conformité ..........33 Ce symbole indique des risques possibles. Déclaration de garantie du fabricant Truma ....34 Indication avec informations et conseils. Instructions de montage Informations concernant la sécurité ......35 Volume de livraison ............ -
Page 27: Informations Concernant La Sécurité
électriques dans un environnement sur l'appareil. Adressez-vous à votre concessionnaire ou au humide ou mouillé. Ne faites pas fonctionner les appareils service après-vente Truma (voir livret de service après-vente électriques à proximité de liquides ou de gaz combustibles. ou www.truma.com). -
Page 28: Utilisation
– des batteries 6 V ou des accumulateurs au plomb 6 V, modules solaires. Utiliser uniquement des modules appro- – des batteries non rechargeables, priés, par exemple Truma SM 23. Observer les valeurs maxi- – des batteries nickel-cadmium. males de tension et de consommation. Le domaine d'utilisa- tion préférentiel du chargeur automatique sont les batteries à... -
Page 29: Éléments De L'appareil
Éléments de l'appareil Fonctionnement L'appareil est équipé d'une technique de charge à trois phases à modulation de largeur d'impulsion. Cette technique permet une puissance élevée associée à un faible poids et de petites dimensions. L'utilisation de composants électroniques de qualité supérieure le fait fonctionner avec un haut degré d'ef- ficacité. -
Page 30: Opération De Recharge
Opération de recharge Régulation de gazage La tension finale de charge change en fonction de la pro- L'appareil possède une protection électronique contre les fondeur de décharge. Si une batterie fonctionne longtemps inversions de polarité, le courant de retour et le court-circuit sans le moindre développement de gaz, une couche d'acide solaire. -
Page 31: Commutation De La Sortie De Consommateur Optionnelle
Commutation de la sortie de Affichage de charge Cause consommateur optionnelle la DEL jaune (H1) est éteinte Quantité insuffisante d'énergie solaire présente. La batterie ne se charge pas. Presser la touche (T) pour activer la sortie de consommateur. la DEL jaune (H1) est allumée La batterie se charge Presser de nouveau la touche (T) pour désactiver la sortie de consommateur. -
Page 32: Caractéristiques Techniques
Caractéristiques techniques Tensions de charge Phase de post-charge 14,4 V Les indications s'appliquent à une température ambiante de Phase de charge d'entretien 13,7 V 25 °C Phase de charge principale 12,5 V tension de commutation Valeurs électriques Tension de charge maximale 15,6 V Tension de fonctionnement 12 V... -
Page 33: Diagramme De Charge
HL = Phase de charge principale 1. Principales données relatives au fabricant NL = Phase de post-charge EL = Charge d'entretien Nom : Truma Gerätetechnik GmbH & Co. KG Adresse : Wernher-von-Braun-Str.12, D-85640 Putzbrunn U[V] 2. Identification de l’appareil Type / modèle : Chargeur automatique solaire SC 3 3. -
Page 34: Déclaration De Garantie Du Fabricant Truma
3. Invocation du cas de garantie – pour les pièces d'usure et en cas d'usure naturelle, Les coordonnées du fabricant sont les suivantes : – suite à l'utilisation de pièces autres que des pièces originales Truma Truma Gerätetechnik GmbH & Co. KG dans les appareils, Wernher-von-Braun-Straße 12,... -
Page 35: Instructions De Montage
L'appareil a été développé pour le raccordement de modules solaires. Utiliser uniquement des modules appropriés, par L'espace de montage pour l'appareil doit être muni en haut exemple Truma SM 23. Observer les valeurs maximales de et sur le côté d'ouvertures de ventilation pour une superficie tension et de consommation. -
Page 36: Raccordement
Utilisez à cet effet toujours uniquement des modules aux valeurs de tension typiques identiques (environ 18 V). Demandez à votre concessionnaire l'extension de jeu de câbles Truma. Respecter l'ordre de raccordement. Raccordez directement les consommateurs de la caravane (fig. A, a) à la batterie. -
Page 37: Glossario
Carica-batterie automatico ad energia solare SC 3 Indice Istruzioni per l'uso Istruzioni per l'uso Prima di effettuare il collegamento e la messa in funzio- Glossario ................37 ne dell'apparecchio, leggere le istruzioni di montaggio e Simboli utilizzati ..............37 per l'uso! Avvertenze di sicurezza ........... -
Page 38: Avvertenze Di Sicurezza
Non mettere in funzione gli all'apparecchio. Rivolgersi al proprio rivenditore o al servizio di apparecchi elettrici in prossimità di liquidi o gas infiammabili. assistenza Truma (vedere il libretto di assistenza o il sito www.truma.com). Protezione da scossa elettrica... -
Page 39: Scopo D'impiego
L'apparecchio è stato sviluppato per il collegamento di moduli – batterie da 6 V o accumulatori al piombo da 6 V, fotovoltaici. Utilizzare solo moduli adatti, ad es. Truma SM 23. – batterie non ricaricabili, Rispettare i valori massimi di corrente assorbita e tensione. Il –... -
Page 40: Elementi Dell'apparecchio
Elementi dell'apparecchio Funzione L'apparecchio è dotato di moderna tecnologia di carica trifase a modulazione di larghezza dell'impulso. Questa tecnologia consente una potenza elevata con peso ridotto e dimensioni limitate. Grazie all'utilizzo di componenti elettronici di alta qualità, si ottiene un alto grado di efficienza. La ricarica auto- matica protegge le batterie ed evita un sovraccarico dannoso. -
Page 41: Carica
Carica Controllo della gassificazione La tensione finale di carica viene modificata in funzione della L'apparecchio dispone di una protezione elettronica da corto- profondità di scarica. Se una batteria viene azionata per lungo circuito solare, inversione di corrente e inversione di polarità. tempo senza sviluppo di gas, esiste il pericolo che si formi Solo se la batteria è... -
Page 42: Attivazione Dell'uscita Utenza Opzionale
Attivazione dell'uscita utenza opzionale Indicatore di carica Causa LED giallo (H1) spento Energia solare insufficiente. Premendo il tasto (T) si attiva l'uscita utenza. Premendo nuo- La batteria non viene caricata. vamente il tasto (T) si disattiva l'uscita utenza. LED giallo (H1) acceso La batteria viene caricata. -
Page 43: Specifiche Tecniche
Specifiche tecniche Tensioni di carica Fase di post-carica 14,4 V Le indicazioni valgono per una temperatura ambiente di 25 °C Fase di carica di 13,7 V mantenimento Valori elettrici Fase di carica principale 12,5 V Tensione di esercizio 12 V tensione di commutazione Tensione d'ingresso max. -
Page 44: Diagramma Di Carica
Indirizzo: Wernher-von-Braun-Str. 12, D-85640 Putzbrunn U[V] 2. Identificazione dell’apparecchio Modello / versione: Carica-batterie automatico ad energia solare SC 3 3. Soddisfa i requisiti delle seguenti direttive CE t[h] 3.1 Direttiva EMC 2004/108/CE Figura 2: Diagramma di carica (andamento di principio) 3.2 Sicurezza elettrica (LVD) 2006/95/CE... -
Page 45: Dichiarazione Di Garanzia Del Costruttore Truma
– in seguito all’utilizzo negli apparecchi di parti di ricambio non origi- nali Truma, In caso di guasti rivolgersi al centro di assistenza Truma o a un nostro – nei sistemi di regolazione della pressione del gas, per danni causati partner di assistenza autorizzato (vedere il libretto di assistenza Truma da corpi estranei (ad es. -
Page 46: Istruzioni Di Montaggio
L'apparecchio è stato sviluppato per il collegamento di moduli Il vano di montaggio dell'apparecchio deve essere provvisto in fotovoltaici. Utilizzare solo moduli adatti, ad es. Truma SM 23. alto e lateralmente di aperture di ventilazione corrispondenti a Rispettare i valori massimi di corrente assorbita e tensione. -
Page 47: Collegamento
(circa 18 V). Contattare il proprio rivenditore per il set di cavi accessori Truma. Rispettare la sequenza di collegamento. Collegare le utenze della roulotte (figura A, a) direttamente alla bat- teria. - Page 48 Having the equipment model and the factory number ready (see type plate) will speed up processing. Veuillez vous adresser au centre de service clientèle de Truma ou à un de nos services après-vente agréés en cas de dysfonctionnements (consultez votre livret de service Truma ou www.truma.com).
Need help?
Do you have a question about the SC 3 and is the answer not in the manual?
Questions and answers