Table of Contents
Advertisement
Quick Links
Advertisement
Table of Contents

Related Manuals for DGTEC DG-FV500PVR


Summary of Contents for DGTEC DG-FV500PVR
-
Page 2: Table Of Contents
INDEX INDEX ......................1 HELP PROVIDED ..................2 SAFETY AND INSTRUCTIONS..............3 ASSEMBLY AND PARTS LIST ..............4 1.1 Parts List ....................4 1.2 Front Panel....................4 1.3 Rear Panel ....................5 1.4 Remote Control Unit................6 1.5 Installing the batteries in the remote control..........7 1.6 Connecting to Equipment ................ -
Page 3: Help Provided
NEED HELP? If you are experiencing difficulty operating this product or require set up assistance please contact the DGTEC Service Centre. The call is free from anywhere in Australia. Our operators will assist you in plain English without the technical jargon:... -
Page 4: Safety And Instructions
SAFETY AND INSTRUCTIONS CAUTION: TO PREVENT ELECTRICAL SHOCK, DO NOT REMOVE THE COVER. THERE ARE NO USER SERVICEABLE PARTS INSIDE. REFER SERVICING TO QUALIFIED SERVICE PERSONNEL. This symbol indicates that high voltage is present inside. It is dangerous to make contact with any part inside the case. This symbol alerts you of important information concerning operation and maintenance of this product. -
Page 5: Assembly And Parts List
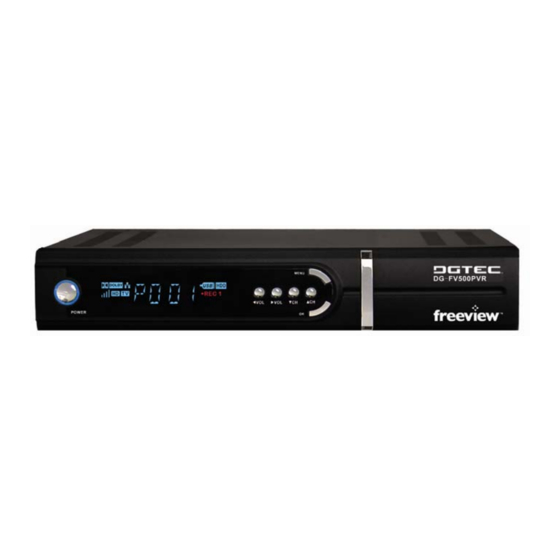
ASSEMBLY AND PARTS LIST 1.1 Parts List Please make sure the following accessories are supplied with the STB. ① High Definition Personal Video Recorder ② Remote Control ③ RCA Video/Audio Cable ④ Batteries (AAA Size) ⑤ User Manual 1.2 Front Panel 1. -
Page 6: Rear Panel
Connects to an External Audio Amplifier with S/PDIF /Optical Digital Audio. 6. USB USB port is used for viewing external files on a memory stick, and for possible software upgrades. (to be advised by DGTEC technician) 7. HDMI Connector Connects High-Definition Multimedia output to HD Monitors (HDMI Type). -
Page 7: Remote Control Unit
ASSEMBLY AND PARTS LIST 1.4 Remote Control Unit All features of the receiver can be controlled with the remote control. POWER: Press to switch between operation and standby mode. 2. MUTE: Press to mute the sound. 3. REC: Press to make a spontaneous Recording. -
Page 8: Installing The Batteries In The Remote Control
ASSEMBLY AND PARTS LIST 1.5 Installing the batteries in the remote control 1. Press down on the retaining catch on the lid of the battery recess on the remote control and remove the lid. 2. Insert two AAA batteries into the recess. 3. -
Page 9: Connecting To Equipment
ASSEMBLY AND PARTS LIST 1.6 Connecting to Equipment 1. Connect your TV antenna cable to the “IN1” jack on the back of the STB using coaxial RF cable. Loop the small loop cable diagonally from IN2 to OUT1. Option 1-YPbPr connection (Cable not supplied) 2. - Page 10 ASSEMBLY AND PARTS LIST Option 3- Video connection 4. Connect the yellow video lead and AUDIO L/R (white and red lead) out connectors on the STB to the AV IN on the back of the TV. Optional: Connect Optical S/PDIF out connector on the HDTV STB to the Audio-Amplifier using optical cable.
-
Page 11: Getting Started
GETTING STARTED First time installation Note: Be sure to have the power cord connected to the mains. After all the connections have been established, switch on your TV. If you are using the STB for the first time or restored to factory default, a First Time Installation menu will be displayed to guide you through the scanning of channels. - Page 12 GETTING STARTED View program info ▲ 1. Press INFO key to view the information of current program. Press the for Now and Next information. Please note there are colored prompts on the right for further features. 2. Press EXIT to exit view. Subtitle Press CC key to switch subtitle on/off.
-
Page 13: Menu Information
INSTRUCTIONS 2.1 MENU INFORMATION < Starting up for the First Time > 1. Turn on your TV and receiver. 2. Channels should already be scanned if you followed the quick start wizard. 3. All fields are already set for you. Press MENU key the main menu will be displayed. -
Page 14: Favorites
INSTRUCTIONS 2.2 FAVORITES ▲ ▼ ◄ ► Press the key to choose “FAVORITES” in the main menu, then press OK key to enter the FAVORITES menu. ▲ ▼ You can edit the TV list or radio list in this menu. Choose the sub-menu by keys, then press OK to enter the channel list. -
Page 15: Standby
INSTRUCTIONS 2.3 STANDBY ▲ ▼ ◄ ► Press the keys to choose “STANDBY” in the main menu, then press OK key, the STB will enter into the standby mode. You can turn back to the operation mode by pressing POWER key. 2.4 PARENTAL CONTROL ▲... -
Page 16: Timers
INSTRUCTIONS Parental rating ▲ ▼ “OFF, P, C, G, PG, M, MA, AV, R” will display when you press the keys. It represents different locking levels. Lock TV channels (The default password is 0000) ▲ ▼ You can press the keys to select the TV channel you want to lock, you can press GREEN key to lock the selected TV channel. - Page 17 INSTRUCTIONS < Creating a recording timer in normal mode> You can create the recording timer using another method, the process is mentioned ▼ below: Press key to enter the channel list, and then select the channel which ◄ ► you want to record using keys.
-
Page 18: Epg
INSTRUCTIONS 2.6 EPG EPG shows the event information on current and all channels. EPG overview will provide you 8 days worth of information on all networks. Please note that EPG does take some time to load due to large amounts of information being processed. ▲... -
Page 19: Set-Up
INSTRUCTIONS Press the OK key on a recorded file to view the content. The SKIP LIST page will appear. If you have recorded more then 1 programme in the 1 file, you can access any of the recordings as listed. Alternatively you can choose start from the beginning to view content from the start. -
Page 20: Usb
INSTRUCTIONS For a manual scan, scroll to the desired frequency, and press the GREEN key, the unit will then detect signals for that particular frequency. The YELLOW button (Tune), is used to inform the user if signal is present on a particular frequency. -
Page 21: Settings
INSTRUCTIONS Use the navigation keys to highlight the file of your choice and press the OK key to preview. Please note that USB feature will only display JPEG images and play MP3 files. Other files may not be compatible. You can enter the options by pressing the RED key. In the options menu, you can create directory, copy selection or remove selection. - Page 22 INSTRUCTIONS Setting-menu consists of 9 submenus as follow. ♦ Language: You can set the language of the menu, audio and activate subtitles. ♦ Timer: Set the program reminder, record reminder and the time zone. ♦ Banner: Set the display duration of the menu. ♦...
- Page 23 INSTRUCTIONS < Set the parameters of the system in Simple mode> You can set the parameters of the system using another method, the process as below: ◄ Press key to enter the shortcuts of AUDIO, VIDEO FORMAT, SUBTITLE and ◄ ►...
-
Page 24: Teletext
INSTRUCTIONS 2.11 TELETEXT If you have selected a channel that contains teletext data, you can press TEXT button to open the OSD Teletext. <TV/Radio and favorite List in Simple mode> ▼ ◄ ► If you press key on the remote controller, the channel list is displayed. Use key to select the channel, press OK then you can watch the channel your choice. -
Page 25: Ps1 Faq
Ps1 FAQ What is a HD PVR/STB? A HD PVR/STB is a device that receives and decodes high definition TV signals. A HD PVR/STB is generally connected to televisions that are HD ready. Can I connect my HD PVR/STB to a CRT television? Yes this HD PVR/STB can be connected to a CRT television, as long as it supports the appropriate connections. -
Page 26: Ps2 Trouble Shooting
TROUBLE SHOOTING Ps2 Trouble Shooting Check the STB according to the procedures detailed below. If the STB does not work properly after conducting Problem Solving Protocols, please contact the technical department. This unit contains dangerous voltages, never remove the cover. When not in use for a long period, it is recommended that you unplug the unit from the main power socket. -
Page 27: Ps3 Specification
SPECIFICATION Ps3 Specification Section Detailed Section Explanation Input Frequency 49 ~ 861MHz UHF& VHF Input Impedance 75 Ohm Channel Bandwidth 6M, 7M & 8MHz Input Signal OFDM Spectrum 2K/8K-carrier hierarchical Modulation Mode QPSK, 16QAM, 64QAM Guard Interval Modes 1/4, 1/8, 1/16, 1/32 Code Modes 1/2, 2/3, 3/4, 5/6, 7/8 Algorithm...
Need help?
Do you have a question about the DG-FV500PVR and is the answer not in the manual?
Questions and answers