Table of Contents
Advertisement
Quick Links
Product Guide
Overview
Use Cases
Getting Started
Vehicle Configuration
Live Map
Vehicle Trips
Zones
Users
Groups
Messaging
Routing
Dispatch
Exceptions
Auxiliary Rules
Drivers
NFC Driver ID
Reports
Vehicle Maintenance
System Options
Engine Data
Software Development Kit (SDK)
Hardware Features
Software Features
What's New
1
Advertisement
Table of Contents

Related Manuals for Geotab GO6


Summary of Contents for Geotab GO6
- Page 1 Product Guide Overview Use Cases Getting Started Vehicle Configuration Live Map Vehicle Trips Zones Users Groups Messaging Routing Dispatch Exceptions Auxiliary Rules Drivers NFC Driver ID Reports Vehicle Maintenance System Options Engine Data Software Development Kit (SDK) Hardware Features Software Features What's New...
-
Page 2: Customer Support
Overview Introducing Geotab For over a decade, Geotab has been a proven industry leader in the area of GPS fleet management and vehicle tracking. Fortune 500 companies, including 30% of the top ten fleet and 10% of the top 100 fleets in North America, rely on Geotab’s technology. Since Geotab provides end-to-end, hardware and software solutions that are highly scalable, everyone from enterprise organizations to small-to-medium sized firms are active users. - Page 3 Geotab’s rich breadcrumb trail tracking is a patented technology that gives you the most advanced insights into your driver’s on-road performance. Geotab stores your trips history information, letting you re-create any of your trips for any date specified. The reports provide in-depth views for various events, such as time spent driving versus at customer locations, helping you identify accurate work time allocations.
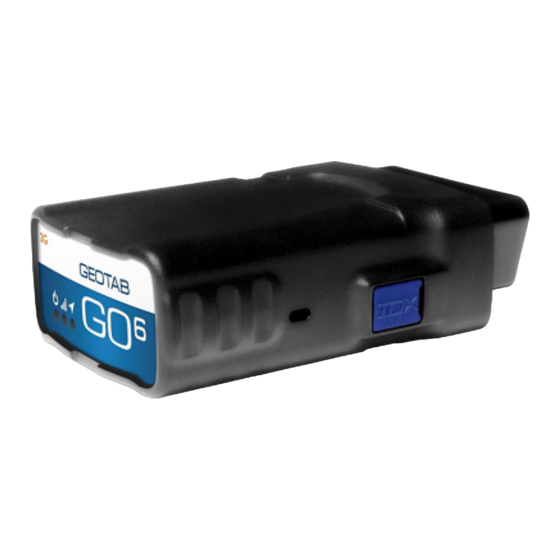
- Page 4 Geotab GO Device It all starts in the vehicle. The Geotab GO Device is a small form-factor device that simply plugs directly into your vehicle’s OBD port. The installation process takes seconds, and doesn't require any special tools. Recording high quality information and making it simple to understand and act upon real-time events is what Geotab is all about.
- Page 5 ● All messages are verified and color coded ● Driver information and location is displayed on a map Note: Geotab works with Garmin devices (refer to this link for all recommended Garmin devices https://geotab.zendesk.com/entries/23383898-List-of-Compatible-Garmin-s) which are compatible with the FMI 45 and FMI 15 interface cable.
-
Page 6: Use Cases
Use Cases UPS Telematics Initiative Reduces Fuel Use Published: June 17 2011, Automotive Fleet UPS plans to have 32,000 vehicles in the U.S. and Canada equipped with telematics technology by year end. When a UPS driver returns to a package center at the end of the work day, the data (generated throughout the workday) is uploaded to a computer and then transmitted to UPS’... - Page 7 Using the Geotab GO Device, the GPS tracking system uses a patented trip recording method as well as Driver ID option that monitors driving performance by individual...
-
Page 8: Getting Started
Focusing on the exceptions has certainly worked for Frito-Lay. Using the Geotab GO Device, the snack provider has created data “scorecards” that are helping O’Connell identify vehicles that are not meeting idle and out-of-route mile goals, the two metrics the company is measuring to drive down fuel costs. -
Page 9: Preparing For Installation
GO6. 2. Align the receiver end of the Geotab GO6 Device with the engine diagnostic port and simply push in place, ensuring that the device is secure. You will hear a number of... - Page 10 4. Once all three lights have come on, secure your Geotab GO6 Device using the supplied Geotab zip tie to prevent tampering. Verify your installation 1. Your Geotab GO Device serial number, which can be found at the bottom of the unit is required for this step. Navigate to the web page http://myinstall.geotab.com here ou will be asked to fill in your name, email address and the device serial number.
-
Page 11: First Steps
Once logged in, navigate to Vehicles from the left hand side options. Now, select Add and then Add Vehicle. You will be asked to name your vehicle and for your Geotab GO Device serial number to pair them together. We recommend a vehicle name such as “Make Model Year”... -
Page 12: System Requirements
● Android 3.0 or later (Android 2.1 or later when using Firefox for Android) ● Touch screen displays are supported Note: Due to the volume of data presented on Geotab as a result of maps and reports, we also recommend you have access to a high speed internet connection. -
Page 13: Vehicle Configuration
Once logged in, navigate to Vehicles on the left side menu. Select Add and then Add Vehicle. Enter your Geotab GO Device serial number and your vehicle name to pair them together. We recommend a vehicle name such as “Make Model Year” or if you prefer, the driver’s name. - Page 14 Additionally, use the comments field to attach information specific to this vehicle such as it’s primary location, make and model, etc. Your Geotab GO Device will attempt to automatically determine information about the vehicle it is installed in. Fields for your vehicle’s VIN, odometer, engine hours and license plate.
- Page 15 Groups To help organize your fleet, you can create groups to separate the vehicles into different areas. When you have multiple user accounts accessing MyGeotab, users can have access to all, or individual groups, this can be used for vehicle types, regions, managers or…..
- Page 16 Custom parameters Geotab supports using specially formatted XML coding to fully customize the behavior of the in-vehicle tracking device. Using custom parameters is used only in advanced usage situations. If you require additional functionality from the device, please contact...
- Page 17 Live Maps Overview Maps allow you to see your vehicles live for current location and trips. To view the current location of your vehicles on a map, select Map from the left side menu. Select your vehicle using the search bar. The current position of your vehicle will be displayed on the map.
- Page 18 The custom maps you define are based on the ESRI shapefile format. For more information about the file format refer to the Custom Maps Integration document or contact your authorized Geotab reseller. You can integrate your own custom maps which are based on OpenLayers such as: ● ArcGIS REST servers ●...
- Page 19 Tip: Select View->Views->Save this View to save specific map views to return to areas of interest quickly. In the example below Bay Area, SF is added as a custom view. When you return to the live map, you can now select a preconfigured view from the top menu.
- Page 20 Displaying zones When viewing the current location of your vehicle(s), you can optionally display informational layers on top of the map. Select View, then from the list select Show/Hide Zones to display any custom zones you have created which are currently in view. Repeat these steps to hide zones.
-
Page 21: Real Time Tracking
Real time tracking You can select multiple vehicles at a time and all will be displayed on the map. Geotab will automatically adjust the zoom level to include your selection in view. To find more information about the current location of a vehicle, hover over its location and an information popup will appear with the device name and trip status. - Page 22 By selecting an area on the map that isn’t the location of a vehicle or another layer, the following options are available: ● Add Zone: Create a zone at this location. The zone will be an editable square centered on your selection.
- Page 23 Filter When viewing the map or other components of your fleet you can easily choose to only view certain groups of vehicles at a time. Use the filter box located in the top left corner of the screen to select which vehicles are shown. Note: The filter is only visible after vehicles have been added to one or more groups.
- Page 24 MyGeotab. Note: Due to differences in vehicle manufacturers detecting the vehicle ignition may be unavailable. If this is the case, your Geotab GO Device will attempt to detect the engine running based on changes to its current location.
- Page 25 Note: Zone names will be used in place of addresses after you have created zones for customers locations, workplaces or other places of interest. If the location is a zone then it will be underlined in the corresponding color to denote the type of the zone: See list above which shows Yellow and Blue lines for specified zones.
- Page 26 Each trip is shown using a different color. The colored bar to the left of the trip data indicates the color of that trip on the map. An automatic legend is shown at the bottom of the map which denotes important events along the trips. Exceptions and the stops which occurred during the trip are shown on the map.
-
Page 27: Trip Summary
When viewing trips on a map, the left hand side options will be automatically collapsed to allow for more room to view the map. To re-open the options menu, select the arrow located to the far left hand edge of the view. Trip summary From within the Trips History view, selecting the Summary button will show you summarized trip information throughout your fleet. - Page 28 Note: Hover your mouse over the pie chart to examine where the driver is spending their time. Hover your mouse over the green distance line of each driver to see the percentage of distance compared to the longest distance traveled. You can examine the idle time compared to the overall drive time by hovering over the clock icon.
-
Page 29: Creating A New Zone
Zones Overview A zone is a virtual perimeter around a real-world area of interest. You can use them to denote where places are such as your office, customers, workplaces, airports, gas stations, entire states and provinces or people’s homes. When combined with exception reporting, zones become a critical component for analyzing the behavior of your fleet. - Page 30 To create a zone, select the Add Zone button. You can create an unlimited number of zones and they can be created individually or by importing a list you prepared in a spreadsheet application. To define the boundary of your new zone, first select a starting point on the map. Continue creating the boundary by selecting points along its perimeter.
- Page 31 Customizing a zone After creating a zone, the following screen is shown. From here you can give the new zone a name. This name will be used in reports and on the map. Many of the fields for the new zone will be automatically set to an initial value. However, you may want to specify your own customizations such as which group the zone should belong to.
- Page 32 ● Sound an in-vehicle alert to a driver who has left work early ● Notify your shipping and receiving department when a truck is soon to arrive Geotab recognizes stops made within zones, such as customer areas, and can also indicate the amount of time spent at these locations.
- Page 33 Modifying an existing zone To change the shape of a zone, find the zone on the map or search for it in the zones list. Selecting a zone on the map and the menu below will be shown. Select Change zone shape to modify the boundary by moving or removing individual points.
-
Page 34: Removing Zones
Removing zones Zones can be removed from the database by selecting a zone and then selecting Remove. Once the zone is removed, your reports which previously displayed the zone name will instead show the address if available and you will no longer be able to see the zone on the map. - Page 35 Importing zones You can use a spreadsheet application to prepare a list of zones which can be imported to your account. This saves time when you have a large number of zones to be created. When addresses for your zones are available use the following format to create a spreadsheet in Excel: If you are creating zones in a remote area where street addresses are unavailable, you can use the following format which utilizes geographical coordinates instead:...
-
Page 36: Creating A Route
You can optionally allow Geotab to optimize the order in which a driver should visit each zone so that fuel consumption is kept to a minimum. -
Page 37: Route Plans
Note: The order in which zones are added to the route is not important as the route can be optimized after all zones are added to ensure that the least distance is traveled. Take a moment to customize your route by adding a description and optional comment. For example, describe the customer’s which will be visited or the main roads that should be driven. - Page 38 Note: Geotab offers SDK samples to assist you with this process. Your stop locations must be entered as unique zones in your Geotab account. After the route has been completed, a report can be generated using the Planned vs. Actual Route Report to highlight stops made out of order, missed stops, travel time and extra time spent in zones along the route.
-
Page 39: Regional Settings
Users Overview Geotab is used by people all around the world. You can customize your account to specify your local date and time format, measurement units, local time zone and language. To change your own personal preferences select your account options from the top right hand corner of the screen. -
Page 40: Map Settings
Map settings Geotab gives you the ability to choose which map provider to use. We offer OpenStreetmaps by default, additional choices include Google Maps and Bing Maps. In some areas one map provider’s imagery may be more recent than another. For that reason, you can change your default view using the options below. -
Page 41: User Interface
User interface You can change which screen is initially shown when you sign in to Geotab by selecting from the default page at start-up list below. Newly created users will be shown the Getting Started page, and after becoming accustomed to using Geotab, selecting a different page may be more beneficial to more advanced users. - Page 42 This screen is composed of three tabs: ● User (User/Employee settings and assigned groups) ● Driver (Driver ID settings) ● Options (User preferences) Modifying multiple users If you want to make the same changes to a number of user accounts, rather than performing them all individually you can use the drop down list in the top right to select multiple users at a time to make account wide changes.
- Page 43 Security clearances You can configure user-level security which ensures certain users have access to limited groups or only specific Geotab features. This process can help to simplify the workflow for a new user by hiding unused advanced features. To add or change security clearances select Administration from the left hand side menu, then select Users from the sub-menu.
-
Page 45: Managing Groups
● Reports (Used to denote which users receive the available emailed reports) ● Vocation (Used to organize assets for reporting sales, service, delivery, etc) Groups can be placed inside other groups. This allows your Geotab account to be set up to match your organization’s hierarchy. -
Page 46: Sending A Text Message
Note: A Garmin device can be added to a Geotab GO6 or Geotab GO4v3 Device. Not every Garmin model works with of all the features Geotab offers. Contact your authorized reseller to purchase the necessary hardware. - Page 47 From the messaging hub, select New Message from the top menu. A message can be sent to a single driver, or a group. 1. Specify recipients: Select one or multiple recipients by either typing their name in the text box or by navigating your user list after selecting the blue arrow to the right.
-
Page 48: Reviewing Sent Messages
Reviewing sent messages After a text message has been sent, a record displaying the user that sent the message and the date and time sent is kept under the Audit Log with the label Send GPS Text Message. Detailed information about sent messages including the date and time of delivery and the driver’s response if one has been received is available from the messaging hub. - Page 49 Once you the statuses are saved, the driver’s in-vehicle Garmin will be updated. They can set their current status by selecting Geotab and then Quick Message. When viewing the map, driver status will be displayed in the information popup when hovering over their...
- Page 50 Garmin equipped vehicles. Note: A Garmin device can be added to a Geotab GO6 or Geotab GO4v3 Device. Not every Garmin model works with of all the features Geotab offers. Contact your authorized reseller to purchase the necessary hardware.
- Page 51 Dispatching routes to vehicles You can send entire routes to vehicles to dispatch a sequence destinations the driver should reach. To send a route to a vehicle, select Zones & Messages from the left hand side menu. Select Routes from the sub-menu, and then select the Routes button. Find the desired route by searching those available and select it to continue.
- Page 52 Geotab offers a robust suite of built in exceptions separated into easy to understand categories. In addition to these, you can create an unlimited number of custom rules which combine different various conditions to suit your needs.
- Page 54 Geotab GO Device. This feedback allows early detection and response to driver activity which greatly increases the road safety of your drivers and others on the road with them.
- Page 55 Productivity exceptions Geotab is consistently raising the bar when it comes to driver productivity tracking. You can be notifications of exceptions such as late arrival, early departure, idling, unauthorized home or customer stops, excessive office time, long lunch and even long stops during work hours.
- Page 56 Fleet exceptions Thousands of vehicles equipped with Geotab technology have realized significant cost savings benefits. Geotab offers the most extensive metrics available to help you reduce fuel consumption. We help you be proactive in keeping your fuel costs down by managing driver behaviors such as excessive speeding, idling and detecting engine issues as before they become costly problems.
- Page 57 Note: Auxiliary Rules were formerly known as Auxiliary Groups. As an example, assume your Geotab GO Device has auxiliary 1 connected to your driver side door and is activated whenever it is opened. In MyGeotab, you would now configure an auxiliary rule named “Door Open”...
- Page 58 6. Click the “+” button under Auxiliaries group 7. Name the group as required, for this example we will use “Salt Truck”, click save Auxiliary Rules Navigate to Rules & Groups from the left hand side menu, then select Rules from the sub-menu.
- Page 59 Because Aux Rules are grouped, you may need to give users access to report on Aux rules. Note that given a user access to an Aux group in their “Data Scope” may result in them getting access to vehicles you do not want them to see. For this reason you can give a user access to the aux group in their reporting scope.
- Page 60 A notification can be displayed in the following ways: ● Email to one or more people ● An alert displayed on Geotab ● The driver can be alerted by an audible in vehicle alarm ● Third-party systems can use additional means such as SMS...
-
Page 61: Email Templates
Email templates The information included in the email notifications is fully customizable using simple to use templates. Examples of customizing the notifications sent out are: ● Compact version for mobile devices to conserve data usage on mobile data plans ● Include a contact phone number for emergency situations ●... - Page 62 Drivers Overview Geotab is designed with next-generation safety technology allowing you to gain incredible insight into your driver’s on-road behavior using informative management reports. Risk and safety scores are assigned to individual drivers and are based on various key indicators such as speeding, seat belt usage, harsh braking, sharp corner turns, over acceleration and after-hours vehicle use.
- Page 63 ● NAVTEQ Maps ● Open Street Maps (OSM) Note: Posted road speed is only available to customers who use the hosted version of Geotab and is supported in the U.S. and Canada. Posted road speeds can change frequently and may contain inaccuracies. You can update the posted road speed of any road by clicking on a road from the live map.
- Page 64 ID keyfob must be touched to the reader before the vehicle will start. Understanding drivers When using Geotab, a Driver is special type of user account that is configured by your administrator. A driver can be issued a physical driver key (NFC or GO key) which is then used to identify that specific driver when in a vehicle.
- Page 65 ● GO key: Legacy driver identification which is inserted to the reader. GO keys are designed for Geotab GO2 and GO4 devices and do not have a visible serial number. Using driver identification When a driver enters a vehicle equipped with a driver identification system they should first use their driver key to identify themselves before starting the engine.
- Page 66 GO key assignment The Assign Key wizard can be used with the GO key reader to prepare a GO key and automatically assign its serial number to a driver’s user account. Manually assigning drivers to vehicles Performing the assignment yourself of drivers to vehicles is useful when you are not using vehicles equipped with driver identification systems.
- Page 67 A small window is displayed, select the driver by name from the drop down list. If this driver will be the default driver, use the Yes/No switch to automatically associate them with this vehicle in the future. When finished, select Apply changes.
-
Page 68: Running Reports
Reports Overview Understanding your fleet behaviors is made simple with Geotab. Report on activities such as deliveries per driver, average fuel consumption, drivers who speed and most often late to arrive and early to depart. There are over 30 standard reports to choose from and the ability create limitless custom reports using Microsoft Excel. -
Page 69: Customizing Reports
● Schedule reports to be emailed to users Dashboards Geotab has many different options for what you will initially see when signing in. One of those options is the dashboard; a graphical view of your reports all on one page. The dashboard is meant to highlight critical events and behaviors throughout your entire fleet at a single glance. - Page 70 Email limitations In order to preserve the quality of service when using Geotab there are a number of limitations applied to the number of emails which can be sent at a time, and the size of each individual message.
-
Page 71: Vehicle Maintenance
Insurance discounts Did you know that Geotab’s fleet management system can help you lower your insurance rates? Insurance premiums can increase as a result of accidents, speeding tickets, and other unexpected incidents. A growing number of insurance providers offer usage based discounts, contact your insurance provider today to find out if you qualify. - Page 72 To create a new reminder select Setup Reminders, a new screen list all your existing reminder rules. When creating your new rule, choose from the following criteria to notify you or others: ● A duration of time has elapsed ● The vehicle has been driven a certain mileage ●...
-
Page 73: Changing System Options
System Options Overview Geotab offers an intuitive and flexible interface to manage your fleet. For system administrators, there are a number of preferences available which can be applied to your entire fleet of vehicles and the users who manage them. -
Page 74: Engine Data
Engine Data Overview Your Geotab GO Device is designed to collect and respond to status information in your vehicle. The port which it is installed in is traditionally used for on-board diagnostics from the vehicle’s manufacturer. -
Page 75: Understanding Your Vehicle
Note: If when installing your Geotab GO Device you experience issues such as power loss, the vehicle stalls or engine lights are displayed you may have an incompatible vehicle. Please remove the Geotab GO Device and contact your authorized Geotab reseller. -
Page 76: Vehicle Odometer
Current vehicle support Use the following charts as a guide as the compatibility of your vehicles with certain features. For the most up to date information please contact your authorized Geotab reseller. Vehicle odometer In most cases, your Geotab GO Device automatically records your odometer value. -
Page 77: Software Development Kit (Sdk)
(SDK). With the Geotab SDK you can create new reports, schedule data requests to import to your own software or even build entire applications centered around your own fleet. You will be able to get started quickly and find help when you need it easily with dedicated and responsive support channels which assist you along the way. - Page 78 Start developing today using our comprehensive getting started guides, sample projects, database schemas and more. Get involved, ask questions and have them answered by dedicated support staff focused only on Geotab products. Read the Geotab SDK documentation at http://goo.gl/CFpUD which includes links to download the latest SDK and samples.
-
Page 79: Hardware Features
Hardware features Standard Features Opti In cab Feedb PTO 3rd Trip driver ack on party expans storag touch Feedbac server integrat rule 2000 ✓ ✓ ✓ ✓ ✓ ✓ miles 2000 ✓ ✓ ✓ ✓ ✓ miles 2000 ✓ ✓ ✓... - Page 80 CDMA Iridi RF local HSPA download ✓ ✓ ✓ ✓ ✓ ✓ ✓ ✓ ✓ ✓ ✓ ✓ ✓ ✓ Safety & Compliance Accident Backup Driver rating Hours of DVIR IFTA miles reconstruction detect Service Garmin ✓ ✓ ✓ ✓ ✓...
- Page 81 ○ 3rd Parties with devices like weigh scales can integrate through a free SDK ○ Geotab has an open protocol that any 3rd party can send serial data to the GO device. That data is automatically sent to the Checkmate database and tagged with location and date and time ●...
- Page 82 VIN ○ Support for extra GM information ● Remote Scan Tool ○ This allows Geotab support to remotely communicate directly with the engine computer. This is useful for adding support for new vehicle types remotely and troubleshooting any issues ●...
- Page 83 ● Iridium ○ Satellite system allowing coverage anywhere in the world ○ Works with GSM/3G/WIFI/CDMA when it has coverage but allows pinging, stop detect and panic when out of cell coverage ○ Additional hardware and a monthly charge required ● WIFI ○...
-
Page 84: Upgrading From Previous Versions
Generic engine rules As of the July 2012 firmware update for Geotab GO Devices, the vehicle will now use a generic engine ruleset for engine diagnostics. Previously, diagnostics were specific to every type of engine source, for example, fuel level for both J1708 and J1939. Now, there are generic and aggregated diagnostics which makes creating rules and generating reports for a fleet with multiple engine types much easier. - Page 85 2. Add a generic diagnostic by using the Add Engine button then add it to the conditions. 3. Open the advanced rule conditions by selecting the script icon.
- Page 86 4. Remove everything except the content of the second term. As an example, you would keep the following: IsValueLessThan[value=50%]( FilterStatusDataByDiagnostic[diagnostic=DiagnosticFuelLevelId] ): When finished, you should have a rule which looks similar to the following:...
-
Page 87: Software Features
● Get minutes per customer visit or minutes spent visiting by category. ● In an actual case study, a large company using Geotab saves 3% on labour by monitoring how much time was done doing their customers’ deliveries. ● Report the number of customer visited by driver per day ●... - Page 88 ● For asset utilization, Checkmate can tell what percentage of vehicles are not being driven over time and by region. In an actual case study, a large company using Geotab reduced their unutilized assets to 4% from a the industry standard of 10% or more.
- Page 89 ● Fault code knowledgebase ○ Optional integration with Asset Management System to provide repair data ● Best repair practices ○ Data provides repair information ○ Reduced unneeded parts expense ● Condition exceptions and threshold alerts based on like vehicles (peers) ●...
-
Page 90: What's New
What’s New March 2014 ● Odometer reconciliation -- see section Vehicle odometer Improved vehicle selection/deselection for vehicles on live map ● Improved vehicle name display for clustered vehicles ● Added the time of last communication for currently non-communicating vehicles to ●... - Page 91 ● New web based Customer visits report. User & Drivers ● Users and Drivers now combined - allowing users to login using their phones or in- vehicle tablets to Geotab Drive. Zones ● Ability to apply settings to multiple devices, zones ●...
- Page 92 ● Vehicles list will remember filter after editing and returning, making day to day editing easier. ● Exceptions that are mostly meant for reporting can now be set to be hidden on the map. When viewing a trip with these exceptions, they won't appear in the legend or as a color on the trip.
- Page 93 mode): ● Garmin Hours of Service BETA support. ● Map context menu on vehicles: ● Historic trips show star for customer stops ● Historic trips shows address in tooltip:...
- Page 94 ● Page through more than 500 zones: ● Fixed rendering issue in map legend. ● Printing of turn by turn directions for routes. ● Click on Trip and go to the Accident and Log Details for that trip. ● Auto scroll to the trip you select. If you make a selection in a very long list of trips, it will ensure that selected trip scrolls into view.
- Page 95 ● Create routes on a map and edit the routes by dragging, adding or removing points Support for new device features ● IOX (Input Output Expander) - a versatile expansion of the GO6 products using simple plug in cable. Supports Garmin, Iridium, IO, 3rd Party expanders ●...
- Page 96 ● New Rules Wizard with one click best practice rules ● Creating of advanced rules now Web based UI editor allowing to create more powerful rules ● New exception rules allowing gps and engine conditions to be combined. This allows rules such as those requiring a seatbelt to be worn when the vehicle moves ●...
Need help?
Do you have a question about the GO6 and is the answer not in the manual?
Questions and answers