movinglife ATTO Owner's Manual
Hide thumbs
Also See for ATTO:
- Owner's manual (98 pages) ,
- Owner's manual (89 pages) ,
- Owner's manual (41 pages)

Related Manuals for movinglife ATTO


Summary of Contents for movinglife ATTO
- Page 1 EVALUATION MANUAL SHORT VERSION OF OWNERS MANUAL FOR EVALUATION PURPOSES DO NOT USE THIS DOCUMENT AS OWNER’S MANUAL movinglife.com...
- Page 2 WELCOME! DO NOT USE THIS DOCUMENT AS OWNER’S MANUAL...
- Page 3 WELCOME! WELCOME! This is a short version of ATTO user manual and intended for potential users who are interested to evaluate how ATTO is used and what is required from them in order to use ATTO. The Table of content on the following page is showing real content and number of pages of the full Owner’s manual provided in hardcopy to ATTO users.
- Page 4 TABLE OF CONTENT TABLE OF CONTENT DO NOT USE THIS DOCUMENT AS OWNER’S MANUAL...
-
Page 5: Intended Users
The intended user of ATTO is the occupant who will be driving it and who may be assisted by an assistant Indications for Use... - Page 6 ATTONOMY ATTONOMY DO NOT USE THIS DOCUMENT AS OWNER’S MANUAL...
- Page 7 ATTONOMY Figure 1 ATTO in trolley mode Figure 2 ATTO in driving mode DO NOT USE THIS DOCUMENT AS OWNER’S MANUAL...
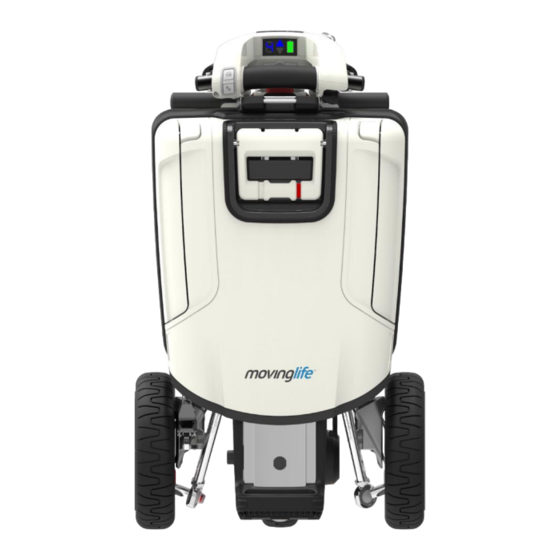
- Page 8 ATTONOMY Figure 3 – More ATTO parts DO NOT USE THIS DOCUMENT AS OWNER’S MANUAL...
-
Page 9: Operating Atto
Opening 1. Make sure your ATTO is on flat ground before ATTO is very easy to operate; it requires no special skills opening. Make sure you have clearance of 2 meters and can be learned by following the steps described in (7 feet) from the side of the back wheels. - Page 10 OPERATING ATTO Figure 5 Figure 7 4. Press the rod button and tilt it away from the main 6. Tilt ATTO toward the rod until the front wheel ATTO body (see Figure 6). touches the ground (see Figure 8). Figure 6 Figure 8 5.
- Page 11 (see Figure 11). Figure 9 Figure 11 8. Gently move the handle down until ATTO is flat as 10. Lock the rod in upright position by pushing the shown in Figure 9 (see Figure 10). front lever down until it clicks and locks in place (see Figure 12).
- Page 12 OPERATING ATTO Figure 12 11. Place one hand on the tiller and with the other hand release the secure lever of the back handle and bring the handle to upright position at 90 degrees (see Figure 13). Figure 13 DO NOT USE THIS DOCUMENT AS OWNER’S MANUAL...
- Page 13 OPERATING ATTO Using the handle, pull the back of the chair backwards 13. Open both sides of the handle bar (see Figure 17). until it clicks and locks in place (see Figure 14). Figure 16 Figure 14 12. Continue using the handle for pulling up the chair Adjusting for maximum comfort until it clicks and locks in place (see Figure 15).
- Page 14 Figure 17 Comfort adjustments Figure 18 Driving Console height lever Adjusting Driving Console angle ATTO’s Driving Console can be adjusted to your comfort in a variety of angels. To adjust the Driving Console you should first be seated on your mobility scooter:...
-
Page 15: Seat Height Adjustment
(see Figure needed: 19). 1. ATTO has to be in opened position in order to 2. Adjust the Driving Console angel so you can reach adjust seat height. Lift the seat to upright position,... -
Page 16: Tiller Angle Adjustment
(see Figure 21). need a 4 mm Allen wrench (hex key). 1. ATTO has to be in the opened position in order to adjust the tiller angle. Once opened, locate and release the two Alan (hex) screws shown in Figure... - Page 17 Driving Console below the display panel. To operating your mobility scooter while driving. turn ATTO on press and hold the button until ATTO starts. B. The two buttons on the sides of the ON/OFF switch marked with "+"...
- Page 18 Throttle Figure 25 Display Panel Battery meter – When ATTO power is ON the battery meter indicates the approximate battery charge level. As with all Li-ion batteries, the charge level indication is Figure 26 Driving Throttle accurate only when the battery is fully charged.
-
Page 19: Display Dimming
Reverse and horn buttons USB port ATTO is equipped with a general USB charging port providing up to 1.2A charging current. If an error accorded, the port is disabled and the scooter will operate as normal. The error will be reset after restarting of the scooter’s controller (power off/on... - Page 20 lock itself in the open position. To fold it back again Step away from the scooter. (only when you are about to fold ATTO), simply pull the grip away from the handlebar and down to an angle of Driving nearly 90 degrees where it will automatically lock itself in the new position.
- Page 21 Set maximum speed For you first driving sessions, make sure that your ATTO starts out on a level surface and that you will Forward driving direction (default) continue driving on a level surface. Battery charge level status See Figure 29 Typical display after turning on.
-
Page 22: Emergency Braking
OPERATING ATTO gradual stop. Note: Always bring your ATTO to a full You should know that for safety reasons ATTO's stop before changing direction from forward to speed in reverse is slower than the maximum speed reverse, or from reverse to forward. -
Page 23: Driving On Slopes
Steering in Reverse Take wide swings with your ATTO around any tight corners. If you do that, the scooter’s rear wheels Backing up your ATTO requires special attention to will follow a wide arc, not cut the corner short, and what you are doing: DO NOT USE THIS DOCUMENT AS OWNER’S MANUAL... - Page 24 Avoid sudden stops and starts. When climbing an incline, try to keep ATTO moving. If you must stop, start up again slowly, and then accelerate cautiously. When driving down an incline, do Figure 30 Maximum recommended incline angle...
-
Page 25: Turning Corners
Folding (closing) 1. Make sure ATTO is on flat ground before folding it. 2. Fold both sides of the handle bar (see Figure 33). Figure 32 Shifts center of gravity... - Page 26 OPERATING ATTO Figure 33 Figure 35 3. Release the secure lever of the back handle and 4. Push the back of the chair forwards until it clicks bring the handle to 90 degrees position. Allow the (see Figure 36). seat to slide down until it clicks in place (see Figure 34 &...
- Page 27 OPERATING ATTO In case the front lever require too much force to operate, you should apply horizontal pressure on the main handle towards the front of the scooter. This will release the pressure on the front lever and will make it easier to open.
- Page 28 (see Figure applies to putting the two halves back together. This is 41). very useful when storing ATTO in the trunk or in an airplane's overhead bins. 1. Make sure the handle bar is secured at an upright position (see Figure 42).
- Page 29 OPERATING ATTO Figure 42 Figure 43 2. Open both separation levers (see Figure 43). In 3. Hold the handle bar with one hand and press case the separation levers require too much the central release button with the second force to operate, you should apply horizontal hand until it clicks (see Figure 44).
- Page 30 OPERATING ATTO 4. Carry the front chassis from the handle bar and separate from the back chassis (see Figure 45). (1) Front handle (2) Driving console handle (3) Frame (underneath) (4) Support leg Figure 45 Lifting separated chassis ...
- Page 31 OPERATING ATTO 3. Repeat the previous step on the other chassis. 4. Lay the chassis flat and secure them with straps (or other ways) to insure safety and damage free transportation. Connecting the chassis Figure 48 1. Make sure the handle bar is secured at an upright position (see Figure 47).
- Page 32 Operating the freewheel In case the battery dies or ATTO is not driving, ATTO may be rolled manually. This will require releasing the mechanic auto-brake of the front wheel using the free wheel lever (see Figure 51).
-
Page 33: Battery And Charger
OPERATING ATTO Battery and charger ATTO's charger is a small yet smart and powerful charger with the ability to connect to any electrical grid rating 110VAC – 240VAC. It is fully approved and safe to use. When connecting the charger, connect the DC... -
Page 34: Removing The Battery
Figure 56 - battery release button and locks in place (see Figure 55). To remove the battery from ATTO, press the release button and pull the battery out (see Figure 57). DO NOT USE THIS DOCUMENT AS OWNER’S MANUAL... -
Page 35: Charging The Battery
OPERATING ATTO Charging the battery can be done on board and off board, meaning you can connect the charger when the battery is in its place inside ATTO or when it is taken out of ATTO. Charging the battery 1. Connect the charger to the electric socket. The... -
Page 36: Transporting Atto
Transport of ATTO on commercial aircraft is subject to federal regulations and airline policy. Please consult your airline prior to your flight to ensure your ATTO and its lithium-ion battery is permitted. To transport ATTO: ... -
Page 37: Specifications
When folded, ATTO is the most compact mobility Speed scooter in the world. Nevertheless, when open and ready to drive, ATTO is the largest and most ATTO’s maximum speed (limited by software) is 6.4 comfortable in its category. km/h (4 mph). Maximum driving speed can be set to one of the presets by simply clicking a button and ATTO’s dimensions, units in cm (inch):... - Page 38 4 Unique Brushless DC Motor Controller. Genuine hours (on average) to fully charge. You can charge ATTO product by Moving Life Ltd. Unique LED Display with on-board and off-board, meaning that you can (but do options of Dimming and a clear error display.
- Page 39 Moving Life Controller provide 10A Environment continues working current with maximum of 30A peak. ATTO was designed and tested according to strict water resistance IP54 standard, requiring the equipment to be Turning Radius water resistant to splash from multiple angles, for a 1.35 meters (53”).
- Page 40 SPECIFICATIONS Calibration, service and repairs of the ATTO Mobility Scooter are carried out by Moving Life Ltd personnel, or anyone authorized by Moving Life Ltd. The equipment is used in accordance with instructions for use. DO NOT USE THIS DOCUMENT AS OWNER’S MANUAL...
- Page 42 SPECIFICATIONS *RG021* ATTO Owner's Manual (RG021) Copyright © 2015 English All rights reserved RG-021-ATTO 1 OWNERS MANUAL SHORT VERSION Ver 1.0.docx DO NOT USE THIS DOCUMENT AS OWNER’S MANUAL...
Need help?
Do you have a question about the ATTO and is the answer not in the manual?
Questions and answers