movinglife ATTO Owner's Manual
Hide thumbs
Also See for ATTO:
- Owner's manual (98 pages) ,
- Owner's manual (85 pages) ,
- Owner's manual (89 pages)
Table of Contents
Advertisement
Advertisement
Table of Contents

Related Manuals for movinglife ATTO


Summary of Contents for movinglife ATTO
- Page 1 OWNER'S MANUAL movinglife.com...
- Page 2 Fout! Gebruik het tabblad Start om Heading 1 toe te passen op de tekst die u hier wilt weergeven.
- Page 3 Fout! Gebruik het tabblad Start om Heading 1 toe te passen op de tekst die u hier wilt weergeven. Intentionally left blank...
- Page 4 MovingLife mission is to produce topnotch superior quality products and services for the benefit of mobility-limited users. Made by professionals and real users, ATTO is handed to you knowing it will become not just another scooter but an extension of your body, part of your life. As such, we made an enormous effort to design and manufacture each and every one of its 500 parts with great attention and care, which we hope you will be able to appreciate.
- Page 5 Fout! Gebruik het tabblad Start om Heading 1 toe te passen op de tekst die u hier wilt weergeven. Intentionally left blank...
-
Page 6: Table Of Contents
TABLE OF CONTENT PREFACE .................................... 7 ABOUT THIS MANUAL ............................... 9 BACKGROUND ................................. 12 SAFETY ..................................... 14 ATTONOMY ..................................30 OPERATING ATTO ................................34 TRANSPORTING ATTO ..............................70 TROUBLESHOOTING ................................ 72 MAINTENANCE ................................74 SPECIFICATIONS ................................80 LIMITED WARRANTY ............................... 84... - Page 7 Fout! Gebruik het tabblad Start om Heading 1 toe te passen op de tekst die u hier wilt weergeven. Intentionally left blank...
-
Page 8: Preface
PREFACE change without notice. Trademarks Important Notice ATTO is a registered trademark of MovingLife Ltd. This document is delivered subject to the following Other company and brand, product and service names conditions and restrictions: are for identification purposes only and may be This Owner’s Manual contains proprietary information... - Page 9 The MovingLife ATTO Mobility Scooter is an indoor The intended user of ATTO is the occupant who will scooter that provides transportation for a disabled or be driving it and who may be assisted by an assistant elderly person.
-
Page 10: About This Manual
ATTO and other capabilities. The manual is aimed at providing you properties. with all the answers to questions that may arise during the operation and use of the ATTO. If you... - Page 11 – otherwise, injury or damage professional or contact MovingLife support to help may occur. you find one.
- Page 12 Fout! Gebruik het tabblad Start om Heading 1 toe te passen op de tekst die u hier wilt weergeven. ATTO users: do not service or operate this equipment without first reading and understanding this Owner's NOTE Manual. If you are unable to understand the This Owner’s Manual is compiled from the latest...
-
Page 13: Background
You should give pedestrians priority and show consideration for other ATTO. You may also want to consider having a regular pavement users, particularly those with a hearing or review of your driving skills. - Page 14 Device cleared by FDA : K160909 Subject to space availability and depending on local regulations, you may be able to travel in your ATTO on buses and trains, so long as those vehicles are constructed or adapted to carry a mobility scooter,...
-
Page 15: Safety
All those and Careful other such irregularities are dangerous to you and to others ATTO is not a toy and should not and should be avoided to be used by children, unless they prevent injury and damage. are the intended users who... - Page 16 CAUTION understanding these instructions. If you are unable to understand the warnings, cautions or FIRST TIME USER – Do not operate your ATTO for instructions, contact a healthcare professional, an the first time before reading and completely authorized MovingLife dealer or MovingLife understanding this Owner's Manual.
- Page 17 Turning too sharply around a corner can cause the do not understand the instructions presented in ATTO to tip over. Avoid this danger at all times by this Owner's Manual, or if, for any reason, you do steering a wide arc around corners and obstacles.
- Page 18 1.1 m (about 4 ft). Please consider this distance Avoid turning off the power while the ATTO is when driving. moving. Doing so will cause the ATTO to come to • an abrupt stop. Do not attempt to use your ATTO on stairs or •...
- Page 19 If you do come to a stop, restart and accelerate slowly and carefully. Driving angles • While you are driving down a slope, if your ATTO starts to move faster than you feel is safe, release • Do not attempt to climb ramps, slopes, curbs, or...
- Page 20 Do not operate your ATTO during stormy weather backward down any step, curb or other obstacle. to reduces the risk of an accident or possible This may cause the ATTO to fall or tip over. damage to the ATTO •...
- Page 21 Lifting getting on or off the ATTO. • Do not attempt to lift or move your ATTO by any Freewheel of its removable parts including the seat or driving console. Personal injury and damage to the ATTO For information on setting the ATTO in Freewheel may result.
- Page 22 Owner's Manual. • • Never operate the ATTO if your health condition Never sit on your ATTO while it is in a moving or medications you are taking cause you to feel vehicle. • dizzy, affect your vision, or affect your ability to Never sit on your ATTO when it is being used in safely operate the ATTO in any other way.
- Page 23 Fout! Gebruik het tabblad Start om Heading 1 toe te passen op de tekst die u hier wilt weergeven. your authorized MovingLife dealer for recycle and 3. Get to know the feel of your ATTO and its capabilities. We recommend that you perform disposal instructions.
- Page 24 Fout! Gebruik het tabblad Start om Heading 1 toe te passen op de tekst die u hier wilt weergeven. Temperature WARNING 1. Some of the parts of the ATTO are susceptible to change in temperature. The controller can only operate in temperature that ranges between minus 20°C and plus 50°C.
- Page 25 Safety labels Marked handle is not intended for The following safety symbols are used on ATTO to product lifting. identify warnings, mandatory actions and prohibited actions. It is very important for you to read and...
- Page 26 6 Deg. Avoid sharp turns or sudden stops. Damaged labels In case labels are unreadable for any reason, please consult this chapter and contact MovingLife for a new set of labels free of charge.
- Page 27 Fout! Gebruik het tabblad Start om Heading 1 toe te passen op de tekst die u hier wilt weergeven. Compliance and Warning Labels EMC information The ATTO Mobility Scooter system components are WARNING equipped with various product compliance labels and icons. These are strategically positioned to provide...
- Page 28 1) Hand-held portable transceivers. These are appliances such as electric shavers and hair dryers are transmitters-receivers with the antenna mounted not likely to cause EMI problems to your ATTO, as far directly on the transmitting unit. These devices as we know.
- Page 29 Therefore, the warnings listed below are intended to prevent possible interference with the control system of the ATTO. Electromagnetic interference (EMI) from sources such as radio and TV stations, amateur radio (HAM) transmitters, two-way radios, and cellular...
- Page 30 (e.g. alarm 3) If unintended movement or brake release systems of shops, automatic doors, etc.). occurs, turn the ATTO OFF as soon as it is safe; 4) Be aware that adding accessories or components, or modifying the ATTO, may...
-
Page 31: Attonomy
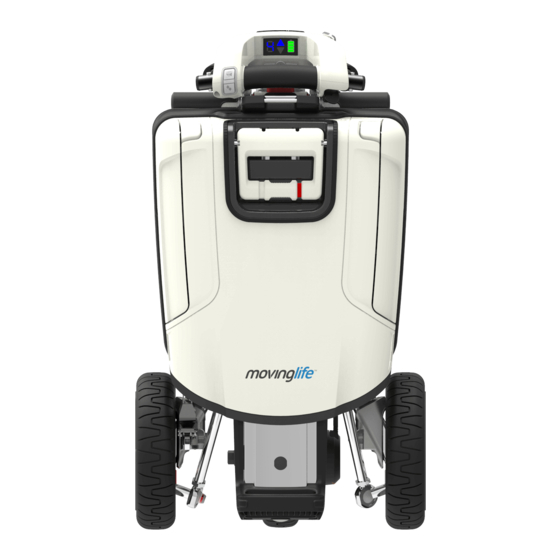
Fout! Gebruik het tabblad Start om Heading 1 toe te passen op de tekst die u hier wilt weergeven. ATTONOMY... - Page 32 Fout! Gebruik het tabblad Start om Heading 1 toe te passen op de tekst die u hier wilt weergeven. Figure 1 - ATTO in folded mode Figure 2 - ATTO in driving mode...
- Page 33 Fout! Gebruik het tabblad Start om Heading 1 toe te passen op de tekst die u hier wilt weergeven.
- Page 34 Fout! Gebruik het tabblad Start om Heading 1 toe te passen op de tekst die u hier wilt weergeven. Figure 3 – ATTO in trolley mode...
-
Page 35: Operating Atto
Injury hazard due to improper assembly, disassembly, opening or closing ATTO. Ensure that ATTO is very easy to operate; it requires no special skills all components in the ATTO have been correctly and can be learned by following the steps described in placed before continuing to the next step. - Page 36 (3). (see Figure 4). Figure 6 5. Hold ATTO by the main handle and the handlebar Figure 4 (see Figure 7). 3. Press the central release button until it clicks and remains pressed (see Figure 5).
- Page 37 Fout! Gebruik het tabblad Start om Heading 1 toe te passen op de tekst die u hier wilt weergeven. 6. Tilt ATTO toward the rod until the front wheel Figure 9 touches the ground (see Figure 8). 8. Gently move the handle down until ATTO is flat (see Figure 10).
- Page 38 (see Figure 12). In case the front lever requires too much force to operate, you should apply horizontal pressure on the main handle towards the front of the ATTO (2). This will release the pressure on the front lever and will make it easier to lock (3).
- Page 39 Fout! Gebruik het tabblad Start om Heading 1 toe te passen op de tekst die u hier wilt weergeven. 11. Place one hand on the tiller and with the other hand release the secure lever of the back handle (1) and bring the handle to upright position at 90 degrees (2).
- Page 40 Fout! Gebruik het tabblad Start om Heading 1 toe te passen op de tekst die u hier wilt weergeven. Using the handle, pull the back of the chair backwards until it clicks and locks in place (see Figure 14). Figure 15 13.
- Page 41 Fout! Gebruik het tabblad Start om Heading 1 toe te passen op de tekst die u hier wilt weergeven. Adjusting for maximum comfort PINCH POINT Several adjustments can be made for maximum Operations described in this chapter are performed comfort. Some adjustments can be made by the user, near and around pinching points.
- Page 42 (2). needed: 3. Tighten the adjustment lever once you're done (3). 1. ATTO must be in opened position in order to adjust seat height. Lift the seat to upright position, locate the seat height adjustment cover at the seat base...
- Page 43 Hold the bracket between your fingers and lift it out. Remember the bracket When the seat is in its highest position, the ATTO will position to make it easier to put it back in place be more inclined to tip over.
- Page 44 4 mm Allen wrench (hex key). The Driving Console (your ATTO's dashboard) contains all the controls and display needed for operating your 1. ATTO must be in the opened position in order to ATTO while driving. adjust the tiller angle. Once opened, locate and...
- Page 45 Display panel A. The On/Off button is located at the center of the Driving Console below the display panel. To turn ATTO on press and hold the button until ATTO starts. B. The two buttons on the sides of the ON/OFF switch marked with "+"...
- Page 46 Fout! Gebruik het tabblad Start om Heading 1 toe te passen op de tekst die u hier wilt weergeven. Figure 25 Display Panel...
- Page 47 Fout! Gebruik het tabblad Start om Heading 1 toe te passen op de tekst die u hier wilt weergeven. Battery level meter – When ATTO power is ON the Throttle battery meter indicates the approximate battery charge level. As with all Li-ion batteries, the charge level indication is accurate only when the battery is fully charged.
- Page 48 Fout! Gebruik het tabblad Start om Heading 1 toe te passen op de tekst die u hier wilt weergeven. Reverse and horn buttons WARNING Always bring the ATTO to a full stop before changing the driving direction. USB port ATTO is equipped with a general USB charging port providing up to 1A charging current.
- Page 49 To fold it back again (only when you are about to fold ATTO), simply pull the WARNING grip away from the handlebar and down to an angle of...
- Page 50 Fout! Gebruik het tabblad Start om Heading 1 toe te passen op de tekst die u hier wilt weergeven. 2. Please check that the battery is fully charged or Never step on or off the ATTO using the seat or the has enough capacity to carry you to your desired seat backrest for support.
- Page 51 ATTO. • For you first driving sessions, make sure that your Forward driving ATTO starts out on a level surface and that you will • Place your hands on the handgrips. Move the tiller continue driving on a level surface.
- Page 52 Increase the pressure applied by your thumb to The throttle will automatically return to the upper increase your speed. (off) position and your ATTO will come to a gradual • To stop ATTO, release all pressure on the throttle. stop.
- Page 53 ATTO. moving direction accordingly. Steering in Reverse • Make certain to maintain sufficient clearance when turning your ATTO so that the rear wheels will clear Backing up your ATTO requires special attention to any obstacle. what you are doing: •...
- Page 54 • Avoid sudden stops and starts. Driving on slopes When climbing an incline, try to keep ATTO moving. If you must stop, start up again slowly, and then accelerate cautiously. When driving down an incline, do WARNING so by adjustment the speed to the slowest setting and Stopping distance on slopes can be significantly driving in the forward direction only.
- Page 55 Do not drive your ATTO across the side of an incline this manual. Doing so could cause your ATTO to or diagonally up or down an incline; Avoid stopping,...
- Page 56 WARNING When you turn a sharp corner, reduce speed. When you use the ATTO at a high speed, do not turn Figure 32 Shifts center of gravity sharply. This will reduce the risk of overturning and falling. Always exercise discretion when taking a turn...
- Page 57 Folding (closing) bring the handle to 100 degrees position (2). Allow the seat to slide down until it clicks in place (3). 1. Make sure ATTO is on flat ground before folding it. (See Figures 34 and 35). PINCH POINT Operations described in this chapter are done near and around pinching points.
- Page 58 Switch hands. Use one hand to keep the rod upright handle towards the front of the ATTO (2). This will and use your other hand to lift the main handle release the pressure on the front lever and will (see Figure 38).
- Page 59 Fout! Gebruik het tabblad Start om Heading 1 toe te passen op de tekst die u hier wilt weergeven. Figure 39 7. Pull the rod lever (1) to adjust the height of the Figure 38 handle bar to the lowest position and bring the lever back to the secure position (2).
- Page 60 Fout! Gebruik het tabblad Start om Heading 1 toe te passen op de tekst die u hier wilt weergeven. 8. Release the adjustment lever of the handle bar (1) below. Lifting ATTO as a whole may be too heavy and may cause injury or damage.
- Page 61 (see Figure 44). pressure on the driving console towards the center of the ATTO. This will release the pressure on the separation levers and will make them easier to open.
- Page 62 Fout! Gebruik het tabblad Start om Heading 1 toe te passen op de tekst die u hier wilt weergeven. Figure 45 Lifting separated chassis 1. Once the two chassis have been separated and you are ready to lift them, for instance into your car trunk, make sure both chassis are set flat on the ground where they will not be an obstacle to you or to others.
- Page 63 Fout! Gebruik het tabblad Start om Heading 1 toe te passen op de tekst die u hier wilt weergeven. Connecting the chassis 1. Make sure the handle bar is secured at an upright position (see Figure 47). Front Module Lifting Handles Rear Module...
- Page 64 When ATTO is in freewheel mode, the braking NOTE: DO NOT try to open ATTO for driving before system is disengaged, and ATTO will move freely with the two levers are secured in the downwards...
- Page 65 After you have finished pushing your ATTO, always lock the brakes by changing to non-freewheel mode. Operating the freewheel In case the battery dies or ATTO is not driving, ATTO may be rolled manually. This will require releasing the mechanic auto-brake of the front wheel pushing the...
- Page 66 Figure 53 ATTO’s Li-ion Battery Figure 52 Securing the freewheel Battery and charger ATTO's charger is a small yet smart and powerful charger with the ability to connect to any electrical grid rating 110VAC – 240VAC. It is fully approved and safe to use.
- Page 67 Make sure the battery is properly connected before folding ATTO or turning it on. Figure 56 - battery release button To remove the battery from ATTO, press the release button (1) and pull the battery out (2). (see Figure 57). Figure 55...
- Page 68 • battery is in its place inside ATTO or when it is taken out DO NOT attempt to recharge the battery and operate ATTO at the same time.
- Page 69 Some errors are not significant and do not affect your 3. When the battery is fully charged, the LED will turn ability to use ATTO such as a call for service, while other green. This may take up to 6 hours. Once charging...
- Page 70 Disconnect any device. Check if High internal electric problem. port is wet. Restart ATTO. Contact support. Throttle may be pressed while ATTO is turned on. Release the Internal electric problem. High throttle. If problem persists Contact support. restarts ATTO. Controller sensed over or Motor Sensors malfunction.
- Page 71 Fout! Gebruik het tabblad Start om Heading 1 toe te passen op de tekst die u hier wilt weergeven. NOTE Error codes may be updated in future software versions.
-
Page 72: Transporting Atto
Please consult • If the ATTO is transported in a vehicle when fully your airline prior to your flight to ensure your ATTO and assembled and in open position, no one should its lithium-ion battery is permitted. -
Page 73: Troubleshooting
Owner's Manual. Once you TROUBLESHOOTING made sure the fuse is good; 6. Try to turn the ATTO on by pressing the On/Off button for at least 2 seconds. If the ATTO does not turn on please contact an authorized If your ATTO does not operate MovingLife dealer. - Page 74 Fout! Gebruik het tabblad Start om Heading 1 toe te passen op de tekst die u hier wilt weergeven. NOTE: ATTO's battery can be charged while it is installed on the ATTO or when it is removed from the ATTO.
-
Page 75: Maintenance
Fout! Gebruik het tabblad Start om Heading 1 toe te passen op de tekst die u hier wilt weergeven. MAINTENANCE ATTO’s expected service life is 10 years and it will extend much longer provided care and maintenance procedures are carefully followed. - Page 76 Remove the battery and place it on a secure surface WARNING such as a table, with its bottom facing up. • Never soak your ATTO in any liquid. This may cause Remove the fuse plastic cover. • personal injury and/or damage to your ATTO.
- Page 77 2. Wheel shafts. or your authorized MovingLife dealer. Clean the areas to be lubricated with clean cloth leaving no fibers, sand or dust on the ATTO. Once you are done Wheels and Tires lubricating and testing the ATTO for proper and easy...
- Page 78 • If you are not going to use your ATTO for an extended period of time, charge the batteries to Figure 66 60% of full charge before storing your ATTO. The...
- Page 79 If electrical terminals on the ATTO become Storage corroded, they need to be cleaned by a certified MovingLife technician. If you plan to not use your ATTO for an extended • period, it is best to: If battery terminals become corroded, it has to be replaced with a new battery.
- Page 80 If you find no problems you may use ATTO, otherwise call a certified MovingLife technician. Disposal Your ATTO must be disposed of according to applicable local and national statutory regulations. Contact your local waste disposal agency or authorized MovingLife dealer for information on proper disposal of packaging, metal frame components, plastic components, electronics, and battery.
-
Page 81: Specifications
When folded, ATTO is the most compact mobility Speed scooter in the world. Nevertheless, when open and ready to drive, ATTO is the largest and most ATTO’s maximum speed (limited by software) is 6.4 comfortable in its category. km/h (4 mph). Maximum driving speed can be set to one of the presets by simply clicking a button and ATTO’s dimensions, units in cm (inch):... - Page 82 30A peak. on-board and off-board, meaning that you can (but do Turning Radius not have to), take the battery off the ATTO in order to charge it. Removing the battery is as easy as pressing a 1.35 meters (53”).
- Page 83 Fout! Gebruik het tabblad Start om Heading 1 toe te passen op de tekst die u hier wilt weergeven. Freewheel mode Environment Yes. ATTO was designed and tested according to strict water resistance IP54 standard, requiring the equipment to be Maximum incline WARNING 6 degrees.
- Page 84 Fout! Gebruik het tabblad Start om Heading 1 toe te passen op de tekst die u hier wilt weergeven. Flammability ATTO Is designed according to UL94 V-0. Responsibility of the Manufacturer The manufacturer considers itself responsible for the effects on safety, reliability, and performance of the equipment only if: •...
-
Page 85: Limited Warranty
This warranty does not include worldwide warranty original ATTO warranty. service outside the origin country of purchase. Worldwide warranty service can be provided for The warranty shall not be affected by change of ownership of the ATTO within the warranty period. Such... - Page 86 Life. battery capacity has dropped below 70% of its original value at the delivery of the new ATTO, Moving Life shall not be liable for any consequential or the portion below 70% will be regarded as incidental damages whatsoever.
- Page 87 Fout! Gebruik het tabblad Start om Heading 1 toe te passen op de tekst die u hier wilt weergeven. Implied warranties, including those of merchantability and fitness for a particular purpose, are limited to one year from the date of original purchase and to the extent permitted by law.
-
Page 88: Contact Information
Fout! Gebruik het tabblad Start om Heading 1 toe te passen op de tekst die u hier wilt weergeven. CONTACT Authorized service INFORMATION facilities label Legal Manufacturer MovingLife ltd. Serial number label Netzer Sereni 709500 Israel Tel: +972(73)-391-3999 Email: info@movinglife.com US IMPORTER: Authorized representative MovingLife Inc. - Page 89 Fout! Gebruik het tabblad Start om Heading 1 toe te passen op de tekst die u hier wilt weergeven. Notes...
- Page 90 Fout! Gebruik het tabblad Start om Heading 1 toe te passen op de tekst die u hier wilt weergeven. RG-012-ATTO-1 ATTO Owner's Manual RG-012-ATTO-1 Owners Manual ENG Ver 2.8 Copyright © 2018-2019 English Issue - July 2018 All rights reserved...
Need help?
Do you have a question about the ATTO and is the answer not in the manual?
Questions and answers