Table of Contents
Advertisement
Available languages
Available languages
Advertisement
Table of Contents

Related Manuals for BE QUIET! BQT L7-730W


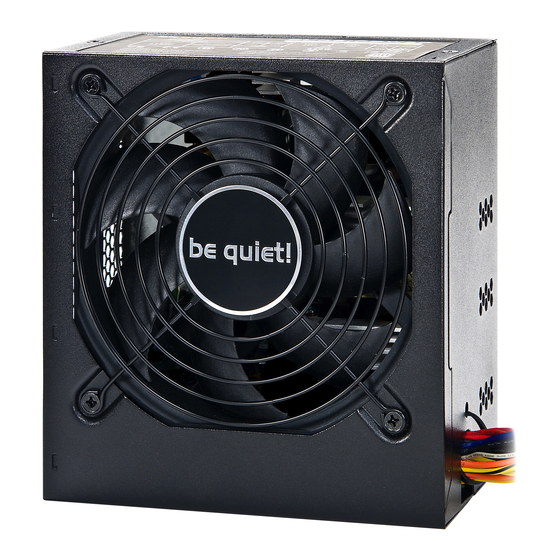
Summary of Contents for BE QUIET! BQT L7-730W
-
Page 2: Table Of Contents
1. INDEx D E U T S C H 1. Einleitung .....................4 2. Warnungen und Sicherheitshinweise ..........4 3. Kompatibilität ..................5 4. Vorteile und Besonderheiten ihres neuen Netzteils ......5 5. Installation ihres neuen Netzteils ............6 6. Fehlerbehebung...................7 7. Zubehör ....................9 8. Entsorgungshinweise ................9 9. - Page 3 F R A N Ç A I S E 1. Introduction ..................18 2. Avertissements et consignes de securite .........18 3. Compatibilite ..................19 4. Avantages et particularites de votre nouveau bloc d’alimentation ...19 5. Installation de votre nouveau bloc d’alimentation ......20 6.
- Page 4 E S P A Ñ O L 1. Introducción ..................34 2. Advertencias e indicaciones de seguridad ........34 3. Compatibilidad ..................35 4. Ventajas y particularidades de su nueva fuente de alimentación ..35 5. Instalación de su nueva fuente de alimentación .......36 6. Solución de errores ................38 7. Accesorios ..................39 8. Indicaciones para su retirada ............39 9.
-
Page 5: Einleitung
EINLEITUNG Wir freuen uns, dass Sie sich dazu entschlossen haben, ein be quiet! Netzteil der Pure Power Serie in Ihrem PC einzusetzen. Lesen Sie bitte vor der Inbetriebnahme alle Punkte in dieser Anleitung sorgfältig durch und beachten Sie diese. Nur dann ist ein ordnungsgemäßer Betrieb des Netzteils sichergestellt und Sie werden lange Freude an diesem Produkt haben. Falls Sie weitere Fragen haben, richten Sie diese gerne an unseren Kundenservice. Siehe Kontaktdaten unter Punkt 9. -
Page 6: Kompatibilität
Dieses Netzteil ist für einen Spannungsbereich zwischen 100 – 240V~ ausgelegt und damit universell einsetzbar. Betreiben Sie den PC nicht direkt neben einer Heizung oder einer anderen Wär- mequelle, da hierdurch die Lebensdauer aller Komponenten verringert und es zu Ausfällen kommen kann. Sorgen Sie für ausreichende Belüftung im PC-Gehäuse z.B. durch zusätzliche Lüfter. Für den Fall, dass Sie Ihr Netzteil reinigen wollen, trennen Sie es komplett vom Stromnetz und benutzen Sie keine feuchten Tücher oder Reinigungsmittel. Reini- gen Sie das Netzteil nur von außen mit Hilfe eines trockenen Tuches. -
Page 7: Installation Ihres Neuen Netzteils
Spannungsstabilität: Die Pure Power Serie verfügt über eine erstklassige Stabilität in der Spannungs- versorgung. Dies wird durch den Einsatz von hochqualitativen Bauteilen sicher- gestellt. Ausgangsspannungen werden somit sehr nah am optimalen Sollwert gehalten, was besonders bei hoher Leistungsanforderung wichtig ist. Sicherungsfunktionen: be quiet! Pure Power Netzteile bieten hohe Sicherheit durch viele Sicherungs- funktionen. Das Netzteil schaltet automatisch ab, wenn Grenzwerte über- bzw. -
Page 8: Fehlerbehebung
Der Einbau Ihres neuen be quiet! Pure Power Netzteils: 1. Setzen Sie das neue Netzteil nun an den vorgesehenen Platz im Gehäuse und schrauben Sie es an der Rückseite mit den vier mitgelieferten Schrauben fest. Verwenden Sie keine übermäßige Kraft. 2. S tecken Sie den 20/24 Pin Stecker in die vorgesehene Buchse am Mainboard. Wenn Sie über einen 24 Pin Anschluss verfügen, dann bringen Sie die zusätz- lichen 4 Pins in die richtige Position, bevor Sie den Stecker mit der Buchse verbinden. Beim Einsatz eines 20 Pin Steckers klappen Sie die zusätzlichen 4 Pins einfach an die Seite. - Page 9 Wenn das System bei installiertem Netzteil nicht ordnungsgemäß funktioniert, überprüfen Sie bitte zuerst die nachfolgend aufgeführten möglichen Fehlerursa- chen: A. Ü berprüfen Sie den korrekten und festen Sitz der Stromversorgungskabel zum Netzteil, sowie auch zur Steckdose. Idealerweise benutzen Sie eine separate Dose nur für das Computernetzteil. B. P rüfen Sie, ob sämtliche Anschlüsse korrekt miteinander verbunden wurden und korrigieren Sie gegebenenfalls diese bei Fehlpolung.
-
Page 10: Zubehör
zUbEHöR Zum Lieferumfang gehören: Kaltgerätekabel, Bedienungsanleitung, Kabelbinder, Schrauben zur Netzteilbefestigung. ENTSORGUNGSHINWEISE Gebrauchte Elektronikgeräte dürfen gemäß europäischer Vorgaben* nicht mehr zum unsortierten Hausabfall gegeben werden. Sie müssen getrennt entsorgt wer- den. Das Elektro-Altgerät muss einer speziellen Sammelstelle (z.B Recyclinghof) zugeführt werden. Dies ist in der Regel für Sie kostenlos. * R ichtlinie 2002/96/EG des europäischen Parlaments und des Rates vom 27. Januar 2003 über Elektro-/ Elektronik-Altgeräte. Gesetz über das Inverkehrbrin- gen, die Rücknahme und die umweltverträgliche Entsorgung von Elektro- und Elektronikgeräten (Elektro- und Elektronikgerätegesetz - ElektroG) vom 16. März... -
Page 11: Rechtliche Hinweise, Copyright
Im Service-Fall werden folgende Nummern zur Abwicklung benötigt. Sie finden diese auf dem Netzteil-Typenschild: Modell-Bezeichnung Artikel-Nummer Serien-Nummer BQT L7-730W BN108 S/N (Nummer siehe Typenschild) BQT L7-630W BN107 S/N (Nummer siehe Typenschild) 10. RECHTLICHE HINWEISE, COPyRIGHT Copyright © Listan GmbH & Co. KG 2011. Alle Rechte vorbehalten. Bitte beachten Sie die folgenden Hinweise: 1. D er Inhalt dieser Dokumentation darf ohne vorherige schriftliche Genehmigung... -
Page 12: Introduction
INTRODUCTION We are delighted that you have chosen to use a be quiet! power supply of the Pure Power Series in your PC. Please read and follow all the information contained in these instructions carefully prior to installation. The power supply is only guaranteed to function properly if the instructions are followed thus providing you with maximum satisfaction with this product. -
Page 13: Compatibility
Ensure that there is sufficient ventilation in the PC case, for example by adding additional fans. Should you want to clean your power supply, disconnect it completely from the mains and do not use damp cloths or cleaning detergent. Clean the power supply from the outside using a dry cloth. -
Page 14: Installing Your New Power Supply
Fuse functions: be quiet! Pure Power power supplies offer high safety with many fuse functions. The power supply automatically switches off if limits are exceeded or not reached. OCP (over-current protection, UVP (under-voltage protection), SCP (short circuit protection), OPP (over power protection), OTP (over temperature protection), OVP (overvoltage protection). If the power supply is operated at an excessively high temperature, it will automatically switch off. It can then be switched on after cooling off. Please ensure that the PC is equipped with sufficient cooling. INSTALLING yOUR NEW POWER SUPPLy You must read the item „Warnings/safety instructions“ before beginning installation. You will need a screwdriver to fit the power supply in your PC. -
Page 15: Troubleshooting
3. N ow connect the 4 pin connector, also called the P4 connector, into the socket provided on the motherboard. This connector is going to supply your PC with additional power. 4. If required, plug the PCIe connector to your graphic card. TROUbLESHOOTING Please note: In ATX systems, the power supply receives a signal from the motherboard when switched on, without which it cannot run. For this reason, please ensure that the power switch connector (usually located on the front panel) is correctly connected to the motherboard using either the motherboard or case manual. -
Page 16: Attachements
D. C heck your system for possible short circuits or faulty hardware, making sure you switch off the computer and disconnect all devices not required for the computer to start. Switch it on again. Repeat this process and switch on one of the devices you have found likely to be faulty upon each restart. If the power supply does not react due to a short circuit, wait at least 5 minutes after the restart as the device is equipped with over power protection. -
Page 17: Warranty, Manufacturer's Data
Fax + 49 40 7367686-69 e-mail: service@be-quiet.de www.be-quiet.net Our General Warranty Conditions apply, which can be viewed on the Internet on http://www.be-quiet.net/service/en/warranty. The following numbers will have to be provided in the event of service. You will find them on the power supply name plate: Model description Article Number Serial Number BQT L7-730W BN108 S/N (see nameplate for number) BQT L7-630W BN107 S/N (see nameplate for number) -
Page 18: Legal Notice, Copyright
10. LEGAL NOTICE, COPyRIGHT Copyright © Listan GmbH & Co. KG 2011. All rights reserved. Please note the following: 1. The content of this documentation may not be copied, transmitted, distributed or stored in any form, whether in whole or in part, without the prior written approval of Listan. -
Page 19: Introduction
INTRODUCTION Nous sommes ravis que vous ayez choisi d’installer un bloc d’alimentation be quiet! de la gamme Pure Power sur votre PC. Avant la mise en service, veuillez lire attentivement tous les points figurant dans ce guide d‘utilisation et les observer attentivement. Seul le respect scrupuleux de ces indications permettra de garantir le bon fonctionnement de votre bloc d’alimentation et d’obtenir ainsi entière satisfaction. -
Page 20: Compatibilite
Ce bloc d‘alimentation est conçu pour une plage de tension comprise entre 100 et 240 V~ il est donc d’entrée universelle. Assurez-vous que votre PC ne se trouve pas à proximité d’un chauffage ou d’une autre d‘une source de chaleur, car ceci pourrait réduire la durée de vie de tous les composants et provoquer des pannes. Assurez une ventilation suffisante dans le boîtier du PC, notamment par le biais de ventilateurs supplémentaires. -
Page 21: Installation De Votre Nouveau Bloc D'alimentation
Securite certifiee TÜV : Les blocs d’alimentation be quiet! Pure Power sont certifiés par le TÜV. Ils sont conformes aux exigences de sécurité électrique selon la loi sur la sécurité des matériels techniques et produits de consommation (EN60950). Les documents se trouvent à l’adresse www.tuv.com, saisissez le numéro d’identification de 10 caractères. Economique grace a un excellent taux d’efficacite : Les blocs d‘alimentation de la gamme Pure Power offrent une efficacité très élevée (certification 80plus), contribuant à la réduction de la consommation et des frais d’électricité. - Page 22 Démontez tout d‘abord votre ancien bloc d‘alimentation. Pour ce faire, veuillez procéder ainsi : 1. Débranchez votre PC de toutes les sources de courant et déconnectez avec prudence tous les câblesreliés au PC. 2. O uvrez le boîtier du PC et respectez, le cas échéant, les instructions du fabricant. 3. Débranchez tous les connecteurs de la carte mère, ainsi que de tous les autres composants tels que disquettes, disques durs et autres lecteurs optiques.
-
Page 23: Depistage Des Pannes
DEPISTAGE DES PANNES Attention : Sur les systèmes ATX, le bloc d’alimentation reçoit un signal de la carte mère connectée sans lequel il ne peut être mis en service. Veuillez donc vérifier, à l’aide du manuel de la carte mère ou du boîtier, si la fiche de l’interrupteur d’alimentation (l’interrupteur de mise en marche se trouve généralement sur la face avant) est correctement connectée à la carte mère. Si c’est le cas, veuillez alors contrôler l’interrupteur d’alimentation (marche/arrêt) car il peut être défectueux. Vous pouvez ici utiliser l’interrupteur de réinitialisation à... -
Page 24: Accessoires
D. V érifiez que votre système ne présente pas d‘éventuels courts-circuits ou de matériel défectueux. Pour ce faire, éteignez l‘ordinateur et débranchez du système tous les appareils qui ne sont pas nécessaires pour le démarrage de l‘ordinateur. Remettez-le sous tension. Répétez cette procédure et rebranchez l‘un des appareils après chaque redémarrage, jusqu‘à... -
Page 25: Garantie Constructeur
Listan France . 65 avenue Georges Politzer . 78190 Trappes Nos conditions générales de garantie sont applicables. Vous pouvez les consulter sur Internet à l‘adresse http://www.be-quiet.net/service/fr/warranty. En cas d’assistance, les éléments suivants sont nécessaires pour l’opération ; ils figurent sur la plaque d’identification du bloc d’alimentation : Description du modele Référence Numéro de série BQT L7-730W BN108 S/N (numéro voir plaque d’identification) BQT L7-630W BN107 S/N (numéro voir plaque d’identification) -
Page 26: Indications Legales, Copyright
10. INDICATIONS LEGALES, COPyRIGHT Copyright © Listan GmbH & Co. KG 2011. Tous droits réservés. Veuillez observer les consignes suivantes : 1. Le contenu de tout ou partie de la présente documentation ne peut être reproduit, distribué, diffusé ou enregistré de quelque manière que ce soit sans l‘autorisation préalable écrite de Listan. 2. -
Page 27: Wprowadzenie
WProWADzENIE Cieszymy się, że zdecydowali się Państwo na instalację zasilacza be quiet! z serii Pure Power w swoim komputerze. Przed uruchomieniem należy uważnie przeczytać niniejszą instrukcję i zastosować się do wszystkich jej punktów. Zapewni to długotrwałą i niezakłóconą pracę zasilacza. Dalsze pytania prosimy kierować do pracowników Działu Obsługi Klienta. Patrz dane kontaktowe punkt 9. 2. oSTrzEżENIA I WSkAzóWkI DoTyczącE BEzPIEczEńSTWA Nigdy nie należy rozkręcać zasilacza. Wewnątrz zasilacza znajdują się elementy, które nawet po długiej przerwie w użytkowaniu mogą być pod wysokim napięciem i powodować obrażenia zagrażające życiu. Zasilacz może być otwierany wyłącznie przez autoryzowany personel specjalistyczny! Gwarancja wygasa w przypadku otwarcia urządzenia przez osoby nieupoważnione oraz w przypadku uszkodzenia plomby gwarancyjnej. Nie należy włączać urządzenia mokrymi lub wilgotnymi rękami. Nie należy wtykać żadnych przedmiotów w wypustki/wentylator zasilacza. -
Page 28: Kompatybilność
Niniejszy zasilacz jest przystosowany do uniwersalnej pracy w obszarze napięć między 100 - 240V~. Komputer nie powinien stać bezpośrednio obok grzejnika lub innego źródła ciepła, gdyż skraca to żywotność wszystkich komponentów i sprzyja awariom. Należy zadbać o odpowiednią wentylację w obudowie komputera np. stosując dodatkowe wentylatory. W celu oczyszczenia zasilacza należy go całkowicie wyłączyć z sieci. Nie należy stosować wilgotnych ściereczek ani środków czyszczących. Zasilacz należy jedynie czyścić z zewnątrz suchą ściereczką. Przed uruchomieniem zasilacz powinien leżeć godzinę w temperaturze pokojowej, aby zapobiec utworzeniu się w nim skroplin. 3. -
Page 29: Instalacja Nowego Zasilacza
oszczędność dzięki wysokiej efektywności (stopień skuteczności): Zasilacze serii Pure Power wykazują bardzo dużą efektywność (certyfikacja 80plus). Przyczynia się to do spadku kosztów energii elektrycznej. Stabilność napięcia: Zasilacze serii Pure Power zapewniają doskonałą stabilność zasilania napięciowego. Jest to możliwe dzięki zastosowaniu wysokogatunkowych komponentów. Napięcia wyjściowe osiągają wartość bardzo przybliżoną optymalnej wartości zadanej, co jest szczególnie istotne przy wysokich wymaganiach wydajności. Funkcje bezpieczeństwa: Zasilacze be quiet! Pure Power zapewniają bezpieczeństwo dzięki wielu funkcjom bezpieczeństwa. Zasilacz wyłącza się automatycznie w przypadku przekroczenia górnych lub dolnych wartości granicznych. OCP (zabezpieczenie przed zbyt wysokim prądem), UVP (zabezpieczenie przed zbyt niskim napięciem), SCP (zabezpieczenie przeciwzwarciowe), OPP (zabezpieczenie przeciążeniowe), OTP (zabezpieczenie temperaturowe), OVP (zabezpieczenie przed zbyt wysokim napięciem). Zasilacz wyłącza się automatycznie, jeżeli pracuje w zbyt wysokiej temperaturze. Po schłodzeniu zasilacz może zostać ponownie włączony. Należy się upewnić, że komputer jest wyposażony w wystarczający system chłodzenia. - Page 30 Najpierw należy odłączyć stary zasilacz. W tym celu należy postępować następująco: 1. Odłączyć komputer od wszystkich źródeł prądu, a następnie ostrożnie wyciągnąć wszystkie kable podłączone do komputera. 2. N astępnie otworzyć obudowę komputera stosując się do poleceń producenta. 3. O dłączyć wszystkie wtyczki od płyty głównej i wszystkich innych komponentów, jak stacji dyskietek, dysku twardego oraz napędów optycznych. Należy się upewnić, że żadna wtyczka starego zasilacza nie jest połączona z żadnym komponentem systemu.
-
Page 31: Usuwanie Usterek
6. USUWANIE USTErEk Uwaga: W systemie ATX zasilacz otrzymuje sygnał z podłączonej płyty głównej. Brak sygnału uniemożliwia uruchomienia urządzenia. Dlatego należy się upewnić, z pomocą podręcznika użytkownika płyty głównej lub obudowy, czy wtyczka włącznika/wyłącznika (włącznik znajduje się przeważnie na osłonie przodu) została poprawnie podłączona do płyty głównej. W takim przypadku należy sprawdzić włącznik/wyłącznik zasilania, ponieważ często dochodzi do jego uszkodzenia, w wyniku czego uruchomienie zasilacza nie jest możliwe. W tej sytuacji zamiast przełącznika zasilania w celu wykluczenia możliwości błędu należy użyć przycisku... -
Page 32: Akcesoria
D. S prawdzić, czy w systemie nie występują ewentualne zwarcia lub czy sprzęt nie jest uszkodzony. W tym celu należy wyłączyć komputer i odłączyć wszystkie urządzenia, które nie są konieczne przy starcie komputera. Następnie ponownie włączyć komputer. Należy powtórzyć tę czynność podłączając po każdym ponownym uruchomieniu jedno z urządzeń, do momentu znalezienia usterki. Jeżeli zasilacz nie reaguje z powodu zwarcia, należy odczekać przynajmniej 5 minut zanim zostanie on ponownie włączony, gdyż urządzenie jest wyposażone w zabezpieczenie przeciążeniowe. -
Page 33: Gwarancja, Dane Producenta
Internecie pod adresem http://www.be-quiet.net/service/pl/warranty. W przypadku kontaktu z serwisem w celu przyjęcia zgłoszenia wymagane są następujące numery. Informacje te znajdują się na tabliczce znamionowej zasilacza: Oznaczenie modelu Numer produktu Numer seryjny BQT L7-730W BN108 Numer seryjny (patrz tabliczka znamionowa) BQT L7-630W BN107 Numer seryjny (patrz tabliczka znamionowa) -
Page 34: Informacje Prawne, Prawa Autorskie
10. INFormAcjE PrAWNE, PrAWA AUTorSkIE Copyright © Listan GmbH & Co. KG 2011. Wszelkie prawa zastrzeżone. Należy przestrzegać poniższych wskazówek: 1. Z abronione jest powielanie, przekazywanie, rozpowszechnianie lub zapis treści tej dokumentacji w dowolnej formie, w całości lub częściowo bez uprzedniego pisemnego zezwolenia firmy Listan. 2. B e quiet! jest zarejestrowaną marką firmy Listan GmbH & Co. KG. Inne wymienione w niniejszej dokumentacji produkty oraz nazwy firm mogą stanowić marki lub nazwy handlowych konkretnych właścicieli. 3. L istan stale rozwija politykę produktów. Listan zachowuje prawo do dokonywania zmian i udoskonaleń każdego z opisanych w niniejszej dokumentacji produktów, bez wcześniejszego uprzedzenia. 4. L istan nie ponosi w żaden sposób odpowiedzialności za stratę danych i dochodów, a także za szczególne, przypadkowe, pośrednie lub bezpośrednie szkody, niezależnie od drogi ich powstania. -
Page 35: Introducción
INTRODUCCIóN Nos alegramos de que haya decidido utilizar un fuente de alimentación be quiet! de la serie Pure Power en su equipo. Antes de la puesta en marcha, lea detenidamente y respete todos los puntos de este manual. Sólo así podremos garantizarle un correcto funcionamiento de la fuente de alimentación y quedará plenamente satisfecho con este producto. Si tiene más dudas, consulte a nuestro servicio de atención al cliente. Vea los datos de contacto en el punto 9. -
Page 36: Compatibilidad
Esta fuente de alimentación está diseñada para su uso con una corriente entre 100 y 240V~, de modo que es universal. No sitúe su PC al lado de la calefacción u otra fuente de calor, ya que se reduciría la vida de todos los componentes y podrían producirse fallos. Procure que la caja del PC esté bien ventilada; por ejemplo, mediante ventiladores adicionales. En caso de que desee limpiar su fuente de alimentación, desenchúfelo totalmente y no use paños húmedos ni detergentes. Limpie la fuente de alimentación sólo desde el exterior con ayuda de un paño seco. -
Page 37: Instalación De Su Nueva Fuente De Alimentación
Seguridad certificada por TÜV: Las fuentes de alimentación Pure Power poseen la certificación TÜV. Cumplen los requisitos de seguridad eléctrica establecidos por la Ley de Seguridad de Dispositivos y Productos (EN60950). La documentación se puede consultar a través de www.tuv.com, introduciendo los diez dígitos del número de identificación. Estabilidad de la tensión: Las fuentes de alimentación de la serie Pure Power disponen de una estabilidad única en el suministro de corriente. Esta está garantizada por el uso de piezas de alta calidad. - Page 38 Primero, desmonte su antigua fuente de alimentación. Para ello, proceda del siguiente modo: 1. Separe su PC de todas las fuentes de energía existentes y desenchufe con cuidado todos los cables conectados al PC. 2. Abra la caja del PC siguiendo las instrucciones del manual del fabricante. 3.
-
Page 39: Solución De Errores
SOLUCIóN DE ERRORES Advertencia: En el caso de sistemas ATX, al encenderse, la fuente de alimentación recibe la señal de la placa base conectada, sin la cual no se pone en marcha. Por lo tanto, compruebe, con ayuda del manual de la placa base o de la caja, si el interruptor de alimentación (tecla de encendido que, normalmente, se encuentra en la parte frontal) está conectado correctamente a la placa base. En ese caso, compruebe el interruptor de conexión/desconexión, ya que muchas veces está defectuoso y, por tanto, la fuente de alimentación no puede iniciarse. Puede utilizar el interruptor de reinicio en lugar del interruptor de alimentación para descartar estas posibilidades de error. -
Page 40: Accesorios
D. Compruebe su sistema por si hubiera cortocircuitos o hardware defectuoso, para ello desconecte el equipo y desenchufe del sistema todos los dispositivos que no sean necesarios para iniciar el ordenador. Conéctelo de nuevo. Repita este proceso y vaya conectando los dispositivos de uno en uno cada vez que reinicie hasta que encuentre el posible defecto. Si la fuente de alimentación no reacciona debido a un cortocircuito, espere al menos 5 minutos antes de conectarlo de nuevo, porque el dispositivo está equipado con una protección... -
Page 41: Garantía, Datos Del Fabricante
Puede acceder a nuestras condiciones de garantía generales vigentes a través de nuestra página web http://www.be-quiet.net/service/es/warranty. Para poder atenderle en caso de avería, son necesarios los siguientes números. Los encontrará en la placa de identificación de la fuente de alimentación: Modelo N.º artículo N.º serie BQT L7-730W BN108 S/N (ver nº en la placa de identificación) BQT L7-630W BN107 S/N (ver nº en la placa de identificación) -
Page 42: Nota Legal, Copyright
10. NOTA LEGAL, COPyRIGHT Copyright © Listan GmbH & Co. KG 2011. Todos los derechos reservados. Tenga en cuenta las siguientes indicaciones: 1. E l contenido de esta documentación no se puede reproducir, entregar, publicar o guardar de ninguna forma, ni total ni parcialmente, sin el previo permiso por escrito de Listan. 2. -
Page 43: Technische Daten
TECHNISCHE DATEN Te c h n i c a l d a t a , D o n n é e s t e c h n i q u e , d a n e t e c h n i c z n e , D a t o s t é c n i c o LAbEL AC Input 100 - 240Vac... - Page 44 POWER SUPPLy DImENSIONS DISTRIbUTION AND PIN ASSIGNmENT...
-
Page 45: Connectivity And Cable Lengths
P C I E X P R E S S V G A C O N N E C T O R Color Signal Color Signal Yellow +12VDC Black Yellow +12VDC Black Yellow +12VDC Black Black Black CONNECTIVITy AND CAbLE LENGTHS 450mm 150mm 150mm...
Need help?
Do you have a question about the BQT L7-730W and is the answer not in the manual?
Questions and answers