Table of Contents

Related Manuals for Panasonic MC-UL810-00


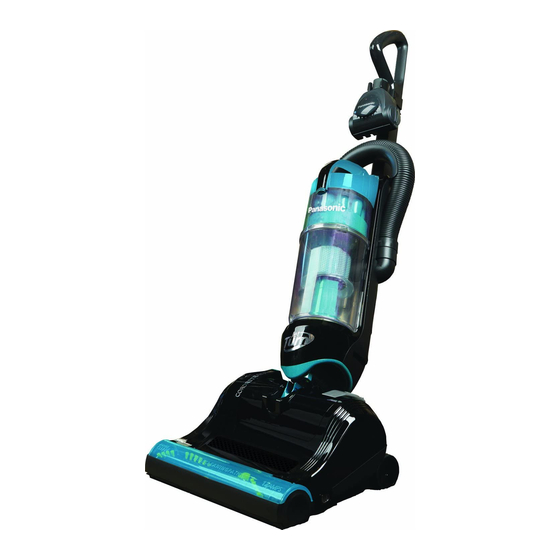
Summary of Contents for Panasonic MC-UL810-00
-
Page 1: Vacuum Cleaner
Order Number MAC1106001CE Vacuum Cleaner MC-UL810-00 Specifications are subject to change without notice for further improvement. © 2011 PANASONIC CONSUMER ELECTRONICS COMPANY, DIVISION PANASONIC CORPORATION OF NORTH AMERICA. All rights... -
Page 2: Table Of Contents
MC-UL810-00 CONTENTS Page Page 1 WIRING DIAGRAM AND DRAWING 2.3. Dust Bin Assembly 1.1. Wiring Diagram 2.4. Packing Materials 1.2. Wire Management Drawing 3 SERVICE PROCEDURES 2 EXPLODED VIEW AND PARTS LIST 3.1. CORD REEL 2.1. Body 3.2. FAN MOTOR 2.2. -
Page 3: Wiring Diagram And Drawing
MC-UL810-00 1 WIRING DIAGRAM AND DRAWING 1.1. Wiring Diagram... -
Page 4: Wire Management Drawing
MC-UL810-00 1.2. Wire Management Drawing NOTE: For general servicing, it is necessary to eliminate pinching of any wire during reassembly. After servicing any electrical component or electrical enclosure, the unit should be reassembled and checked for dielectric breakdown or current leakage. -
Page 5: Exploded View And Parts List
MC-UL810-00 2 EXPLODED VIEW AND PARTS LIST 2.1. Body 2.1.1. Exploded View... -
Page 6: Parts List
MC-UL810-00 2.1.2. Parts List Ref. No. Part No. Part Name & Description Quantity Remarks AC60KDNYZUU3 DUST COVER (DECO) AC39LDNYZV07 AIR GUIDE AC40KDNYZV07 DUST COMPARTMENT AC24ADNYZC0Q BODY COVER AC01BDNYZV07 HANDLE AC70PDNYZV07 EXTENSION WAND HOLDER AC10UDNYZV07 AC19PDNYZV07 HOSE COVER AC58PDMTZV07 HOSE ADAPTER... -
Page 7: Nozzle Housing
MC-UL810-00 2.2. Nozzle Housing 2.2.1. Exploded View... - Page 8 MC-UL810-00 2.2.2. Parts List Ref. No. Part No. Part Name & Description Quantity Remarks AC06ADNYZUU3 BODY PLATE (DECO) AC14NDNYZC0Q CORD GUIDE AC23DDEVZ000 SPRING AXTN4+16BFY SCREW SHIPPED 10 PER PACKAGE AC05EDNYZM0L SWITCH BUTTON AC01EDDRZ000 ON/OFF SWITCH AC58FDPAZU00 MOTOR SHIELD AC92FDNYZ000 FAN MOTOR UNIT...
-
Page 9: Dust Bin Assembly
MC-UL810-00 2.3. Dust Bin Assembly 2.3.1. Exploded View... - Page 10 MC-UL810-00 2.3.2. Parts List Ref. No. Part No. Part Name & Description Quantity Remarks AC14BDMTZU03 HANDLE LID AC64NDMTZM0L PRESS BUTTON AC18DBRMZ000 SPRING AC64HARTZ000 SUCTION INLET PACKING AC20HDPAZC0Q AXTN4+16BFY SCREW SHIPPED 10 PER PACKAGE AC44KDPAZ000 FILTER AC75KDPAZ0U0 DUST BOX TERMINAL AC39LDPAZC0Q...
-
Page 11: Packing Materials
MC-UL810-00 2.4. Packing Materials 2.4.1. Exploded View 2.4.2. Parts List (Packing Material) Ref. No Part No. Part Name & Description Quantity Remarks AC61ZDNYZ000 Packing Assembly Includes Items A thru H AC01ZDNYZ000 Operating Instructions... -
Page 12: Service Procedures
MC-UL810-00 3 SERVICE PROCEDURES 3.1. CORD REEL 3.1.1. Removal 1. Press tab and remove hose cover. 4. Remove upper nozzle hose by Inserting a flat screwdriver into the slot in the dust container as show and gently pry hose from body. - Page 13 MC-UL810-00 9. Rotate nozzle arm up and lift off. 6. Press nozzle latches and remove nozzle housing. 10. Remove five (5) screws from body plate and lift off. 7. Press handle release pedal and rotate nozzle arm down. 8. Remove two (2) screws from body cap and lift off.
-
Page 14: Fan Motor
MC-UL810-00 12. Pull power cord plug through the body plate. 13. Lay body plate aside. 14. Remove one (1) screw and cord reel from the lower plate. 15. Disconnect lead wires. 3. Lift out motor assembly. 16. Discard cord reel. -
Page 15: On/Off Switch
MC-UL810-00 6. Route wires in lower plate (see WIRE MANAGEMENT illustration). 7. Reinstall body plate and secure with five (5) screws. 6. Remove lead wires from fan motor terminals. 8. Reinstall nozzle cover. Make sure that the latches are 3.2.2. - Page 16 MC-UL810-00 4. Reinstall motor assembly into lower plate (See FAN MOTOR - Installation). 5. Route wires in lower plate (see WIRE MANAGEMENT illustration). 6. Reinstall body plate and nozzle cover (see FAN MOTOR - Replacement). 7. Reinstall nozzle cover. Make sure that the latches are locked into the slots.
Need help?
Do you have a question about the MC-UL810-00 and is the answer not in the manual?
Questions and answers