
Subscribe to Our Youtube Channel
Related Manuals for Stirling SRH60


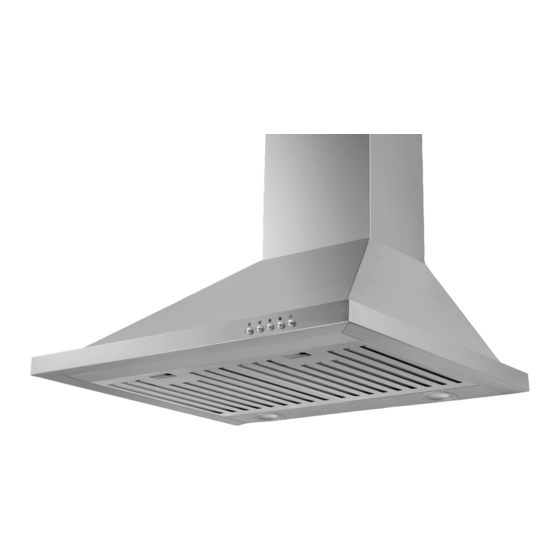
Summary of Contents for Stirling SRH60
- Page 1 60cm/90cm Canopy Rangehood Model Number SRH60 / SRH90 INSTRUCTION MANUAL IM Version No.: V1.7 Issue Date: 22 December 2015...
- Page 2 Welcome Congratulations on choosing to buy a STIRLING® product. All products brought to you by STIRLING® are manufactured to the highest standards of performance and safety and, as part of our philosophy of customer service and satisfaction, are backed by our comprehensive 3 Year In Home Warranty. We hope you...
-
Page 3: Table Of Contents
Contents 02 Welcome Section 04 Warranty Page 06 Safety Instructions 07 Specifications & Components 08 Controls 09 Installation Requirements 11 Cleaning & Maintenance 12 Troubleshooting & Technical Data 13 Repair and Refurbished Goods or Parts Notice... - Page 4 The product is guaranteed to be free from defects in workmanship and parts for a period of 36 months from the date of purchase. Defects that occur within this warranty period, under normal use and care, will be repaired, replaced or refunded at our discretion. The benefits conferred by this warranty are in addition to all rights and remedies in respect of the product that the consumer has under the Competition and Consumer Act 2010 and similar state and territory laws.
- Page 5 Safety This rangehood must only be installed in accordance with the instructions provided. Incorrect installation may cause harm to persons, damage property and void the product’s warranty. This rangehood complies the safety standard AS/NZS60335.2.31 and AS/NZS 60335.1 Important Please ensure that you read the entire instructions before beginning the installation of your rangehood. Warning All electrical work must be done in accordance with local and national electrical codes as applicable and should be undertaken by licenced and qualified persons only.
-
Page 6: Specifications & Components
– 2 x LED lights – 2 x Stainless steel baffle filters – 3 x Stainless steel baffle filters Rangehood components Your Stirling Canopy Rangehood is supplied with: 1 x Wall bracket (“hook”) for 1 x Rangehood the rangehood 1 x Expandable 150mm... -
Page 7: Controls
Controls Your Canopy Rangehood features push button controls (Fig. 1) with three speed levels of extraction. Fig. 1 pic6C pic6C pic6C – Push the ‘Low’ button, an audible buzzer will sound once, and the rangehood will operate at low speed. –... -
Page 8: Ducting Options
Ducting options Before beginning the installation of your rangehood, the method of ducting should be considered and selected. The guide below illustrates the various ducting options. Note: this rangehood can be operated in recirculation mode where required, although it is recommended to duct wherever possible. - Page 9 Installing the rangehood – Once the installation height has been determined, use the fasteners and wall plugs to install the mounting bracket (hook) on to the wall ensuring that it’s secured in a level position. The mounting bracket connects to the canopy at the top (i.e. where the chimney connects into the canopy). Also using the fasteners and wall plugs, install the wall bracket for the chimney pieces.
-
Page 10: Cleaning & Maintenance
Cleaning & Maintenance Cleaning the grease filters Keeping this filter clean will keep the rangehood extraction performance at an optimum. Please strictly follow the guidelines below. – To remove the grease filters squeeze the spring loaded latch with your fingers and gently lower the filters out. -
Page 11: Troubleshooting & Technical Data
Troubleshooting & Technical Data Operation in case of emergency In the event of an emergency you should: – Switch off all rangehood controls. – Switch the rangehood off at the power outlet and immediately unplug. – Call After Sales Support on 1300 11 HELP (4357). Some minor faults can be fixed by referring to the instructions given in the Troubleshooting section below. -
Page 12: Repair And Refurbished Goods Or Parts Notice
60cm/90cm Canopy Rangehood Repair and Refurbished Goods or Parts Notice Unfortunately, from time to time, faulty products are manufactured which need to be returned to the Supplier for repair. Please be aware that if your product is capable of retaining user-generated data (such as files stored on a computer hard drive, telephone numbers stored on a mobile telephone, songs stored on a portable media player, games saved on a games console or files stored on a USB memory stick) during the process of repair, some or all of your stored data may be lost. - Page 14 This page is intentionally left blank...
- Page 15 This page is intentionally left blank...
- Page 16 This page is intentionally left blank...
Need help?
Do you have a question about the SRH60 and is the answer not in the manual?
Questions and answers