Advertisement
Quick Links
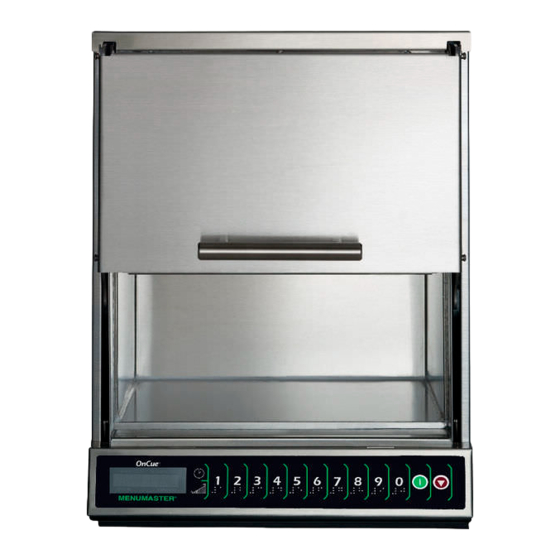
So...how do I use it?
Preprogrammed Pads
To cook food using preprogrammed
cooking sequences.
1. Place food in oven. Close door.
2. Press desired pad.
3. Oven begins to cook.
4. At end of cooking cycle oven
door opens
Programming Items
1. Press and hold pad 1 for approximately 5 seconds with the door open.
2. Press pad to be reprogrammed.
3. Enter cooking time by using the number pads.
4. Press POWER LEVEL pad to program microwave power level if less than
100% is desired.
• For a lower microwave power, press pads 1 (for 10%),
through 9 (for 90%), or 0 for no microwave energy.
NOTE: Press POWER LEVEL pad twice to return to 100% microwave power.
5. Press TIME ENTRY pad to add up to three additional cooking stages.
• Total cooking time cannot exceed 5 minutes.
• Enter cook time and power level as in steps 4 and 5.
6. Press START pad to set new programming changes to the pad.
NOTE: To discard changes, press STOP pad or close oven door.
Installation
•
Do not install oven next to or above source of heat, such as pizza oven
or deep fat fryer. This could cause microwave oven to operate improperly
and could shorten life of electrical parts.
•
Do not block or obstruct oven air inlet above door.
•
Install oven on level countertop surface.
•
Not recommended for built-in installations.
•
Outlet should be located so that plug is accessible when oven is in place.
•
A safety strap is attached to the side of the oven. This is to be used to
secure two ovens together (back to back) on a shelf.
The switching operation of this microwave oven can cause voltage fluctuations on the supply line. The operation of this oven under unfavorable voltage supply conditions can have adverse effects. This device
is intended for the connection to a power supply system with a maximum permissible system impedance Zmax of 0.31 Ohm at the interface point of the user's supply. The user has to ensure that this device is
connected only to a power supply system which fulfills the requirement above. If necessary, the user can ask the public power supply company for the system impedance at the interface point.
Quick Start Reference Guide
Refer to Product Safety Manual for Safety Statements
Manual Operation
To cook food using a specific entered time and power level.
1. Place food in oven. Close door.
2. Press TIME ENTRY pad and enter cooking time.
3. Press POWER LEVEL pad to program microwave power level if less than
100% is desired.
• For a lower microwave power, press pads 1 (for 10%),
through 9 (for 90%), or 0 for no microwave energy.
4. Press START pad.
5. At end of cooking cycle oven door opens.
Factory Settings
Pad
Seconds
1
5
2
10
3
15
4
20
5
25
6
30
7
35
8
40
9
45
0
60
Advertisement

Related Manuals for ACP On Cue


Summary of Contents for ACP On Cue
-
Page 1: Quick Start Reference Guide
Quick Start Reference Guide Refer to Product Safety Manual for Safety Statements So...how do I use it? Preprogrammed Pads Manual Operation To cook food using preprogrammed To cook food using a specific entered time and power level. cooking sequences. 1. Place food in oven. Close door. 1. -
Page 2: Troubleshooting Tips
Quick Start Reference Guide For Enclosed Installation A—For North America (UL/CSA) models, allow at least 2” (5.1cm) of clearance around top of oven. For International (50Hz) models, allow at least 7 “ (17.78 cm) of clearance around top. Proper air flow around oven cools electrical components. With restricted air flow, oven may not operate properly and life of electrical parts is reduced. -
Page 3: Care And Cleaning
Quick Start Reference Guide Care and Cleaning Clean interior and exterior of microwave oven with mild detergent and damp soft sponge or cloth. Wring cloth or sponge to remove excess water before wiping equipment. Splatter Shield (Clean Monthly) 1. Unplug the oven. 2. -
Page 4: Changing User Options
Quick Start Reference Guide Changing user options Options such as single or double pad programming and beep volume can be changed to suit individual preferences. To change options: Press and hold pad 2 for approximately 5 seconds with door open. 2.