
Related Manuals for GUTMANN Vertica


Summary of Contents for GUTMANN Vertica
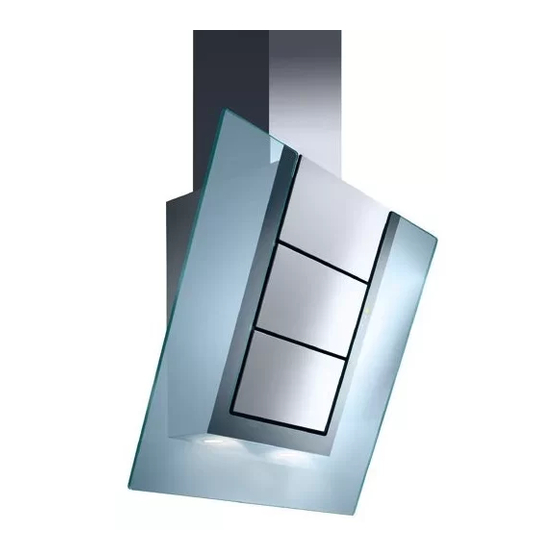
- Page 1 Montageanleitung fr Notice de montage it Istruzioni per il montaggio en Installation Instructions nl Montage-instructies es Instrucciones de uso Vertica...
- Page 2 Befestigungslöchern sich vergewissern, dass keine elektrische Leitungen durch das Boh- Sicherheitshinweise ren beschädigt werden können. Der Elektro- anschluss muss so vorbereitet werden, dass Montage, Anschluss, Inbetriebnahme und die Dunstabzugshaube damit einfach ange- Reparatur dürfen nur von einer Fachkraft schlossen werden kann. Örtliche Bestimmun- durchgeführt werden.
- Page 3 lässig, wenn folgende Nennwärme- belastungen (Hs) nicht überschritten werden: Gas-Herde Belastung einer Kochstelle max. 3,0 kW Belastung aller Kochstellen max. 8,3 kW Belastung des Backofens max. 3,9 kW Gas-Kochmulden Belastung einer Kochstelle max. 3,9 kW Belastung aller Kochstellen max. 11,3 kW Technische Änderungen vorbehalten! Turmhaltewinkel Anschluß...
- Page 4 12. Halteauskerbungen am Oberturm ca. 2- 3. Löcher bohren und entsprechenden Dü- 3mm nach außen biegen. bel bündig einsetzen. 4. Aufhängung des Oberturms befestigen 5. Stockschrauben soweit in die Dübel (Ø10 mm) einschrauben, dass noch ca. 20 mm her- vorstehen. 6.
- Page 5 Entsorgung Verpackung Die Verpackung des Geräts ist recyclebar. Als Verpackungsmaterial werden Karton und Polyethylenfolie (PE) verwendet. Diese Ma- terialien sind auf umweltgerechte und den jeweiligen vor Ort geltenden Vorschriften entsprechende Weise zu entsorgen. Umwelthinweise Dieses Gerät ist entsprechend der europäi- schen Richtlinie 2002/96/EG über Elektro- und Elektronikaltgeräte (waste electrical and electronic equipment - WEEE)
-
Page 6: Consignes De Sécurité
manière à pouvoir raccorder facilement la hotte. Respectez les directives locales. Consignes de sécurité Conduit d‘évacuation (pour le mode aspirant) L’évacuation ne doit pas être conduite vers Seul un personnel qualifié est autorisé à une cheminée qui est utilisée pour procéder au montage, aux branchements, à... - Page 7 cidessous: Cuisinieres â gaz Charge thermique d’un foyer 3,0 kW maxi. Charge therm. de tous les foyers 8,3 kW maxi. Charge thermique du fou 3,9 kW maxi. Toutes modifications réservées! Suppert raccord Suspension Pour flexibble de conduit Percage de fixation 4 trous (Ø10mm, 10er Dübel) pour renforcer la fixation de la hotte, si cette derniere presente les alesages de montage...
- Page 8 11. H.Realisez le branchement electrique. En cas d’emploi d’un moteur de ventilateur ex- terne (evacuation de l’air a l’exterieur), raccordez le cordon d’alimentation. 3. Percez les trous, puis enfoncez les chevilles a ras de la surface : 4. Fixez la Suspension du conduit superieur. 5.
-
Page 9: Elimination Des Déchets
Elimination des déchets : Emballage L’emballage de l’appareil est recyclable. Le matériel d’emballe est composé de carton et de feuilles PE. Eliminez ces matériaux de maniere écologique et en tenant compte des réglementations locales. Respect de l’environnement Cet appareil est marque selon la directive europeenne 2002/96/EG relative aux appareils electriques e! ôlectroniques usages (waste electrical and electronic equipment -... -
Page 10: Per La Vostra Sicurezza
nessuna linea elettrica possa essere danneggiata durante l’operazione. Per la vostra sicurezza L’allacciamento alla rete elettrica deve consentire un facile collegamento della Il montaggio, l’allacciamento alla rete, la cappa di aspirazione. Rispettare le messa in funzione e le riparazioni devono disposizioni locali. - Page 11 Cucine a gas Carico termico di un for max. 3,0 kW nello Carico termico tutti i for max. 8,3 kW nelli Carico termico del fomo max. 3.9 kW Piani di cottura a gas Carico termico di un for max. 3,9 kW nello Carico termico tutti i for max.
- Page 12 10. (Funzionamento ad espulsione d’aria) applicare e fissare il tubo flessibile di scarico aria senza piegarlo. 11. Eseguire l’allacciamento elettrico. (Funzionamento ad espulsione d’aria) In caso d’impiego di un motore della ventola esterno, collegare il cavo. 3. Trapanare i fori ed inserire in questi i tasselli a raso: 4.
- Page 13 Smaltimento Imballaggio L’imballaggio è fatto di cartone e polietilene (PE) ed è quindi riciclabile. Questi materiali devono essere smaltiti nel rispetto dell’ambiente e in base alle norme vigenti nel paese di acquisto. Avvertenze per la tutela dell’ambiente Questo apparecchio dispone di contrassegno ai sensi della direttiva europea 2002/96/EG in materia di apparecchi elettrici ed elettronici (waste electrical and...
-
Page 14: Safety Instructions
be prepared in such a manner that the exhaust hood can be easily connected to it. Safety Instructions Local conditions must be complied with. Installation, connection, startup and repairs Exhaust Air Flow (Exhaust Operation) may only be conducted by a service technician. -
Page 15: Installation Instructions
Bore 2 holes (Ø6mm) for hanging the upper Gas Stoves tower (tower angle bracket). Load of one cooking area max. 3.0 kW Load of all cooking areas max. 8.3 kW Bore 4 holes (Ø10mm) for the attachment of Load of the oven max. 3.9 kW the exhaust hood. - Page 16 4. Attach tower angle bracket (for attaching 12. Bend the retaining grooves on the upper the upper tower) to the wall. tower outwards approximately 2-3 mm. 5. Screw machine screws into the screw anchors (Ø10 mm) until they protrude by about 20 mm.
-
Page 17: Environmental Instructions
Disposal Packaging The packaging of the exhaust hood is recyclable. Cardboard and polyethylene foil (PE) are used as packaging materials. The- se materials are environmentally compliant and should be disposed of as per the valid regulations of the respective location. Environmental Instructions This device is labeled as per European... -
Page 18: Belangrijke Aanwijzingen
Gevaar door een elektrische schok De netspanning moet overeenkomen met de Belangrijke aanwijzingen gegevens op het typeplaatje. Het typeplaatje bevindt zieh bij de filters aan de binnenzijde Algemeen van de kap. Sluit de afzuigkap alleen aan op Deze montagehandleiding bevat belangrijke een volgens de voorschriften ge’i’nstalleerd aanwijzingen die in acht moeten worden geaard stopcontact. - Page 19 wegvliegende vonken) is de montage van de afzuigkap alleen toegestaan wanneer het Montagehandleiding fornuis een gesloten, niet verwijderbare afscherming heett. afzuigkap met muurbe- Minimumafstand tot een elektrisch fornuis vestiging De minimumafstand tussen de onderkant van de afzuigkap en de kookzones of kookplaten De pagina met afbeeldingen uit- bedraagt 650 mm.
- Page 20 trekken tot hij iets omlaag klapt. Glasplaat in deze schuine stand naar achteren drukken tot hij vrijkomt. Dan de glasplaat geheel omlaag klappen. 8. Eventueel de afzuigkap extra bevestigen met twee schroeven. Moer in stap 6 vastdraaien. 9. (Alleen bij kappen met een glasplaat) De glasplaat in omgekeerde volgorde weer omhoog klappen.
-
Page 21: Afvoeren Van De Verpakking
13. Buig de ondertoren iets open en plaats hem over de boventoren en de afzuigkap. De ondertoren moet op de afzuigkap rüsten. Model retourluchttoren bij wandkappen Afvoeren van de verpakking De verpakking van het apparaat kan worden gerecycled. Als verpakkingsmaterialen wor- den karton en polyethyleenfolie (PE) gebruikt. - Page 22 especialista en construcciön, como por ejemplo un especialista en cälculos estäticos Instrucciones de montaje o arquitecto. para todos Los grupos Peligro de lesiones El cuerpo de la campana extractora puede Advertencia importancia incorporar bordes con rebabas (cortantes), resultantes del proceso de fabricaciön. Por Las presentes instrucciones de montaje ello, se deberä...
- Page 23 para la conducciòn del aire de evacuaciön al exterior. La via de evacuaciòn del aire al Instrucciones de montaje exterior y la conexiön a la red electrica tienen para campana extractora que realizarse de tal manera, que la campana extractora pueda acoplarse a ellas con fijada a la pared facilidad.
- Page 24 4 Practique dos taladros de (Ø10mm, 10er 4. Monte la sujeciön del mödulo de Dübel) para la fijaciön adicional de la revestimiento superior. campana extractora en caso de incorporar esta los correspondientes agujeros 5. Enrosque los tornillos de sujeciön de la campana en los tacos (en los agujeros de 10 mm), dejando unos 20 mm de rosca libre.
- Page 25 10. (Funcionamiento de extractor) Colocar y fijar la manguera del extactor, cuidar que no se formen dobleces. 11. Llevar a cabo la conexión eléctrica. (Funcionamiento de extractor) Conectar el cable en caso de emplearse un motor externo de ventilación. 12. Torcer hacia fuera aprox. 2-3mm las muescas de soporte en el tubo superior.
- Page 26 Eliminación residuos Embalaje El embalaje del aparato es reciclable. Para el embalaje se utiliza cartón y polietileno expandido. Estos materiales deben ser eliminados según la normativa vigente de protección del medio ambiente y las ordenanzas municipales correspondientes. Campana Su municipio le informará sobre la normativa de protección de medio ambiente para la correcta eliminación...
- Page 28 Installationszubehör 6 x Dübel 10x50 6 x Sperrzahnmuttern M8 6 x Stockschrauben 2 x Dübel 6x30 2 x Spannplattenschrauben 4,5x40...
- Page 29 Vertica Typ 515 Vertica Typ 516 C-Version...
- Page 32 Exklusiv-Hauben Mühlackerstraße 77 D-75417 Mühlacker Tel. (49) 0 70 41/8 82-0 Fax (49) 0 70 41/4 68 82 Internet: http://www.gutmann-exklusiv.de E-Mail: info@gutmann-exklusiv.de HRB 705602 Amtsgericht Mannheim DE263391836 Index 06/10 Artikel Nr.: 67201300...
Need help?
Do you have a question about the Vertica and is the answer not in the manual?
Questions and answers