
Related Manuals for Faber INHC29SS600-B


Summary of Contents for Faber INHC29SS600-B
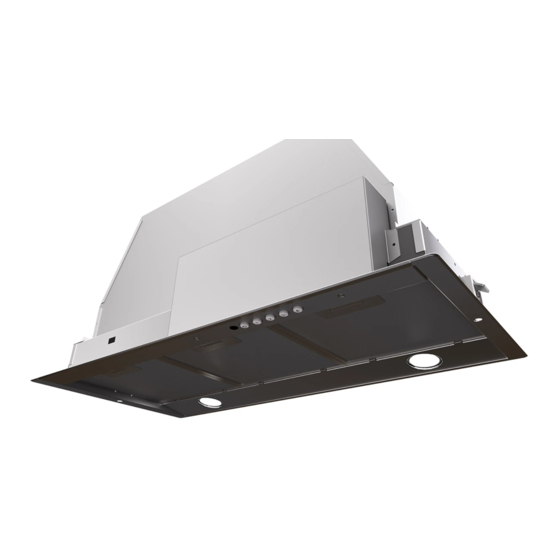
- Page 1 INCA HC Installation Instructions Use and Care Information Instructions d'installation Utilisez et d'entretien INHC29SS600-B...
- Page 2 READ AND SAVE THESE INSTRUCTIONS BEFORE YOU START INSTALLING THIS RANGEHOOD WARNING: - TO REDUCE THE RISK OF A RANGE TOP GREASE FIRE: a) Never leave surface units unattended at high settings. Boilovers cause smoking and greasy spillovers that may ignite. Heat oils slowly on low or medium setting. Suzette, Cherries Jubilee, Peppercorn Beef Flambé).
-
Page 3: Venting Requirements
When cutting or drilling into wall or ceiling, do not damage electrical wiring and other hidden utilities. Ducted fans must always be vented to the outdoors. ALL WALL AND FLOOR OPENINGS WHERE THE RANGEHOOD IS INSTALLED MUST BE SEALED. This rangehood requires at least 24" of clearance between the bottom of the rangehood and the cooking surface or countertop. - Page 4 WARNING • Electrical ground is required on this rangehood. • If cold water pipe is interrupted by plastic, nonmetallic gaskets or other materials, DO NOT use for grounding. • DO NOT ground to a gas pipe. • DO NOT have a fuse in the neutral or grounding circuit. A fuse in the neutral or grounding circuit could result in electrical shock.
-
Page 5: Rangehood Dimensions
RANGEHOOD DIMENSIONS 47 " Min. 24"... -
Page 6: Parts Needed
MAIN PARTS Components Ref. Qty. Product Components Hood Body, complete with: Con- trols, Light, Filters, Blower. Power cord Recirculation Vent Grill Damper ø 5 " Ref. Qty. Installation Components Screws 1/8" x 3/8" (for Recirculation Grill mounting) Qty. Documentation Instruction Manual Parts needed - 6"... - Page 7 Only for Ducted Venting Installation Install Damper that is included with the Hood before connecting to the ductwork. Choose your ducting method Ducted Venting Options Installation Non Ducted - Recirculation Option Vertical 6" Requires purchase of Horizontal Activated Charcoal Accessory...
-
Page 8: Installation Instructions
Installation Instructions Cut out the open- ing in the underside of the cabinet as shown in Figure 1. Insert Hood before installing into cabinet. • Screw the Frame into place Vertical Ducting Installation Install Roof or Wall Cap purchased separately. Connect the 6"... - Page 9 Horizontal Ducting Installation ” > For horizontal(rear) ducting there must be a minimum of 2 1/2" of space open between the back of the Hood Insert and the wall. For a horizontal ducting installation the motor needs to be unsecured shown.
- Page 10 Non-Ducted Recirculation Option For Non-Ducted Recirculation venting route the ductwork to a location above the hood where the discharge is vented back into the room. Use the included Recirculation Vent Grill to cover the opening. Secure the grill with the 2 screws provided in the Install Kit.
- Page 11 OPTIONAL WIRING BOX Direct Connect Wiring Box For Permanent wiring Installation-Use only Accessory sku # WIREBOX with Listed rangehood Wiring Box kit (purchased separately) sku # WIREBOX, manufactured by Faber. For Non-Ducted Recirculation Option Attach each charcoal black grid on each side of the blower.
- Page 12 LINER DIMENSIONS LINER DIMENSIONS / DIMENSIONS DU CADRE Standard Liner 30 Stainless Standard Liner 30 Stainless (LINE30ST) (LINE30ST) designed for 30” wide installations designed for 30” wide installations. Cadre Standard 30 Axier Inoxydable (620000304) oyée les hottes encastrable sur mesure de 30" Standard Liner 36 Stainless (LINE36ST) Standard Liner 36 Stainless (LINE36ST) designed for 36”...
- Page 13 FOR INSTALLATION WITH LINERS WARNING When building a custom hood, always follow all applicable codes and standards. The Inca HC SS can be used with WARNING custom cabinetry and hoods 30" wide and up. Choose either a custom liner or our Standard Liner designed for 30"...
-
Page 14: For Best Results
USE AND CARE INFORMATION For Best Results rangehood to operate for several minutes after cooking is complete to clear all smoke and odors from the kitchen. T1. Fan Off Button:Turn the blower Off. The fan can be operated by pressing any of the fan setting buttons. - Page 15 lution or washed in the dishwasher. They should be cleaned • Remove grease filters. every 2 months, or more frequently if use is particularly heavy. • the unit and at the same time pulling downward. • color over time, this will have absolutely no effect on its •...
-
Page 16: Wiring Diagram
Wiring Diagram... - Page 17 To obtain warranty service, contact the dealer from whom you purchased the range hood, or the local Faber distributor. If you cannot identify a local Faber distributor, contact us at (508) 358-5353 for the name of a distributor in your area.
- Page 18 VEUILLEZ LIRE ET CONSERVER LA PRÉSENTE NOTICE AVANT DE COMMENCER L'INSTALLATION DE LA HOTTE DE CUISINE AVERTISSEMENT:-POUR RÉDUIRE LE RISQUE D'UN FEU DE GRAISSE SUR LA TABLE DE a) Ne laissez jamais sans surveillance les éléments de la surface de cuisson à température élevée. Les bouillonnements excessifs peuvent provoquer de la fumée et les débordements de graisse b) Assurez-vous de toujours mettre en marche le ventilateur de la hotte lorsque vous cuisinez c) Nettoyez régulièrement les ventilateurs d'aspiration.
- Page 19 Lorsque vous faites une ouverture ou percez dans un mur ou le plafond, veillez à ne pas Un espace libre d'au moins 24 " est requis entre le bas de la hotte et la surface de d'installation de la surface de cuisson ou de la hotte fournie par le fabricant avant de pratiquer des ouvertures.
- Page 20 AVERTISSEMENT...
- Page 21 DIMENSIONS DE LA HOTTE 47 " Min. 24"...
-
Page 22: Pièces Principales
PIÈCES PRINCIPALES Composants Réf. Qté Composants du produit Bâti de la hotte, avec : Com- teur. Câble d'alimentation Grille d'évent de recirculation Registre ø 5 " Réf. Qté Composants d'installation Vis 1/8" x 3/8" (pour montage de la grille de recir- culation) Qté... - Page 23 Pour installation avec ventilation canalisée uniquement Installez le registre inclus avec la hotte avant de la raccorder aux conduits. Choisissez la méthode de canalisation Options d'installation avec Sans canalisation - Option de ventilation canalisée recirculation Verticale 6" Exige l'achat de Hori- l'accessoire zontale...
-
Page 24: Notice D'installation
Notice d'installation Pratiquez l'ouverture sur la face inféri- eure de l'armoire, comme il- lustré à la Figure 1. encastrable avant de l'installer dans l'armoire. • Screw the Frame into place Installation avec canalisation verticale Installez le clapet de toiture ou le clapet mural acheté... - Page 25 Horizontal Ducting Installation ” > Pour l'installation d'une canalisation horizontale (à l'arrière), un espace d'au moins 2 1/2" est requis entre l'arrière de la hotte encastrable et le mur. Pour l'installation d'une canalisation horizontale, le moteur doit d'abord être détaché. Pour ce faire, retirez les 12 vis comme illustré.
- Page 26 Option non canalisée avec recirculation d'air Pour la ventilation avec recirculation sans canalisation, dirigez les conduits à un emplacement au-dessus de la hotte où l'air évacué est retourné dans la pièce. Utilisez la grille d'évent de recirculation pour couvrir l'ouverture. Fixez la grille à...
- Page 27 Boîtier de connexion directe, utilisez uniquement la trousse de boîtier de no d'article WIREBOX connexion pour hotte indiquée, (acheté séparément) no d'article WIREBOX, fabriquée par Faber. Pour option non canalisée avec recirculation d'air charbon à la grille noire de chaque...
- Page 28 DIMENSIONS DE LA CAISSE LINER DIMENSIONS / DIMENSIONS DU CADRE Caisse standard 30", acier Standard Liner 30 Stainless (LINE30ST) inoxydable (LINE30ST), designed for 30” wide installations Cadre Standard 30 Axier Inoxydable (620000304) conçue pour les installations d'une largeur de 30”. oyée les hottes encastrable sur mesure de 30"...
- Page 29 POUR L'INSTALLATION AVEC CAISSES AVERTISSEMENT Lorsque vous construisez un habillage de hotte sur mesure, assurez-vous de toujours respecter les codes et normes applicables. La hotte Inca HC SS peut être utilisée WARNING avec des armoires et habillages sur mesure d'une largeur de 30" et plus. Vous pouvez choisir une caisse sur mesure ou nos caisses standards CUSTOM/WOOD...
- Page 30 INFORMATIONS POUR L'UTILISATION ET L'ENTRETIEN Pour de meilleurs résultats absorber toute la fumée et les odeurs de la cuisine. T1. Bouton Arrêt du ventilateur : éteint le ventilateur. Le ventilateur peut être allumé en ap- puyant sur l'un ou l'autre des boutons de réglage. Tenez ce bouton enfoncé...
- Page 31 solution d'eau chaude savonneuse ou dans le lave-vaisselle. Ils devraient être nettoyés tous les 2 mois, ou plus fréquemment • Remove grease filters. en cas d'utilisation particulièrement intensive. • l'arrière de l'appareil et en le tirant vers le bas. • avant de le réinstaller (un changement de la couleur à...
-
Page 32: Schéma De Câblage
Schéma de câblage... - Page 33 état de marche. Pour bénéficier de services prévus par la garantie, veuillez communiquer avec le détaillant auprès duquel vous avez acheté la hotte de cuisine, ou encore avec le distributeur Faber de votre région. Si vous n'êtes pas en mesure de localiser un distributeur Faber dans votre région, veuillez communiquer avec nous au 508-358-5353 pour connaître le nom d'un distributeur à...
Need help?
Do you have a question about the INHC29SS600-B and is the answer not in the manual?
Questions and answers