NEC MH240 User Manual
Wireless ip telephone
Hide thumbs
Also See for MH240:
- User manual (104 pages) ,
- Setup manual (92 pages) ,
- Features & specifications manual (2 pages)
Table of Contents
Advertisement
Quick Links
Download this manual
See also:
Setup Manual
MH240 Wireless IP Telephone
USER'S GUIDE
Model: IP3NA-8WV(USA) / IP3AT-8WV(Australia) / IP3PH-8WV(EU)
Before using your product, read this User's Guide thoroughly to ensure
correct handling.
After reading the User's Guide, keep it in a place that is accessible for read
reference.
A50-017158-001 Issue1.2, January 2009
Advertisement
Table of Contents

Related Manuals for NEC MH240


Summary of Contents for NEC MH240
- Page 1 MH240 Wireless IP Telephone USER’S GUIDE Model: IP3NA-8WV(USA) / IP3AT-8WV(Australia) / IP3PH-8WV(EU) Before using your product, read this User’s Guide thoroughly to ensure correct handling. After reading the User’s Guide, keep it in a place that is accessible for read reference.
- Page 3 NEC Infrontia Corporation reserves the right to change the specifications, functions, or features, at any time, without notice. NEC Infrontia Corporation has prepared this document for use by its employees and customers. The information contained herein is the property of NEC Infrontia Corporation and shall not be reproduced without prior written approval from NEC Infrontia Corporation.
- Page 5 Recharge the battery with the matching battery charger only (see battery label description). ● Use the battery only for this MH240 phone system. Do not use it with other electrical devices. ● To prevent the battery pack from overheating, exploding, or catching fire: ●...
- Page 6 Contact the nearest NEC service office. If you keep using the unit, it may cause fire or electrical shock. Keep out of reach from children.
- Page 7 ● Follow the instruction below when you use a battery pack. They may cause heating, explosion, and fire; ● Do not put the battery pack into a microwave oven or a pressure chamber. ● Do not use other batteries with this battery pack. ●...
- Page 8 This page is for your notes.
-
Page 9: Important Note
FCC Portion --------------------------------------------------------------------------- This equipment has been tested and found to comply within the limits for a Class B digital device, pursuant to Part 15 of the FCC rules. These limits are designed to provide reasonable protection against harmful interference in a residential installation. This equipment generates, uses, and can radiate radio frequency energy and, if not installed and used in accordance with the instructions, may cause harmful interference to radio communications. - Page 10 Industry Canada Portion --------------------------------------------------------------------------- Canada Regulatory Compliance Statement This Class B digital apparatus complies with Canadian ICES-003. Cet appareil numériqué de la classe B est conformé à la norme NMB-003 du Canada. For Customers in Canada This device complies with RSS 210 of Industry Canada (IC). Operation is subject to the following two conditions: ●...
-
Page 11: Declaration Of Conformity
European Union Information --------------------------------------------------------------------------- Notice to the user The handset described in this manual is intended to be used in combination with NEC Assured Mobility concept for Wireless Local Area Networks. Country specific limitation Italy General authorization is required when this handset is used outside own premises. - Page 12 In case your electrical and electronic products need to be disposed of please refer to your supplier or the contractual agreements that your company has made upon acquisition of these products. www.nec-philips.com/weee you can find information about separate disposal and environmentally sound recycling.
-
Page 13: Table Of Contents
• SIGNAL WORDS..................1 • SAFETY SYMBOLS..................1 • IMPORTANT SAFETY INFORMATION ........... 2 1.INTRODUCTION • WHAT IS MH240? ..................5 • ABOUT THIS GUIDE ................... 5 • KEYS AND PARTS ..................6 • ICONS......................7 • STANDBY MODE..................8 •... - Page 14 5.CALL HISTORY • TO VIEW CALL HISTORY................ 19 • TO MAKE A CALL FROM CALL HISTORY ......... 20 • TO ADD PHONE NUMBER TO DIRECTORY ........20 • TO DELETE A CALL HISTORY .............. 23 • TO DELETE ALL CALL HISTORIES ............. 23 6.DIRECTORY •...
- Page 15 • FONT SIZE ....................45 • LANGUAGE ....................46 • MY NAME ....................46 • DISPLAY PATTERN .................. 47 • CHANGE PASSWORD ................47 • KEY TOUCH TONE ................... 48 • SPEAKER MONITOR................48 • DATE ......................49 • TIME......................49 •...
- Page 16 14.TROUBLE SHOOTING • MESSAGE MEANINGS AND SUGGESTIONS ........69 • TIPS AND SUGGESTIONS ..............70 15.SPECIFICATIONS • TECHNICAL SPECIFICATIONS ............. 71 • LED SPECIFICATIONS................72 16.LICENSE...
-
Page 17: Signal Words
RECAUTION To avoid serious injury or death, follow the safety information in this section. • SIGNAL WORDS DANGER indicates a hazardous situation which, if not avoided, will result in death or serious injury. WARNING indicates a hazardous situation which, if not avoided, could result in death or serious injury. -
Page 18: Important Safety Information
• IMPORTANT SAFETY INFORMATION Observe these precautions when using a lithium-ion battery pack. ● Never charge the pack from other than the phone or the appropriate charger. ● The lithium-ion battery pack has a specified connector orientation. When inserting the pack into the phone, observe the correct connector orientation. ●... - Page 19 Do not insert metallic objects or put metallic objects into the interiors of the products through openings, which could result in fires, electrical shock hazards or failures. If it is necessary to use an AC adapter, use one of the specified type; otherwise, fires, electrical shock hazards or failures could result.
- Page 20 This page is for your notes.
-
Page 21: Introduction
NTRODUCTION • WHAT IS MH240? MH240 is a wireless VoIP phone that complies with IEEE 802.11b/g specifications. MH240 has the following features: MH240 dedicated features are available such as Call History, Directory, Password Lock, Favorites, Speed Dial, Speaker monitor and Courtesy Mode. -
Page 22: Keys And Parts
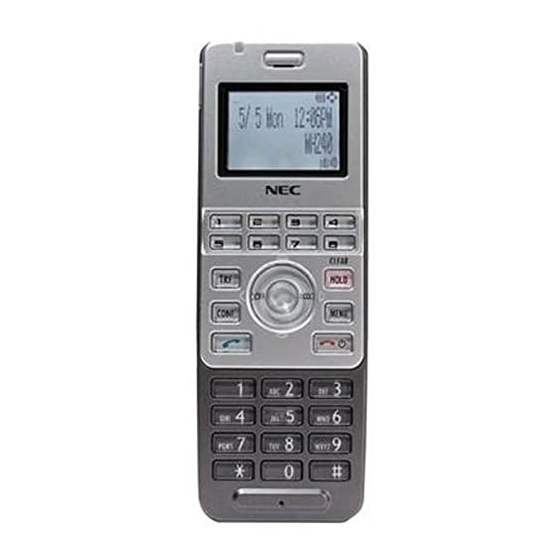
• KEYS AND PARTS The phone has the following keys and parts. PARTS REMARK (1)Info LED Info LED Display charging status (3)USB Connector (2)Ear Speaker and receiving a call Ear Speaker USB Connector Charge the power via AC (4)Display adapter Display Monochrome LCD, 90 pixels... -
Page 24: Standby Mode
Your phone starts up in this mode after being powered on. Your phone displays the first screen similar to the following. 1/ 1 Tue 12:00AM MH240 • MAIN MENU Press the key when your phone is in Standby mode. The following main menu will be displayed. -
Page 25: Getting Started
ETTING TARTED • HOW TO INSERT THE • HOW TO REPLACE THE BATTERY BATTERY Insert the battery into the unit as follows. Replace the battery of the phone as follows. (1) Remove the battery cover from the phone. (1) Power off the phone by pressing and holding key for 2 seconds or more. -
Page 26: How To Charge The Battery
(4) The LED on the cradle lights red, indicating • HOW TO CHARGE THE the battery is being charged. When the BATTERY phone battery is not being charged the Info Be sure to charge the battery before using the LED turns off. phone for the first time. - Page 27 By using the AC Adapter: To charge the phone using the AC adapter: (1) Insert the AC adapter into an appropriate AC outlet. (2) Insert the AC adapter plug (mini USB) into USB connector of the phone. Info LED : Light red (Charging) : Light green (Charging is completed) USB connector AC Adapter...
- Page 28 This page is for your notes.
-
Page 29: Basic Operation
ASIC PERATION • TO POWER ON THE PHONE • TO POWER OFF THE PHONE (STANDBY MODE) Press and hold the key for 2 seconds or more. “Power Off” is displayed and the Press and hold the key for 2 seconds Info LED flashes. -
Page 30: To Answer A Call
Name is displayed. This operation different When the calling party also uses depending on your system. Please MH240, My Name of MH240 is contact your network displayed. administrator. • TO MAKE A CALL • TO TRANSFER A CALL To make a phone call, do either of the following;... -
Page 31: To Redial (Last Number Redial)
Mute mode. Number Your phone displays as follows. 1.14581234567 2.12621234567 [MUTE] 3.200 00:00:50 TALKING MH240 Prefix Call Back Press the key or “Call” soft key to redial the party after you select a phone number by pressing the key. -
Page 32: To Use A Headset
• TO USE A HEADSET • TO USE WHILE CHARGING When a headset is inserted to the Headset You can operate MH240 while charging as connector, your phone is in headset call mode. following figure. But, the battery may become empty when you talk for long time. -
Page 33: Features
EATURES This section explains how to use the features on • TO ADJUST CALL VOLUME your phone. You can increase or decrease the receiver volume in Standby mode or during a call. The • TO USE CONFERENCE volume can be set in 3 steps (From Level 1 (3-WAY CALL) [Soft] to Level 3 [Loud]). -
Page 34: To Use Courtesy Mode
• TO USE COURTESY MODE • TO RECONNECT TO NETWORK You can set your phone to Courtesy Mode. When your phone is placed in this mode, your You can reconnect to your network. phone displays the Courtesy icon ( Press and hold the key for 3 seconds Press and hold the key for 1 second... -
Page 35: Call History
ISTORY You can find missed calls easily Your phone can record recent Call History in the following 3 lists up to 50 records for each list. from the list of Incoming Calls by You can open each list from the main menu or missed call icon ( by pressing the associated key while in Standby Once you see a list of Missed Calls... -
Page 36: To Make A Call From Call History
• TO MAKE A CALL FROM CALL • TO ADD PHONE NUMBER TO HISTORY DIRECTORY Press the key while in Standby mode. Press the key while in Standby mode. Your phone displays the main menu. Your phone displays the main menu. Press the key to select “1.Call History”... - Page 37 Press the key to select an item you Press the “Save” soft key to save the data to want to edit and then press the “Edit” soft the Directory. The display returns to the key as required. In this example, Name and previous screen.
- Page 38 Press the “Detail” soft key and then press key to select a phone number input area you want to add. Name 14581237654 Back If you save to an already existing entry, it will be overwritten by the new phone number. Press the “OK”...
-
Page 39: To Delete A Call History
Press the key to select a history you • TO DELETE A CALL HISTORY want to delete and then press the “OK” soft Press the key while in Standby mode. key. Your phone displays the main menu. All Delete Press the key to select “1.Call History”... - Page 40 This page is for your notes.
-
Page 41: Directory
IRECTORY You can save, edit, delete and view up to 500 Press the key. Your phone displays the record entries. Search menu. • TO VIEW DIRECTORY Search 1.Group Press the key while in Standby mode. 2.Name Your phone displays as follows. 3.Tel number 4.Others 001.John... - Page 42 To Search by Name: To Search by Memory ID: Press the key to select “2.Name” and Press the key to select “4.Others” and then press the key. then press the key. Enter a name or letter you want to search Press the key to select “1.Memory ID”...
- Page 43 Your phone displays searched records. You can reach each Search menu by pressing the following keys. To go to the Group Search menu: 001.John 002.Ken 003.Kenny To go to the Name Search menu: Delete Detail Back To go to the Tel Number Search menu: To Search by Company: To go to the Memory ID Search...
-
Page 44: To Setup Group
To Edit Group Name: • TO SETUP GROUP Press the key to select “1.Name” and Press the key while in Standby mode. then press the key. Your phone displays the main menu. Enter a Group Name you want and then Press the key to select “2.Directory”... -
Page 45: To Add A New Entry
To Setup Group Illumination: • TO ADD A NEW ENTRY Press the key to select “3.Illumination” Press the key while in Standby mode. and then press the key. Your phone displays the main menu. Press the key to select a Group Press the key to select “2.Directory”... - Page 46 Press the key to select an Item you want to edit and then press the “Edit” soft key. Edit the selected item. In the following example, Tel #1 data is edited. Tel #1 14581233333 Clear Press the “OK” soft key to write the data. The display returns to the previous screen.
-
Page 47: To Delete A Record
You can delete all the records in • TO DELETE A RECORD the Directory by pressing the You can delete a record from the Directory. following keys. Press the key while in Standby mode. To Delete All Directory: Your phone displays as follows. •... -
Page 48: To Edit An Entry
• TO EDIT AN ENTRY • TO CONFIRM YOUR PHONE NUMBER You can edit a registered Directory. Press the key while in Standby mode. Press the key while in Standby mode. Your phone displays the main menu. Your phone displays as follows. Press the key to select “2.Directory”... -
Page 49: Speed Dial/Preset Dial
PEED IAL/ RESET You can use Speed Dial assigned multi function Press the key to select “2.Speed Dial” keys (up to 8 entries) and Preset Dial assigned and then press the “OK” soft key. dial keys (up to 10 entries). You can enable Function Keys as Speed Dial... -
Page 50: To Use Preset Dial
You can enable the Dial Keys as • TO USE PRESET DIAL Preset Dials pressing In Standby mode, press a dial pad following keys. ) to select one of the Preset Dial entries that have already To Enable Preset Dial: registered in your phone. - Page 51 When all of the editing is completed, press the “Back” soft key. Assign Dial F7.Bill D1.Aaron D2.Donald E. Back You can reach the Assign Dial menu by pressing the following keys. To go to the Assign Dial menu:...
- Page 52 This page is for your notes.
-
Page 53: Setting
ETTING Various settings such as Incoming Call, Talk, • RING TONE Display, Password, Password Lock, Keypad Factory Default: Tone Type1 (All kind) Mode and Date & Time can be modified as required on your phone. You can select ring tone on a call kind basis (External Ring, Internal... -
Page 54: Incoming Popup
You can reach the Ring Tone • ILLUMINATION menu by pressing the following Factory Default: Green (All kind) keys. You can select an illumination color of the Info To go to the Ring Tone menu: LED on a call kind basis (External Ring, Internal Ring, IM and Non-notification). -
Page 55: Private Call
• PRIVATE CALL • VIBRATION SETTING Factory Default: Allow Incoming Factory Default: Pattern1 (All kind) Your can block incoming calls without Caller You can select a vibration setting pattern on a call kind basis (External Ring, Internal Ring, IM and Non-notification). Press the key while in Standby mode. -
Page 56: Incoming Mode
• INCOMING MODE • HEADSET Factory Default: Both Factory Default: Headset (Ring Tone Sending), None (Auto response) You can select an incoming mode of Ring and Vibration. Your can modify a headset mode. Press the key while in Standby mode. Press the key while in Standby mode. -
Page 57: Offhook Ring
Auto Response: • OFFHOOK RING Press the key to select “2.Auto Factory Default: Enable Response” and then press the key. Your can accept a second incoming call. Press the key to select an auto response Press the key while in Standby mode. times you want and then press the “OK”... -
Page 58: Rtp Alarm
• RTP ALARM • HOLD MUSIC Factory Default: Disable Factory Default: Tone Type12 Your phone can provide an alarm if RTP packet You can select the music that is provided while loss is suspected. your phone is in hold status. Press the key while in Standby mode. -
Page 59: Call Volume
• CALL VOLUME • HANDOVER TONE Factory Default: Middle Factory Default: Disable You can adjust receiver volume. Your phone can provide a warning tone when handover takes place. Press the key while in Standby mode. Your phone displays the main menu. Handover process Press the... -
Page 60: Talk Start Vibration Setting
• TALK START VIBRATION • LCD CONTRAST SETTING Factory Default: 3 Factory Default: Disable You can adjust LCD contrast. Vibrator can work as talk start notification when Press the key while in Standby mode. a called party answers your call. Your phone displays the main menu. -
Page 61: Back Light
• BACK LIGHT • FONT SIZE Factory Default: 5sec Factory Default: Standard You can adjust a timer until the LCD back light You can select a font size. is off. Press the key while in Standby mode. Press the key while in Standby mode. Your phone displays the main menu. -
Page 62: Language
• LANGUAGE • MY NAME Factory Default: English Factory Default: MH240 The information on the LCD can be displayed in Your phone can display specific strings (up to 10 English or Japanese. You can select from the 7 characters) such as your name in Standby mode. -
Page 63: Display Pattern
• DISPLAY PATTERN • CHANGE PASSWORD Factory Default: Normal Factory Default: - Your phone can display reversed LCD pattern. You can change the password that is used for Password Lock. Press the key while in Standby mode. Your phone displays the main menu. Please contact your... -
Page 64: Key Touch Tone
• KEY TOUCH TONE • SPEAKER MONITOR Factory Default: Disable Factory Default: Disable You can unmute or mute a tone that is provided You can use the Speaker monitor while talking when you press any key on your phone. as required. When entering Speaker monitor mode, you can hear the called party’s voice from Press the key while in Standby mode. -
Page 65: Date
• DATE • TIME Factory Default: 2008/ 1/ 1 (YYYY/MM/DD) Factory Default: 0: 0 (HH:MM) You can adjust the date information of your You can adjust time information of your phone phone as required. as required. Press the key while in Standby mode. Press the key while in Standby mode. -
Page 66: Time Format
• TIME FORMAT • DAYLIGHT SAVING Factory Default: 12hour Factory Default: Disable You can select a time format (12hours, 12hours You can use daylight saving as required. (AM0:00) and 24hours) as required. Press the key while in Standby mode. Press the key while in Standby mode. -
Page 67: Ntp Setting
• NTP SETTING • NTP SERVER Factory Default: Disable Factory Default: - You can use NTP server in your network as You can set a NTP server in your network as required. required. Press the key while in Standby mode. Press the key while in Standby mode. -
Page 68: Time Zone
• TIME ZONE Factory Default: Depending on country You can set time offset in the range -12:00 to +14:00, which specifies time offset between GMT and your area. Press the key while in Standby mode. Your phone displays the main menu. Press the key to select “5.Setting”... -
Page 69: Information
NFORMATION You can confirm the information of your phone • TO DISPLAY WIRELESS such as Phone Number, IP address and MAC STATUS address. You can confirm the Wireless Status of your • TO DISPLAY STATUS phone by: ● BSSID You can confirm the Status of your phone by: ●... -
Page 70: To Display Ip Address
• TO DISPLAY IP ADDRESS • TO DISPLAY SIP STATUS You can confirm the IP Address of your phone You can confirm the SIP Status of your phone ● ● IP Address SIP Status ● ● Net Mask Phone No. ●... -
Page 71: Password Lock
ASSWORD You can lock your phone against unauthorized • TO ENBLE MANUAL LOCK usage. This is also useful for guarding your Factory Default: Disable phone against inadvertent button presses. Press the key while in Standby mode. • TO USE MANUAL LOCK Your phone displays the main menu. -
Page 72: To Use Outside Lock
• TO USE OUTSIDE LOCK • TO USE POWER OFF LOCK Factory Default: 0sec (Disable) Factory Default: Disable When your phone is in out of service area, your When your phone is turned on after power off, phone is locked automatically expire timer you your phone is locked automatically. -
Page 73: Prefix Dial
REFIX To Make a Call from Call History: You can add Prefix Dial to phone number when you make a call. Press the key to view a call history you want and then press the key to select a • TO USE PREFIX DIAL phone number you want. -
Page 74: To Register Prefix No
To Make a Call from Directory: • TO REGISTER PREFIX NO. Press the key to view Directory and Factory Default: - then press the key to select a called Press the key while in Standby mode. party you want. Your phone displays the main menu. Press the key and then press the Press the... -
Page 75: Favorites
AVORITES You can use favorites menu that you can • TO ENTRY A MENU TO customize. FAVORITES Press the key while in Standby mode. • TO USE FAVORITES Your phone displays the main menu. Press the key while in Standby mode. Press the key to select “#.Favorites”... - Page 76 This page is for your notes.
-
Page 77: Menu List
• MENU LIST The following shows the menu list of MH240 with the default values and remarks as required. Category Menu Default Remarks This is main menu of the phone. MENU 0.Information 1.Call History 2.Directory 3.Tools 4.Voice Mail 5.Setting #.Favorites... - Page 78 Category Menu Default Remarks 0.Information 1.Status SIP Status Not Registered / Registering / Registered Wireless Status Not Connected / Searching / Authenticating / Getting IP / Connecting / Connected 2.Wireless BSSID xx:xx:xx:xx:xx:xx ESSID Channel 1 to 11 MACAddress xx:xx:xx:xx:xx:xx Security OPEN / WEP / WPA-PSK / WPA2-PSK / WPA /WPA2...
- Page 79 Category Menu Default Remarks 2.Edit Name (alphanumeric characters) blank 32bytes Group 01.Default to 01.Default 20.Group20 Tel #1 (32 digits) blank 32bytes Tel #2 (32 digits) blank 32bytes Tel #3 (32 digits) blank 32bytes Company Name (alphanumeric characters) blank 32bytes Ring Tone 01.Disable 02.Default 02.Default...
- Page 80 Category Menu Default Remarks 3.Tools 1.Sitte Survey 1.AP Scan (Chanel 1 to 11) 2.Ping (xxx.xxx.xxx.xxx) blank 4.Voice Mail 5.Setting 1.User Setting 1.Incoming Call 1.Ring Volume Large Middle Middle Small Gently 2.Ring Tone 1.External Ring 01.Tone Type1 01.Tone Type1 2.Internal Ring 02.Tone Type2 3.IM 03.Tone Type3...
- Page 81 3.Font Size 1.Standard 1.Standard 2.Large 4.Language 1.Japanese 2.English 2.English 3.German 4.Italian 5.Dutch 6.Spanish 7.Norwegian 5.My Name (alphanumeric characters) MH240 10bytes 6.Display Pattern 1.Normal 1.Normal 2.Reversing 4.Change Password Old Password (4 digits) blank 4bytes New Password (4 digits) blank 4bytes 5.Password Lock 1.Manual Lock...
- Page 82 Category Menu Default Remarks 6.Keypad Mode 1.Key Touch Tone 1.Disable 1.Disable 2.Enable 2.Function Key 1.System 2.Speed Dial 2.Speed Dial 3.Dial Key 1.Alphabet Search 1.Alphabet Search 2.Preset Dial 4.Assign Dial 1.Name (alphanumeric characters) blank 16bytes 2.TEL (32 digits) blank 32bytes 5.Speaker Monitor 1.Disable 1.Disable 2.Enable...
- Page 83 (xxx.xxx.xxx.xxx or FQDN) 172.16.254.1 40bytes 3.FTP Settings 1.User ID (characters) blank 40bytes 2.Password (characters) blank 40bytes 3.Folder (characters) mh240 40bytes 3.Maintenance 1.Config (Need Config Password) Password (4 digits) blank 4bytes 1.Network Setting 1.Profile 2.Hand-off List 3.1st Connect 2.SIP Setting 1.NEC-SETUP 1.Profile Name...
-
Page 84: Character Code List
• CHARACTER CODE LIST The following shows character code list when your phone is in edit mode. Character Code List 10th 11th 12th 13th ” space ’ &... -
Page 85: Message Meanings And Suggestions
ROUBLE HOOTING • MESSAGE MEANINGS AND SUGGESTIONS The following shows the meanings and suggestions of messages that may be displayed on your phone. Message Meaning & Suggestion [Password] The entered password is incorrect. Enter the correct UnAuthorized! password. [Low Battery] Battery charge level is low. -
Page 86: Tips And Suggestions
• TIPS AND SUGGESTIONS The following shows suggestions on how to resolve MH240 operation problems. Confirm the following before making a call: ● Is the power ON? ● Is the battery charged? ● Is the Antenna icon ( ) displayed? -
Page 87: Specifications
<Australia / New Zealand> AS/NZS 60950.1 AS/NZS 4268 AS/ACIF S004 AS/NZS CISPR 22 2006 PTC220 Radiocommunications (Electromagnetic Radiation-Human Exposure) Standard 2003 NZS 2772.1:1999 *Note In case of using a SIP server except SIP servers recommended by NEC, a connection test is required. -
Page 88: Led Specifications
Light Green Any abnormality is found in the battery Light Off *Note1 LED status depends on the order in above table when MH240 is in more than 2 conditions. *Note2 LED status depend on your system when MH240 displays I-SIP icon. -
Page 89: License
This product uses the software of GPL/LGPL, and we will inform that the customer has the right of obtaining the source code of that software, the modification, and the re-distribution. Please contact the nearest NEC service office about the method of obtaining the source code. - Page 90 GNU GENERAL PUBLIC LICENSE Version 2, June 1991 Copyright (C) 1989, 1991 Free Software Foundation, Inc. 59 Temple Place, Suite 330, Boston, MA 02111-1307 USA Everyone is permitted to copy and distribute verbatim copies of this license document, but changing it is not allowed. Preamble The licenses for most software are designed to take away your freedom to share and change it.
- Page 91 1. You may copy and distribute verbatim copies of the Program's source code as you receive it, in any medium, provided that you conspicuously and appropriately publish on each copy an appropriate copyright notice and disclaimer of warranty; keep intact all the notices that refer to this License and to the absence of any warranty;...
- Page 92 code means all the source code for all modules it contains, plus any associated interface definition files, plus the scripts used to control compilation and installation of the executable. However, as a special exception, the source code distributed need not include anything that is normally distributed (in either source or binary form) with the major components (compiler, kernel, and so on) of the operating system on which the executable runs, unless that component...
- Page 93 the limitation as if written in the body of this License. 9. The Free Software Foundation may publish revised and/or new versions of the General Public License from time to time. Such new versions will be similar in spirit to the present version, but may differ in detail to address new problems or concerns.
- Page 94 If the program is interactive, make it output a short notice like this when it starts in an interactive mode: Gnomovision version 69, Copyright (C) year name of author Gnomovision comes with ABSOLUTELY NO WARRANTY; for details type `show w'. This is free software, and you are welcome to redistribute it under certain conditions;...
- Page 95 GNU LESSER GENERAL PUBLIC LICENSE Version 2.1, February 1999 Copyright (C) 1991, 1999 Free Software Foundation, Inc. 59 Temple Place, Suite 330, Boston, MA 02111-1307 USA Everyone is permitted to copy and distribute verbatim copies of this license document, but changing it is not allowed. [This is the first released version of the Lesser GPL.
- Page 96 the library. We call this license the "Lesser" General Public License because it does Less to protect the user's freedom than the ordinary General Public License. It also provides other free software developers Less of an advantage over competing non-free programs. These disadvantages are the reason we use the ordinary General Public License for many libraries.
- Page 97 You may charge a fee for the physical act of transferring a copy, and you may at your option offer warranty protection in exchange for a fee. 2. You may modify your copy or copies of the Library or any portion of it, thus forming a work based on the Library, and copy and distribute such modifications or work under the terms of Section 1 above, provided that you also meet all of these conditions:...
- Page 98 from a designated place, then offering equivalent access to copy the source code from the same place satisfies the requirement to distribute the source code, even though third parties are not compelled to copy the source along with the object code. 5.
- Page 99 specified materials from the same place. e) Verify that the user has already received a copy of these materials or that you have already sent this user a copy. For an executable, the required form of the "work that uses the Library"...
- Page 100 It is not the purpose of this section to induce you to infringe any patents or other property right claims or to contest validity of any such claims; this section has the sole purpose of protecting the integrity of the free software distribution system which is implemented by public license practices.
- Page 101 safest to attach them to the start of each source file to most effectively convey the exclusion of warranty; and each file should have at least the "copyright" line and a pointer to where the full notice is found. <one line to give the library's name and a brief idea of what it does.> Copyright (C) <year>...
- Page 102 This page is for your notes.
- Page 104 Manufacture: 2-3, Kandatsukasa-cho, Chiyoda-ku, Tokyo 101-8532, Japan...
Need help?
Do you have a question about the MH240 and is the answer not in the manual?
Questions and answers