Table of Contents
Advertisement
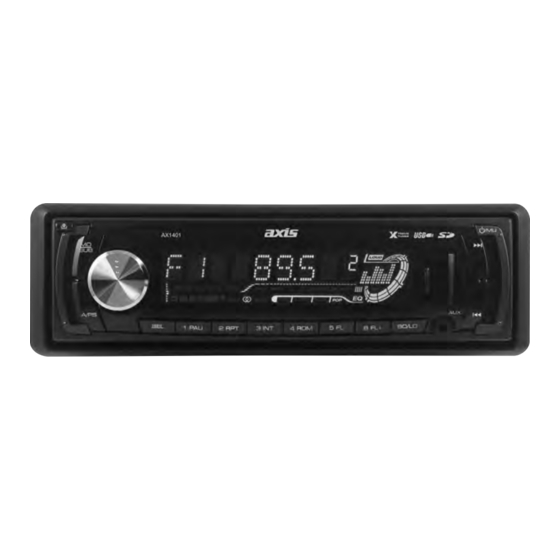
CD/MP3 MULTIMEDIA PLAYER RECEIVER
• FRONT PANEL AUX-IN • USB/SD-MMC Ports
• Subwoofer Output • 'Ultra Memory'
SPECIFICATIONS:
GENERAL:
Detachable Face Panel
Ultra Memory Power Backup
LCD Display
Illuminated Controls (Blue)
ISO DIN Mounting
ISO Wiring Harness
Includes 300mm AUX-In Cable (3.5mm Plug)
Dimensions: (Chassis)
(Nose Piece) 188Wx58Hx20D mm
12 Volt DC (10.8-15.6V) Negative Ground
CD PLAYER:
Auto Load / Eject
Supports MP3/WMA/CD/CDR/CDRW Formats
Electronic Shock Protection
Intro / Repeat / Random Play / Track Up-Down
Select Folder / Track / File Search / Pause
MP3 ID3 Tag Display
MULTIMEDIA:
AUX-IN: Front Panel
USB Port: Front Panel
SD-MMC Ports: Behind Front Panel
Compatible with audio output of most MP3 Players
178Wx50Hx158D mm
DESIGNED FOR AUSTRALASIAN CONDITIONS
TUNER:
PLL Synthesized AM/FM Stereo
Xtreme Long Range Tuner
FM 87.5~108 MHz; AM 522~1710 KHz
Interference Absorption Circuit
30 Station Presets - 18FM / 12AM Memory
Station Seek / Preset Scan / Auto Store
Automatic or Manual Tuning
Mono / Stereo
Local / Distant Control
Digital Clock
AUDIO CONTROL:
Rotary Encoder
Electronic Volume / Balance / Bass / Treble / Fader
Loud / Mute
Beep Adjustment
4-Band DSP Settings
Speaker Impedance 4-8 Ohms
Max Power 40 Watts x 4 Ch
2 Ch RCA Line In
2 Ch RCA Line Out - 5 Volt (Max)
Subwoofer Line Out - 4 Volt (Max)
AX1401
Advertisement
Table of Contents

Related Manuals for Axis AX1401


Summary of Contents for Axis AX1401
-
Page 1: Specifications
AUX-IN: Front Panel 2 Ch RCA Line Out - 5 Volt (Max) USB Port: Front Panel Subwoofer Line Out - 4 Volt (Max) SD-MMC Ports: Behind Front Panel Compatible with audio output of most MP3 Players DESIGNED FOR AUSTRALASIAN CONDITIONS AX1401... -
Page 2: Installation
INSTALLATION PRECAUTIONS • Choose the mounting location carefully so that the unit will not interfere with the normal driving functions of the driver. • Avoid installing the unit where it would be subject to high temperatures, such as from direct sunlight or hot air from the heater, or where it would be subject to dust, dirt or excessive vibration. • Use only the supplied mounting hardware for a safe and secure installation. 182mm • Be sure to remove the front panel before installing the unit. 53mm NOTE : Inclination angle for car radio installation must not exceed 30˚ otherwise the front panel will not open. release screw and bracket 182mm 53mm Bend these claws, if necessary Note: Keep the release key in a safe place as you may need it in the future to remove the unit from the car. UNIT TO SUPPORT THE UNIT RELEASE CASE... -
Page 3: Wire Connection
Notes: • Do not press the front panel hard against the unit when attaching it. It can be easily attached by pressing it lightly against the unit. Main unit • When you carry the front panel with you, put it in the supplied front panel case. • Do not press hard or give excessive pressure to the display window of the front panel when attaching it to the unit. Cotton Swab CLEANING THE CONNECTOR Rear of front panel The unit may not function properly if the connectors between the unit and the front panel are contaminated with dirt. -
Page 4: Location Of Parts And Controls
LOCATION OF PARTS AND CONTROLS AX1401 AX1401 AX1401 AX1401 (1-6) 1. POWER ON/OFF ) / MUTE (MU) 2. FUNCTION SELECT BUTTON: BASS/TREBLE/BALANCE/FADER / DISP/LOCAL/STEREO/BEEP/ADJ TIME/AUDIO DSP (SEL) 3. VOL UP/VOL DOWN FOR BASS/TREBLE/BALANCE/FADER / DISP/LOCAL/STEREO/BEEP/ADJ TIME/AUDIO DSP 4. PRESET STATIONS (1,2,3,4,5,6) (1-6) AX1401 5. -
Page 5: Operation
OPERATION POWER ON/OFF ( ) / MUTE (MU) By pressing this key, the unit is switched on and off. This unit is turned on by pressing any key. If you just press this key briefly, it will turn to MUTE. To return to sound, press it briefly again. SELECT VOLUME UP/DOWN By turning the VOL (3) knob Right or Left, you can adjust VOL/BASS/TREB/BAL/FAD in the order listed. To select each function, Press the SEL (2) button briefly until the desired function is shown on the display. Figure 1 shows how functions are selected: Fig. 1 Selection of sound control function 1. VOL 2. BAS 3. TRB 4. BAL 5. FAD Turning the VOL knob Right or Left. Increase or decrease the volme by turning . - Page 6 2 sec. DISP STEREO BEEP ON / 2nd / OFF 2 sec. AUDIO DSP CONTROLS (2) DISP STEREO to set minute to set hour BEEP Press the SEL button again (for more than 2 seconds) to activate Selecting mode for DSP: 2 sec.
-
Page 7: How To Select Mp3/Wma Files
CD/MP3 CONTROL Inserting the CD Carefully slide the CD or CD-R or CD-RW through the CD slot into the CD compartment. The CD starts playing automatically. TRACK/SEARCH BUTTON FORWARD AND REVERSE TRACK SEARCH (8) Press and release to advance to next track or to return to the beginning of the current track (track number will be displayed). -
Page 8: Memory Backup
20. MULTI-MEDIA CARD (MMC) / SD CARD SLOT Note: Supports MP3 ID3 format music only. 1. Press to open the front panel. 2. Memory card insert it into the memory card reader. RESET 15° 15° 3. The player will automatically starts playback. 4. See the section on operations common for audio files on how to control USB or memory card playback. -
Page 9: Troubleshooting Guide
CAUTION & MAINTENANCE This detachable panel AM/FM car radio with MP3/CD player is an example of superior design and craftsmanship. The following suggestions will help you care for the product and experience many years of enjoyment. 1. Do not touch the contacts on the front panel or the unit body. 2. The product can only operate on 12V-14V DC power supply, negative ground. -
Page 10: Technical Specifications
TECHNICAL SPECIFICATIONS CD/MP3/WMA PLAYER SECTION Signal to Noise Ratio > 60 dB Channel Separation > 50 dB (1kHz) Frequency Response 20Hz - 20 kHz TUNER (FM) Frequency Range 87.5 - 108 MHz Sensitivity 2.8 µV Stereo Separation 30 dB Signal to Noise Ratio 50 dB Channel Step 100 kHz... -
Page 11: Consumer Warranty
SIX MONTH warranty. An abnormal commercial application is one where usage, dust, vibration, heat/cold and other environmental conditions exist at an extreme level. Please complete details below in the event of warranty service being required. Purchaser’s Name: Purchaser’s Address: AX1401 Model Number: Serial Number: Dealer Name: Date of Purchased:...
Need help?
Do you have a question about the AX1401 and is the answer not in the manual?
Questions and answers