Table of Contents
Advertisement
Advertisement
Table of Contents

Subscribe to Our Youtube Channel
Related Manuals for Opel Speedster


Summary of Contents for Opel Speedster
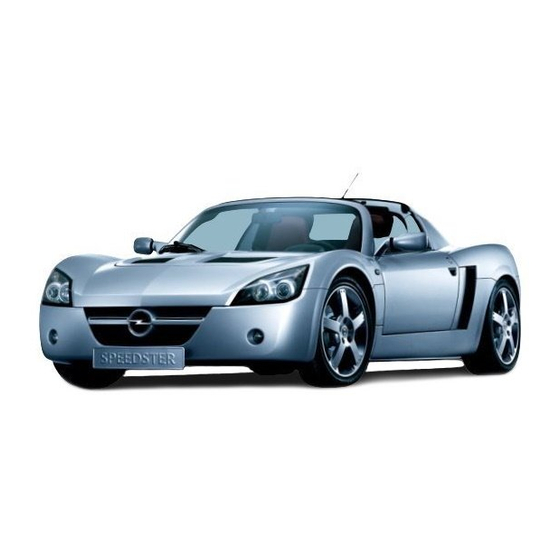
- Page 1 Opel Speedster @- 5"="." Operation, Safety, Maintenance...
- Page 2 Opel Speedster Owners Manual...
- Page 3 In Brief Key numbers, Code numbers Unlocking the vehicle: Adjusting the seat: Remove key number from key_ Turn key in door lock, Pull handle, move seat, _ , _ . remove release handle, The $93 "umber '3 9e" '" the Vemcle papers Press lock button and open door lock seat in position _ '...
- Page 4 Lumbar support: Adjust interior and exterior mirrors: Seat belt: The mirror housings can be swivelled 7 Pump on outboard side of seat Draw smoothly from inertia reel, guide over the shoulder and into position Operate pump to increase support. engage in buckle Move lever on underside of interior mirror...
- Page 5 S 0622...
-
Page 6: Table Of Contents
Page Lever for headlamps flash, dipped and main beam, ...... 9 turn signal lamps, ......- ..9 Ventilation jet ........41 Instruments ......16, 18, 19 Odometer reset button (not visible) ........19, 35 Lever for windscreen wiper and wash system ...... - Page 7 S 0623...
-
Page 8: Lever For Headlamps Flash
Page Ventilation jet ........41 -Ii-(DB3-I Starter button ........Heating and ventilation controls ..40 Lever for headlamps flash, dipped and main beam, ...... 9 turn signal lamps, ........ 9 Instruments ......16, 18, 19 Odometer reset button (not visible) ........ -
Page 9: Horn
r___ Control indicators Fuel level: see pages 18, Heating and ventilation Headlamp main beam: Blower switch: see pages 9, 34. ¢|?> Turn signal lamps: see page 41. see pages -.-E: Coolant temperature: Air distribution: see pages 17, Parking brake system: (®) see page 40, see pages 16, 73. -
Page 10: Dipped And Main Beam
Light switches: Dipped and main beam: Turn signal lamps: ENE = Side lamps Push lever fonivards = Main beam Lever in rest position -§- = Headlamps and side lamps Pull lever towards Upwards Flight turn Fog tail lamp steering wheel = Dipped beam Downwards Left turn... - Page 11 Horn: Windscreen wiper: Press Move lever upwards Windscreen wash system: Timed interval wipe Pull lever towards steering wheel Slow Wash fluid is sprayed onto the windscreen the same time the wiper is operated for Fast several cycles. D Further information - page 75.
-
Page 12: Starter Button
Releasing the steering column lock: Starter button: Ignition switch: To release the lock, move steering Ignition off Depress button with the ignition on to start wheel slightly and turn key to the engine (transmission in neutral). Steering unlocked, ignition on position I Ill Key returns to position ll... - Page 13 Before driving off check: I Tyre pressures and condition. I Engine oil level and fluid levels in engine compartment (see pages 71 to 72). I All windows, mirrors, exterior lighting and number plates free from dirt, snow and ice and are operational. I No objects are on the instrument panel.
- Page 14 And now, have a good journey Releasing the hand brake Starting: Transmission in neutral Drive carefully, Slightly raise lever. Depress lock button. economically and Depress clutch Lower lever fully. with the environment in mind Do not accelerate The mechanical hand brake acts on the rear Turn key to II Whilst driving, do not do anything that could wheels.
- Page 15 Parking the vehicle: Service, Apply hand brake firmly Maintenance Switch Off engine Your Authorised Opel Dealer can provide you RGMOVG with reliable service. All work is correctly ' Engage steering wheel lock . performed according to factory instructions.
- Page 16 =16 Genuine Opel Parts and Accessories and released conversion parts are available from your Authorised Opel Dealer, who can advise You will also nd further you on any point, including permissible important information on...
- Page 17 Flashes rapidly: a turn signal bulb has failed. Brake system Lights up when ignition is switched on if fluid level for brake hydraulics is too low. Consult an Authorised Opel Dealer. Further information - see page 54.
- Page 18 Should the indicator continue to flash, consult an Authorised Opel Dealer Coolant level immediately. Is illuminated when coolant level is low and requires topping up.
- Page 19 Tachometer Speedometer Making use of the tachometer helps to save fuel; it indicates the engine speed in revolutions per minute. Indicates the vehicle speed. Display panel Warning zone on right: maximum permissible engine speed exceeded, danger to engine. Displays fuel level, odometer, trip odomete and coolant temperature.
- Page 20 Odometer Coolant temperature gauge Records the total distance driven. The coolant temperature is displayed in the bottom right hand corner of the display as Trip odometer soon as the coolant temperature reaches Pressing the reset button located on the 70 °C. right hand side of the steering column shroud For physical reasons, the coolant temperature for less than one second, will zero the...
- Page 21 23 10 W overhead antenna. CNet NMT Standard D-Net (GSM 900) 20 W E-Net (GSM 1800) 10 W Mobile telephones fitted at a later date must be installed by an Authorised Opel Dealer. Accessory socket, see page 27.
- Page 23 L Keys, Doors, Bonnet Replacement keys The use of replacement keys ordered at an Authorised Opel Dealer ensures that the electronic immobilizer functions correctly. This will prevent unnecessary expense and possible insurance-related problems in the event of loss or damage as well as problems concerning the validity of warranty claims.
- Page 24 I Turn ignition off and remove key, Have your Car Pass ready to hand when I wait approximately two seconds, consulting an Authorised Opel Dealer. To deactivate: I then repeat starting procedure. Insert ignition key and turn the ignition on; the engine can then be started.
- Page 25 Consult your Authorised Opel Dealer. If any of the doors are not fully closed when the alarm is activated a warning will sound. Alarm back-up system =16...
- Page 26 (e.g. at too great a distance from the vehicle). The remote control must be reprogrammed by an Authorised Opel Dealer. Changing the battery in remote control unit Bonnet release Replace the battery in accordance with the...
- Page 27 To hold the cover in the open position, insert Engine and load compartment cover the support rod into the slot provided in the release underside of the engine cover. The engine cover release lever is located Before closing the cover, press the support behind the drivers seat.
- Page 28 Seats, Interior Do not connect any current-delivering accessories, e.g. electrical charging devices or batteries. Connected electrical accessories must comply with DIN VDE 40 839 standard in terms of electromagnetic compatibility. otherwise malfunctions may occur in the vehicle. Cigarette lighter 3;. Seat adjustment see page 4.
-
Page 29: Safety Systems
_§ Three-stage restraint system Safety Systems The system comprises I Three-point seat belts. I Belt tensioners on the front seats. I Airbag system for driver. These stages are activated in sequence depending on the seriousness of the accident: Seat belts are designed to be used by only I The automatic seat... - Page 30 sing the belts Removing the belt To remove the belt, depress the red push- Fitting the belt button on the buckle; the belt will retract Pull the belt out evenly from the retractor and automatically. -guide it across the body, making certain that ltis not twisted.
- Page 31 Belt tensioner control indicator The seat belt tensioners are monitored I The Opel safety directives must always be electronically together with the airbag, and observed when disposing of the vehicle or their operational readiness shown by the siiii; components of the belt tensioners. For this control indicator in the instrument panel.
- Page 32 The airbag system is triggered: Airbag system I depending on the severity of the accident The airbag system is identified the word I depending on the type of impact airbag on the steering wheel. I within the range shown in the illustration. The airbag system comprises: Examples: I an airbag with an inflator in the steering...
-
Page 33: Airbag _System
The system might not be triggered in the F01 This reason. dlepeeal Sneuld event of an accident. Have the airbag system Den°0nneel by an Alnneneed Opel Dealer- checked without delay by an Authorised Opel Dealer. The system's integral self-diagnosis... - Page 34 All items are Genuine Opel Parts and Accessories, guaranteeing high quality and an accurate fit. Your Authorised Opel Dealer will be happy to advise you, for example with regard to: I Tow rope Tow rod Exterior...
-
Page 35: Hazard Warning Lamps
Lighting Exterior lights Interior lamp ENE = Side lamps Operated by the switch. With the switch in.its Headlamps and side lamps uppermost position, the lamp functions as a Fog tail lamp courtesy light and operates when the doors are opened or closed. #0 = Front fog lamps =!= Hazard warning lamps... - Page 36 Headlamps when driving abroad The asymmetrical dipped beam increases the field of vision on the near side of the lane. When driving in countries which drive on the opposite side of the road, this causes glare for oncoming traffic. To avoid glare, the headlamp glasses must be provided with an appropriate black cover strip.
- Page 37 I If you experience difficulty or are unsure To remove about the procedure, contact your 1. Open both doors or lower the windows. Authorised Opel Dealer. 2. Unscrew the three bolts that secure the I Only use the 'torx' tool supplied when front header panel and remove the panel.
- Page 38 an-a-\c-z4ns.a..;.;;..,u..;._._._,;=,,.,;,_._u,_____ 3. Unscrew the bolt that secures the front 5. Unscrew the bolt that secures the rear 7. Unscrew the bolt that secures the rear cup I dowel bracket and remove the bracket. cover panel and remove the panel. bracket and remove the bracket.
- Page 39 The rear cover panels are handed and can 5. Install the rear cup bracket, ensuring that To install only be installed to their respective sides. the cup locates correctly over the cantrail I During installation, ensure that the bracket bracket (see inset), and retain with the bolt. tether wires do not become trapped.
- Page 40 Load one cantrail into the bracket, rotating To install Soft top down to ensure that the latches engage. Ensure that the windows are down or that the F To remove vehicle doors are open. From the other side of the vehicle, load the Ensure that the soft top canopy is dry and that second cantrail and rotate down, ensuring...
- Page 41 Temperature switch Heating and ventilation controls Heating and ventilation system Hotter Air distribution switch Opel air mixture system: by mixing cold and £4 To foot area hot air the temperature can be regulated without delay and held practically constant at £1...
- Page 42 Fan switch V Ventilation jets Ventilation Three Speeds: Depending upon the position of the . I Turn temperature switch to blue. 0 Off temperature switch, cold or heated air will be directed into the vehicle via these jets. I Switch on 3 High Speed I For maximum...
- Page 43 Heating The amount of heat is dependant on the engine temperature and is thus not fully attained until the engine is warm. For rapid warming of the passenger compartment: I Turn temperature switch to red. I Switch on fan. I Set the air distribution switch to the desired position.
- Page 44 _ .»:~ -.-'4---ru__|:-J-n;:_ E 9, '_Lj,_;,|-&'r__l_ _ , . _' 1rt3:.:::.§s.tz1.*;-3'5;iczsraw-:S?.a?fr:.a:-.gre. -"F":-reg; 5.3.: er: :3__ua.a:e=a gf_ti_2_e ,;:r-;=.=:l{5-._:-.:. . _C5§f$:_. 1': '3. " %i?:1T§r%;2I* traffia yam. turn at am -must-.e:&i:si §_'1:}=f.-1' to pr-afrnt >f»'i:.:.:'-.*::*«:_; .«: 9"-?.1»:*.._-*';:*"Li-.u_:~*-=2 I ._. - 3té1r*%.é.*xg_; ¬52» shut -- ;".
- Page 45 Driving in mountainous terrain The first 1000 km (600 miles) Driving Hints Electrically driven fan: The fan cooling Drive your vehicle at various speeds. Do not capacity is not dependant on engine speed. It use full throttle. Never allow the engine to is not necessary, therefore, when driving labour at low revs.
- Page 46 Clutch Engine rpm Always depress the clutch pedal hard to the Under all driving conditions drive in a lfthe engine temperature is very high, e.g. T after driving in mountainous terrain: allow the floor to prevent shifting difficulties and favourable engine speed range. transmission damage.
-
Page 47: Saving Fuel
Idling Warming up Saving Fuel I The engine also consumes fuel when idling. I Driving at full throttle or idling while the engine is still cold increases engine wear I If you have to wait for more than one and fuel consumption. minute, it is worthwhile switching off the . - Page 48 I Fiegular checks (every 14 days) pay off. ._..l'." fully to avoid traffic congestion. I You will save fuel by consulting an Electrical loads Authorised Opel Dealer. ..-'~"~_'i'i1% anticipation avoids unnecessary I The power consumption of electrical Extreme driving conditions equipment increases fuel consumption.
- Page 49 The pollutants contained in exhaust gas are and high revs, can increase the noise level reduced. up to four times over. As an Opel driver, you can make a major Select the next higher gear as soon as contribution to protecting the environment: possible.
- Page 50 I By consulting an Authorised Opel Dealer, pollution in the form of exhaust emissions. you protect yourself, other road users and Drive considerately, especially in residential the environment.
-
Page 51: Fuel Consumption
Fuel with too low an octane rating can cause components lasting for several thousand pinking. Opel cannot be held liable for kilometres/miles. This increases fuel resultant damage. consumption. Petroi with a higher octane rating can always be used. - Page 52 ~ occurs in the vehicle itself, have the cause I fuel is not leaking. immediately determined by an Authorised To restart the fuel supply, reset the cut-off Opel Dealer and a remedy found. device by pressing down the button.
-
Page 53: Catalytic Converter
Controlling exhaust emission Exhaust system Catalytic converter, Through designre|atedg measures mainly in When the vehicle is driven for the first time, the area of the mixture formation system and Exhaust Emissions wax and oil on the exhaust system may ignition system the proportion of noxious evaporate, producing smoke-like emissions materials in the exhaust, such as carbon which should not be inhaled. - Page 54 Service Booklet. All checks and setting work should therefore be left to an Authorised Opel Dealer which has suitable equipment and trained personnel available. Electronic testing systems permit rapid diagnosis and remedying of faults.
- Page 55 Service Booklet is therefore of the your journey. utmost importance for traffic safety. Have worn brake linings replaced by an Authorised Opel Dealer, thereby ensuring that only Opel approved parts, which guarantee optimum brake performance, will be installed.
- Page 56 ABS fails. This may cause the vehicle to swerve. The benefits of the ABS are lost. You can continue driving, provided you drive with care and anticipation. Consult an Authorised Opel Dealer to have the cause of the fault eliminated.
- Page 57 Wheels, Tyres "93 Factoryfitted tyres are matched to the chassis and offer optimum driving comfort and safety. Consult an Authorised Opel Dealer before changing over to different tyres or wheels and obtain their advice as regards technical possibilities. New tyres should be fitted in pairs, or for preference in sets.
- Page 58 Check tyres regularly for damage (foreign bodies, punctures, cuts, cracks, bulges in sidewalls). A damaged tyre could burst. Check wheels for damage. In the event of damage or abnormal wear, consult an Authorised Opel Dealer.
- Page 59 Up to 270 km/h (168 mph) around the tyre within the tread. Their position is indicated by markings on the tyre sidewall. In the event of tyres requiring changing consult an Authorised Opel Dealer. 1) Varies from country to country on account of national regulations.
- Page 60 .33" lyfine|inked chains - not protruding more an 15 mm on the tyre tread and inboard des (including chain lock) - as :: ommended by Opel may be used. tyre chains may only be used at speeds up to km/h (30 mph) and, when travelling on Tn that are free of snow, they may only be :_;...
- Page 61 Se"-'...He|p Do not start with quick charger This prevents damage to electronic components. Fuel cut-off device see page 51. Starting the engine by pushing or towing Starting the engine with jump leads =16 e A vehicle with a discharged battery can be _ started using jump leads and the battery of- another vehicle.
- Page 62 be done with extreme care. Any from the following instructions lead to personal injury or damage ng from battery explosion, as well as to e to the electrical systems in both I Do not connect the lead to the negative terminal of the battery on the vehicle providing the jump start! The connection point should be as far away from the...
- Page 63 To prevent the entry of exhaust fumes from the towing vehicle, close the windows. Have your vehicle taken to the nearest Authorised Opel Dealer, who will serve you best to get your vehicle back on the road. Towing service Entrust your vehicle only to the towing service...
- Page 64 'ng of the vehicle are only carried out by 12 miles) in a moderate manner and not Authorised Opel Dealer. exceeding 45 km/h (30 mph) to allow the I :1 ver., if the vehicle needs to be lifted in an sealant to spread.
-
Page 65: Ashers
B'e 15 A I Never use the tyre aerosol on more than set of fuses, obtainable from an Authorised Yellow 20 one wheel at a time. Opel Dealer. C|ear 25 A 1 Rating in Amperes. - Page 66 No. Circuit Rating" *0 Horn 11 Alarm and interior lamp 10 A ®®®¬B®¬B¬B®@ 13 - ii. . In . ii 14 Head lamps 25 A i__ if I If _. 15 Radio 20 A 16 Side|ampLH 19 Lamp switches 10 A __ o .
-
Page 67: Turn Signal
Headlamp aiming Caution! Headlamp aiming should be carried 4. Twist and remove the bulb housing(s) out by an Authorised Opel Dealer. Headlamp dipped and mam beam, parking and front turn signal indicator required and remove the defective bU|b($)- amps 5. Insert... - Page 68 2. Twist and remove the bulb housing(s) 3. Reinstall lens assembly. 3. Renew bulb and install lens. required and remove the defective bu|b(s). Instrument illumination 3. Insert a new bulb and replace the Have bulbs replaced by an Authorised Opel housing(s). Dealer.
- Page 69 All parts have undergone special quality and precision checks to establish their reliability, safety and specific suitability for Opel vehicles. Opel Service is backed by the experience of Our aim: to keep you happy with your car. one of the world's leading automobile manufacturers.
- Page 70 28046 Madrid Spain '0 - I Danmark Tel. 900 20 25 20 ;.obaksvejen 22 Opel Ireland Ltd. A-I Seborg - Denmark Opel House, Unit 60, Heather Fload Saab Opel Sverige AB el. 39 57 85 00 Sandyford, Dublin Ireland Esbogatan Tel.
- Page 71 " . t r ' your vehicleitisofvital Malntenance maintenance work is carried out at O intervals as specied by Opel in the J 3' § whichever isr H ched rst - your vehicle is due for its next In the case of low kilometre/mi O...
- Page 72 500 km (300 miles) or responsible for ensuring that the oils they before starting a long trip. Capacities, see page 90. ~ pply are suitable for Opel vehicles. A stabilisation of the oil consumption will not The oil level must be checked...
- Page 73 The anti-freeze provides excellent corrosion protection for the cooling and heating system. Use genuine Opel oil lters. as well as freeze protection down to -30 C. Anti4freeze is a danger to health; it must therefore be kept in the original container and out of the reach of children.
- Page 74 "MIN" mark. Flemove filler cap carefully so that pressure To top up, use Opel heavyduty brake fluid can escape slowly. Top up anti-freeze. If no (see Technical Data). It is essential to ensure anti-freeze is available, top up with clean tap absolute cleanliness during this process as water.
-
Page 75: Regular Checks
Opel Windscreen Wash Solvent. If the wiper becomes frozen onto the glass, it should be released with the aid of Opel De- icer Spray. To renew blade, lift wiper arm, remove release clip and detach wiper blade. Wiper blades whose lips have become hardened, cracked or covered with silicone must be replaced. - Page 76 Windscreen wash system Fill only with clean water to prevent the 7016 nozzles from clogging. To improve cleaning efficiency, add a little Opel Windscreen Wash Protection of electronic components Battery Solvent. In order to avoid the breakdown of electronic The battery is maintenance-free.
- Page 77 Authorised Opel Dealer I Connect battery, see page 75. I Do not apply hand brake. to ensure that no damage occurs: I Check tyre pressure, see page 88.
- Page 78 -_I __l...
-
Page 79: Vehicle Care
T Vehicle Care Consult an Authorised Opel Dealer with Vehicle care aids =1: regard to care aids tested and recommended Vehicle wash: by Opel. I Car Shampoo In caring for your vehicle observe all national I Sponges environmental regulations, particularly when... - Page 80 (a chamois will leave lint, while a be removed by thorough washing with plenty of lukewarm water together with a car wash brush may abrade the threads) and use a Opel Exterior storage detergent (household detergents are not Car Shampoo and lukewarm water solution.
- Page 81 Authorised Opel Dealer. Do not forget the surfaces and edges nearest to the road where Wheels and tyres Never let things deteriorate this far. Waxing surface cracks may also form unnoticed.
- Page 82 A smearing wiper blade should be cleaned surfaces. Wash engine only if absolutely with a soft cloth and Opel Windscreen Wash necessary. Before washing the engine, Solvent, and replaced if necessary.
-
Page 83: Technical Data
European Community The vehicle identification number is on the standards. Opel reserve the right to make vehicle identification plate, which is mounted modifications. Specifications in the vehicle on the right-hand side B-pillar and on the documents always have priority over those forward chassis, visible through the front given in this manual. - Page 84 When using commercially available engine oils, a matter of principle only those oils Engine oils that meet the minimum quality requirements We recommend using Opel engine oils with specified in the following table are the following qualities and viscosities: permissible. Information...
- Page 85 T'"5'i55° "id SAE 10 W_30 10 W40 10 w_50 Opel specified transmission Coolant LLC (long Opel life coolant) Brake fluid DOT4 brake fluid meeting US Safety Standard FMVSS § 571.116 and SAE Specification J 1703. W30, W-40 IIIIIIIIIIIIIIIIIIIIIIIIIIIIIIIIIIIIIIIIIIIIIIIII Information...
- Page 86 Engine data Sales designation 2.2i Engine identier code 2 22 SE Number of cylinders 4 Bore dia. (mm) 86.0 Stroke (mm) 94.6 Piston displacement (cm3) 2198 Max. engine power (kw) at rpm 5800 Torque (Nm) 3'! rpm 4000 Compression ratio 10.0 Octane requirement (FiON) unleaded...
- Page 87 emission (app|,ox_) Fuel consumption (approx. I/100 km 1), CO2 emissions (approx. g/km). Fuel consumption Z 22 SE The EC Directive 80/1268/EEC as last Engine amended by 1999/100/EC applies measurement of the fuel consumption of Urban 12-3 Vemclea Extraurban - Fuel consumption previously given...
- Page 88 The combined total of front and rear axle Speedster 1 150 945 loads (see vehicle identification plate) must not exceed the permissible gross vehicle weight, i.e. if the front axle load is being fully utilized, the rear axle load must not be such that the permissible gross vehicle weight is exceeded.
- Page 89 Consult an Authorised Opel Dealer to 175/55 R17 81 V 1 8/26 establish which makes of tyre have been approved by Opel 225/45 R17 90 v 1.9/27.5 Winter tyres The tyre sizes given may be used as winter tyres (M+S tyres).
- Page 90 Electrical system Battery Voltage 12 Volt Amp Hours 45 Ah Spark gap 1.0 :1: 0.1 mm...
-
Page 91: Cooling System
¥ Capacities (approx. in litres) z 22 SE 1) Engine Cooling system 12.3 Fuel tank 36.0 Engine oil with filter change 5.5 Engine oil between MIN and MAX on dipstick... - Page 92 Dimensions (mm) 399°-d5te" Length 3735 Width 1708 with exterior mirrors 1384 Height 1117 Wheelbase 2330 Track width: Front 1450 Rear 1 Turning circle diameter (m): kerb to kerb 10-5 wall to wall 13-25...
- Page 93 Number plate mounting When installing to the front of the vehicle it is important not to obscure the air intake. When installing to the rear of the vehicle be sure to mount it as high as possible. This is especially relevant for plastic number plates that may be damaged by heat from the exhaust system.
- Page 95 Fuel consumption ........Cigarette lighter .........27 Fuel cut-off device ........51 Code numbers ..........4 Fuses ............64 Control indicators ........8, Coolant ............72 Coolant temperature gauge ..... ..19 Genuine Opel Parts ........15...
- Page 96 Ignition switch ......... .. 11 Instrument illumination ......Instruments ..........16 Interior and upholstery ......80 Interior lamps ..........34 ............4, 22 switch ......... Light .. 9, 34 Paint damage ..........8O Lighting ........... .. 34 Parking the vehicle ........
- Page 97 The information and illustrations contained in this Owner's Manual are effective as of the date indicated below. Adam Opel AG reserves the right to make changes to the technical specifications, features and design of the vehicles relative to the information and illustrations contained in this Owner's...
- Page 99 ,® ._o..
- Page 100 m sm 5 .m ..>_ o h m _ m a o m .2 um 8 cm :23 .mc:m 9: 9 m>oE o v m 9 3 H m 2 . m . m Q_D H_ H.
- Page 101 .._o _ua__a> .m..o._ ._o_._o ._Ot__.: .o_.mE_ m a :8 co £9: £2. ..o. 0:.. ._0m .5 mn_m._o .w_NNm woaumg :o_..m 52:3. ._w>m_ w>o_>_ mc_m .a..F_ .E_oa 4603 9: mmobm ..oU_: ._0>o couzn mmma >__ 3a._ ..m. Um..m_ ..oc :_ omm 53>...
- Page 102 «moo...
- Page 103 m ....5 ..mm ....o_..F ....mama 3595 EmN .aEm_ __9. mo? .ma .maEm_ Aw_n_m_> 8 co.._2.w Joccon 5.. .m>m_ mmmw_mm_ 8.52 .8 mm.._B_Bw mom E0... m._m:mm_.. :oE:m_ mm¬_< 5.2.. ow ..1...? . .
- Page 105 dEm_ : mo.. _m .maEm no .3....m..or ..om ... _.m ... mm ..... _._....mama @5595 Emm ucm. A.w_n_m ;o.._3m amccon ..dEm._ 5.. .96. mwmm_mm .9 mo_._o.._>>.w Em: ._o_._mE_ o_vmm_ mo.. E9... w._m_._mm= mmn.__< :._o_._ x-.q .
- Page 106 . m m : . E .2 Q .2 mm m m .3 .a m m . 2. :mm .a mm 2 .3 a:_ mmmm .E mx .5 ma .8 .5 .m .m_. 9. . 82 B "m "aE :3 ac" ma_>...
- Page 107 ____ gown U053 2 >95 m:_xmE :.wEs _mc_m 9 mE_.= mam. ._m>m_ @>OF_ cosm. m:>:.w :._:.. _mmE mczw :mc>> #0.. :oEmon_ umo. .mc_m mcm_ "mnEm_ ___3 £5» .co_.._m >__mo ._0>0_ :wc>> .22» 5:... mc_._m ._o_.__E :_ ._e>o._ m_Em.sE m_u._m2E_._ .mc_mcm.. c..E>>...
- Page 108 .6 cm9om m_.= .8 Umu .ma_ o£ .092 .65. __:n .._ to mama "E396 cam? :ow.om co_..m Eats. 9: $93 _w> mu._E ..o>o_ 9.05. :63? :oo._ow Emu. amok. "E0...
- Page 109 oc_m_._. moco _._. 2 co émbaw :o_mm co_.. £_>., _om. cotbn .9 mama Eozn m:_m:o m5 .m:_:c:._ m_ m:_tm..w gatmum 200. m:_. m:_m >9. m:_..o3w >9. :._:.. £00. 2. 3520.. Una >_ _woEs _ :o_u_mon .3 $8 .m:_mc _._o m:_. __ :o_.._m 0..
- Page 110 :5 m:o >_w eo_. awmwm e.._>> wmwew .mn_xoeoE m:oeo o._w moww Hmzw w_wee em>we eonewo e_w..eo mmww we_m e:._ ew>w wmwa .nwmo meoo mmwe .._:o_oo emzwexm .w._£w._mE. umzwexm wmzwexm ._:ono me_E eoexw .meoe _m3on Eoem we_mem m_m>w_ ._wewa ..ewE:.e mew. >=o9eoo .eo=_neoo mwewmm...
- Page 111 mc__ _u:_ :_ __.:0 ..=__ cm>_a 2.89 mama >m:..:o_ uooa .3 mama :o_. _u:m >=mo_ o_tm: .3 mama .m:_>_. ..m__£s m>m: .25: .>__:um. m>_5 .6 ummc mxmh ac_>_5 50> _m:.. a:_>mm Bm.:m_u u:< ..m> >_E ..mm._ cmés >__m m£ mv_m _u:m a:_mm mmom...
- Page 112 . >= __< :o> .m:o=o mE>oE cwo ._o_m _omw mc_Eo oo:m:B:_m .oo_>._0w mmwm mxmb 23... m m:_m:m Eta co :2 >mE :9. m_ goo. _ _omE E3... I mctw >__EE mm 935 van 9: 23¢ wwao_m .Eo_..o9 mmmm .959. ._o to cogaw 3% om._m>...
- Page 113 oo:m:oE_ 9.0.: ._$¢_>._0>O .m_o._Eoo ..o_._t:__ .xo_u:_ =3» _m:o_Eo :o_uuE._oE _.0_._D 5 mm? mm... _u:m boumm 363500 ow_m om_m two. a_oEo> mu:oE.5m:_ u:aEn__:_uo .:o_um._ono Emton_E_ >_n_wmon omm0_n_ ..:o> u.._._. :o> E9... w_n_m__ mm_>um 2.8. wmucmumzm mc_._omm¢oo< mo_.._..o£:m .oa>._ .a___%__e cows osscwwa am...
- Page 114 _o_:_.._ cam: 2 co zzmco :o_. Um_._ :o_.._ mama 93.5 _m> ..m_ co_E ._8__..% 9.99 9.92 m:_._ mEm_._ mu .c >m_am E mwa mEoo 9.: E .m>m maEm ____..mm >_u_n_ C053 mm _m:m_m C ___u_ ._wcma .>EEm «a mEmE:.=m...
- Page 115 mooo .:o oco 32 .E. mama m_ o5..m .600 m_ _o>o_ Em_ooo ocm co ..o_mmo nocoésm 3o__m m_ Emma :_mE moi: on m_ co_..__._ coca 9.. oco m:_m .oo..o._moo ootm m_ Em_ooo 3&2 _oom_. o..3E@nE cos? coca, on own? on 9.__&2 o:_mco com:...
- Page 116 .._9 w>m_ 9: .6 .mEo m> m> .__:u 3&5 .___..om §EE .mw.=.__ E _m> _oE 46 .mS..EmaE __o:m_._ _o:mn_ >m Em_ooo vcm .03. .63". mm._..__ mm oz» mmam m5 m ..3oEo_uu ooow .xo m_oEm :_ umm m5 m ~_ :9 w>mm .m..__m.cm 9 >>O_...
- Page 117 >_:o 9.5.8.2 9: E _om> mS..m .uwN E$m> _m>o mmcom 939852 m._3m._m >w_n_m_u w._£9 >mE Em_oo 9: dcomm _m> ._mEoo Em_o maoc wmsmm :o_..m 9:50 Em_ooo 9: mm coom Eozon a..3u..@n_E o._3m.._ Em_ooo _wo_mb._a .on_ Em_ooo w_._._. 9: .6 mu .:o= 9: .6 mm m£...
- Page 118 E u > .. 9 E w : m I 0 o E >> on E >> on Eo >> 3 or E0 .5 om 3 mm ._._ HWDE :w:E 3 9 68 >> 2: N15 9. an _> m_m>m_ ._9son_ o_Ua..
- Page 119 -;.u f ff ' ' -__|Ij'| 1 '1'...
- Page 120 9: =3 9: swa 9: :30 _uw.._oo_c 9190. mu_m 9: __:a 9: .6 v9.00. >_:o 9: _._.._z. comm goon .m__u:m; m._oon_ 5 mEm uo..m w_n_ .mE_ bcmt .6 >.._v 9: m:_E omconxm Emmmo .>=oo mcoz ._mN_ o_:o:o mEo_n_oE 9: E5 mmmco .mow_a mzmm...
- Page 121 .m.t< .m 9.: xoo .u._ xoo_ .w_oE.m> 9: m.m_o __m m con? m>m3 .m_oE E E3 an E: Hm:E gmmo 5:9. .80 _o >Um.m. moon ._ m:._. mmmm E .30» mmmn_ 50 ms» m.o__m._ m£ 9.__>$_ mc=_:m:oo m.>m_._ .._:m.. m _u9wc_ 9: :m_.__.s m_ Qw...
- Page 122 doom ._m> ._u9m E._m ___>> Am._9 wU_m mc_u m._o..E._ ..o9 >._ :m._m aziomn bmzmn 9: 8%, 6..v9mmm coma F_.=w_ >_9w=uoE E9m>m .530: mé .xo.ao_w 9: mmo:9 _mE.o ._mu:: ..om _o..E 9oEm .5 :o:o9Eoo o_oEm> 9. mmmoo _,_a%..$30: u9o9.co ._o:coo .9059...
- Page 123 3 _._o=_mo m_._._. >__m._tmd >__EEmo .m_mum u.w.5o.. 9: come .u.wmo_o _m:_m_.o E500 >__:.. g_ m. ___3 Ucw _o$_oo_ B >_E 9: m _uEmoo_.m_ _u9_oo gmcco dame mu 9. ._m.>w E39 - u$_oo__._: ._o:ma ._m>m_ mm m_ #_ .._ 3.8 m._ E ._w>w_ 9: EmE::m:_ mu._m§a:...
- Page 124 or... 9.: 9 tmmc_ . toaazm wt 50 mmzm >_Emm .w> .2995 :25 9.: c >__ >__ ._m. mg 2 >_E ._oom m_ .. mzzm P: 5.0:: __m..w>oo wc_mc E w_u 9.: E ._m>oo m m.c_m $0.5m .._ >.6__ :9...
- Page 125 9: c_ .5000 >m.E mwo_>mu Emucm mo> .>..___n o:m:mm mc_@_mc _mo_._..om .m.m m:_._w>__o mmtommwoom m:o_..o:£ mm_2cm z_n_ £_.s $5.8 _moEom_m Emccoo .mm_._w:mn dmtomwmoom .6 wE._..z umomccoo .m_oEm> B Em mc_mcw mE.m._m wmma EwEm_m moco coca >mE arm? Emtm mmzm E: _.m: .mEm__ _._o.._>>...
- Page 127 E _Am suon 50> coma cwmzzmn...
- Page 128 9: .0. .m.. :8 9: :0 9c9 .3 umg >_:o _o_: .5 >_:_c_ E :_:mm._ >mE _uw>oE9 52.: :¢x_:w 99...: .._m_w Uwm_ .m._9_o_mc9 9: .5 9_oN m_oEm> 50> >._:.__.__ wmzmo m_oEm> m>m>,._m ..m:E 9: 9 .mo:o >mE .6 mc_m :93. umtm 99:3 ._o._...
- Page 129 wwzw .5000 >_ >n >n .6 v_w eo_ew bwww w£ we.. .6 EwEw> >_xo_: .6 ..ew we.eo mneo newz w_._. .._w> ...ewn_oo .nwo:nwe .6 >E nw._ >_eo w£ w_ow -e e w .eo=w 9: e_ Esoe .ww_ eozw w_ow e_n_ EwEw Ewn_oow .nwwa...
- Page 130 vmxm 5: E38 owo .6 ncm 2 .6 9 3 >m_ 505: an :9 532. vo>o 2:0 U m_._ 2 .w:mw .o_.mE m m : m oz..m_oE Eucw : 3.5 .._m 2 I cm _ E a _mmc.s me.
- Page 131 to..Eo m:_> mE2_ .mm_ .5 we _____.> co_Es mm_o_ >:mE £_2, mocmu E m_o__. 50> £_...: m:_m ...wo m26__m mmzom .6 09.9 3am; ___..s ._m_moo mean. o:_::m0 m..o:uo._a .939 m_n_E .2 50> >..m,.mm ovwmc :0» co=_u.um :_ .mocm_2, o_oEm> .6 3:9 Eo_:2 E u_m-5 umm_._o...
- Page 132 .m=.:_ _._9._>>m m._oou vmmmoco mcozocé n_Em_ cos? mmgoao ..=_>> ..._o.._>>m wm._m>m: 630.0 .co=_m ..moE.w Uwcogam >2 coca aEm_ >mwt:oo n_Em_ vmcoao ow._o>om_ UQMEQO .o_._9.:_ m..EoO co=_:m_ 9053 Eocmm Emma mama mn_Em_ dam... maEm_ maa. 02¢ vmco ..m:E aEm_ m:_Em E0... m..._Ea_ m:_Em.s Emma:...
- Page 133 5.. Ema mwmzmo on ..m:E 9: co .96. 9: ._m>oo mommm._oc_ umou m:_>_.._ m>_. coE3 Emma 8& _woEmEE xom_n_ 9. .6 mu_m Law: mmmmm m_£ .um.9 QEm_uwmE 9.: mm_._E:oo E 9: co can? .6 w_o_m mgmoaao .o_tm= m:_Eo .9m._m U_o>m mc_>_.u :m_._>>...
- Page 134 9: mzaom ._m:mq .w26uc_3 m5 m>o 9: ._m2,o HMS. 9: 3 new _ Eumm w._oo_u E o>oEo._ cmao ._. 0... 05. £._>> UQ_.m... w_ 8.. m mm m>_.h 93:: Em cmés ucoowm car: . ._mc Em: m5 50> .6 _m mtma .6 _m>oEE Bcoo...
- Page 135 m£ E. Eoma Q30 ._w@._ .. % ..§.oen ago mzwo ..m_ Em: m5 9: . ._.m any mogzowm .Exom._ m>oEm ._mE 55> .w_oE .6 ._m r... :0 6:3 B K .56 on E m>o an own mmogw .co=m_ 32 v_o>m Em...
- Page 136 .0 0...: 00:59 0:00 :0>00 .00.. >0 .0000 ._0>00 .0020 05000 :_0:: :0 350 .>_ mc_:::0 .:c00_ 000:0: :0_:0 :000 :0 =0 :0 00.0 :0 :...0 .0:_0 9__:_ 00:: .020 0:_000 20:00 ._0>00 :00. c_ 05000 00__0:0:_ __0:0c_ .:_on .:_0 ::_..
- Page 137 9: two 9: :0 mum 9: Eoi .550 390. Joxo E uoom w mzzmcm dmmmcw m9.o:m 9: :9: Esmcw :oo._ 9: :omam >__m dmmmcw .._mm: w.w:...:m 9: EE t.._O.:. 9. E500 .vmo._ 9: E __9 9: m:_ 9: m>o 9: :9: __m: 9: co 9.50...
- Page 138 .9 o. .. U 9 E . _ cozzm E3u.. m u c Eo .__m 9: ..w:._um .._:m ._ou :o:_m 2 mm mm cmo mw._m. 59 Ucm m._.9. ..OO .3 _u2 :oEsm ms» w.m..mo._ .3 ._o «M. 2 Em :o_..:nEm >__ :o_..m_ o._3m...
- Page 139 .__m 9: 8m.._u How nmmzm gm.» ucm um Ucm coco co__ .5. I .__m Em mm._m ..c :o_..m _m> .m:_n gmmcmwm :o:m :o:>>m 9 Ucm . 9: P_m .3 9 60.. ;o.._2.,m _._o.. .cm.__ :0 :o:m__ :o_Sn_.:m :o___Eo> r_2___sw I _.::._.
- Page 140 .om.__U m:_u m:_u _mm._m ..oo.. 9: .5 mc_E 9: mEm .&w _om.__:_u9 .3.» r_o.._> :o_.._5 .__m r_o.._2. m:3m.o r_o.. :o_:5 .__m mm... :o=m__E .:w.. m:om: ._on_ r_2_.sw 2.ou:_>> E3..3 9. .Um._ _._o:_ :o_5n .__w co.._3m m._3m. no.5 pooh m:=mo_ .:m...
- Page 141 :7 3-711 u.-.3-_ _ ,, - .,_..._..,-.l_.~_-..,..,. .;-.._ _ .. _ . - . «U..| ..|. .. I...
- Page 142 95000 och Em :m>_.u cm.._ mmam osmco co 9_>_.u .m:o__ me: __ Eaton m c_ m.._ Emma .@.so_ m .95: m 9.5 Esou Ecm Q. Emucoamu ..o: E nE__o m_ Qomamo m_oEm> ..o: ___%5 __m c _m>m m_nm B m._ :o=o :9: _ mp: o...
- Page 143 9: m m.um Emtmn ._o..oE m_ m_oE 9: :23 Em: _m _._oS_ mmma m..m.E 9. a ma 9: 9 m_ m :o_m .._mm>> vcm. mw 9._E_% __m. to -a2m ;oS_o _m mmnmo on 53E _o_tm: : 25_m E _muwa 9: 99:.
- Page 144 :_ .. o2 9 .m:_ 9: to 9__._9 9. :. ..22__ m_ m_ 9: :23 .3 __._ .D:__U_ C _03_. mm muco .6 mw m>_u .5 m__ 0.9 m. oco .xo to Ec >__m >_n_ 9? I 25 9:00 me. :_ o>mm .2: cam ._mm>.,...
- Page 145 :_ >__mo_..m mcacm 9: ._ooQ .._o:m «:02, So _m:.. mmm9o: __m m:_>_.u .mm._:..m._m .uw:omw._ 5 amwx 9. Eva: E:E m:_.._:mcoo EwE..m:_om B 9__>_.__o m:oE_u:o mwmmm m_ 939859 m>onm ._mE_>> ._o .mE_>., am mo__.: tocm oo:m:oE__w .:o_EE:m:oo .mmao_m a .._w_mm.n_ :m>_m 9.5 on .:o_EE:mc ..._mm._:o>...
- Page 146 .m.._ a.__§ mm> m__E 9: m_ >_mE m_..:. mc_> u 9 A £5. o E mc .m_n _m>m 9: mm cmo .m ..<Ev E cm v E B m m .6 mc .m._ d _.=nn _._O:E m mmmaw mco_m _u:m wm_o >oc 9: :2;...
- Page 147 .6 wemtwzc meow: 50> ._.w>w: .e=wm Em.Eaw:._ .em_wmn_ newoew .nw_o>o.we wwweamo .m._wwm _wo_Eoeoowe: .w:_ mo_>._wm me_mew dnwwam ..V.V QDMQ me_moa _wnwq m_w_e9wE moewEeotma mew. Sonw_ mm.eEe_ nwoe mo__E _.e:E_xwE o_nw__w>w m:o_ew> mson >wE me_wa.we woew B So >w..e nmw_ ewtoew Em_E mtwa mew.
- Page 148 _ma 9 c_ _o mm> .2__m _.O D @520 30> .:o_..omc: m_w:.. a 2:0 mm: .6 m..__ m_m:.. >. m_nm__m mwzmo cmo m>m2.._m cmo ._o.. o_E:n_ 6.. m_nm u_mE 8 poccwo mocm:_.E_ m _m:.. 9: 9__§_ mcoo 959 wcoo >..___nm ._m25a m_£...
- Page 149 62 9: .9; 9: mc_m:m to-3o .:oE.5 ESOU E u2moo_ mw..m ms. Emm. .:o_m___oo .m_%m>_ __m:.. __mEm c_ _um>_o>: iooco s_&:m oo_>ou ._ mo_>mu :o ..m._= m .m:_v_mm _m:.. tmmz o_o__._m> m..__mmm m_ m_oEm> mo_>mu t 3 mo_>w w_ m._m£ .EmEtmaE _o:..
- Page 150 E mEm m:o:o .6 :o_to Em:m :o:m mS:x .6 m:Eo :om._. >2 um:_F AID. w:on._ .50: ou_xo Em:m>m >_c_mE m:o_xo: .6 :o_toao._ 9: - :on._mo umozu Axozv mmum :mmo.: :o_mm_ umamc m:___o Jmsmcx m_.: E m_m_._ :o:mE._o .o.=:x_E 9: .6 mm._m mo._:mmmE u9.m_m.;:m :m:o.E._.
- Page 151 vm_tm mo:mc m>m_ so.» comwm. mE._o.. E9m>m ...:2x_E m5 mo_2mw 50> 5 EmEHm ucm mcv 5. .cm_n motcmm .6 :3 m__.= co_.._:m_ ne Emzm _u¢Eoma 9: E co__.m.E._o.. .6_v_oom £03 __< .B__ _..:o= ;o_Es _3o u .._E._ma cmm .__m EmtoaE_ c :o_= mczm...
- Page 152 coma _mum 9: Eta _ow:c Ezoc 9.99 >mE .._ > .8 um So 9 90.62 .9_m xomz cozom 9:. .mo .0 moc comm ram 9 ._m:m .>oc. mo:E umaa 9: :.._ .._:£ .._.:2_o 9.99 m ooxo 2.0% E2.. 9: .6 _w>m= =3 9.: mm___...
- Page 153 w_..=. .._ .:o__.6:6 .6 66:66 mm_< $5. .6E_.. 6:66 626 _.6 >wE 36.. 6 .6 E66 66:66 6666 66< 66:: 6.6_ wm_< 6:6 66 :6_Es .6 6:66:6 6..66_6:_ 6:._ .m:_>_._o 65 .8 :._o:_. 05 66 05 ..< 666_>o._ 6_E. xo6:6-.._66 6 @566 6...
- Page 154 30.0 >0_ >0 05000.0 -E.0.s 05 0 0003 00: 0 >E0:000 02 0 t0..E 0050005 E0... m 05000.0 0>_ .0000 ..00.s w000.0 00000.0:_ .E::._:_E :000_I t0..E0 _.:::.=0 0:0 0_ 00.3 00.3 00.000. 00 .0. .0 500 0.05 0.30 _00O 000_.0 E0.0E0 0..
- Page 155 .._ 295 .99. 9.: >_co mm._& :.w_uu__._ 9. B Em>w 9: E5 mzsmcm cm_9o .w..:o ...mSo_ :o_c>., .6 E :9. m .6 mmum U3. cmo =:m:oo mmmEm_ :o_.__u:oo _:oo 9: msmmm ._o.. > mmcb .wmm.E >_2,o_m .._m_mwn_ .m:_v_.ma m.._m£ Eo _aoEs _wE..o mEmU...
- Page 156 m>m: >9: m_._mmE 9.: :_£_2, .6 E m_n_mm _m_oEw> 9: 9:10.. uwmam U_30.._m Ucm bmhmm .m:_>_ ._o__ w n.9._E vmxfm ma ..m:E .m_$®£>> __m .6 E5 8 Eu .2 an :o_m_> mmcb ._mEE:m .w:o=o_bm omma m_n_mm_ :m_.= mam. m_ mm._>.. _u®_._+ ma m.oE._m£...
- Page 157 35 E5 mgamcw ma 2:0 >mE 2 as o._oE Hmon tam: _.om._ m>_.__u 9: dmcm _uwEu_ o mummam 9.__ 5%.. 3 >9: m:_u::o >9: >m..= .305 mm - nmm: >_co new um >_:o 2 was Eco. Emco umm: 8 >9: .mco=o_.zmm >92.
- Page 158 ..=_ 2.5: ...o 9: new bmrmn _umm. .o_o_.._m .6505 £_3 m_oE¢> < m:E..2 3 o:_m: m:_tm ._0m..u xo__.._ tuna o_co.=om_m oo_>0_u __.o-u:o E3". mmmccmu mEo>m.a mE._. .5 mama .mEwcoaEoo m:_3ou .__c_._-___am...
- Page 159 5.. m_U_ _._o..mo Sccm 99:5 wocm 35.0 E: _u_=o :o:o9Eoo .932 9: m>:mm9_ ducoomm __:w m_oEm> mc_m:m 9::_E mco E0: >9sm m.:_u_>oE mUmm_ 9: 9: 9. m9__m:m 9: tm 9_._. =._9m 9: co 9__m:¢ ._9___:.:9 >9: :9so__m mom._am._ 9: c_ _899_om_n m_oEm>...
- Page 160 wmmE $20.. m .m_n_ E0: m Hwsm Em>m 9: : .mEwE u_o>m >_3o_ m>_5 o>=m._wao :5 otom :mEs Emmmmo on cmo wo_>._¢ 9: 2 ..mm.m 2 cmx m_oEm :0» mzwm .m__s $20 .w m:_3o .30. .9: 9.552 >cm ___2, .._m_m Umm_ 9mE=mm cm .mc_:::.
- Page 161 >__:.. 2 Eu .39: >£mcm_ m m>_m> um._md9 w $_:o m_ 93 595: cmo 2m_.E_ .__mam._ wco new ._wc:mE 9 Ex 25__m mzzmcoo .EwEmom_a@ 50> .>m_mU 9.: 9. .35. 8 m_.= >_6__m B .9:mmmE umcgmmu cm m._oE _wmEs zamcoo xomco 505:5 mt ._o..
- Page 162 < mm ._mm_ < m < m._. < om < v < m < m 30 0 .m2mn_E mczmm _..._ 8_.. .6 m 5.0.5 2:0 E 32.. 2 5.0 mg 3 umu B :8 w. Ba x_c_n 2230. .6 $30 m_r_m mzm com .m ___m c...
- Page 163 cmczum < < < < < < < mp < < m < m n_Em_ .o_._mE_ 2 ..aEm_ mmcosm _._._ mQEm_ o_umm_ o_Ew_mu_w aEm_m_u_.w mc__oo0 .._:u.__0 E.m_< two: aEw._ wm_< >9: .. _. _. _. «N cmcaum < my <...
- Page 164 ..oo >_n 7 9.: E23 m 9: @> 9.: w $50 . 2 co @m:_ 2: o>o >_n .5: 9 .v . §a E9 u. 9: oosaam .@o_.__m:oc o>o m_ > n_Em .6 E9 .6 .o>o 05 __.O 55$; 9: CO u:C 9.: 0>OF_ m5 w>oE...
- Page 165 _mQO Umm:o£ :o_um:_E _umom._am: main u:oE:bm: ..m_mmn_ m>m_._ .@n__5 Amvmczoc m>_..o£mu mom_Qo._ m>oEm._ n__.5 m>oEm._ £3 .@9__2§_ 8__:_8. tam...
- Page 166 .6 mocmzwa 0< .000 Em_0< .0. >_mmm:0x0 30> _m:0_>_0c_ ucm >:_m:0 0:00.03 ._00O >0 0050.: .>>___0m__ o._0E.>>.0> .80 5.. a___n2_:m 2&3 :00 mo_..0mm _0o:m..m 0__00E2_._m .mc0=0_.Em 0_0m__0._ 02000. 00 mE0E mwcocmb 05 >0 00mm.0_0._ 2 .2000 :m__nEm0 9. 9__u$_ w .m0_:mc0 .000 _umm >._0>m_...
- Page 167 9: 53:00 m_:o .m_: .m_..wm_ Emacs: .o .o N .<.m Jmma _2a_.ou_ >9_._:._. .m:_ om_n_ mm__>oE9.:< _u:m_on_ 8 78 _mm3._o._ couozm .m:m__9mm ucm_on_ .__.am m_< mmm.m_a ._..w .B._ .mmm£mmm_>_ tons 8 .2 .._E~ .m_:ou .mm_._m>m EmEtw 3mEm>> «no-8 .<.m, Econ. 20>...
- Page 168 V V. gow km « 3 3.. m_oE i W... _r So mm .4VnW£ _. . ._oa _ _ . L E_3w> o5 c_Bc_mE 1..- E So 1. %., :_ Em §_mEo__ ..._um oEm.= cu E00 Em _5_>> new _wo mcmsm E.
- Page 169 :m>_.u cmmn ___2, :o_EE:m mEmw .mm:m m£ co_EE 9: mm: :m£ .mm.:m mama m_oE __E: mom_ mama EEmtm .6 mmmmmu .6 :o=mm_ < Umm: ucmmz _m._m _mcEm_:m_ Emco _m3om m£ .um.._m_ .mm_.._omn Emo_.5:._ cmc>> mxmy m£ :_ _._o_ U_:o_. _m>m_ m:_m: .._m>>...
- Page 170 m>m_._ 9.0:. Em_o_t: c< um..m5__m :o_..o2o.a m~mm.c._E m~$._EEu coamocbo 5.3 as oNoo._.. S. wumohf . ucm .m:_m 9: E E9. co_w mmu_ do on. .nmN_._:mm E99? .Em>m mcnm m:__o 5.. coz ._m>o E2... mm: w._o__m >mE .._ _£_mm 9. Emcmu Esou :o__.oB .:m.__..
- Page 171 m . _ m m $5 $5 ._9so_ mm mm u_:_.. 9 Esmcm = Am _um.m_ c . E2 >0 ¥_m __ 9 55 a u->> _w>o_ 2: 9.9m U_:= oxen .v_.aE __ ..w_m Q3 o .._ >_ w._:. 9.: Q 9: xomc _mwcm m._3m...
- Page 172 ommm: .ELN .mum coupo a__o __ma_> .mum_n -8 .8 .6 pm 9: £5 .oom u_:o o._. u_ .m 05 D :mN0 ._0Q d__ . 9: Q. .._:m ma Emmm .._ E5 .mEm 5 mm w>m w:oo_ um.w> ,6 . .m:_>_ 8..
- Page 173 9: _:_> 9: :om .m> 9: .m .>. 9: :0 Eo m> w> 9: .2 m: .w> 9: :o9 9: E9.. 9. :38 oEo: .6 E>ou 9: _u_o m... o_:o .5 :o_. m> 9: :9: m> 9: w__E m:_m 9: tmam .E9m>m _mo_ 9: _.__,...
- Page 174 acsa m..2m «_._o._ ac_>.,o m£ mama .m5mmm 0060 mama mama .Em..m>m .m:o=m_: __m>m m:_acm xomco cmmz, :mm.omu a:_:o_m m_o_.._m ._umo._ ._m>m_ ..C.m_O xomco acmtmn womccoo _mco:m: m>._mmnO xomn m_oEm> m._>.. mama xomco ___u_ >.._mo _moE m_oE _mc_ m>_. gmma mm.m>m._ ._mma m_mmEs .mu::...
- Page 175 .1. mm..\_L - LI I. . .1. - - I . .'I._r: |\..I. I..u.
- Page 176 m.o._o..mmm Em>_ow :m _w_._mm_O m_u_m OLNO zmcaw So_oO\mmc I mEcmo_O _m m._m:mm_o ._w£mm._ wbeaw mE_mn_ w._.w_mww\w mbwcam . w>_..mEm>9n_ bBm_o w._mcmm_o ooaEm:m $0 Emma. _m>oEmm_ "$.60 :mm._owu:_ _m._m.o a:-co:o._. I Emo_._n_j I mmmcoaw I w_oEm_._o I mmm_o I 0_O__._0> zm I ._o_.2xm_ m_oEm>...
- Page 177 0. 0_0 000 00 000:0E 0. 0 .0.0 0.0.0 000_ 00 00000 000 00 000. 00 ..:0.0 0 0..0 0> 0. .0002, 000:00x 000002, .00 0000. 000.0. .0003 0E00 0.60.0. 00::00 .960 000.0.00000 .0:0E. 00:000 0.000_00 0 0.5000 0 000030 0 .000.
- Page 178 EmE_E .mrwa. _o:m ._0DD:._ new .wco..mom m .._o_._9c_ mEm>_om mm: .m_.=o >5 .m_nB_:m:: mo_5m._ £09 mc_cm w_.__Em E::om> m m_o__._w> m m.m:mm_o .6 _m>oEm. .._mc:_£ E :03 mE_mm ..m:mw_0 _mcma ozmm om_m m_ mc_u:_o:_ .E .5... mtaa .6 mc_cmm_u _.=_.s m_nm.._:w :o_Es 6...
- Page 179 mc_3o__o.. Um 9659 9. commwm .>uon._9uc: .m£m.9> Ezocm mczmcvm 9: .6 >uoEmu:: >uon..m_u:: En Em £_..s Em -5; m. u9_.__md mEm.>m._a m m_.__o_-m_u 9.6: >9: o>mm_ >9: U99. .m:=moo 9: E EmEt9._Eoo x.o>a.:_md m._.Ew9m mc_o_-mv __m mm >9: >_9:_omn_w ._m_u:__>o .m:_m:m com.
- Page 180 _mnE Ucm o ._oEE ..w:_m 300 .o_ omcm 5:: __o B momp Em2co.. 9: _o9.moo_ m_ ..on_E:: .m:_w:o.._ sofa :onm 9.: co 9: co m_ . co_.. 9: co dwxo 3% = o_oE >.._c _.=_ $05 .05 .mxmE E Uw:_E. >Eo_ w>m E9.
- Page 181 .w.mnE ..Lm: m_ Eo m:_m:m ww__no 3mo_U: 30> E5 m ..8__ Ucoo .c£_m:E .__m£ 9. c_ >..__m.:U E0... mm ao_:8__%_m Emu Emcmm m._mo Bmcwm B _o_m 9: m2m .25. 9: mmzoz co_..m_ .m:o_..wo m:o_uao_=mmm_ 9: m9m .onE:c «E..520 _m mccmo m_nmo__Qam mv_o:._...
- Page 182 Emuc w: 9.3 us... Eon. :o=8_ new 9 t Em m ww> __o :o_m _um_.._o ?a_ooo 9 ago: 3.. 2:: _..o_mm_ 2:: 9.5m .8: .. __.:m_OOO >_o._ ___o E >.._ 9: co __o 9 yo :o= B mm m_< 9: c_ >.._m m:o_>wE ...m_...
- Page 183 A n_ In E aim. nvng mm oomo :2 E mc_>_. _w:_n_ _u_o E:_Em .E:_E an cmo .._m._ m mmm .m_n _umn E2 8 E: co wmam HEE5 83 .xoB_n_m E _8 o:_m:m AEQ: m m_n__m umnmm_:: ._ uwumm_:: .0 m_o_.._m Emucw...
- Page 184 . um .5 .6 3 « o .AEv<m . . 00 Ex ooC_ .xo._aa 8: op m. :o_EE:m _w:n_ .m\m 5:; om B mv Emco .o_:m 6 .. vc .m E2 v co_.. m:_E :o:m 9.0 :o EmEm ..o., 5% >_m:o_.>...
- Page 185 vc b = Em_w n_._¢v_ _. E A . m m m O w_n_ E903 o_oEm> mEm_9s o_o_ m:_u 2.2 9 .a._ E was E 2.. ._ .m__ om. m5 _u:m. E w_oEm> _wco 9: cmw .wo:m m_ um ms... m_ E995 m_o__._m m5 om_m...
- Page 186 G suntan vac. =2 5:? o.5m msmx .62. E9 - 8% > 5 N _.m : o._ E S m 3: o a 5 8 B . > 2 t 8 > 8 3 3,0 Eco ._o u__m> mcE: 3 Emma .80 _oom >=cm.::o ..
- Page 187 Eu 3. 2:01 9 D... _..o H Eoumam _mo_._uo@_m {mam...
- Page 188 : mm «N m:__ E 20.83 wmcmc §_: .6 9__9m_ E296 m:__ooo mo__=omam0 m:_m:m...
- Page 189 O N _. wm w B E 5.5 .m. m._o._ _.Eu_..s e» m=o_2_aE_n __m..>...
- Page 190 m_ : m_o_ .5 E0 m_ w_: .w_n_m .9_m 9: E 9 yo: 3 m_oE 9: __o 9: E 3 cmm >mE m:_E: .onE:z _._mE mm. 9: 9. .._ E39: 2 92m .E9m>m m:___m.. m:___.m..
- Page 192 .00 ....... O . . 0 .. ©® W . . Fm ... VD .. NN .. Dr ... NO .. Om .. mm ..N..©N ..MN .... Nw ....w._u ..VG ....
- Page 193 ..® .._..V ....mw .©m._ ....GK . O .... Gm ..QN ..NW ... Wm ..Or ..Km ..NO ... ©N ..©N ... Nw .... wk ..OF ..w__..m_ 0_O_£®...
- Page 194 ® I_WnO E _u ms» ucm : 9: _o w.._m:3 S R . .Z wmmcm o>_..om.cm .E_2m _maO mmmcmc o>_§E 9: __o _m::m5 £5 $c.o: E9. 9: 8282 58 E2 Hcoa __o__s mm ..m%a >2 Eminoo Eta: _m .>:mE._o0 _u9_om ._m::m$_ vctn.
Need help?
Do you have a question about the Speedster and is the answer not in the manual?
Questions and answers