Table of Contents

Subscribe to Our Youtube Channel
Related Manuals for Vivitar DVR 794HD


Summary of Contents for Vivitar DVR 794HD
-
Page 1: User Manual
DVR 794HD Wi-Fi Action Camcorder User Manual © 2009-2014 Sakar International, Inc. All rights reserved. Windows and the Windows logo are registered trademarks of Microsoft Corporation. All other trademarks are the property of their respective companies. -
Page 2: Table Of Contents
CONTENTS Introduction ..........................2 What’s Included ..........................3 Parts of the Camcorder ........................ 4 Initial Camcorder Setup ........................ 5 Main Camcorder Modes ....................... 9 Camcorder Technical Specifications ................... 10 Waterproof Case ......................... 11 Powering On Your Camcorder ....................12 LCD Display ..........................13 Changing Camcorder Mode ....................... -
Page 3: Introduction
Introduction Thank you for purchasing the Vivitar DVR 794HD Full HS Wi-Fi Action Camcorder. Everything you need to take high definition digital videos and photos is included with your camcorder. This unique, ultraportable camera design is adapted specifically for this camera and can be used to capture special moments in many different environments. -
Page 4: What's Included
What’s Included 1. Wi-Fi Action Camcorder 6. Remote Control 2. USB Cable 7. Bicycle Mount 3. AC Adapter 8. Helmet Mount & Strap 4. Vivitar Experience Installation CD 9. Lithium Battery 5. Waterproof Casing NOTE: Micro SD Card not included. -
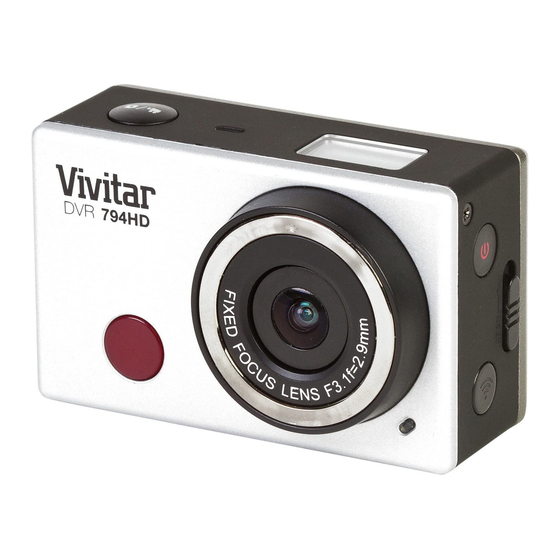
Page 5: Parts Of The Camcorder
Parts of the Camcorder 1. Shutter Button Micro USB Port 2. Microphone Mini HDMI Port 3. LCD Display 10. Micro SD Card Slot 4. Lens 11. AV Out 5. Wi-Fi Button and Status Indicator (Red) 12. Battery Cover Release lever 6. -
Page 6: Installing/Charging Battery
Initial Camcorder Setup INSTALLING AND CHARGING THE BATTERY To insert the lithium battery: 1. If the camera is inside the waterproof casing, please take it out of the casing. 2. Push the battery cover lever up, to the unlock/open position, and remove the battery cover. See Figure 1 and 2. -
Page 7: Installing Micro Sd Memory Card
Battery Indicator: Battery Indicator Description The battery level is full. The battery level is half. When this icon flashes, this indicates that the battery level is low and the camcorder will then automatically turn off. Please recharge your camcorder. NOTE: When the battery capacity drops to a low level, the battery icon will flash on the display, indicating that the camcorder requires to be recharged. - Page 8 IMPORTANT: Please power the camcorder off before plugging in or taking out the memory card. If the card is inserted or removed while the camcorder's power is on, it may damage the card and/or any recorded data. Always confirm that the power is off before inserting the card into the camcorder.
-
Page 9: Using The Camcorder
Energy Save: In order to save the camcorder’s battery power, the camcorder automatically powers off after sitting idle for 5 minutes. USING THE CAMCORDER... -
Page 10: Main Camcorder Modes
Main Camcorder Modes Press the Power/Mode button to toggle between the Video and Photo Capture Modes. Video Capture Mode Use this mode to capture videos with your digital camcorder. To record a video, please check that the DV is in Video mode. If the video icon is not displayed on the LCD screen, press the Power/Mode button repeatedly until it appears. -
Page 11: Camcorder Technical Specifications
Self Timer (via App) mobile device) Auto Power Off 5 minutes Language English Interface USB 2.0 System Requirements for WINDOWS XP (SP3), Vista (SP1), WINDOWS 7 or higher; Vivitar Experience MAC OSX v10.5.x and above Battery Removable 3.7V rechargeable Li-ion battery... -
Page 12: Waterproof Case
Waterproof Case 1. Shutter Release 2. Power/Mode Button 3. Wi-Fi Button 4. Clamp (Securing Latch) 5. Tripod socket Your action cam comes with a waterproof casing for underwater action and added durability. To assemble your camera to the case, follow the instructions below: 1. -
Page 13: Turning Power On/Off
NOTE: A single hair or grain of sand can cause a leak. You can test by closing the case without inserting the camera. Submerse the case completely in water for about a minute. Remove the case from the water, dry off its exterior with a towel, and then open the case. If the entire interior is dry, the case is safe for use under water. -
Page 14: Lcd Display
LCD Display After turning on the Wi-Fi Action Camcorder, the LCD displays the following status and settings: Photo Capture Mode Video Capture Mode ICON DESCRIPTION Indicates currently in Photo Capture/Camera Mode. CAMERA MODE ICON Indicates currently in Video Capture Mode. (Default Mode) VIDEO RECORDING ICON Flashing icon means the camcorder is recording a video. -
Page 15: Changing Camcorder Mode
Changing Camcorder Mode THREE MAIN MODES 1. Video Capture Mode - Use this mode to capture videos with your camcorder. 2. Photo Capture Mode - Use this mode to capture photos with your camcorder. 3. Playback Mode (for photos and videos) – Connect to your camcorder to your computer or television to use this mode to view your captured photos and videos. -
Page 16: Video/Photo Capture Mode
Video Capture Mode After powering on your camcorder, the camcorder enters the default mode of Video Capture Mode, recording at a default resolution size of ‘HI’ (FHD 1920x1080,30fps). Press the MODE button to switch between the Video Capture Mode resolution sizes: from ‘HI’... -
Page 17: Video Capture Mode
Video Capture Mode The Video Capture Mode allows you to capture videos with your digital camcorder. After turning on your camcorder, the default mode is Video Capture Mode. TAKING A VIDEO 1. Power On: Press and hold the POWER button for about 3 seconds to power on the camcorder. 2. -
Page 18: Photo Capture Mode
Photo Capture Mode The Photo Capture Mode allows you to capture photos with your digital camcorder. When you first power on the camcorder, the Video Capture Mode will be active. In order to open the Photo Capture Mode, press the MODE button twice. TAKING A PHOTO 1. -
Page 19: Playback Mode
Playback Mode The Playback mode allows you to review and delete photos and videos that you’ve captured with you camcorder. PLAYBACK MODE: HDTV 1. Use the HDMI cable to connect the camcorder to your HDTV. If you need to transfer the image and audio to an HDTV for playback, insert the Com end of the HDMI cable to the DV, and the other end (output) to the HD input of the HDTV, as shown in the following figure: NOTE: Before connecting or removing the HDMI cable, first stop video recording, playback... - Page 20 The LCD displays as below: ICON DESCRIPTION Indicates currently in Playback Mode. PLAYBACK MODE ICON Indicates the number file you are currently viewing / out of FILE NUMBER the total number of files. Indicates the current file is a video file. VIDEO FILE ICON 1.
- Page 21 PLAYBACK MODE: COMPUTER 1. Connect your camcorder to your computer using the supplied USB cable. Connect the smaller end of the USB cable to the USB interface of your camcorder and the other end to the USB port of your computer. The camcorder will enter U-disk mode and the LCD displays as below after connection: 2.
-
Page 22: Deleting Captured Images
5. Now you can start the Web Cam through using most instant messaging and web conferencing applications that support video. Select the camcorder, ‘iCatchtek SPCA6330’, from the video settings of the web conferencing application. 6. To return to U-disk mode (PCU mode), press the Shutter button again. -
Page 23: Remote Control
Caution: Please use the Delete feature with care. Once images are deleted they are permanently deleted from the Micro SD Memory card. Please make sure that you only use this feature once you have downloaded and saved all the images you wish to your computer. Remote Control Power off button Signal emission port... -
Page 24: How To Install App
Mobile Device Application HOW TO INSTALL THE APP 1. Search for “SYMAGIX” in Google Play (for Android OS),or scan the QR code printed on the gift box to find the APP and install it according to the instructions. 2. Search for “SYMAGIX” in the Apple App Store (for iOS) or scan the QR code printed on the gift box to find the APP and install it according to the instructions. - Page 25 ICON DESCRIPTION VIDEO RESOLUTION - Indicates the current Video Resolution while in Video Capture Mode. - Indicates the current Photo Resolution while in Photo Capture Mode. Tap icon to change resolution. WHITE BALANCE Indicates the current White Balance Selection: Auto, Daylight, Cloudy, Fluorescent, Incandescent SETUP Tap to enter Settings Menu.
- Page 26 iOS APP 1. Install “SYMAGIX” APP (provided by dealer or via internet) on your iOS phone or tablet. When installation completes, the LCD will display the App icon 2. Make sure you have installed the TF card and turn on the camcorder. Then press the Wi-Fi button to enable the WiFi connection.
- Page 27 WHITE BALANCE Indicates the current White Balance Selection: Auto, Daylight, Cloudy, Fluorescent, Incandescent SETUP Tap to enter Settings Menu. The options include: Continuous Shooting: Off/On White Balance: Auto, Daylight, Cloudy, Fluorescent, Incandescent Frequency: 50Hz, 60Hz Format Camera: Yes, No (Formats SD Memory Card) ...
-
Page 28: Computer System Requirements
Computer System Requirements To be able to download videos and photos to your computer using the ‘Vivitar Experience Image Manager’ Software, you will need the following minimum configuration: WINDOWS OS MICROSOFT® Windows XP with Service Pack 3, Windows Vista with Service Pack 1 or Windows 7 ... -
Page 29: Installing The Software
Installing the Software You must be connected to the Internet to install and run the Vivitar Experience Image Manager Software. 1. Insert the installation CD into your CD-ROM drive. The installation screen should automatically open. On WINDOWS OS: The Vivitar Experience Image Manager Installer window appears. If the window does not appear, open the application’s CD/DVD drive and click on... -
Page 30: Connecting The Camcorder To The Computer
On MACINTOSH OS: Click the “Quit” button when the installation is complete. Click the “Launch Vivitar Experience Image Manager” to open the application. 13. If you close the application you can run the Vivitar Experience Image Manager from the Programs (PC) or Applications (Mac) menu on your computer. -
Page 31: Getting Videos From The Camcorder To The Computer
Getting Videos from the Camcorder to the Computer The Micro SD Memory card needs to be inserted. Do not disconnect the cable during transfer. Doing so will cancel the transfer of any files on their way to your computer. 1. Select the “Get Images” button from the Main menu. 2. -
Page 32: Getting Started
Edit images using automatic and manual tools Use automatic “Geotagging” with built in Google Maps For more details on how to use the Vivitar Experience Image Manager open the Help file or click the “Take a Tour” button on the application’s Home screen. - Page 33 MACINTOSH OS 1. Use the supplied USB cable to connect your camcorder to your computer’s USB port. 2. Power on the camcorder. 3. The camcorder’s device icon appears on the desktop. 4. Click on the device icon and open the DCIM folder and the folder inside to view the media files.
-
Page 34: Camcorder Maintenance
Camcorder Maintenance Please read the information below carefully before using your camcorder for proper and safe operation, so as to use the camcorder to its fullest and maintain its performance. MEMORY CARD MAINTENANCE: For the first time of using a new memory card, or when there is unrecognized data for the camera or images with other cameras in the memory card, please make sure to firstly format the memory card. - Page 35 DEVICE MAINTENANCE: Take good care of the video camera and prevent water or sand particles from entering the video camera when it is used on the beach or near water. Please note that water, sand particles, dust or component containing salt may damage the video camera. ...
-
Page 36: Sakar Warranty Card
Sakar Warranty Card This warranty covers for the original consumer purchaser only and is not transferable. Products that fail to function properly UNDER NORMAL USAGE, due to defects in material or workmanship will be repaired at no charge for parts or labor for a period of one year from the time of purchase. -
Page 37: Technical Support
Technical Support For technical support issues please visit our website at www.vivitar.com. You can find manuals, software and FAQ’s at the website. Can’t find what you are looking for? E-mail us at support@vivitar.com and one of our technical support team members will answer your questions.
Need help?
Do you have a question about the DVR 794HD and is the answer not in the manual?
Questions and answers