Table of Contents

Related Manuals for Vivitar DVR 785HD


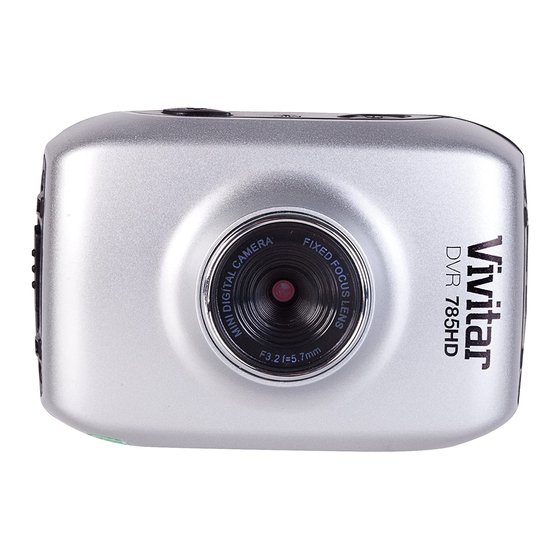
Summary of Contents for Vivitar DVR 785HD
-
Page 1: User Manual
DVR 785HD Action Camcorder User Manual © 2009-2012 Sakar International, Inc. All rights reserved. Windows and the Windows logo are registered trademarks of Microsoft Corporation. All other trademarks are the property of their respective companies. -
Page 2: Table Of Contents
Contents Introduction ..........................2 What’s Included ..........................3 Parts of the Camcorder ........................ 4 Initial Camcorder Setup ........................ 5 Main Camcorder Modes ....................... 8 Camcorder Technical Specifications ..................... 9 Camcorder Mounts and Accessories ..................10 Powering On Your Camcorder ....................13 Video Capture Mode ........................ -
Page 3: Introduction
This camera is a plug and play device. You can download the pictures and videos without the software by directly accessing the memory card from your computer. We would however recommend that you install the Vivitar Experience Image Manager software to enjoy the full Vivitar experience. -
Page 4: What's Included
1. Digital Camcorder 6. Waterproof Casing 2. USB Cable 7. Helmet and Bicycle Mount Screw 3. AC Adapter 8. Helmet Mount 4. Vivitar Experience Installation CD 9. Bicycle Mount 5. Stand Accessory 10. Helmet Mount Strap NOTE: Built-in Lithium Battery included (not shown). -
Page 5: Parts Of The Camcorder
Parts of the Camcorder Micro SD Memory Card Slot Reset Button USB Interface Power Button Microphone Shutter Button Mode Switch: Photo, Video, Vehicle Mounted Lens LCD TFT Screen 10. Power Indicator/Busy LED Light 11. Charge Indicator LED Light 12. Strap Connector... -
Page 6: Initial Camcorder Setup
Initial Camcorder Setup Charging the Battery Installing the Micro SD Memory Card To Charge the Built-in Lithium Battery: Micro SD Memory card (up to 32GB) Use the supplied USB cable to connect needed for normal use. the camcorder to the computer’s USB port or to the AC Adapter. - Page 7 Powering the Digital Camcorder ON Battery Make sure the built-in lithium battery has been fully charged before using your camcorder. To Charge the battery: 1. Power off the camcorder. 2. Connect your camcorder to a running computer with the USB cable provided, or use the AC charger provided in the package.
- Page 8 If the memory card has successfully been inserted an icon appears on the LCD screen. 4. To remove the card, gently press on the edge of the card to release it and pull the card out. 5. If the card is inserted or removed while the camcorder's power is on, it may damage the card and/or any recorded data.
-
Page 9: Main Camcorder Modes
Main Camcorder Modes Video Capture Mode Use this mode to capture videos with your digital camcorder. Slide the MODE Switch to the Video Capture icon to open the Video Capture Mode. To take a video, aim your camcorder as desired and press the Shutter button to start recording. -
Page 10: Camcorder Technical Specifications
Camcorder Technical Specifications Image Sensor CMOS Sensor HD(1280×720)@30fps Video Resolution VGA (640x480)@60fps 5.1MP (2592X1944) Photo Resolution 3.0MP (2048x1536) 1.3 MP (1280×1024) File Format AVI (Video), JPEG (Photo) External Memory Micro SD Memory card, up to 32GB 2.0”TFT, resistive touch panel LCD Display Zoom 4X Digital Zoom... -
Page 11: Camcorder Mounts And Accessories
Camcorder Mounts and Accessories Waterproof Case 1. Clamp 2. Shutter Release 3. Power Button 1. Insert a finger at the half circle of the clamp by prying the clamp up - away from the case. 2. Before sealing the case, inspect the water sealing gasket to be sure it’s in good condition. You can test the gasket by closing the case without inserting the camcorder. - Page 12 Installing the Bicycle Mount: Handlebar Clamp 1. ¼-20 Screw 2. Locking Wheel 3. Bar Clamp Bolt 4. Bar Clamp 5. Tilt Knob 1. The camcorder does not have a standard tripod mount. For all the accessories with a ¼-20 screw, the camcorder must be enclosed in with the waterproof case or in the included mounting adapter.
- Page 13 Installing the Helmet Mounting System 1. Helmet Belt 2. Helmet Mount 3. ¼-20 Screw 4. Locking Wheel 5. Tilt Knob 1. Insert the free end of the Helmet Belt through one of the slots in the base of the Helmet Mount.
-
Page 14: Powering On Your Camcorder
Mounting Adapter 1. This Mounting Adapter allows you to attach mounting accessories that have a ¼-20 screw. 2. The camcorder will clip right into this adapter. Powering On Your Camcorder Turning Power On and Off 1. Press the POWER button to turn on the camcorder. 2. -
Page 15: Video Capture Mode
Video Capture Mode The Video Capture Mode allows you to capture videos with your digital camcorder. Slide the MODE Switch to the middle, to the Video Capture icon, in order to open the Video Capture Mode. The Video Capture icon appears on the bottom of the LCD screen. Resolution Indicator HD (1280x720)@30fps 640 VGA (640x480)@60fps... -
Page 16: Vehicle Mounted Video Capture Mode
The elapsed time appears on the top left corner of the LCD screen. 5. To stop the video recording, press the Shutter button or touch the LCD screen again. 6. The video is automatically saved to the camcorder’s Micro SD card. NOTE: When the storage capacity of the Micro SD Memory card is full, the earliest segment of video will be deleted to release the corresponding space for continuous recording. - Page 17 2. Touch the Zoom In or Zoom Out in order to better set the camcorder display if desired. NOTE: The Zoom magnification is indicated on the right of the LCD screen (in between the zoom in and zoom out icons). 3.
-
Page 18: Photo Capture Mode
Photo Capture Mode The Photo Capture Mode allows you to capture photos with your digital camcorder. Slide the MODE Switch to the top, to the Photo Capture icon, in order to open the Photo Capture Mode. The Photo Capture icon appears on the bottom of the LCD screen. Resolution Indicator 5.1MP (2592X1944) 3.0MP (2048x1536) -
Page 19: Playback Mode
Playback Mode The Playback mode allows you to review and delete photos and videos that you’ve captured with you camcorder. When you first turn on the camcorder, the camcorder will be in Capture mode by default. To enter the Playback Mode: From Photo, Video, or Vehicle Mounted Video Capture Mode touch the Playback Mode icon on the bottom, right of the LCD screen to open the Playback Mode. - Page 20 Fast forward by touching the FAST FORWARD right arrows, located to the right of the Play arrow on the LCD screen. Fast rewind by touching the FAST REWIND left arrows, located to the left of the Play arrow on the LCD screen. ...
-
Page 21: Computer System Requirements
Computer System Requirements To be able to download videos and photos to your computer, you will need the following minimum configuration: WINDOWS OS Microsoft® Windows XP with Service Pack 3, Windows Vista with Service Pack 1 or Windows 7 ... -
Page 22: Installing The Software
Installing the Software You must be connected to the Internet to install and run the Vivitar Experience Image Manager Software. 1. Insert the installation CD into your CD-ROM drive. The installation screen should automatically open. On WINDOWS OS: The Vivitar Experience Image Manager Installer window appears. If the window does not appear, open the application’s CD/DVD drive and click on... -
Page 23: Connecting The Camcorder To The Computer
On MACINTOSH OS: Click the “Quit” button when the installation is complete. Click the “Launch Vivitar Experience Image Manager” to open the application. 13. If you close the application you can run the Vivitar Experience Image Manager from the Programs (PC) or Applications (Mac) menu on your computer. -
Page 24: Getting Videos From The Camcorder To The Computer
Getting Videos from the Camcorder to the Computer The Micro SD Memory card needs to be inserted. Do not disconnect the cable during transfer. Doing so will cancel the transfer of any files on their way to your computer. 1. Select the “Get Images” button from the Main menu. 2. -
Page 25: Getting Started
Edit images using automatic and manual tools Use automatic “Geotagging” with built in Google Maps For more details on how to use the Vivitar Experience Image Manager open the Help file or click the “Take a Tour” button on the application’s Home screen. - Page 26 MACINTOSH 1. Use the supplied USB cable to connect your camcorder to your computer’s USB port. 2. Power on the camcorder. The ‘MSDC’ connection icon displays on the LCD screen. 3. The camcorder’s device icon appears on the desktop. 4. Click on the device icon and open the DCIM folder and the folder inside to view the media files.
-
Page 27: Camcorder Maintenance
Camcorder Maintenance The digital camcorder is a delicate device. Please handle your camcorder with care to avoid damaging it. Do not expose your camcorder to heat sources. Do not use you camcorder in wet or moist conditions without the waterproof casing. Sakar Warranty Card This warranty covers for the original consumer purchaser only and is not transferable. -
Page 28: Technical Support
Technical Support For technical support issues please visit our website at www.vivitar.com. You can find manuals, software and FAQ’s at the website. Can’t find what you are looking for? E-mail us at support@vivitar.com and one of our technical support team members will answer your questions.
Need help?
Do you have a question about the DVR 785HD and is the answer not in the manual?
Questions and answers