
Related Manuals for Grundig GCT-K2326D


Summary of Contents for Grundig GCT-K2326D
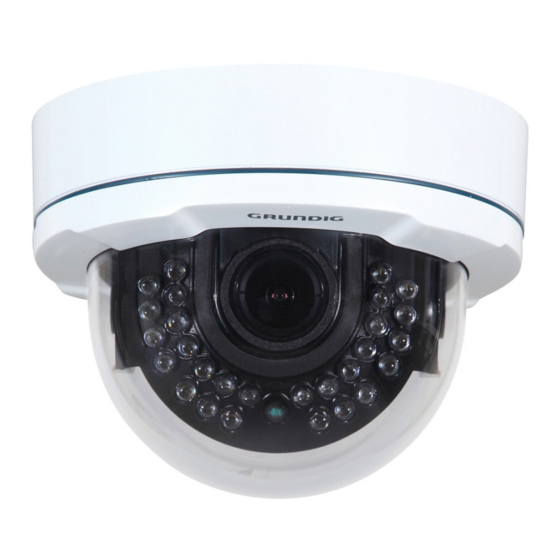
- Page 1 Owner's Manual HD Video Cameras GCT-K2326D 2 Megapixel Full HD-TVI Fixed Dome Camera IR 28 LED GCT-K2326D.165.1.26.06.2015 © ASP AG...
-
Page 3: Table Of Contents
Content: 1. Important Safety Instructions 2. Package Contents 3. Installation 1. Zoom & Focus Adjustment 2. 3-Axis Gimbal Adjustment 4. Part Names 5. Control Stick 6. OSD Menu 1. LENS 2. EXPOSURE 3. WHITE BAL (White Balance) 4. BACKLIGHT 5. DNR (Digital Noise Reduction) 6. -
Page 4: Package Contents
Continued use in such a condition may cause fire or electric shock. If this product fails to operate normally, contact the nearest service center. Never disassemble or modify this product in any way. (GRUNDIG is not liable for problems caused by unauthorised modifications or attempted repair.) To prevent fire or electric shock, do not expose the inside of this device to rain or moisture. -
Page 5: Zoom & Focus Adjustment
3.1. Zoom & Focus Adjustment 3.2. 3-Axis Gimbal Adjustment English... -
Page 6: Part Names
4. Part Names 5. Control Stick - Pressing the SET UP stick: Accesses the menu mode or confirms the setting. - UP / DOWN: Chooses the desired menu. - LEFT / RIGHT: Sets up the value of the selected menu and changes the settings. English... -
Page 7: Osd Menu
6. OSD Menu 1. Press the SET UP stick to access the menu mode. 2. Select the desired feature by using UP/DOWN. 3. If there is a setting for this feature on the right side of the screen, use LEFT/RIGHT to switch between the settings and confirm your choice by pressing the stick. -
Page 8: Exposure
- DC [INDOOR, OUTDOOR, DEBLUR]: You can select a mode depending on the installation environment. - MANUAL [NORMAL, DEBLUR]: You can select a mode depending on the installation environment. 6.2. EXPOSURE This function is used to control the light exposure. BRIGHTNESS [0~20] : Sets the value of auto exposure operations. -
Page 9: Backlight
6.4. BACKLIGHT To overcome difficult light situations, this GRUNDIG camera features different options to improve the image quality. You can choose between HLC, BLC, WDR, OFF. This function is used for backlight compensation. Please choose from OFF, WDR, BLC and HLC. -
Page 10: Dnr (Digital Noise Reduction)
HLC (High Light Compensation): This function is used to surpress or mask a strong light source (for example, headlights of cars during night-time) so that other subjects can be seen in more detail. - LEVEL: Adjust the brightness level from which on the light source is to be masked out. -
Page 11: Day/Night
NOTE: If the DNR function is used, the cancellation of the noise will be excellent. The higher the compensation proportion is raised, the better the effect of noise cancellation will be, but a ghost effect may also occur. 6.6. DAY/NIGHT This function is used to improve the camera's sensitivity at night or when the brigthness level of the ambient environment is low. -
Page 12: Image
> SMART IR [0~20]: This option controls the IR LED (bright portion base), saturation is not expected. 6.7. IMAGE Here you can optimise the image quality by adjusting different options. SHARPNESS [0 ~ 20] : Adjusts the image sharpness. If the level goes up excessively, it may affect the video image and generate a noise. - Page 13 - MODE [AUTO, MANUAL] : Please choose a mode for the DEFOG function. - LEVEL [LOW, MIDDLE, HIGH] : Please choose a level for the DEFOG function. SHADING [ON, OFF] : Compensates the shading effects of lenses when the lens is set to a very wide angle. This function will reduce the brightness difference between the centre and the edges.
-
Page 14: Motion
6.8. MOTION This function is used to detect moving objects in the monitored area. > SENSITIVITY [0~20]: Set the sensitivity of the motion detection. > WINDOW TONE [0~6]: Here you can set up the tone of the mask area. > WINDOW USE [0~3]: Here you can set up the zone of the mask area. >... -
Page 15: Exit
IMAGE RANGE [FULL, COMP, USER] : This is a control function for the video signal for monitors. Here you can adjust the rate of the YC signal to 100%(FULL), 75%(COMP) or 100%~75%(USER). Through adjusting this function, you can find the most suitable signal value for your monitor type. When selecting "USER", you can make finer adjustments in a sub-menu that will appear. - Page 16 Specifications GCT-K2326D Image Sensor 1/2.8" CMOS Progressive Scan Sony Exmor™ Pixels - Effective 1920(H) x 1080(V) Col/B&W Auto (ICR) / Color / B/W / External Sensitivity Colour 0.9 lux@50IRE (AGC max, Sensup OFF) Sensitivity B&W 0 Lux LED IR on Video Outputs 1 CH HD-TVI (BNC), 1 ch Composite 1.0Vp-p 75Ω...
- Page 17 Dimensions English...
- Page 18 EC Declaration of Conformity GCT-K2326D 2 Megapixel Full HD-TVI Fixed Dome Camera IR 28 LED WDR It is hereby certified that the products meet the standards in the following relevant provisions: EC EMC Directive 2004/108/EC Applied harmonised standards and technical specifications:...
Need help?
Do you have a question about the GCT-K2326D and is the answer not in the manual?
Questions and answers