Nilfisk-ALTO ATTIX 30 Operating Instructions Manual
Hide thumbs
Also See for ATTIX 30:
- Operating instructions manual (32 pages) ,
- Service manual (31 pages) ,
- Quick start manual (28 pages)

Related Manuals for Nilfisk-ALTO ATTIX 30


Summary of Contents for Nilfisk-ALTO ATTIX 30
-
Page 1: Operating Instructions
ATTIX 30 H / M / PC / XC ATTIX 50 H / M / PC / XC Operating Instructions 107400338 - 2008-09-17... -
Page 2: Table Of Contents
4.2.4 Auto-On/Off-Operation - "auto" switch position ....13 Cleaning the filter element ..........14 4.3.1 Cleaning the filter element " Push&Clean System " (ATTIX 30- / 50-xx PC) ............14 4.3.2 Check the volume flow monitor 4.3.3 Acoustic warning 4.3.4 Cleaning the filter element " XtremeClean "... -
Page 3: Important Safety Instructions
ATTIX 30-50 H/M 1 Important safety instructions Symbols used to mark Prior to using the appliance for the first time, be sure to read instructions this document through and keep it ready to hand. DANGER Danger that leads directly to serious or irreversible injuries, or even death. - Page 4 OEL values , carcinogenic dusts, dusts containing germs. The vacuum cleaners ATTIX 30-XH and ATTIX 50-XH are also ap- proved for asbestos abatement (TRGS 519). The vacuum cleaners are suitable for commercial use, such as e.g. •...
- Page 5 Regularly check whether the power cord is damaged or shows signs of ageing. Have the faulty mains connecting lead replaced by your Nilfisk-Alto service representative or a qualified electri- cian prior to using the appliance again. DANGER The upper section of the vacuum cleaner contains live components.
- Page 6 Using the vacuum cleaner for WARNING asbestos abatement work To pick up materials containing asbestos: ATTIX 30-XH and ATTIX 50-XH can be used for picking up asbestos. The hose diameter and the setting for the suction hose diameter must be the same.
- Page 7 Spare parts and accessories. The use of non-genuine spare parts and accessories can impair the safety of the appliance. Only use spare parts and accessories from Nilfisk-Alto. Use only the brushes supplied with the vacuum cleaner or specified in the operating manual.
-
Page 8: Description
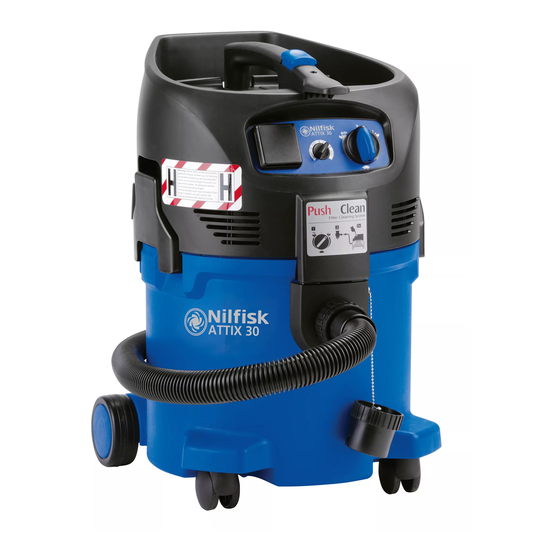
ATTIX 30-50 H/M 2 Description Operating elements Handle with receptacle for electrical lead Fixing point for suction pipe holder Retaining clamp Castor Dirt tank Inlet fitting Applicance switch Appliance socket Operating knob for filter cleaning ATTIX 30 ATTIX 50 Optional accessories / Option depending on model... -
Page 9: Operating Panel
ATTIX 30-50 H/M Operating panel ATTIX 30- / 50-01 auto ATTIX 30- / 50-21... -
Page 10: Before Starting The Cleaner
ATTIX 30-50 H/M 3 Before starting the cleaner Assembling the Take vacuum cleaner and vacuum cleaner accessories out of the pack- 3.1.1 Taking accessories out aging. of the packaging The mains plug should not yet be inserted into a sock-... -
Page 11: Inserting The Safety Filter Bag
Wood dusts & concrete dusts • Dusts with OEL values > 0.1 mg/ Filter bag (observe any additional national ATTIX 30-XM: Order No. 302004000 regulations) ATTIX 50-XM: Order No. 302004004 • Wood dusts & concrete dusts • Dusts with OEL values >... -
Page 12: Inserting The Filter Bag
ATTIX 30-50 H/M Inserting the filter bag The mains plug should not yet be inserted into a socket. Open the retaining clamps (A) and remove the up- per sec-tion of the vacuum cleaner. Insert the filter bag into the dirt tank. -
Page 13: Control / Operation
ATTIX 30-50 H/M 4 Control / Operation Connections Connect the suction hose. 4.1.1 Connecting the suction hose 4.1.2 Electrical connection 1. Ensure that the cleaner is switched off. 2. Insert the power cord into a The operating voltage shown on the... -
Page 14: Suction Power Control
ATTIX 30-50 H/M 4.2.3 Suction power control Switch Function position The suction auto power control switch allows precise adaptation of the suction power for different cleaning tasks. 4.2.4 Auto-On/Off-Operation Switch off the vacuum clean- - "auto" switch position Switch off the power tool. -
Page 15: Cleaning The Filter Element
4.3.1 Cleaning the filter Filter Cleaning System element " Push&Clean System " (ATTIX 30- / 50-xx PC) Only for vacuum cleaning without a filter bag and without a cloth insert filter. If suction performance drops: Turn switch to position "I" (maximum suction power). -
Page 16: Techniques
ATTIX 30-50 H/M 5 Applications and techniques Techniques If used correctly, additional accessories, suction nozzles and suc- tion hoses can enhance the cleaning action and reduce the cleaning effort. Effective cleaning is achieved if you follow just a few guidelines in combination with your own practical experience in special fields. -
Page 17: Switching The Vacuum Cleaner Off And Storage
ATTIX 30-50 H/M 6 After finishing work Switching the vacuum After picking up hazardous cleaner off and storage dust, vacuum clean the out- side of the cleaner. Switch off the cleaner and pull the mains plug out of the socket. -
Page 18: Maintenance Plan
ATTIX 30-50 H/M 7 Maintenance Maintenance plan After finishing work When required 7.2.1 Emptying dirt tank 7.2.2 Replacing the safety filter bag 7.2.3 Replacing the filter bag 7.2.4 Replacing the disposal bag 7.2.5 Replacing filter element (H) (Push&Clean) 7.2.6 Replacing filter element (H) (XtremeClean) 7.2.7 Replacing filter element (M) (Push&Clean) -
Page 19: Replacing The Safety Filter Bag
ATTIX 30-50 H/M 7.2.2 Replacing the safety Switch off the vauum clean- filter bag er and pull the mains plug out of the socket. Open the retaining clamps (A) and remove the up- per section of the vacuum cleaner. During the following work, ensure that dust is not unnecessarily spread around, Wear a P2 breathing mask. -
Page 20: Replacing The Filter Bag
ATTIX 30-50 H/M 7.2.3 Replacing the filter bag Switch off the vacuum clean- er and pull the mains plug out of the socket. Open the retaining clamps (A) and remove the upper section of the vacuum clean- Removing the filter bag:... -
Page 21: Replacing The Disposal Bag
ATTIX 30-50 H/M 7.2.4 Replacing the disposal Switch vacuum cleaner and pull the mains plug out of the socket. Open the retaining clamps (A) and remove the up- per section of the vacuum cleaner. Removing the disposal bag: Close the disposal bag with string (B). -
Page 22: Replacing Filter Element (H)(Push & Clean System)
ATTIX 30-50 H/M 7.2.5 Replacing filter element Switch vacuum (H) (Push & Clean cleaner and pull the mains System) plug out of the socket. Open the retaining clamps (A) and remove the up- per section of the vacuum cleaner. During the following work, ensure that dust is not unnecessarily spread around. -
Page 23: Replacing Filter Element (H)(Xtremeclean System)
ATTIX 30-50 H/M 7.2.6 Replacing filter element Switch off the vacuum clean- (H) (Xtreme Clean er and pull the mains plug System) out of the socket. Open the retaining clamps (A) and remove the upper section of the vacuum clean-... -
Page 24: Replacing Filter Element (M)(Push & Clean System)
ATTIX 30-50 H/M Attach the upper section of the vacuum cleaner. Close the retaining clamps (A). Ensure that the retaining clamps fit properly. 7.2.7 Replacing filter element Switch vacuum (M) (Push & Clean cleaner and pull the mains System) plug out of the socket. -
Page 25: Replacing Filter Element (M)(Xtremeclean System)
ATTIX 30-50 H/M 7.2.8 Replacing filter element Switch vacuum (XtremeClean System) cleaner and pull the mains plug out of the socket. Open the retaining clamps (A) and remove the up- per section of the vacuum cleaner. Never use the vacuum clean er with- out a filter. -
Page 26: Troubleshooting
ATTIX 30-50 H/M 8 Troubleshooting Fault Cause Remedy ‡ Motor does not start > Fuse of the mains socket has • Connect mains fuse. blown. > Overload protection switch • Switch off the vacuum cleaner has tripped. and allow it to cool for approx. -
Page 27: Further Information
Nilfi sk-Advance A/S Industrivej 1 DK-9560 Hadsund Product: Vacuum cleaner for wet and dry operation Model: ATTIX 30 -/50 -/0H/0M/PC/XC ATTIX 30 -/50 -/2H/2M/PC/XC Description: 110/230-240V 50Hz The design of the appliance EC Machine Directive 2006/42/EC corresponds to the following... -
Page 28: Technical Data
3G2,5 3G1,5 CAUTION! Only use the cables mentioned Optional accessories Description Order No. Safety filter bag "H" ATTIX 30 (5 pcs.) 107400233 Safety filter bag "H" ATTIX 50 (5 pcs.) 107400236 Fleece filter bag ATTIX 30 (5 pcs.) 302004000 Fleece filter bag ATTIX 50 (5 pcs.) - Page 29 Aéroparc 1 Tel.: +48 22 738 37 50 19 rue Icare Fax: +48 22 738 37 51 67960 Entzheim E-mail: info@nilfi sk-alto.pl Tel.: +33 3 88 28 84 00 www.nilfi sk-alto.pl Fax: +33 3 88 30 05 00 E-mail: info@nilfi sk-alto.fr PORTUGAL www.nilfi...
Need help?
Do you have a question about the ATTIX 30 and is the answer not in the manual?
Questions and answers