DVTEL CM-4221-00 User And Installation Manual
Mini-dome camera
Hide thumbs
Also See for CM-4221-00:
- Use and installation manual (137 pages) ,
- Quick installation manual (2 pages)
Table of Contents
Advertisement
All text and figures included in this publication are the exclusive property of DVTel Inc., and may not be copied, reproduced or
used in any way without the express written permission of DVTel Inc. Information in this document is subject to change without
notice. This document also contains registered trademarks and service marks that are owned by their respective companies or
organizations.
Copyright © 2012, DVTel Inc., All Rights Reserved.
CM-4221 Installation Manual
Quasar CM-4221
Series Mini-Dome
Camera User and
Installation Guide
Installation and configuration instructions
for the CM-4221 Series IP Mini-dome
Camera
CM-4221-00 Indoor camera with
CM-4221-01 Outdoor camera with
CM-4221-10 Indoor camera with
CM-4221-10-I Indoor camera with
CM-4221-11 Outdoor camera with
CM-4221-11-I Outdoor camera with
varifocal lens
varifocal lens
motorized lens
motorized lens and infrared LED
illuminator
motorized lens
motorized lens and infrared LED
illuminator
Advertisement
Table of Contents

Subscribe to Our Youtube Channel
Related Manuals for DVTEL CM-4221-00


Summary of Contents for DVTEL CM-4221-00
-
Page 1: Installation Guide
All text and figures included in this publication are the exclusive property of DVTel Inc., and may not be copied, reproduced or used in any way without the express written permission of DVTel Inc. Information in this document is subject to change without notice. -
Page 2: Table Of Contents
Remove the Base Plate ..................11 Mounting Instructions ..................... 12 4.6.1 Mounting the CM-4221-00, CM-4221-10, or CM-4221-10-I Indoor Camera ..12 4.6.2 Mounting the CM-4221-01, CM-4221-11, or CM-4221-11-I Outdoor Camera .. 15 Adjusting and Framing-Up the Camera View ............18 Searching and Accessing the Camera with Device Search ...... - Page 3 CM-4221 Installation Manual 6.3.3.4 UPnP ......................59 6.3.4 DDNS ....................... 61 6.3.5 Mail ........................63 6.3.6 FTP ........................64 6.3.7 HTTP ........................ 65 6.3.8 Application ......................66 6.3.9 Motion Detection ....................74 6.3.10 Network Failure Detection ................78 6.3.11 Tampering Alarm ................... 80 6.3.12 Storage Management ..................
- Page 4 Appendix B: Internet Security Settings ..............136 Appendix C: Install UPnP Components ............... 140 Appendix D: Deleting the Existing DC Viewer ............143 Appendix E: Deleting Temporary Internet Files ............ 144 Appendix F: Contacting DVTel ................146 Appendix G: Accessories ..................147...
-
Page 5: Overview
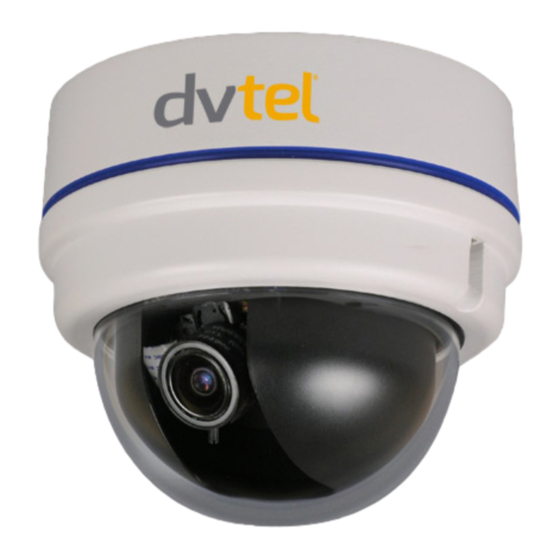
CM-4221-11-I Outdoor Camera with motorized lens and infrared IR illuminator Important: If you are using DVTel Latitude, we recommend that you configure the camera’s settings via the AdminCenter. This is because the camera’s web-based interface might be overwritten by Latitude settings. Refer to the Latitude online help for information regarding configuring camera settings. -
Page 6: Package Contents
CM-4221 Installation Manual (CM-4221-01/11/11-I) (CM-4221-10/11/11-I) (CM-4221-10-I/11-I) NOTE: MJPEG is not supported by Latitude. 1.2 Package Contents Check that the package contains the items listed below. Indoor and Outdoor Camera Package Contents DC jack cable Mini-dome camera Star-bit tool (Torx wrench) Power terminal block Self-tapping screws Plastic screw anchors... -
Page 7: Introduction To The Cm-4221 Series Ip Mini-Dome Camera
PCB board is also specified. Related Links CM-4221-00 Camera Dimensions CM-4221-01 Camera Dimensions CM-4221-10, CM-4221-10-I, CM-4221-11, and CM-4221-11-I Camera Dimensions Camera Connectors Appendix A: Technical Specifications 2.1 CM-4221-00 Indoor Vari-focal Camera Dimensions The CM-4221-00 IP Indoor Mini-dome Camera’s dimensions are shown below. -
Page 8: Cm-4221-01 Outdoor Varifocal Camera Dimensions
CM-4221 Installation Manual 2.2 CM-4221-01 Outdoor Vari-focal Camera Dimensions The CM-4221-01 Vari-focal IP Outdoor Mini-dome Camera’s dimensions are shown below. -
Page 9: Cm-4221-10/10-I/11/11-I Indoor And Outdoor Motorized Camera Dimensions
CM-4221 Installation Manual Top View Side View 2.3 CM-4221-10/10-I/11/11-I Indoor and Outdoor Motorized Camera Dimensions The CM-4221-10, CM-4221-10-I, CM-4221-11, and CM-4221-11-I Indoor and Outdoor Motorized IP Mini-dome Camera dimensions are shown below. Top View Side View Related Link Appendix A: Technical Specifications... -
Page 10: Camera Connectors
CM-4221 Installation Manual 2.4 Camera Connectors The diagram below shows the CM-4221-xx’s reset button and various connectors. Definition for each connector is given as follows. Connector Pin No. Definition Remarks Reset Button Restore to factory default Analog Video Output GND (Input-) Input+... -
Page 11: System Requirements
CM-4221 Installation Manual RJ-45 10/100 Mbps Ethernet/PoE System Requirements To access the camera via a web browser, ensure that your PC has the proper network connection and meets system requirements as described below. Items System Requirement Intel® Pentium® M, 2.16GHz or Intel® Core 2 Duo, 2.0GHz, Personal Computer 2GB RAM or more... -
Page 12: Installation
Installation Following are instructions for indoor and outdoor installation of the CM-4221 series cameras. 4.1 Indoor Installation Read the instructions provided in this chapter thoroughly before installing the CM-4221-00, CM-4221-10, or CM-4221-10-I. Following are additional considerations for indoor installation: There must be a fuse or breaker at the starting point of the electrical wiring ... -
Page 13: Power And Ethernet Cable Connection
CM-4221 Installation Manual Mounting the CM-4221-00, CM-4221-10, or CM-4221-10-I IP Indoor Mini-dome Camera Mounting the CM-4221-01, CM-4221-11, or CM-4221-11-I IP Outdoor Mini-dome Camera Adjusting and Framing Up the Camera View 4.3 Power and Ethernet Cable Connection Power Connection Make sure the camera’s power cable is properly connected. Refer to the pin definition table in Camera Connectors. -
Page 14: Initial Camera Configuration
From the Latitude Sidebar, run the Unified Configurator by selecting Applications Device Configuration Tool and then on the Unified Configurator screen, click DVTel HD Series. 4.) In the DeviceSearch application, click Device Search and do the following: In the search results, click on the camera to select it. -
Page 15: Remove The Base Plate
2.) Press the sides of the inner cover inward and remove the cover. 3.) Unscrew the module-fastening screw. Caution: The CM-4221-00 is an indoor CM camera and should be kept in a clean and dry indoor environment. Operating temperature should be maintained within -10°C~50°C. -
Page 16: Mounting Instructions
Avoid aiming the IR where there are nearby objects closer than the scene of interest which might reflect back into the lens. 4.6.1.1.2 Mounting the CM-4221-00, CM-4221-10, or CM-4221-10- I Indoor Camera 1.) Do one of the following: For drilled wall or ceiling mounting: ... - Page 17 CM-4221 Installation Manual achieved when the system is assembled. b.) In the marked locations, drill each hole using a drill-bit of a slightly smaller diameter than the supplied screw anchors (molly-plug anchor). You want to achieve a snug insertion so that the plug expansion holds firm after the screws are screwed in.
- Page 18 CM-4221 Installation Manual 3.) Thread the wires through the base plate and screw it to the predrilled wall, ceiling, CM Series Mini-dome Recessed Mount, CM Series Mini Mini-dome Corner Mount, or 4S electrical box. Check that the installation is not flimsy, will not wobble, and is flush with the mounting surface.
-
Page 19: Mounting The Cm-4221-01, Cm-4221-11, Or Cm-4221-11-I Outdoor Camera
CM-4221 Installation Manual 7.) If needed, connect the other end of the CAT5 cable to the network and turn on the power from the power supply. Note: Do not reassemble the camera’s inner cover and mini-dome cover until after hardware configurations and lens adjustments are made. 4.6.2 Mounting the CM-4221-01, CM-4221-11, or CM-4221- 11-I Outdoor Camera... - Page 20 CM-4221 Installation Manual b.) Ensure that the box is sufficiently sturdy (attach to the wall stud, ceiling joist, or reinforced surface as needed) to securely hold the weight of the camera. For bracket, pole and pendant installations: Follow the hanging device installation instructions. 2.) Thread the power and Ethernet cables and any other wires (such as a relay output, alarm input, audio in, or audio out) through the wire entry.
- Page 21 CM-4221 Installation Manual 5.) Plug the CAT5 cable into the camera’s Ethernet port and, if needed, plug the power terminal block into the power terminals. 6.) If applicable, wire the Alarm In, Alarm Out, Audio In, and Audio Out terminal blocks to external devices.
-
Page 22: Adjusting And Framing-Up The Camera View
Log in using the default user name “Admin” and password “1234”. b.) Allow the ActiveX to download and choose to install the DVTel Web Player. 3.) On the camera, loosen the screw on the tensioning collar of the camera tilt axis. - Page 23 CM-4221 Installation Manual IMPORTANT: Best focusing results can be achieved when the lens iris is fully open (such as at night in low light). This prevents loss of sharpness if light levels are reduced at night. To achieve this during the day, in the Web Base Viewer go to the Camera Exposure screen and select from the Exposure Setting menu Auto-shutter mode.
-
Page 24: Searching And Accessing The Camera With Device Search
If you are working with DVTel Latitude, configure the unit with a static IP address rather than with DHCP. This ensures that the IP address will not automatically change in the future and interfere with configurations and communication. - Page 25 CM-4221 Installation Manual 3.) In the Device Search application, click the “Device Search” button. 4.) If you have not disabled the Windows Firewall, a security alert window will pop up. Do the following: a.) Click “Unblock” to continue. Latitude users should consult the Latitude Installation Instructions on disabling the Windows Firewall.
- Page 26 CM-4221 Installation Manual Tip: Record the camera’s MAC address for future identification. Do the one of the following. For DHCP (not supported by Latitude): a.) Select “DHCP”. Do not use for Latitude. b.) Click “Apply”. When prompted with instructions to search again after one minute, click “OK”.
- Page 27 CM-4221 Installation Manual 7.) Right-click and select “Browse” to directly access the camera via a web browser. The default web browser opens and requests access to the camera IP address.
- Page 28 If the wizard appears for installing the component application DC Viewer, follow the steps of the wizard to complete the installation. NOTE: If you change the password and you are using the DVTel Latitude AdminCenter Discovery feature, deselect all other proprietary types. Select “DVTel HD Series”...
- Page 29 CM-4221 Installation Manual Additionally, users can change the camera’s network property (either DHCP or Static IP) directly in the device finding list. Refer to the following section for changing the camera’s network property.
-
Page 30: Configuration And Operation
In this chapter, information about main page introduction, system related settings and camera settings are described in detail. Additionally, if you have DVTel Latitude, many of the configurations and features of DVTel’s NVMS provide configuration and automation of the camera. -
Page 31: Browser-Based Viewer Introduction
CM-4221 Installation Manual 6.1 Browser-Based Viewer Introduction The figure below shows the main page of the camera user interface. At the top of the Viewer Window is the Navigation Bar, which contains five tabs: Home, System, Streaming, Camera, and Logout. Home Page ... - Page 32 CM-4221 Installation Manual System Settings The administrator can set host name, system time, root password, network related settings, etc. Further details are discussed in System-Related Settings. Streaming Settings The administrator can modify video resolution and rotate type and select audio compression mode in this page.
-
Page 33: Home Page
6.2 Home Page Function buttons are located at the bottom of the Home page, as seen below. 6.2.1 CM-4221-00/01 Varifocal Camera Home Page All models in the CM-4221-xx series include the following function buttons, which are displayed below. Display Size Adjustment (x1/x½) - Page 34 CM-4221 Installation Manual Digital Zoom Control Click on this button to view the monitored image in full screen mode. Double-click on the screen to exit Digital Zoom mode and return to the Home page. Talk button (on/off) The Talk function allows the local site to talk to the remote site. Click on the button to switch it on/off.
-
Page 35: Cm-4221-10/10-I/11/11-I Motorized Camera Home Page
CM-4221 Installation Manual 6.2.2 CM-4221-10/10-I/11/11-I Motorized Camera Home Page The CM-4221-10, CM-4221-10-I, CM-4221-11, and CM-4221-11-I, which feature a motorized lens, include the following function buttons in addition to those shown above for the CM- 4221-00/01. Wide/Tele buttons Hold the Tele/Wide button to implement continuous zoom adjustment. Near/Far buttons... - Page 36 CM-4221 Installation Manual Hold the Near/Far button to implement continuous focus adjustment. Push AF button Press the Push AF button once to adjust Zoom or Focus. Wide/Tele Steps buttons Press the Wide/Tele Steps buttons to alternate the zoom between Wide and Tele views within a user-defined range of steps, which can be selected from the drop-down menu shown below.
- Page 37 CM-4221 Installation Manual Step Range Select from a user-defined range of steps, which can be selected from the drop-down menu below.
-
Page 38: System-Related Settings
CM-4221 Installation Manual 6.3 System-Related Settings The figure below shows all categories under the <System> tab. Each category in the sidebar is explained in the following sections. NOTE: The System configuration page is accessible only by the Administrator. -
Page 39: Host Name And System Time Setting
CM-4221 Installation Manual Related Links Host Name and System Security Network Time Setting DDNS Mail HTTP Application Motion Detection Network Failure Detection Tampering Alarm Storage Management Recording ... - Page 40 CM-4221 Installation Manual Host Name The host name is for camera identification. If the alarm function (see Application) is enabled and is set to send an alarm message by Mail/FTP, the host name entered here is displayed in the alarm message. Time Zone Select the time zone you are in from the drop-down menu.
-
Page 41: Security
CM-4221 Installation Manual 6.3.2 Security Clicking the category <Security> in the sidebar opens a drop-down menu with tabs including <User>, <HTTPS>, <IP Filter>, and <IEEE 802.1X>. Related Links User HTTPS IP Filter IEEE 802.1X... -
Page 42: User
CM-4221 Installation Manual 6.3.2.1 User Click the <User> tab under the category <Security> in the sidebar to display the following page. Root password Change the administrator’s password by inputting the new password in both text boxes. The input characters/numbers are displayed as dots for security purposes. After clicking “Save”, the web browser asks the Administrator for the new password. -
Page 43: Add User
CM-4221 Installation Manual Add user Type the new user's user name and password in the respective fields. Click “Add” to add the new user. Both user name and password can be up to 16 characters. The new user name is displayed in the user name list. - Page 44 CM-4221 Installation Manual NOTE: You must enter the user password as well as select the function available to the user. When finished, click “Save” to modify the account authority.
-
Page 45: Https
CM-4221 Installation Manual 6.3.2.2 HTTPS <HTTPS> allows secure connections between the camera and web browser using <Secure Socket Layer (SSL)> or <Transport Layer Security (TLS)>, which protect camera settings or Username/Password info from snooping. It is necessary to install a self-signed certificate or a CA-signed certificate for implementing <HTTPS>. - Page 46 CM-4221 Installation Manual Create a Self-signed Certificate Before a CA-issued certificate is obtained, users can first create and install a self-signed certificate. Click the “Create” button under “Create self-signed certificate” and provide the requested information to install a self-signed certificate for the camera. Refer to “Provide the Certificate Information”...
- Page 47 CM-4221 Installation Manual Create Certificate Request Click the “Create Certificate Request” button to create and submit a certificate request in order to obtain a signed certificate from a CA. Provide the requested information in the “Created Request” field. Refer to “Provide the Certificate Information”...
- Page 48 CM-4221 Installation Manual When the signed certificate is returned, install it by uploading the signed certificate, as seen in the following screen.
- Page 49 CM-4221 Installation Manual Provide the Certificate Information To create a self-signed HTTPS Certificate or a Certificate Request to CA, enter the information as requested:...
- Page 50 CM-4221 Installation Manual Country Enter a two-letter combination code to indicate the country the certificate will be used in. For instance, type in “US” to indicate United States. State or province Enter the local administrative region. Locality Enter other geographical information. Organization Enter the name of the organization to which the entity identified in “Common Name”...
- Page 51 CM-4221 Installation Manual Enter the name of the organizational unit to which the entity identified in the “Common Name” field belongs. Common Name Indicate the name of the person or other entity that the certificate identifies (often used to identify the website). Valid days (self-signed certificate only) Enter the period in days (1~9999) to indicate the valid period of certificate.
-
Page 52: Ip Filter
CM-4221 Installation Manual 6.3.2.3 IP Filter The IP filter restricts access to the camera by denying/allowing specific IP addresses. General Enable IP Filter Check the box to enable the IP Filter function. Once enabled, the listed IP addresses (IPv4) are allowed/denied access to the camera. Select “Allow”... -
Page 53: Ieee 802.1X
CM-4221 Installation Manual may be specified. To remove an IP address from the list, select the IP address and then click the “Delete” button. 6.3.2.4 IEEE 802.1X The camera is allowed to access a network protected by 802.1X/EAPOL (Extensible Authentication Protocol over LAN). Users must contact the network administrator to obtain certificates, user IDs, and passwords. - Page 54 CM-4221 Installation Manual CA Certificate The CA certificate is created by the Certificate Authority for the purpose of validating itself. Upload the certificate to check the server’s identity. Client Certificate/Private Key Upload the Client Certificate and Private Key to authenticate the camera. Settings Identity Enter the user identity associated with the certificate.
-
Page 55: Network
CM-4221 Installation Manual 6.3.3 Network Click the category <Network>. A drop-down menu appears with tabs including <Basic>, <QoS>, <SNMP>, and <UPnP>. Related Links Basic QoS (Quality of Service) SNMP (Simple Network Management Protocol) UPnP... -
Page 56: Basic
CM-4221 Installation Manual 6.3.3.1 Basic Users can connect to the camera with either fixed or dynamic (DHCP) IP address. The camera also provides PPPoE (Point-to-Point Protocol over Ethernet) support for users who connect to the network via PPPoE. General Get IP address automatically (DHCP) The camera’s default setting is “Use fixed IP address”. - Page 57 CM-4221 Installation Manual NOTE: For future identification, record the camera’s MAC address, which is found on the camera label. Use fixed IP address To setup static IP address, select “Use fixed IP address” and move the cursor to the IP address blank (as indicated below) and insert the new IP address, ex.
- Page 58 CM-4221 Installation Manual IP address The IP address is necessary for network identification. Subnet mask The subnet mask is used to determine if the destination is in the same subnet. The default value is “255.255.255.0”. Default gateway The default gateway is the gateway used to forward frames to destinations in a different subnet.
- Page 59 CM-4221 Installation Manual Click “Save” to save the settings.IPv6 Address Configuration With IPv6 support, users can use the corresponding IPv6 address for browsing. Enable IPv6 by checking the box. Click “Save” to save the setting.
-
Page 60: Qos
CM-4221 Installation Manual 6.3.3.2 Quality of Service (QoS) provides differentiated service levels for different types of traffic packets and guarantees delivery of priority services during periods of network congestion. Adapting the Differentiated Services (DiffServ) model, traffic flows are classified and marked with DSCP (DiffServ Codepoint) values, and thus receive the corresponding forwarding treatment from DiffServ-capable routers. -
Page 61: Snmp Settings
CM-4221 Installation Manual Audio This setting is only available for cameras that support audio. Management this class consists of HTTP traffic (web browsing). Click the “Save” button when complete. NOTE: To enable this function, make sure the switches/routers in the network support QoS. - Page 62 CM-4221 Installation Manual SNMP v1/v2 Enable SNMP Select the version of SNMP (v1 or v2) to use by checking the box. Read Community Specify the community name that has read-only access to all supported SNMP objects. The default value is “public”. Write Community ...
-
Page 63: Upnp
CM-4221 Installation Manual 6.3.3.4 UPnP The UPnP Setting page enables you to use Universal Plug-and-Play protocols for networking your devices. - Page 64 CM-4221 Installation Manual UPnP Setting Enable UPnP When UPnP is enabled, whenever a camera is discovered on the LAN, the icon of the connected camera appears in My Network Places and allows direct access as shown below. NOTE: To enable this function, make sure the UPnP component is installed on your computer.
-
Page 65: Ddns
CM-4221 Installation Manual 6.3.4 DDNS Dynamic Domain Name System (DDNS) allows a host name to be constantly synchronized with a dynamic IP address. This permits those using a dynamic IP address to be accessed by a static domain name. - Page 66 CM-4221 Installation Manual Enable DDNS Check this box to enable DDNS. Provider Select a DDNS host provider name from the drop-down list. Host name Enter the registered domain name in the field. Username/E-mail Enter the username or e-mail address required by the DDNS provider for authentication.
-
Page 67: Mail
CM-4221 Installation Manual 6.3.5 Mail The Administrator can send an e-mail via Simple Mail Transfer Protocol (SMTP) when an alarm is triggered. SMTP is a protocol for sending e-mail messages between servers. SMTP is a relatively simple, text-based protocol, where one or more recipients of a message are specified and the message text is transferred. -
Page 68: Ftp
CM-4221 Installation Manual 6.3.6 The Administrator can send an alarm message to up to two File Transfer Protocol (FTP) sites when motion is detected. Settings include first and second server, server port, user name, password, and remote folder. Enter the details in the appropriate fields. Click “Save” when finished. -
Page 69: Http
CM-4221 Installation Manual 6.3.7 HTTP An HTTP notification server listens for notification messages of triggered events sent from cameras. You can set up to two notification server accounts. <Alarm> triggered and <Motion Detection> notifications can be sent to the specified HTTP server. Enter the HTTP details, including server, user name, and password, in the appropriate fields. -
Page 70: Application
CM-4221 Installation Manual 6.3.8 Application Alarm Pin Definition PIN 1. Input- PIN 2. Input+ PIN 3. Output- PIN 4. Output+... - Page 71 CM-4221 Installation Manual The alarm configuration page is shown below. Alarm Switch The Administrator can enable or disable the alarm function. Alarm Type Select an alarm type (“Normal close” or “Normal open”) that corresponds with the alarm application. Alarm Output Define the normal alarm output signal as “Output high”...
- Page 72 CM-4221 Installation Manual Triggered Action The Administrator can specify various alarm actions to be taken when an alarm is triggered. The options are listed below. Enable Alarm Output Select this box to enable alarm relay output. Record Stream to SD Card ...
- Page 73 CM-4221 Installation Manual Send Message by FTP/E-Mail Select whether to send an alarm message by FTP and/or e-mail when an alarm is triggered. Upload Image by FTP Select this box to assign an FTP site and configure the parameters shown in the figure below.
- Page 74 CM-4221 Installation Manual...
- Page 75 CM-4221 Installation Manual Upload Image by E-Mail Select this box in order to assign an e-mail address and configure various parameters as shown in the figure below. When the alarm is triggered, event images are sent to one of two designated e-mail addresses. Select the number of frames for the pre-trigger and post-trigger buffers from the drop-down menu of 1-20 frames.
- Page 76 CM-4221 Installation Manual Send HTTP notification Check this box to specify the destination HTTP address and parameters for event notifications by the triggered alarm. When an alarm is triggered, the notification will be sent to one of two specified HTTP servers. File Name File Name ...
- Page 77 CM-4221 Installation Manual Add sequence number suffix (no maximum value) File name: imageXXXXXXX.jpg X: Sequence Number Add sequence number suffix (limited value) File Name: imageXX.jpg X: Sequence Number The file name suffix ends at the number being set. For example, if the setting is up to “10,”...
-
Page 78: Motion Detection
CM-4221 Installation Manual 6.3.9 Motion Detection The motion detection function detects suspicious motion and triggers alarms when motion volume in the detected area reaches/exceeds the determined sensitivity threshold value. Within the Live View Pane on the Motion Detection setting page, there is a frame (Motion Detection Window) which is used for defining the motion detection area. - Page 79 CM-4221 Installation Manual When motion is detected, the signals are displayed in the Motion window as shown below. Detailed settings for Motion Detection are as follows: Motion Detection Activate this function by selecting “On” or “Off”. Default setting is “Off”. Motion Detection Setting Various parameters of Motion Detection can be set in this section.
- Page 80 CM-4221 Installation Manual Enable Alarm Output Check this box to select the predefined type of alarm output in order to enable alarm relay output when motion is detected. Select either “Low” or “High” relay output. Record Stream to SD Card ...
- Page 81 CM-4221 Installation Manual click on this radial button. Finally, select the number of frames per second from the drop-down menu next to “Image frequency”. NOTE: Make sure that SMTP or FTP configuration has been completed. See Mail for further details. Send HTTP notification ...
-
Page 82: Network Failure Detection
CM-4221 Installation Manual 6.3.10 Network Failure Detection The network failure detection function sends a ping to a device to ensure that it is operating on the network. Detection Switch The Administrator can enable or disable the detection function by selecting “On” or “Off”. Detection Type Enter the IP address to ping and the time interval in minutes between pings. - Page 83 CM-4221 Installation Manual The Administrator can specify various alarm actions to be taken when an alarm is triggered. The options are listed below. Enable Alarm Output Select this box to enable alarm relay output. Select either “Low” or “High” relay output.
-
Page 84: Tampering Alarm
CM-4221 Installation Manual Send Message by FTP/E-Mail Select whether to send an alarm message by FTP and/or e-mail when a network failure is detected. 6.3.11 Tampering Alarm The Tampering Alarm function protects the camera against tampering such as deliberate redirection, blocking, paint spray, and lens cover obstruction by using video analysis. - Page 85 CM-4221 Installation Manual Tampering Alarm Turn the Tampering Alarm function “On” or “Off”. The default setting is “Off”. Tampering Duration The tampering duration is the time for video analysis to determine whether camera tampering has occurred. Minimum duration defines the tampering threshold. A longer duration represents a higher threshold.
- Page 86 CM-4221 Installation Manual...
- Page 87 CM-4221 Installation Manual Upload Image by E-Mail Select this box in order to assign an e-mail address and configure various parameters as shown in the figure below. When motion is detected, event images are sent to one of two designated e-mail address. Specify which of two e-mail addresses you wish to use from the drop-down menu.
-
Page 88: Storage Management
CM-4221 Installation Manual 6.3.12 Storage Management Users can implement local recording of up to 32GB on a Micro SD/SDHC card. The Storage Management page shows the capacity information of the Micro SD card and a recording list of all the recording files saved on the memory card. Users can also format the SD card and implement automatic recording cleanup on this page. - Page 89 CM-4221 Installation Manual Device setting Press the “Format” button to format the memory card. Disk cleanup setting You can enable automatic recording cleanup by clicking on “Enable automatic disk cleanup”. From the pull-down menu, specify the minimum length of time over which you wish to remove recordings, for example, remove recordings over 10 days old.
- Page 90 CM-4221 Installation Manual...
-
Page 91: Recording
CM-4221 Installation Manual 6.3.13 Recording In the Recording page, specify the recording schedule according to your requirements. Select one of three options: disable this function (“Disable”), always use this function (“Always”), or record only during a specified time frame (“Only during time frame”). The Recording page is displayed below. -
Page 92: File Location
CM-4221 Installation Manual 6.3.14 File Location Specify a storage location for snapshots and web recordings. The default setting is: C:\. After confirming the setting, click “Save” to save the snapshots and recordings in the designated location. NOTE: Make sure the selected file path contains valid characters. -
Page 93: Iris Adjustment
CM-4221 Installation Manual 6.3.15 Iris Adjustment Users of an auto-iris lens that needs adjustment should refer to the iris adjustment procedure in the setting page displayed below. -
Page 94: View Information
CM-4221 Installation Manual 6.3.16 View Information The View Information page enables you to view the following information: View log file User Information Parameters ... -
Page 95: View Log File
CM-4221 Installation Manual 6.3.16.1 View Log File Click on the link to view the system log file. The content of the file provides useful information about configuration and connections after system boot-up. -
Page 96: User Information
CM-4221 Installation Manual 6.3.16.2 User Information The Administrator can view each added user’s login information and privileges (see Security). View User Login Information All users in the network are listed in the “User information” screen shown below. Click on “get user information” to see each user’s details. For example: Admin: 1234. This indicates that the user’s login user name is “Admin”... - Page 97 CM-4221 Installation Manual View User Privilege Click on “get user privacy” at the bottom of the page to view each user’s privileges. As the figure above shows: Admin: 1:1:1:1 1:1:1:1= I/O access : Camera control : Talk : Listen (see Security) This denotes that the user name “Admin”...
-
Page 98: View Parameters
CM-4221 Installation Manual 6.3.16.3 View Parameters Click on this selection on the sidebar to view the entire system’s parameter settings. -
Page 99: Factory Default
CM-4221 Installation Manual 6.3.17 Factory Default The factory default setting page is shown below. Follow the instructions to reset the camera to factory default settings if needed. Full Restore Click on the “Full Restore” button to restore the factory default settings. The system restarts in 30 seconds. - Page 100 CM-4221 Installation Manual Partial Restore Click on the “Partial Restore” button to restore the factory default settings, but save your network settings. The system restarts in 30 seconds. The following screen appears when selecting this option: Reboot Clicking on the “Reboot” button restarts the system without changing current settings.
-
Page 101: Software Version
CM-4221 Installation Manual 6.3.18 Software Version The current software version is displayed in the software version page, which is shown below. -
Page 102: Software Upgrade
CM-4221 Installation Manual 6.3.19 Software Upgrade Software upgrade can be carried out in the “Software Upgrade” page, as shown below. NOTE: Make sure the upgrade software file is available before carrying out software upgrade. - Page 103 CM-4221 Installation Manual The procedure for software upgrade follows: To upgrade the firmware: 1.) Click “Browse” and select the binary file to be uploaded, for example, “uImage_userland.img”. NOTE: Do not change the upgrade file name or the system will fail to find the file.
- Page 104 5.) Click “Control Panel” and then double-click “Add or Remove Programs”. In the “Currently install programs” list, select “DCViewer” and click the button “Remove” to uninstall the existing DC Viewer. 6.) Open a new web browser, re-login the camera, and then allow the automatic download of the DVTel Web Player (DV Viewer).
-
Page 105: Maintenance
CM-4221 Installation Manual 6.3.20 Maintenance Users can export configuration files to a specified location and retrieve data by uploading an existing configuration file to the camera. - Page 106 CM-4221 Installation Manual Export Users can save the system settings by exporting the configuration file (.bin) to a specified location for future use. Press the “Export” button and the popup File Download window appears as shown below. Click “Save” and specify a desired location for saving the configuration file.
-
Page 107: Video And Audio Streaming Settings
CM-4221 Installation Manual 6.4 Video and Audio Streaming Settings Pressing the <Streaming> tab in the navigation bar at the top of the page displays the configurable video and audio selections in the sidebar. In Streaming, the Administrator can configure specific video resolution, video compression mode, video protocol, audio transmission mode, etc. -
Page 108: Video Resolution And Rotate Type
CM-4221 Installation Manual 6.4.1 Video Resolution and Rotate Type Different values are displayed and can be selected on the video format setting page for an NTSC or PAL TV system. The TV system is set on the sidebar of the <Camera> tab (see System). -
Page 109: Ntsc System Settings
CM-4221 Installation Manual 6.4.1.1 NTSC System Settings Following are the video resolution settings for an NTSC TV system. MJPEG + H.264 Video Resolution: The following video resolution options are available: H.264 MJPEG BNC SUPPORT 720 x 480 (30 fps) √ 1920 x 1080 (30 fps) 640 x 480 (30 fps) √... - Page 110 CM-4221 Installation Manual MJPEG-Only Video Resolution: The following video resolution options are available: MJPEG BNC SUPPORT 1920 x 1080 (30 fps) √ 1280 x 1024 (30 fps) √ 1280 x 720 (30 fps) √ 1024 x 768 (30 fps) √ 800 x 600 (30 fps) √...
- Page 111 CM-4221 Installation Manual 640 x 480 (30 fps) √ 352 x 240 (30 fps) √ 640 x 480 (30 fps) √ 640 x 480 (30 fps) 352 x 240 (30 fps) √ 352 x 240 (30 fps) 352 x 240 (30 fps) H.264 Only Video Resolution: The following video resolution options are available: H.264...
-
Page 112: Pal System Settings
CM-4221 Installation Manual 6.4.1.2 PAL System Settings Following are the video resolution settings for a PAL TV system. MJPEG + H.264 Video Resolution: The following video resolution options are available: H.264 MJPEG BNC SUPPORT 720 x 576 (25 fps) √ 1920 x 1080 (25 fps) 640 x 480 (25 fps) √... - Page 113 CM-4221 Installation Manual MJPEG-Only Video Resolution: The following video resolution options are available: MJPEG BNC SUPPORT 1920 x 1080 (25 fps) √ 1280 x 1024 (25 fps) √ 1280 x 720 (25 fps) √ 1024 x 768 (25 fps) √ 800 x 600 (25 fps) √...
- Page 114 CM-4221 Installation Manual H.264 + H.264 Video Resolution: The following video resolution options are available: H.264-1 H.264-2 BNC SUPPORT 1920 x 1080 (25 fps) √ 1920 x 1080 (13 fps) √ 1280 x 1024 (25 fps) √ 1280 x 720 (25 fps) √...
-
Page 115: Text Overlay Settings
CM-4221 Installation Manual H.264 Only Video Resolution: The following video resolution options are available: H.264 BNC SUPPORT 1920 x 1080 (25 fps) √ 1280 x 1024 (25 fps) √ 1280 x 720 (25 fps) √ 1024 x 768 (25 fps) √... - Page 116 CM-4221 Installation Manual Video Rotate Type Users can change video display type if necessary. Selectable video rotate types include Normal video, Flip video, Mirror video, 90 degree clockwise, 180 degree rotate, and 90 degree counterclockwise. Differences among these types are illustrated below. The following drop-down menu appears when selecting this option.
- Page 117 CM-4221 Installation Manual Suppose the displayed image of the camera is shown as follows. To rotate the image vertically, for instance, users can select “Flip video”. Then the displayed image is reversed as shown below. Following are descriptions of different video rotate types. Normal video ...
-
Page 118: Video Compression
CM-4221 Installation Manual 90 degree counterclockwise Selecting “90 degree counterclockwise” inverts the image 90° counter- clockwise (to the left). Click “Save” to confirm the setting. GOV Settings Users can set the GOV length to determine the frame structure (I-frames and P-frames) in a video stream for saving bandwidth. - Page 119 CM-4221 Installation Manual MJPEG Q (Quality) factor A higher value implies higher bit rates and higher visual quality. The default setting of MJPEG Q factor is 35; the setting range is from 1 to 70. Click “Save” to confirm the setting. NOTE: MJPEG is not supported by Latitude.
- Page 120 CM-4221 Installation Manual...
-
Page 121: Video Ocx Protocol
CM-4221 Installation Manual 6.4.3 Video OCX Protocol In the Video OCX protocol setting page, users can select RTP over UDP, RTP over TCP, RTSP over HTTP or MJPEG* over HTTP, for streaming media over the network. In the case of multicast networking, users can select the Multicast mode. -
Page 122: Video Frame Rate
CM-4221 Installation Manual NOTE: MJPEG is not supported by Latitude. Click “Save” to confirm the settings. 6.4.4 Video Frame Rate Video frame rate is for setting the frames per second (fps) if necessary. The setting page is shown as below. MJPEG/H.264-1/H.264-2 Frame Rate The default setting of MJPEG Frame Rate is 30 fps (NTSC) or 25 fps (PAL). - Page 123 CM-4221 Installation Manual NOTE: MJPEG is not supported by Latitude. NOTE: A lower frame rate decreases video smoothness.
- Page 124 CM-4221 Installation Manual Video Mask The Video Mask function enables selection of up to five active masks and selection of mask color. Active Mask Function Add a Mask Upon checking a Video Mask checkbox, a red frame appears in the Live Video pane on the right side of the screen.
-
Page 125: Audio Mode And Bit Rate Settings
CM-4221 Installation Manual Mask Setting Mask color The selections of Mask color include red, black, white, yellow, green, blue, cyan, and magenta. Click “Save” to confirm the settings. 6.4.5 Audio Mode and Bit Rate Settings The audio setting page is show below. In the Audio page, the Administrator can select one transmission mode and audio bit rate. - Page 126 CM-4221 Installation Manual Transmission Mode Full-duplex (Talk and listen simultaneously) In the Full-duplex mode, the local and remote sites can communicate with each other simultaneously, i.e. both sites can speak and be heard at the same time. Half-duplex (Talk or listen not at the same time) ...
-
Page 127: Camera Settings
CM-4221 Installation Manual 6.5 Camera Settings The figure below is the <Camera> configuration page. Details of each parameter setting are described in the following subsections. Related Links Exposure Setting White Balance Setting Picture Adjustment Backlight Digital Zoom ... -
Page 128: Exposure Setting
CM-4221 Installation Manual WDR Function Noise Reduction TV System 6.5.1 Exposure Setting The Exposure pull-down menu is shown as follows: The exposure is the amount of light received by the image sensor and is determined by the width of the lens diaphragm opening, the amount of exposure by the sensor (shutter speed), and other exposure parameters. -
Page 129: White Balance Setting
CM-4221 Installation Manual Auto Shutter Min Shutter Speed When selecting this mode, the camera’s shutter speed works automatically to get consistent video output level. Users can select a suitable shutter speed according to the environmental luminance. In PAL systems, the shutter speed is selectable in 13 steps from 1/425 to 1/1.5 seconds. -
Page 130: Picture Adjustment
CM-4221 Installation Manual environment. The following table shows the color temperature of some light sources for reference. Light Sources Color Temperature in K Cloudy Sky 6,000 to 8,000 Noon Sun and Clear Sky 6,500 Household Lighting 2,500 to 3,000 75-watt Bulb 2,820 Candle Flame 1,200 to 1,500... -
Page 131: Backlight
CM-4221 Installation Manual Brightness Users can adjust the image’s brightness by adjusting this parameter. Select from the range between -12 to +13. To increase video brightness, select a higher number. Press <√> to confirm the new setting. Sharpness Increasing the sharpness level can make the image look sharper, especially enhancing the object’s edge. -
Page 132: Digital Zoom
CM-4221 Installation Manual 6.5.5 Digital Zoom The camera’s digital zoom is selectable in steps between x2 to x8. Select the desired zoom or “Off”. Press <√> to confirm the new setting. 6.5.6 IR Function The IR Function setting activates two functions: IR mode, which is the IR Cut (IRC) filter for electronic day/night operation and, on the CM-4221-10-I and CM-4221-11-I cameras, activates the IR LED illuminator for use in low-light conditions or at night. -
Page 133: Wdr Function
CM-4221 Installation Manual “Off”-the IR light is always off. Press <√> to confirm the new setting NOTE: The IR LED function is available only on CM-4221-10-I and CM-4221-11-I. 6.5.7 WDR Function The Wide Dynamic Range (WDR) function is for resolving high contrast or changing light issues in order to enhance the video display. -
Page 134: Tv System
CM-4221 Installation Manual 6.5.9 TV System Select the video format that matches your TV system: “25 fps (PAL)” or “30 fps (NTSC)”. Press <√> to confirm the new setting. 6.6 Logout By pressing the <Logout> tab in the navigation bar at top of the page, the login window pops up and enables login with another user name. - Page 135 CM-4221 Installation Manual...
-
Page 136: Appendix
Appendix A: Technical Specifications Appendix B: Internet Security Settings Appendix C: Install UPnP Components Appendix D: Deleting the Existing DC Viewer Appendix E: Deleting Temporary Internet Files Appendix F: Contacting DVTel Appendix G: Accessories ... -
Page 137: Appendix A: Technical Specifications
1920 (H) x 1080 (V) Shutter Speed 1.0 - 1/10,000 Enclosure Tamper-resistant surface mount plastic case Sensitivity 0.2 Lux @ F1.2 in color mode; 0.02 Lux in night mode Lens CM-4221-00 CM-4221-01 CM-4221-10 CM-4221-10-I CM-4221-11 Lens Type CM-4221-11-I Varifocal Varifocal Motorized F 1.2/f=2.7-9mm... - Page 138 CM-4221 Installation Manual Output Photo Relay Output 300V DC/AC Event Notification HTTP, FTP, SMTP English, German, French, Italian, Simplified Chinese, Languages Traditional Chinese, Russian, and Korean Analytics On/Off, plus sampling pixel interval, detection level, Motion Detection sensitivity level, and time interval settings. Web interface: Configurable up to 10 ROI masks.
- Page 139 CM-4221 Installation Manual General CM-4221-00 CM-4221-01 CM-4221-10 CM-4221-10-I CM-4221-11 CM-4221-11-I 149 x 131 mm 151 x 130 mm 151 x 130 mm Dimensions (5.9 x 5.2 in.) (5.9 x 5.1 in.) (5.9 x 5.1 in.) Weight 0.7 kg (1.5 lbs.) 0.8 kg (1.8 lbs.)
-
Page 140: Appendix B: Internet Security Settings
CM-4221 Installation Manual 7.2 Appendix B: Internet Security Settings If ActiveX control installation is blocked, either set Internet security level to default or change ActiveX controls and plug-ins settings. Internet Security Level: Default 1.) Start Internet Explorer (IE). 2.) From the Command Bar toolbar, click “Tools” and select “Internet Options” from the menu that appears. - Page 141 CM-4221 Installation Manual If the settings are not defined as default, click “Default Level” and move the Allowed levels for this zone slider to “Medium-high” and click “OK”. 5.) Close all browsers and reopen so that the settings take effect.
- Page 142 CM-4221 Installation Manual ActiveX Controls and Plug-ins Settings - Creating a Custom Level 1.) From the Command Bar toolbar, click “Tools” and select “Internet Options” from the menu that appears. 2.) In the <Internet Options> dialog that appears, click the “Security” tab, and if not selected, click 3.) Click “Custom Level”.
- Page 143 CM-4221 Installation Manual 5.) Click “OK” to accept the settings and close the <Security> screen. 6.) Click “OK” to close the <Internet Options> screen. 7.) Close the browser window and restart IE again to access the camera.
-
Page 144: Appendix C: Install Upnp Components
CM-4221 Installation Manual 7.3 Appendix C: Install UPnP Components Follow the instructions below to enable UPnP so that the camera can be discovered and displayed in Network locations under Other Devices: To Enable UPnP Discovery 1.) Click (Start) and select “Control Panel”. 2.) Click on “Network and Internet”. - Page 145 CM-4221 Installation Manual 4.) Click on “Change Advanced Sharing Settings”. 5.) Expand the Home or Work node, select “Turn on network discovery” and click “Save Changes”. Note: Network discovery requires that the DNS Client, Function Discovery Resource Publication, SSDP Discovery, and UPnP Device Host services are started, that network discovery is allowed to communicate through Windows Firewall, and that other firewalls are not interfering with network discovery.
- Page 146 CM-4221 Installation Manual To check that the UPnP Device Host services are running 1.) Click (Start) and type in the “Search programs and files” field “services” and then select “Services” from the displayed Programs. The <Services manager> dialog box appears. 2.) In the <Services manager>...
-
Page 147: Appendix D: Deleting The Existing Dc Viewer
CM-4221 Installation Manual 7.4 Appendix D: Deleting the Existing DC Viewer Users who have previously installed the DC Viewer in the PC should first delete the existing DC Viewer from the PC before accessing the camera. To delete a legacy DC Viewer 1.) Click Start and select “Control Panel”. -
Page 148: Appendix E: Deleting Temporary Internet Files
CM-4221 Installation Manual 7.5 Appendix E: Deleting Temporary Internet Files To improve browser performance, we recommend cleaning up the all the files in the Temporary Internet Files. The procedure is as follows: To delete temporary Internet files In Internet Explorer (IE), from the Command Bar toolbar, click “Tools” and select “Internet Options”... - Page 149 CM-4221 Installation Manual 2.) In the Internet options dialog, click “Delete”. In the Delete Browser History dialog that appears, select “Temporary Internet files”. Deselect “Cookies” and “History” if you want to keep this data. Then click “Delete”.
-
Page 150: Appendix F: Contacting Dvtel
CM-4221 Installation Manual 7.6 Appendix F: Contacting DVTel DVTel, Inc. is a multiple award-winning market leader in the development and delivery of intelligent security solutions over IP networks. We provide unified solutions that leverage existing network infrastructure, while providing unmatched levels of flexibility, scalability, cost-effectiveness—all backed by superior customer support. -
Page 151: Appendix G: Accessories
For assistance, email us at support@dvtel.com or phone 1-888-DVTEL77. 7.7 Appendix G: Accessories The following accessories are available from DVTel for installation of your Quasar CM-4221 Series IP Mini-dome Camera. For more information on available options, contact your DVTel sales representative or visit www.dvtel.com to request details on where to get the accessories you need. - Page 152 CM-4221 Installation Manual Image Name Description CM-CAPX-0 CM Series Mini-dome Pendant Mount CX-ARMX-0 Short Arm Bracket CX-ARMX-1 Long Arm Bracket CX-CRNR-0 Corner Bracket fits CX-ARMX-0 and CX-ARMX-1. CX-F125-0 1 1/4" Pole Mount Adaptor adapts all pendant cameras to 1-1/4" male pipe threads.
- Page 153 Adapts all pendant cameras to 1-1/2" male pipe threads. CX-F150-1 Pendant Mounting Adapter Ring adapts all pendant cameras to common legacy 1-1/2" female pipe mounts. Fits DVTel legacy mounts and many others. CX-PIPE-0 Short Pipe straight tube (9.8") for pendant mount...
- Page 154 CM-4221 Installation Manual Image Name Description CX-PIPE-1 Long Pipe straight tube (19.7") for pendant mount. CX-PLBX-0- Pole-Mount Box fits CX-ARMX-0 Pole-Mount and CX-ARMX-1.
- Page 155 CM-4221 Installation Manual Image Name Description CX-POLE-0 Pole-Mount Bracket fits CX- ARMX-0 and CX-ARMX-1. CX-WLBX-0 Wall Mount Box fits CX-ARMX-0 and CX-ARMX-1.
Need help?
Do you have a question about the CM-4221-00 and is the answer not in the manual?
Questions and answers