Sign In
Upload
Manuals
Brands
DVTEL Manuals
IP Camera
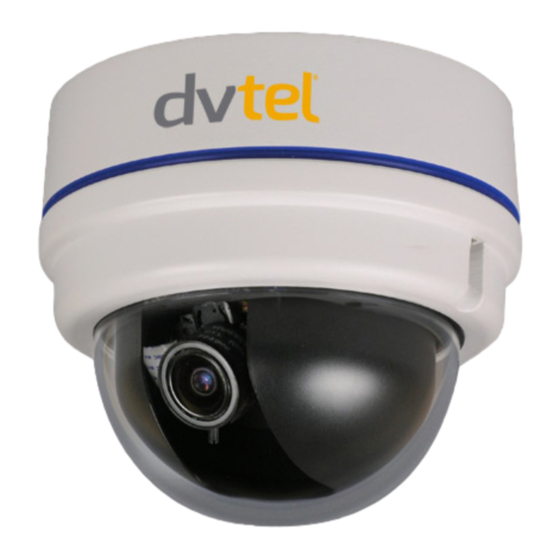
Quasar CM-4221-00
DVTEL Quasar CM-4221-00 Manuals
Manuals and User Guides for DVTEL Quasar CM-4221-00. We have
3
DVTEL Quasar CM-4221-00 manuals available for free PDF download: User And Installation Manual, Use And Installation Manual, Quick Installation Manual
DVTEL Quasar CM-4221-00 Use And Installation Manual (137 pages)
CM-3211/4221 Series Mini-Dome Camera
Brand:
DVTEL
| Category:
Security Camera
| Size: 6 MB
Table of Contents
Table of Contents
2
1 Document Information
7
2 Overview
12
Features
13
Quasar CM-3211/CM-4221 Series User and Installation Guide
13
Package Contents
14
Figure 1: Package Contents
14
Typical CM-3211/4221 Series Camera
15
Figure 2: Typical CM-3211/4221-XX Camera with Motorized Lens
15
3 Introduction to the CM-3211/4221 Series IP Mini-Dome Camera
16
CM-3211/4221 Indoor Camera Dimensions
16
Figure 3: CM-3211/4221-00 Varifocal Indoor Camera Dimensions
16
CM-3211/4221-01 Outdoor Camera Dimensions
17
CM-3211/4221-10/10-I/11/11-I Motorized Camera Dimensions
17
Figure 4: CM-3211/4221-01 Varifocal Outdoor Camera Dimensions
17
Figure 5: CM-3211/4221-10 Motorized Indoor Camera Dimensions
17
Camera Connections
18
Figure 6: CM-3211/4221 Camera Input/Output Connections
18
4 System Requirements
20
5 Installation
22
Indoor Installation
22
Outdoor Installation
22
Power and Ethernet Cable Connection
23
Initial Camera Configuration
23
Figure 7: Discovered IP Devices
23
Removing the Base Plate
24
Figure 8: Network Setup Dialog Box
24
Figure 9: Inner Cover Removal
24
Mounting Instructions
25
CM-3211/4221-10-I and CM-3211/4221-11-I Mounting Tips
25
Figure 10: Releasing the Module
25
Figure 11: Removing the Camera Module from the Base Plate
25
Mounting the CM-3211/4221-00/10/10-I Indoor Camera
26
Figure 12: Base Plate Used as a Template to Mark Drilling Locations
26
Figure 13: Threading Wiring through the Base Plate
27
Mounting the CM-3211/4221-01/11/11-I Outdoor Camera
28
Figure 14: Input/Output Connections and Reset Button
28
Figure 15: Base Plate Used as a Template to Mark Drilling Locations
28
Figure 16: Top and Side Cable Entry Openings to Dome
29
Figure 17: Replacing Camera Module Onto Base Plate
30
Figure 18: Reset Button and Input/Output Connections
30
6 Using the DNA Utility to Search and Access the Camera
31
Introduction
31
Quick Start
31
Main Screen
32
Navigation Bar
32
Figure 19: DNA Main Screen
32
Context Menu
33
Configuring Communication Settings on the Quasar Camera
33
Figure 20: Context Menu
33
Figure 21: Windows Firewall Screen
34
Figure 22: Discovered IP Devices
34
Figure 23: DNA Assign IP - Use DHCP Dialog Box
34
Figure 24: DNA Assign IP - Static IP Dialog Box
35
Figure 25: Installing the Activex Control
36
Figure 26: Security Window
36
Adjusting and Framing-Up the Camera View
37
Figure 27: CM-3211/4221 Camera - Pan, Rotate and Tilt Angles
37
7 Configuration and Operation
40
Browser-Based Viewer Introduction
40
Figure 28: Quasar Browser-Based User Interface
40
Home Page
42
CM-3211/4221-00/01 Varifocal Camera Home Page
42
Figure 29: Home Page Function Buttons - for Varifocal Cameras
42
CM-3211/4221-10/10-I/11/11-I Motorized Camera Home Page
43
Figure 30: Home Page Function Buttons - for Cameras with Motorized Lens
43
Figure 31: Home Page - Step Range Drop-Down Menu
44
System-Related Settings
45
Figure 32: System Screen
45
System
46
Figure 33: System Configuration - Security
47
Security
47
Figure 34: Security Screen
48
Figure 35: Editing Password and Privileges
49
Figure 36: Modifying Account Authority
49
Figure 37: HTTPS Screen
50
Figure 38: HTTPS Screen - Create Self-Signed Certificate
50
Figure 39: HTTPS Screen - Install Signed Certificate
51
Figure 40: HTTPS Screen - Upload Signed Certificate
51
Figure 41: Example of Self-Signed Certificate
52
Figure 42: Self-Signed Certificate - Details
52
Figure 43: IP Filter Screen
53
Figure 44: IEEE 802.1X/EAP-TLS Screen
55
Figure 45: Network Screen
56
Network
56
Figure 46: Qos Screen
58
Figure 47: SNMP Settings Screen
59
Figure 48: Upnp Screen
61
Figure 49: Direct Access to Camera with Upnp Enabled
61
Ddns
62
Figure 50: DDNS Screen
62
Figure 51: Mail Screen - SMTP
63
Mail
63
Figure 52: FTP Screen
64
Ftp
64
Figure 53: HTTP Screen
65
Http
65
Application
66
Figure 54: Application Screen
66
Figure 55: Application - Record Stream to SD Card
67
Figure 56: Application - Upload Image by FTP
68
Figure 57: Application - Upload Image by E-Mail
68
Figure 58: Application - Send HTTP Notification
69
Figure 59: Motion Detection Screen
70
Motion Detection
70
Figure 60: Motion Detection Screen - with Schedule Drop-Down Menu
71
Figure 61: Network Failure Detection Screen
74
Network Failure Detection
74
Figure 62: Tampering Alarm Screen
76
Tampering
76
Figure 63: Storage Management Screen
78
Storage Management
78
Figure 64: Video File Recording List
79
Figure 65: Selected File Window
79
Figure 66: Recording Screen
80
Recording
80
Figure 67: Schedule Screen
81
Schedule
81
Figure 68: File Location Screen
82
File Location
82
Figure 69: System Log Screen
83
View Information
83
Figure 70: User Information Screen
84
Figure 71: User Information - Privileges Screen
84
Figure 72: Parameter List Screen
85
Factory Default
86
Figure 73: Factory Default Screen
86
Figure 74: Partial Restore Screen
86
Figure 75: Software Version Screen
87
Figure 76: Upgrade Screen
87
Software Upgrade
87
Software Version
87
Figure 77: Software Upgrade - in Process
88
Figure 78: Maintenance Screen
89
Figure 79: File Download Screen
89
Maintenance
89
Video and Audio Streaming Settings
90
Video Format
90
Figure 80: Video Format Screen
90
Figure 81: Video Rotate Type Screen
99
Figure 82: View-1 (Source)
100
Figure 83: View-2 Image Rotated Vertically (Reversed)
100
Video Compression
101
Figure 84: Video Compression Screen
101
Video OCX Protocol
102
Figure 85: Video OCX Protocol Screen
102
Video Frame Rate
103
Figure 86: Video Frame Rate Screen
103
Video Mask
104
Figure 87: Mask Screen
104
Audio
105
Figure 88: Audio Screen
105
Camera-Related Settings
106
Figure 89: Camera Settings Screen
106
Exposure
107
Figure 90: Camera Settings Screen - Exposure
107
Figure 91: Camera Settings Screen - White Balance
110
White Balance
110
Figure 92: Camera Settings Screen - Picture Adjustment
111
Picture Adjustment
111
Backlight
112
Digital Zoom
112
Figure 93: Camera Settings Screen - Backlight
112
Figure 94: Camera Settings Screen - Digital Zoom
112
IR Function
113
Figure 95: Camera Settings Screen - IR Function
114
Figure 96: Camera Settings Screen - WDR Function
114
WDR Function
114
Figure 97: Camera Settings Screen - Noise Reduction
115
Noise Reduction
115
Figure 98: Camera Settings Screen - TV System
116
TV System
116
Logout
117
Figure 99: Login Message
117
Figure 100: Login Window
117
8 Appendices
118
Technical Specifications
119
A.1. Technical Specifications
119
Device Search Software
122
Initial Camera Configuration
122
Figure 101: Device Search Application
122
Searching and Accessing the Camera with Device Search
123
Configuring Communication Settings of a Quasar Camera
123
Figure 102: Windows Security Alert
124
Figure 103: Device Search Application - Select Browse
125
Figure 104: Device Search Application - Select Install Activex Control
125
Figure 105: Security Warning Window
125
Internet Security Settings
127
Figure 106: Command Bar Toolbar - Select Internet Options
127
Figure 107: Internet Options Screen
127
Figure 108: Command Bar Toolbar - Internet Options
128
Figure 109: Schedule Screen
128
Install Upnp Components
129
Deleting the Existing Dcviewer
131
Deleting Temporary Internet Files
132
Connecting Leads to a Spring Clamp Terminal Block
133
Figure 110: Spring Clamp Terminal Block
133
Figure 111: Connecting a Wire to a Terminal Block
133
Mounting Accessories
134
A.8. Mounting Accessories
134
Contacting DVTEL
137
Advertisement
DVTEL Quasar CM-4221-00 User And Installation Manual (155 pages)
Mini-Dome Camera
Brand:
DVTEL
| Category:
IP Camera
| Size: 7 MB
Table of Contents
Installation Guide
1
Table of Contents
2
1 Overview
5
Features
5
Package Contents
6
2 Introduction to the CM-4221 Series IP Mini-Dome Camera
7
CM-4221-00 Indoor Varifocal Camera Dimensions
7
CM-4221-01 Outdoor Varifocal Camera Dimensions
8
CM-4221-10/10-I/11/11-I Indoor and Outdoor Motorized Camera Dimensions
9
Camera Connectors
10
3 System Requirements
11
4 Installation
12
Indoor Installation
12
Outdoor Installation
12
Power and Ethernet Cable Connection
13
Initial Camera Configuration
14
Remove the Base Plate
15
Mounting Instructions
16
Mounting the CM-4221-00, CM-4221-10, or CM-4221-10-I Indoor Camera
16
Mounting the CM-4221-01, CM-4221-11, or CM-4221-11-I Outdoor Camera
19
Adjusting and Framing-Up the Camera View
22
5 Searching and Accessing the Camera with Device Search
24
6 Configuration and Operation
30
Browser-Based Viewer Introduction
31
Home Page
33
CM-4221-00/01 Varifocal Camera Home Page
33
CM-4221-10/10-I/11/11-I Motorized Camera Home Page
35
System-Related Settings
38
Host Name and System Time Setting
39
Security
41
User
42
Add User
43
Manage User
43
Https
45
IP Filter
52
Ieee 802.1X
53
Network
55
Basic
56
Qos
60
SNMP Settings
61
Upnp
63
Ddns
65
Mail
67
Ftp
68
Http
69
Application
70
Motion Detection
78
Network Failure Detection
82
Tampering Alarm
84
Storage Management
88
Recording
91
File Location
92
Iris Adjustment
93
View Information
94
View Log File
95
User Information
96
View Parameters
98
Factory Default
99
Software Version
101
Software Upgrade
102
Maintenance
105
Video and Audio Streaming Settings
107
Video Resolution and Rotate Type
108
NTSC System Settings
109
PAL System Settings
112
Text Overlay Settings
115
Video Compression
118
Video OCX Protocol
121
Video Frame Rate
122
Audio Mode and Bit Rate Settings
125
Camera Settings
127
Exposure Setting
128
White Balance Setting
129
Picture Adjustment
130
Backlight
131
Digital Zoom
132
IR Function
132
WDR Function
133
Noise Reduction
133
TV System
134
Logout
134
7 Appendix
136
Appendix A: Technical Specifications
137
Appendix B: Internet Security Settings
140
Appendix C: Install Upnp Components
144
Appendix D: Deleting the Existing DC Viewer
147
Appendix E: Deleting Temporary Internet Files
148
Appendix F: Contacting Dvtel
150
Appendix G: Accessories
151
DVTEL Quasar CM-4221-00 Quick Installation Manual (2 pages)
Mini-Dome Camera
Brand:
DVTEL
| Category:
Security Camera
| Size: 0 MB
Advertisement
Advertisement
Related Products
DVTEL Quasar CM-4221-01
DVTEL Quasar CM-4221-10
DVTEL CM-4221-10-I
DVTEL Quasar CM-4221-11
DVTEL CM-4221-11-I
DVTEL CF-4221-00
DVTEL CM4221-10-1
DVTEL CM4221-11-1
DVTEL CM-4221
DVTEL Quasar CM-4321
DVTEL Categories
Security Camera
Media Converter
IP Camera
Thermal cameras
Server
More DVTEL Manuals
Login
Sign In
OR
Sign in with Facebook
Sign in with Google
Upload manual
Upload from disk
Upload from URL