Table of Contents
Advertisement
Advertisement
Table of Contents

Summary of Contents for Techmaster T9530
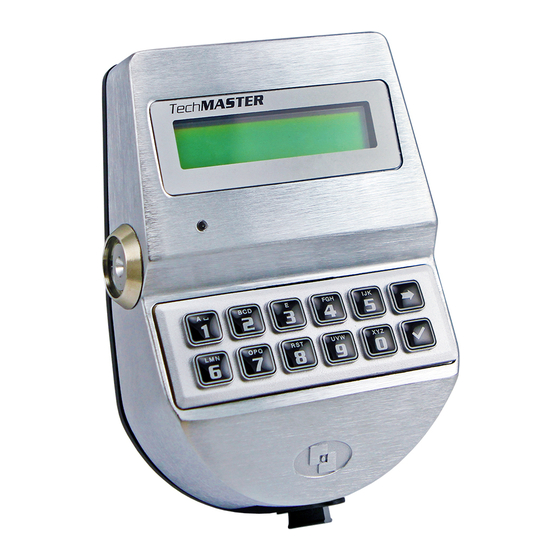
- Page 1 TechMaster Lock system for safes PROGRAMMING AND OPERATING INSTRUCTIONS...
-
Page 3: Table Of Contents
Information about TechMaster ....................4 1. Master Menu ........................... 6 1.1. Set Time and Date ..................... 6 1.2. Time Lock ........................7 1.2.1. Time Lock - Add ...................... 7 1.2.2. Time Lock - Verify or Delete ................. 8 1.2.3. Special Events - Add ....................8 1.2.4. -
Page 4: Information About Techmaster
Information about TechMaster Using your keypad To power up TechMaster press any key. To slide the functions of a menu use the slide/change button To exit from one function of a menu and go back to the main menu slide the functions until the last one (“EXIT?”) and confirm with the confirm/enter button... - Page 5 Long audio and visual signals during opening indicate low battery. Emergency battery If your TechMaster is powered by the mains or an internal battery box it is possible to connect an emergency battery to the keypad in case of sudden blackout: connect a new 9V ALKALINE battery to the battery connector located at the bottom of the keypad.
-
Page 6: Master Menu
Each Lock will record last 900 operations with time & date, user and function. Override Reopening TechMaster can be set to have Override Reopening option (from 0 to 59 minutes). If this option is set, it will be possible to reopen the lock overriding Time Delay during the set value of time. -
Page 7: Time Lock
1.2.1. Time Lock - Add Use this function to add Time Lock values. STANDARD WEEK 1 Power up TechMaster and access the Time Lock menu. Press To add Standard week 2 or 3 press one or two times, then press Press . -
Page 8: Time Lock - Verify Or Delete
1.2.2. Time Lock - Verify or Delete Use this function to verify or delete Time Lock values. STANDARD WEEK 1 Power up TechMaster and access the Time Lock menu. Press To verify or delete Standard Week 2 or 3 press one or two... -
Page 9: Special Events - Verify Or Delete
Use this function to add Special Events values. STANDARD WEEK 1 Power up TechMaster and access the Time Lock menu. Press SPECIAL EVENTS Press three times. Press , LCD will display the message: " DD/MM/YY hh:mm Press , LCD will display the message: ! DD/MM/YY hh:mm The first one is the closing time and date and the second one is the opening time and date. -
Page 10: Opening Periods - Add
END OF LIST At the end of the list press 1.2.5. Opening Periods - Add Use this function to add Opening Periods values. STANDARD WEEK 1 Power up TechMaster and access the Time Lock menu. Press OPENING PERIODS Press four times. Press . -
Page 11: Pc Link
END OF LIST At the end of the list press 1.3. PC Link Use this function to start the communication between TechMaster and PC (audit, settings). Power up TechMaster and access the Master Menu. PC LINK Press two times. LCD will display the message:... -
Page 12: Dynamic Codes
Power up TechMaster and access the Master Menu. MANAGERS MANAGEMENT Press three times. LCD will display the message: ü MANAGER Press . LCD will display the message: OVR MANAGER ü ü Select the Manager entering his number and press to confirm. -
Page 13: Manager Menu
X X X X X X Enter Manager code (default code 1-2-3-4-5-6). 2.1. Users Management – Install/Delete/Enable/Disable users Use this function to install, delete, enable or disable or disable Users on the lock. Power up TechMaster and access the Manager Menu. USERS MANAGEMENT Press . -
Page 14: Variable Time Delay
LCD will display the message: 2.3.1. Variable Time Delay - Add Use this function to add Variable Time Delay values. Power up TechMaster and access the Variable Time Delay menu. Press . LCD will display the message: Press . -
Page 15: Variable Time Delay - Verify Or Delete
Open the lock and then set Variable Time Delay values. Variable Time Delay always have to be increased or decreased in steps of 10 minutes from the value of Time Delay (2.2.). If not, TechMaster will automatically adjust values to the next available ones. -
Page 16: Ovr Manager Menu
Depending on lock configuration you could find this menu inside Master menu or inside Manager menu Use this function to install, delete, enable or disable or disable OVR Users on the lock. Power up TechMaster and access the OVR Manager Menu. USERS MANAGEMENT Press . -
Page 17: Change Code Menu
4.1. Change Users and OVR Users Code Use this function to change Users and OVR Users code. Always perform this operation with the door opened. Power up TechMaster System and access the Change Code Menu. CHANGE USER CODE Press . -
Page 18: Change Ovr Manager Code
Confirm the new code. 4.3. Change OVR Manager Code Use this function to change OVR Manager code. Always perform this operation with the door open. Power up TechMaster System and access the Change Code Menu. CHANGE USER CODE Press . LCD will display the message:... -
Page 19: Time Menu
5.1 Opening Extension Use this function to delay the beginning of Time Lock up to 2 hours more than programmed Time Lock. Power up TechMaster and access the Time Menu. USER CODE X X – X X X X X X Press . -
Page 20: Immediate Time Lock
5.2 Immediate Time Lock Use this function to start up the Time Lock immediately. Power up TechMaster and access the Time Menu. USER CODE X X – X X X X X X Press . LCD will display the message:... -
Page 21: Install Locks
6.1. Install Locks Use this function to install up to five locks on TechMaster keypad. Power up TechMaster and access the Configuration Menu. LCD will INSTALL display the message: LOCKS SELECT Press and select the lock to install. LOCK= If lock is already installed, LCD will display the message:... -
Page 22: Lcd Contrast
Always keep the lock connected during removal operations. Always perform this operation with the door opened. 6.3. LCD Contrast Use this function to set LCD contrast. Power up TechMaster and access the Configuration Menu. LCD will INSTALL display the message: LOCKS Press two times. -
Page 23: System Info
7. Opening the Locks 7.1. Users (or OVR Users): Opening the lock without Time Delay Power up TechMaster and select the lock when two or more locks are installed. LCD will display the message: USER CODE X X – X X X X X X Enter a valid user code and insert the Dallas key, if set-up. -
Page 24: Manager (Or Ovr Manager): Opening The Lock Without Time Delay
11:44 01 / 09 / 2010 7.3. Manager (or OVR Manager): Opening the lock without Time Delay Power up TechMaster and select the lock when two or more locks are installed. LCD will display the message: USER CODE X X – X X X X X X... -
Page 25: Manager (Or Ovr Manager): Opening The Lock With Time Delay
11:44 01 / 09 / 2010 7.4. Manager (or OVR Manager): Opening the lock with Time Delay Power up TechMaster and select the lock when two or more locks are installed. LCD will display the message: USER CODE X X – X X X X X X... -
Page 26: Opening The Lock With Dynamic Codes (Dallas Key Option)
11:44 01 / 09 / 2010 7.5. Opening the lock with Dynamic Codes (Dallas key option) Power up TechMaster (select the lock if two or more locks are installed). LCD will display the message: USER CODE X X – X X X X X X Insert the Dynamic User Dallas Key. -
Page 27: Opening The Lock With Dynamic Codes (Pin Option)
11:44 01 / 09 / 2010 7.7. Dual Mode: Opening the lock without Time Delay Power up TechMaster (select the lock if two or more locks are installed). LCD will display the message: USER CODE X X – X X X X X X Enter a valid user code and insert the Dallas key, if set-up. -
Page 28: Dual Mode: Opening The Lock With Time Delay
11:44 01 / 09 / 2010 7.8. Dual Mode: Opening the lock with Time Delay Power up TechMaster and select the lock when two or more locks are installed. LCD will display the message: USER CODE X X – X X X X X X Enter a valid user code and insert the Dallas key, if set-up. -
Page 29: Shortcuts
9.2. Override Reopening TechMaster can be set to have Override Reopening option (from 0 to 59 minutes). If this option is set, it will be possible to reopen the lock overriding Time Delay during the set value... -
Page 30: Iu_Techmaster_02_Eng
This function is available only after a standard opening procedure of the lock (after opening with time delay). Power up TechMaster. Enter a valid user code. LCD will display time delay counting: TIME DELAY 00:59 After Time Delay LCD will display open window counting:... - Page 31 DICHIARAZIONE CE DI CONFORMITA’ CE DECLARATION OF CONFORMITY TechMaster: T9530 Con la presente l’Azienda Tecnosicurezza s.r.l. dichiara sotto la propria responsabilità, che il suddetto prodotto soddisfa per progettazione e costruzione i requisiti delle direttive di: compatibilità elettromagnetica 2004/108/CE, 2006/95/CE e RoHS 2 2011/65/UE.
- Page 32 Before operating the lock, please read this manual thoroughly, and retain it for future reference. Correct disposal of this product: (Waste Electrical & Electronic Equipment) Applicable in the European Union and other European countries with separate collection systems. This marking displayed on the product or its literature indicates that it should not be disposed with other wastes at the end of its working life.
Need help?
Do you have a question about the T9530 and is the answer not in the manual?
Questions and answers