Table of Contents
Advertisement
Quick Links
Advertisement
Table of Contents

Related Manuals for Osprey Talon series


Summary of Contents for Osprey Talon series
- Page 1 Osprey® Talon Series User Guide...
-
Page 2: Table Of Contents
Connecting to the Internet ......................8 Package contents ..........................8 Getting Started .......................... 9 Prerequisites ..........................10 Osprey Talon front panel diagram ....................11 Osprey Talon back panel diagram ....................11 Osprey Talon Status Lights ......................12 First time set up ..........................13 Connecting to an electrical power source ................ - Page 3 Osprey Talon Series User Guide Changing Operating Modes ......................20 Status ............................21 Encoder Setup ......................... 22 Stream Control Buttons ......................... 23 Save ............................23 Clone ............................23 Delete ............................23 Creating Additional Streams ......................24 NOTE: More About Operating Modes ..................24 Encoder Setup ..........................
- Page 4 Osprey Talon Series User Guide RTP ............................31 Save to File ..........................31 Finding your encoder with Osprey BOSS ..................32 Appendix: Osprey Hardware Specifications ................. 34 Osprey Talon H.264 Encoder ......................34 Osprey Talon SAH-E23 Features ....................35...
-
Page 5: Overview
FCC Notice The Osprey Talon has been tested and found to comply with the limits for a Class B digital device, pursuant to Part 15 of the FCC Rules. These limits are designed to provide reasonable protection against harmful interference in a residential installation. This equipment generates, uses and can radiate radio frequency energy and, if not installed and used in accordance with the instructions, may cause harmful interference to radio communications. -
Page 6: Warranties
Standard Limited Warranties warranties for the products through to the customer without modification. Any modification of a product voids the Osprey Video or any other existing or available warranty. FEEDBACK: We greatly value your input. Please direct any questions, comments or support issues to support@ospreyvideo.com... -
Page 7: Product Description
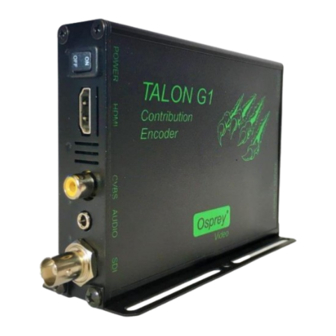
Osprey Talon User Guide Product Description The Osprey Talon is a small form-factor H.264 video encoder designed to be easy to use, portable, and easily stream both your standard definition and high definition content to broadband and mobile networks in H.264 RTMP servers such as Adobe® and Wowza®. - Page 8 A dropped system Osprey Video assumes no liability or responsibility for any damaged system that clients continue using. Use only attachments, accessories, or equipment specified by the manufacturer with the system. Using accessories or attachments not recommended by the encoder manufacturer voids the Limited Warranty.
-
Page 9: Installing Additional Software
Osprey Talon systems is not allowed. Connecting to the Internet Never connect an Osprey Talon system to the Internet through a direct connection without the use of a firewall. We recommend taking precautions against unwanted access such as installing systems behind a router or firewall. -
Page 10: Getting Started
Osprey Talon User Guide Getting Started Before you can use your Osprey Talon encoder, you first need to set up and configure it. This chapter is dedicated to providing you with the details and step-by-step instructions you need to make your installation as quick and easy as possible. -
Page 11: Prerequisites
Osprey Talon User Guide Prerequisites Before connecting the Osprey Talon encoder, ensure you comply with the following prerequisites: All packaged items are undamaged and in working order. Your environment meets all starting requirements. Safety instructions, notices, and warnings detailed in “Before you Begin” including: ... -
Page 12: Osprey Talon Front Panel Diagram
Osprey Talon User Guide Osprey Talon front panel diagram You should familiarize yourself with the front panel controls for the Osprey Talon. Besides the basic buttons for power, start/stop, up/down and menu access, there are indicator lights that are hidden until illuminated. -
Page 13: Osprey Talon Status Lights
Osprey Talon User Guide Osprey Talon Status Lights There are five lights on the front panel of Talon that indicate the status of several functions. A and B: Indicate power and boot status of Talon. Single Red indicates that Talon’s power is on but is not ready. -
Page 14: First Time Set Up
You should read all instructions, notices, and warnings in the previous section prior to getting started with your new Osprey Talon hardware for the first time. Also, ensure you have all required parts and meet all system requirements before installing this product. -
Page 15: Web Interface
By default, the Talon receives its IP address via DHCP. If you are unable to determine the address of your encoder, we have created an application for finding Talon and performing some critical remote functions. Please consult the section labeled finding your encoder with Osprey BOSS at the end of this user guide. -
Page 16: Tab Id
Osprey Talon User Guide Tab ID The tabs on the front page provide access to the available configuration features of the Talon. System IP Setup, Set Device Name, Set Password, Update Firmware, Select Mode Control Status Displays real time information regarding streams and inputs... -
Page 17: System Control Tab
Osprey Talon User Guide System Control Tab This tab accesses most of the administrative functions of the Talon. Talon IP Setup By default, Talon receives its IP address via DHCP. If you need to use a manual address it can be set in the IP setup dialog box on the System Control page. -
Page 18: Device Management
The model designation for Talon is loaded as the default device name. To easily distinguish multiple Talons, you can create a new name here. Set Password The default password is “osprey”. In order to maintain device security it is recommended you change the default password. Reboot Reboot performs a complete power reset of the device. -
Page 19: Update Firmware
Talon to ensure that you have the very latest version. There are two methods. Updating via the Talon Web page. 1. Download the update from the Osprey Video webpage and save it on the host computer. 2. Login to the Talon via the web page a click the System Setup tab. -
Page 20: Updating Via Flash Drive
Osprey Talon User Guide Updating via Flash Drive In the event you cannot access the Talon web page, it is possible to update directly from a Flash drive. Insert a Flash drive in your host computer. Format the drive as FAT (do not use FAT32) ... -
Page 21: Operating Mode
Osprey Talon User Guide Operating Mode Talon has two operating modes. The current operating mode is indicated in the upper right corner of the webpage along with the serial number and device name. The mode can be changed from the menu just below the Device Management box on the System Control tab. -
Page 22: Status
Osprey Talon User Guide Status The Status page provides information about inputs and outputs. From this tab you can get specific statistics about the incoming video, and outgoing audio and video streams. -
Page 23: Encoder Setup
Osprey Talon User Guide Encoder Setup All configuration for actual encoding is found under the tab marked “Stream (1)”. If your interface doesn’t have a tab marked “Stream” simply click on the tab marked “+” and one will be created automatically. -
Page 24: Stream Control Buttons
Osprey Talon User Guide Stream Control Buttons The five buttons in the Stream 1 Control box control the Stop and Start of the encoder labeled Stream 1. Save The Save button can be used to save the changes you make in the encoder configuration below. Use Save if you are going to leave the configuration page without starting the encoder. -
Page 25: Creating Additional Streams
Osprey Talon User Guide Creating Additional Streams Clicking the “+” button will create another Stream tab. The number of tabs you can create is determined by the Operating Mode that is selected. NOTE: More About Operating Modes 1x3 MBR Mode will allow the creation of 3 Streams. Each must have the same Video Source. You may select from SDI, HDMI or Composite. -
Page 26: Encoder Setup
Osprey Talon User Guide Encoder Setup Video Source The choices in the pull-down menu vary depending upon the Operating Mode you have selected. In 1x3 MBR mode you may select from the three available input sources. Once selected, the same input will be re-used for any additional streams. -
Page 27: Gop Size
Osprey Talon User Guide GOP Size GOP size refers to the distance between i-frames in a stream or file. Live streaming generally uses shorter GOP sizes than saving to file. For live streaming a setting of 2 x (frame rate) is a good starting point. -
Page 28: Audio Info
Osprey Talon User Guide Audio Info When “Audio Enable” is set to “True” the web interface exposes the “Audio Info” fields. Available options change to reflect the Output Format as set in the Output Setup area. Only the audio features... -
Page 29: Enable (All Formats)
Osprey Talon User Guide Enable (all formats) For Web streaming, only 1 pair of audio inputs may be used at a time. Enable the input from “Sub Channel 1” by selecting “yes”. Be certain that all of the remaining Sub Channels are disabled. -
Page 30: Output Setup
Osprey Talon User Guide Output Setup Talon supports delivery via RTP, UDP, and RTMP, as well as an option to save a .TS file. Select the desired delivery from the Output Format pull down menu. Configuration options change depending upon the... -
Page 31: Rtmp
Osprey Talon User Guide RTMP RTMP has become the most common delivery protocol for internet based video. RTMP streaming requires a source, and encoder, and a streaming server. The resulting video is then played in a browser window or via web based player. Many users us a Content Delivery Network (CDN) do distribute their Live and On Demand video. -
Page 32: Rtp
Osprey Talon User Guide File Location As Talon has no hard drive, in order to save a file it is necessary to mount a USB device on the external USB port. By default, any device mounted on this port will be designated “/media/usb/[filename].ts”. -
Page 33: Finding Your Encoder With Osprey Boss
Finding your encoder with Osprey BOSS If your Talon is powered up and attached to the local network Osprey has included an application that allows you to use a browser on another computer to locate the encoder and access it via the network. - Page 34 Osprey Talon User Guide BOSS will populate with the Serial number, Device name, IP and MAC Address along with the Description for all Talon encoders on this Subnet. To access the web page of a particular Talon, click on the Serial Number of the desired Talon and you...
-
Page 35: Appendix: Osprey Hardware Specifications
@ 40° C Non-operating humidity range 95 % RH (non-condensing); gradient 30 % per hour Operating altitude range 0 to 3,048 meters (10,000 feet) Non-operating altitude range 0 to 15,240 meters (50,000 feet) Approximate weight: Osprey Talon = 65 grams... -
Page 36: Osprey Talon Sah-E23 Features
Osprey Talon User Guide Osprey Talon SAH-E23 Features Description: standard*** (Available in UDP & RTMP streams) 2 channel SDI HD/SD, composite, or HDMI Video Modes: Software Control: HDMI / SDI: HTTP-Based GUI: Configuration and Software 1080p, 25, 29.97, 30, 50, 60 Update 1080i 50, 59.94... - Page 38 Easy first time set up, 14 Setup System Option, 23 Environmental specifications, 27 Stopped icon, 24 Install Overview, 10 Talon Back View, 13 Installing additional software, 9 Warnings, 7 Osprey Talon back panel, 13 Warranties, iv Osprey Talon back panel diagram, 13 Osprey Video...
- Page 39 ® ® © 2015 Osprey Video. Osprey and SimulStream are registered trademarks of Osprey Video. All other trademarks are the property of their respective owners. Product specifications and availability may change without notice.
Need help?
Do you have a question about the Talon series and is the answer not in the manual?
Questions and answers