Subscribe to Our Youtube Channel
Summary of Contents for Makita SJ401
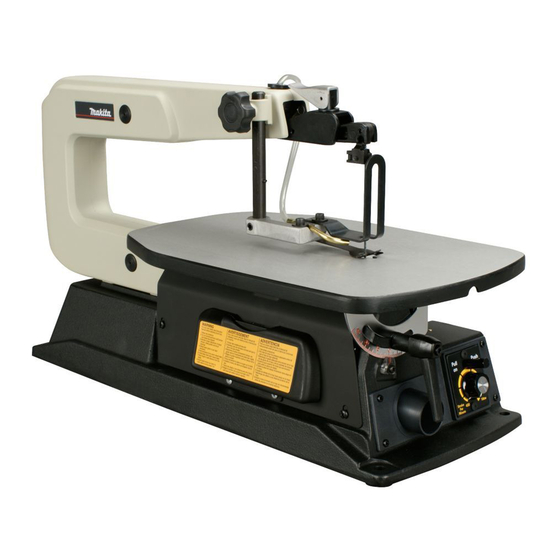
- Page 1 16” Variable speed Scroll saw SJ401 INSTRUCTION MANUAL IMPORTANT: Read Before Using.
-
Page 2: Table Of Contents
SPECIFICATIONS Throat 406 mm Blade length 125 mm Stroke per minute 400-1,600 Overall length 600 mm Net weight 14.1kg * Manufacturer reserves the right to charge specifications without notice. * Note: Specifications may differ from country to country. WARNING: For your personal safety, READ and UNDERSTAND before using. SAVE THESE INSTRUCTIONS FOR FUTURE REFERENCE Contents With padlocks, master switches, or by removing starter keys. -
Page 3: Special Safety Rules For Scroll Saw
21. Avoid Accidental Starting scroll saw .. remove plug from power source outlet ... wedge Makes sure switch is in “OFF” position before plugging in open the kerf ... back the blade out of the workpiece. power cord. H. To avoid unsupervised use or accidents due to inattention. 22. -
Page 4: Unpacking And Checking Contents
Unpacking and Checking Contents TOOLS NEEDED FOR ASSEMBLY COMBINATION SQUARE MUST BE TRUE Straight Edge of Board 20 mm Thick, This Edge Must be Perfectly Straight. Medium Screwdriver Phillips Screwdriver Draw Light Line On Board Along This Edge Combination square 10 mm Wrench Should Be NO Gap Or Overlap Here When Square ls Flipped Over In Dotted Position... -
Page 5: Getting To Know Your Scroll Saw
Getting To Know Your Scroll Saw 10. Blade Holders Lamp support 7. Table Lock knob Base 8. Degree Scales Motor 9. Speed Control Knob 9. ON-OFF Switch 5. Hold Down Foot Adjusting Knob 6. Blade Tension Lever Switch lock 11. Blade Support & Guard 4. -
Page 6: Glossary Of Terms
Getting To Know Your Scroll Saw Trailing Edge The workpiece edge last cut by the saw blade. This versatile heavy-duty scroll saw is great for making toys, Workpiece puzzles, games, artwork, and jewelry, and because of its cutting The item on which the cutting operation is being performed. capacity, it is a handy do-it-yourself tool. -
Page 7: Setting The Table For Horizontal Or Bevel Cutting
SETTING THE TABLE FOR HORIZONTAL OR ADJUSTING DUST BLOWER BEVEL CUTTING Blade Support & Guard Set Screw Blade Support & Guard Hold Down Foot Allen Sawdust Blower Set Screw Screw Sawdust Blower Table Table Lock Knob The dust blower may be moved to direct air to the most effective point on the cutting line by loosening screw, adjust dust blower accordingly and tighten screw. -
Page 8: Installing Pin End Blades
INSTALLING PIN END BLADES INSTALLING PLAIN END BLADES Plain Blade Set Screw Lower Blade Holder Blade Tension Lever NOTE: For plain end blades, the set screw of the blade holders needs to WARNING: be used. The set screws are supplied in the loose parts bag. To avoid injury from unexpected tool movement, always 1. -
Page 9: Speed Control Knob/On-Off Switch
Basic Scroll Saw Operation NOTE: Before plugging saw in, use screwdriver to turn the motor shaft at least one cycle and insure the blade is properly installed. PLEASE, read and understand the following items about your scroll saw before attempting to use the saw. 1. -
Page 10: Making Interior Scroll Cuts
MAKING INTERIOR SCROLL CUTS • Use extra supports (tables, saw horses, blocks, etc.) for any workpieces large enough to tip when not held down to the table top. • NEVER use another person as a substitute for a table extension, or as additional support for a workpiece or to help feed, support or pull the workpiece. -
Page 11: Maintaining Your Scroll Saw
Maintaining Your Scroll Saw WIRING DIAGRAM Green Ground Lead MAINTENANCE WARNING: Insulated Quick Connects For your own safety, push control knob “OFF” and remove plug from power source outlet before maintaining or Black Leads lubricating your saw. Circuit Board General An occasional coat of paste wax on the work table will allow the wood being cut to glide smoothly across the work surface. -
Page 12: Troubie Shooting
TroubIe Shooting WARNING: Turn switch “OFF” and always remove plug from the power source before trouble shooting. TROUBLE PROBLEM REMEDY Breaking blades 1. Wrong tension. Adjust blade tension. 2. Over working blade. Reduce feed rate. 3. Wrong blade application. Use narrow blades for cutting thin wood, wide blades for thicker wood. -
Page 13: Warranty Policy
Warranty Policy Every Makita tool is thoroughly inspected and tested before leaving the factory. It is warranted to be free of defects from workmanship and materials for the period of ONE YEAR from the date of original purchase. Should any trouble develop during this one-year period, return the COMPLETE tool, freight prepaid, to one of Makita’s Factory or Authorized Service Centers. - Page 16 Makita Corporation www.makita.com SJ401_EN_0610...


Need help?
Do you have a question about the SJ401 and is the answer not in the manual?
Questions and answers