GRAUPNER Micro Magic User Manual
Gr-12 receiver hott
Hide thumbs
Also See for Micro Magic:
- Building instructions (46 pages) ,
- Building instructions (15 pages)
Table of Contents
Advertisement
Quick Links
Advertisement
Table of Contents

Related Manuals for GRAUPNER Micro Magic


Summary of Contents for GRAUPNER Micro Magic
- Page 1 Manual racing Micro Magic HoTT...
-
Page 2: Technical Data
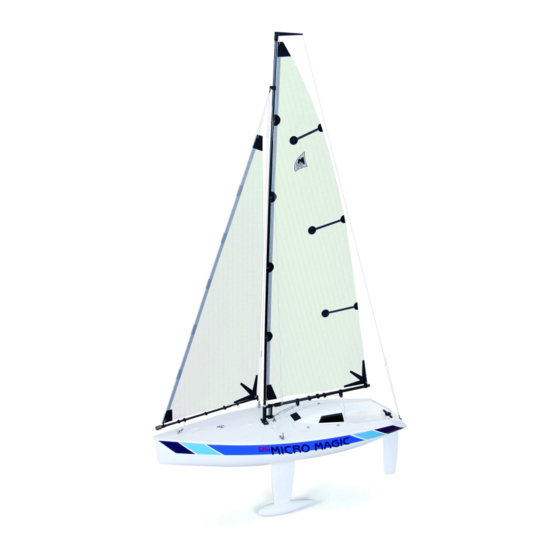
This model is one of the GRAUPNER/SJ sailboat series. These models are almost finished constructed and painted. To make the model ready to sail, just install the RC components and the battery and the model can be used. Technical data... -
Page 3: Operating Instructions
Operating instructions Assembling the boat stand Assemble the boat stand and secure the connections with wood or cyano glue . If desired, you can plump up the surface for the boat with a soft material. For example, No. 701.2 Installation of rudder Grease the rudder shaft slightly and mount the helm along with the small compression spring and the tiller. - Page 4 Installation of keel Plug the keel in the hull and secure the keel from the top with the enclosed washer and nut. It is suggested to use some thread lock fluid. Through the weight the boat is now ready for further assembly.
- Page 5 Assembly of the rig Note: The rig of your Micro Magic RTR is designed so that it can be replaced by another / smaller one if necessary for use in competition, without requiring nodes must be opened. Slide the boom bearing on the mast so that the aluminum press-down is on top. Take the lon- ger cord, with a prepared sliding clamp and run the free end of the bottom through the plastic tubes on boom fitting.
- Page 6 Assembly of the main sail Even the mainsail can be optimized a bit for the regatta use. Please skip to the next para- graph if you do not need it. Insert the leading edge of the mainsail (luff) in parallel with a ruler or other straight line flat on a surface.
- Page 7 Now you can install the mainsail. First knot the head with a minimum distance to the prepared string in the top of the mast. The upper edge of the sail should not be more than 5 mm below the boom. Next, fix the rear end of the sail (clew) at the end of the boom (yardarm) between the two silicon rings.
- Page 8 Now you can attach the mast that you have assembled before to boom bearing threaded luff straightener to the sail. Insert the eyelet coming out of the clamping slide to the front hook on the deck and move it so that it comes to clamping slide to lie on deck just behind the rear hook.
- Page 9 Assembly of the Foresail (Fock) Pull the counterweight from the jib boom. Insert the pin through the ring at the lower end of the forestay (the tack) and insert the pin again. If the pin is quite loose, secure it with a drop of glue.
- Page 10 At the rear end of the jib boom (boom yardarm) the forestay has already struck. It enables the twist of the headsail to be set later. Run the free end of the forestay upward through the ring on the mast, hang the shroud to the forestay and tie it tight. Pull the terminal tab on the fo- restay slightly upward so that the leech of the headsail describes a slight curve.
- Page 11 Receiver GR-12 HoTT (No. 33506). Attention! Never plug the connector system horizontally (see Figure 2)! To be connected to a HOTT transmitter, the receiver must first be bound with the Graupner HoTT 2.4 RF module. To do this, follow these steps:...
- Page 12 Set the rudder servo by placing the lever arm or by adjusting the transmitter so that the rud- der arm is a little more to the front when in the neutral position. Bring the rudder blade to the center position and fix the pushrods by tightening the grub screw. Limit the Rudder travel on the transmitter so that no blockages occur.
- Page 13 To begin choose a day with no more than 1 to 2 Bft. wind strength, make a range test and observe all additional instructions for your remote control system. Set sail on the recommen- ded default setting and have fun with your Micro Magic! Managing the boat Sailing with yachts model is not difficult if one knows the relationship between wind direction, boat sails direction and appropriate setting.
- Page 14 To sail faster than the wind the boat normally does not sail straight with the wind but with but- terfly slightly lateral wind incidence and it possibly multiple gybes. The jib will be placed in each case on the windward side.
- Page 15 / wave conditions. The descriptions are deliberately kept simple and reduced to what you can use in the model sailing hobby on your Micro Magic RTR as a beginner.
- Page 16 The boat can naturally be driven with different settings of the mast and sails. But even top sailors drive their Micro Magic approximately with the described basic trim. You should not deviate too far from the recommended set values, without having acquired further knowledge just at the beginning.
- Page 17 So we focus on the rig. In very weak winds, the heel of Micro Magic goes to zero and the boat is increasingly porting, ie the bow turns away to a close-hauled course by the wind. If then a slight breeze later re- turns the boat is hauled, with sailing on half wind course and therefore barely moves.
- Page 18 After sailing Care and maintenance Especially with the first sailing please take sometimes the boat out of the water and check that all screws have not become loose, not interlocked ropes, no knots solved and no water is in the boat. Small amounts of moisture inside the boat, especially when used in the rain or strong wind and waves are normal and can be easily recorded and eliminated with a paper towel or a sponge.
Need help?
Do you have a question about the Micro Magic and is the answer not in the manual?
Questions and answers