
Subscribe to Our Youtube Channel
Summary of Contents for Marrison MD Series
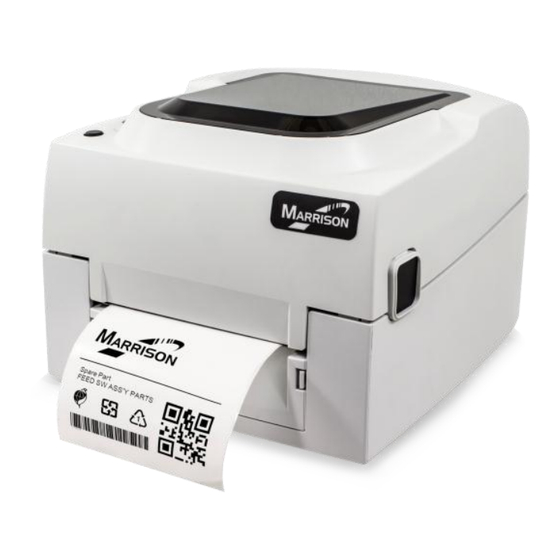
- Page 1 MD/ME Series USER MANUAL User Manual : MD/ME series Version Issue Date : 2016/01 : 920-016511-00...
-
Page 2: Table Of Contents
CONTENTS Barcode Printer ....................1 1-1 Box Content .......................... 1 Getting To Know Your Printer..................... 2 Printer Setup ....................4 2-1 Open The Printer Cover ....................... 4 2-2 Open The Printing Mechanism ................... 5 2-3 Loading The Ribbon ......................6 2-4 Loading The Label Roll ...................... - Page 3 Declaration FCC COMPLIANCE STATEMENT FOR AMERICAN USERS This equipment has been tested and found to comply with the limits for a CLASS A digital device, pursuant to Part 15 of the FCC Rules. These limits are designed to provide reasonable protection against harmful interference when the equipment is operated in a commercial environment.
-
Page 4: Safety Instructions
SAFETY INSTRUCTIONS Please read the following instructions carefully. 1. Keep the equipment away from humidity. 2. Before you connect the equipment to the power outlet, please check the voltage of the power source. 3. Make sure the printer is off before plugging the power connector into the power jack. 4. -
Page 5: Barcode Printer
Barcode Printer 1-1 Box Content Please check that all of the following items are included with your printer. Barcode Printer Ribbon Hubs ( set of 2 ) Power Adapter Empty Ribbon Core AC Adapter Label Supply Hub USB Cable Label Guide Plates ( set of 2 ) Quick Guide CD ( with LabelPro software / user manual ) -
Page 6: Getting To Know Your Printer
Getting To Know Your Printer Front View TOP COVER LED INDICATOR FEED BUTTON FRONT COVER COVER OPEN BUTTONS Rear View FAN-FOLD LABEL INSERT POWER SWITCH USB PORT POWER JACK... - Page 7 Open The Printer Cover LABEL SUPPLY MODULE - LABEL SUPPLY HUB - LABEL GUIDE PLATES ( SET of 2 ) RIBBON MODULE - RIBBON FEED MECHANISM - RIBBON HUB - EMPTY RIBBON CORE ADJUSTMENT SCREW ( LEFT ) Screw for adjusting the print head pressure ADJUSTMENT SCREW ( RIGHT ) Screw for adjusting the print head pressure Open The Printing Mechanism...
-
Page 8: Printer Setup
2. Printer Setup 2-1 Open The Printer Cover Pressing The Cover Open Buttons Place the printer on a flat surface. Open the printer cover by pressing the release buttons on both sides of the printer housing and lift the cover. Pressing the button Pressing the button COVER OPEN BUTTONS... -
Page 9: Open The Printing Mechanism
2-2 Open The Printing Mechanism Pressing The Release Catches Release and lift the printing mechanism. RELEASE CATCHES Lift the printing mechanism Pressing Pressing... -
Page 10: Loading The Ribbon
2-3 Loading The Ribbon A New Ribbon Module Installation Place the new ribbon on the hub which forms a ribbon supply hub. Place on the hub RIBBON SUPPLY HUB RIBBON HUB NEW RIBBON Place the empty ribbon core on the hub which forms a ribbon rewind hub. Place on the hub RIBBON FEED MODULE RIBBON HUB... - Page 11 Install The Ribbon On The Printer Place the ribbon supply hub at the back of the printing mechanism Insert into the printing mechanism Pass the ribbon supply hub under the print head. Insert the ribbon rewind hub on the ribbon feed mechanism. Close the printing mechanism, making sure that it clicks into place.
-
Page 12: Loading The Label Roll
2-4 Loading The Label Roll A New Label Roll Module Installation Place the label stock on the label supply hub, attach the guide plates to the label stock holder LABEL STOCK Place on the ribbon hub LABEL SUPPLY HUB LABEL GUIDE PLATES ... - Page 13 Release the printing mechanism and lift it. Pass the labels through the label guides up to the tear-off plate. Adjust the label guides to the label width. Through the label guides LABEL GUIDES Close the printing mechanism Close...
-
Page 14: Installing The Label Supply Hub Base On Internal Diameter
2-5 Installing The Label Supply Hub Base On Internal Diameter 1" Cores Installing the label supply hub for 1" cores. 1.5" Cores Installing the label supply hub for 1.5" cores 3" Cores Installing the label supply hub for 3" cores. -
Page 15: Preparing For Tag Printing
Preparing For Tag Printing In tag printing, the tag hole indicates the height of a label. During adjustment, the sensor must therefore be positioned directly below the tag hole as shown in the illustration. SENSOR POSITION... -
Page 16: Connecting The Printer To The Host Computer
Connecting The Printer To The Host Computer Please make sure that the printer is switched off. Connect the power cord to the AC adapter and connect the adapter to the printer. Connect the USB / parallel cable to the printer and host computer. (USB / parallel cable’s type ... -
Page 17: Wizard Cd Standard Installation
2-8 Wizard CD Standard Installation Step.01 Insert the Super Wizard CD in the CD/DVD drive of the host computer and the installation program should pop up automatically. You will see the Welcome screen first. On the Welcome screen, choose “STANDARD INSTALLATION”. Step.02 The wizard will then ask you to make sure your USB and power cables are connected and that the power is turned on. - Page 18 Step.04 As the printer driver and LabelPro are installing, a screen will display a progress bar. While downloading completed you will see Installation completed. Click “NEXT” to continue. You can also print a test label. If don’t print a test label, the screen display as step 6. Step.05 Note * If you need more resources, tools or reference documents, you can also find them on Super Wizard CD.
- Page 19 Step.06 Once the installation is complete, you can start to make and print labels with LabelPro or through the printer driver.
-
Page 20: Wizard Cd Other Choice Installation
2-10 Wizard CD Other Choice Installation Step.01 Click “OTHER CHOICES” to next screen and select “PRINTER DRIVERS”. Step.02 Click “INSTALL SEAGULL SCIENTIFIC WINDOWS DRIVER” to next screen, and click “NEXT”. Step.03 Select “I accept the terms in the license agreement”, and click ”Next”,then click ”Finish” to step 4. - Page 21 Step.04 The Driver Wizard will guide you through the installation procedure. Select "Install printer drivers" and click “Next”. Step.05 With a USB connection, search models such as the right diagram printer device. Specify your printer model and click ”Next”. Step.06 Enter the printer name (you can use default), then click "Next"...
- Page 22 Step.07 Driver installation completed.
-
Page 23: Operation Panel
3. Operation Panel LED Operation Panel LED Operation Panel LED Indicator FEED Button FEED Button When you press the FEED button, the printer moves the label to the defined stop position. If you are using continuous labels, pressing the FEED button will move label stock until you release the button again. If you are using individual labels, pressing the FEED button will move only one label. -
Page 24: Error Alerts
Error Alerts In the event of a problem that prevents normal functioning of the printer, you will see an error message on LED indicators and hear some beep signals. Please refer to below table for the error alerts. Error Indicators ●... -
Page 25: Label Size Calibration And Self Test Page
Label size calibration and Self Test Page The printer can automatically detect and store label height. That means the host computer does not need to transmit the label height to the printer. And the self-test function lets you check whether the printer is functioning normally. Here is how you run the label size calibration and self test. -
Page 26: Operation Panel
3-4 Operation Panel STEP 1, Let the printer enter Dump Mode (For Desktop printer EZ100/EZ300/EZ500 series) 1. Power off the printer, press and hold the FEED key. 2. Power on the printer (while still holding the FEED key). 3. There are 3 serial short beeps first, then, 3 single beep. Release FEED key when heard the 3 beep. -
Page 27: Maintenance And Adjustment
4. Maintenance And Adjustment 4-1 Cleaning The Print Head Dirt on the print head or ribbon, or glue residue from the label stock may result in inadequate print quality. The printer cover must therefore always be closed during printing. Keeping dirt and dust away from the paper or labels ensures a good print quality and a longer lifespan of the print head. -
Page 28: Adjusting The Print Head Pressure
4.2 Adjusting The Print Head Pressure When printing on special media (with varying material thickness), the print quality may suffer. You will then need to adjust the print head pressure. Adjustment Steps 1. Open the printer cover. 2. Remove the ribbon. 3. -
Page 29: Adjusting The Print Line
4-3 Adjusting The Print Line When the print line is incorrectly set, the print quality on one side of the medium may suffer. In such a case, the print line must be adjusted so it is positioned parallel to the paper feed roller. ... -
Page 30: Troubleshooting
4-5 Troubleshooting Problem Solution The printer is switched on but the display Check the power supply. does not light up. Check the software settings (driver settings) or command codes. One or both LEDs light up red and printing is Look for the error alert in the table in Section 3-3 Error interrupted. -
Page 31: Appendix
Appendix Model ME120 MD120 ME130 MD130 Print Method Thermal Transfer / Direct Thermal 203 dpi (8 dots/mm) 300 dpi (12 dots/mm) Resolution Up to 5IPS (127 Up to 4 IPS (102 4 IPS (102 3 IPS (76 mm/s)** Print Speed mm/s)** mm/s)** mm/s)**...
Need help?
Do you have a question about the MD Series and is the answer not in the manual?
Questions and answers