Table of Contents
Advertisement
NS090SSXEA, NS090SSXEX, NS100SSXEX
RC090DHXEA
RC090SHXEA
RC100SHXEA
RC100DHXEA
RC100DHXGA
Refer to the service manual in the GSPN(see the rear cover) for the more information.
NS100SSXEA_E_33623A(1)_co.indd 1
AIR CONDITIONER
NS090SDXEA, NS100SSXEA
NS100SDXEA
NS125SDXEA
NS140SDXEA
RC125DHXEB
RC125DHXGA
RC140DHXEB
RC140DHXGA
SYSTEM AIR CONDITIONER
INDOOR UNIT
Model : NS100SSXEA
NS090SDXEA
NS090SSXEA
NS090SSXEX
NS100SSXEX
NS100SDXEA
NS125SDXEA
NS140SDXEA
CONTENTS
1. Precautions
2. Product Specifications
3. Disassembly and Reassembly
4. Troubleshooting
5. Exploded Views and Parts List
6. PCB Diagram
7. Wiring Diagram
8. Schematic Diagram
9. Reference Sheet
OUTDOOR UNIT
RC100SHXEA
RC090SHXEA
RC090DHXEA
RC100DHXEA
RC100DHXGA
RC125DHXEB
RC125DHXGA
RC140DHXEB
RC140DHXGA
2011-04-08
10:52:44
Advertisement
Table of Contents
Troubleshooting

Related Manuals for Samsung NS100SSXEA


Summary of Contents for Samsung NS100SSXEA
-
Page 1: Troubleshooting
SYSTEM AIR CONDITIONER INDOOR UNIT OUTDOOR UNIT Model : NS100SSXEA RC100SHXEA NS090SDXEA RC090SHXEA NS090SSXEA RC090DHXEA RC100DHXEA NS090SSXEX NS100SSXEX RC100DHXGA NS100SDXEA RC125DHXEB NS125SDXEA RC125DHXGA NS140SDXEA RC140DHXEB RC140DHXGA AIR CONDITIONER CONTENTS 1. Precautions 2. Product Specifications NS090SDXEA, NS100SSXEA 3. Disassembly and Reassembly NS090SSXEA, NS090SSXEX, NS100SSXEX 4. -
Page 2: Table Of Contents
Contents 11. Precautions ............................1-1 Precautions for the Service ......................................1-2 Precautions related to static electricity and PL ................... 1-3 Precautions related to product safety ..........................1-4 Other precautions 12. Product Specifications ....................... 2-1 The Feature of Product ........................2-2 Product Specifications ........................ - Page 3 Contents ......................4-5-12 Communication error 4-30 ......................4-5-13 Compressor start error 4-31 ......................4-5-14 Compressor lock error 4-32 4-5-15 DC Link Over voltage/ Low voltage error ................ 4-33 4-6 PCB Inspection Method 4-34 ........................4-6-1 Pre-inspection Notices ......................4-34 4-6-2 Inspection Procedure ......................
-
Page 4: Precautions
Check whether the installation location is at least two meters away from other electronic products such as TV, video, or audio. – Otherwise, the video quality might be degraded or noise might be generated. Do not let end users repair the products themselves. – Unauthorized disassembly might cause electric shock or fire. Samsung Electronics NS090SDXEA_E_SM_33623A(1)_1.indd 1 2011-04-08 10:54:26... -
Page 5: Precautions Related To Product Safety
– Release the high pressure and low pressure valve caps. – Close the high pressure valve completely using an L-wrench – After about two minutes, close the low pressure valve completely. – Stop running the air conditioner. – Separate the connecting pipe. Samsung Electronics NS090SDXEA_E_SM_33623A(1)_1.indd 2 2011-04-08 10:54:26... -
Page 6: Product Specifications
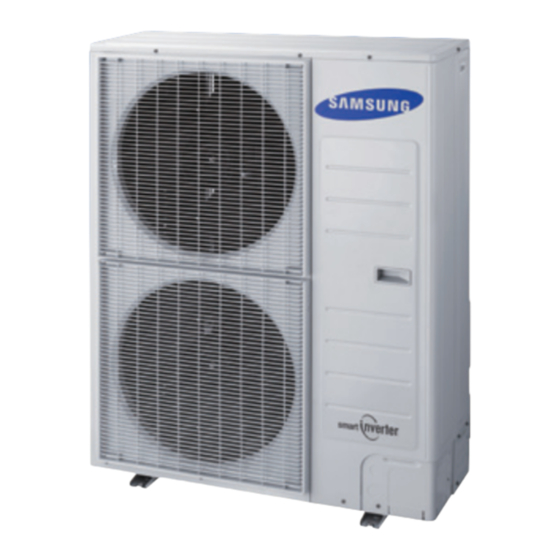
It can give the benefit to the installers and aries the reliability of the air conditioner. Long Ambient Operation(In Low Temperature) It can arise the reliability and the capacity of the air conditioner, especially operated in low temperature. Eco-friendly Product(Lead-Free, RoHS, WEEE) Samsung Electronics NS090SDXEA_E_SM_33623A(1)_1.indd 1 2011-04-08 10:54:26... - Page 7 2-2 Product Specifications NS090SSXEA NS100SSXEA NS090SDXEA ITEM NS090SSXEX NS100SSXEX /RC090DHXEA /RC090SHXEA /RC100SHXEA Indoor Unit Outdoor Unit IMAGE Remote Controller Power Product 1Φ, 220~240V/50Hz 1Φ, 220~240V/50Hz 1Φ, 220~240V/50Hz Indoor L x H x D 1150x480x320 1150x480x260 1150x480x260 Outdoor L x H x D...
-
Page 8: Product Specifications
In case of strongest air Heating) Outdoor unit 59/63 59/63 blow Refrigerant 3000 3100 Liquid 9.52 9.52 Connecting Pipe 15.88 15.88 Additional Refrigernat Standard Extension length(Total) Extension length(Elevation) Product Option 011044-1560E8-276470-370000 011044-1560E8-276470-370000 Option Code Installation Option 020000-100000-200000-300000 020000-100000-200000-300000 Samsung Electronics NS090SDXEA_E_SM_33623A(1)_1.indd 3 2011-04-08 10:54:27... - Page 9 In case of strongest 59/61 59/61 unit air blow Refrigerant 2900 2900 Liquid 9.52 9.52 Connecting Pipe 15.88 15.88 Additional Refrigerant(g/m) Standard Extension length(Total) Extension length(Elevation) Product 011044-1570F8-277D8C-370000 011044-1570F8-277D8C-370000 Option Option Code Installation 020000-100000-200000-300000 020000-100000-200000-300000 Option Samsung Electronics NS090SDXEA_E_SM_33623A(1)_1.indd 4 2011-04-08 10:54:29...
- Page 10 In case of strongest 60/62 60/62 unit air blow Refrigerant 3400 3400 Liquid 9.52 9.52 Connecting Pipe 15.88 15.88 Additional Refrigerant(g/m) Standard Extension length(Total) Extension length(Elevation) Product 011044-167208-278CA0-370000 011044-167208-278CA0-370000 Option Option Code Installation 020000-100000-200000-300000 020000-100000-200000-300000 Option Samsung Electronics NS090SDXEA_E_SM_33623A(1)_1.indd 5 2011-04-08 10:54:31...
-
Page 11: Specifications Of Optional Items
Code No. Q’ty Remark User’s manual DB98-28944A Installation manual DB98-28943A DB62-03439J Insulation DB62-03439H Essential Offer Insulation Drain In DB62-03440H DB72-00143E Insulation Install Inlet DB72-00143G Ass'y Holder Drain Pipe DB90-02064A Ass'y Drain Hose Joint DB94-00758A Samsung Electronics NS090SDXEA_E_SM_33623A(1)_1.indd 6 2011-04-08 10:54:32... - Page 12 Concealed type User’s manual DB98-05160A Installation manual DB98-05186A DB39-00223A Wire kit (MRW-10A) DB93-01066A Receiver & display unit (MRK-A00) M4x12 Tapped Screw Cable-tie Standard type User’s manual DB98-04184A Installation manual DB98-04189A DB39-00223A Wire kit (MRW-10A) Samsung Electronics NS090SDXEA_E_SM_33623A(1)_1.indd 7 2011-04-08 10:54:33...
- Page 13 Item Descriptions Code-No. Q'TY Remark DB93-00251G Wireless remote controller (ARH-401) Batteries for remote controller DB47-90024A (specification: "AAA" type) Remote controller holder DB61-00204A Optional STS 2S-2x10 Tapped Screw 6002-000581 User’s manual DB98-05156A Installation manual DB98-05184A Samsung Electronics NS090SDXEA_E_SM_33623A(1)_1.indd 8 2011-04-08 10:54:34...
- Page 14 Item Descriptions Code-No. Q'TY Remark DB93-04858C Wireless remote controller (MR-BH01) Batteries for remote controller DB47-90024A (specification: "AAA" type) Remote controller holder DB61-03147A Optional STS 2S-2x10 Tapped Screw 6002-000581 User’s manual DB98-27999A Installation manual DB98-27997A Samsung Electronics NS090SDXEA_E_SM_33623A(1)_1.indd 9 2011-04-08 10:54:34...
- Page 15 Cable clamp DB65-10074E M4×16 Tapped Screw 6002-000474 Indoor unit power drawing cable DB39-00221A Optional Communication cable of thewired remote DB39-00933A controller Wire joint DB39-90020A User’s manual DB98-25179A Installation manual DB98-25180A 2-10 Samsung Electronics 2-12 Samsung Electronics NS090SDXEA_E_SM_33623A(1)_1.indd 10 2011-04-08 10:54:35...
-
Page 16: Centralized Controller
Product Specifications Accessories (cont.) ■ Centralized controller Item Descriptions Code-No. Q'TY Remark DB93-03425C Centralized controller (MCM-A202) Cable tie DB65-10088B Cable clamp DB65-10074E Optional M4x16 Tapped Screw 6002-000474 User’s manual DB98-12721A Installation manual DB98-25773A Samsung Electronics 2-11 NS090SDXEA_E_SM_33623A(1)_1.indd 11 2011-04-08 10:54:36... -
Page 17: Function Controller
Cable clamp DB65-10074E Optional M4x16 Tapped Screw 6002-000474 User’s manual DB98-27317A Installation manual DB98-27315A ■ Transmitter Item Descriptions Code-No. Q'TY Remark DB97-00647P Transmitter (MIM-B04A) Transmitter power cable DB39-00378D Optional Transmitter communication cable DB39-00253D 2-12 Samsung Electronics NS090SDXEA_E_SM_33623A(1)_1.indd 12 2011-04-08 10:54:36... - Page 18 Accessories (cont.) ■ DMS(Date Management Server) Item Descriptions Code-No. Q'TY Remark DB93-03709B (MIM-D00) Cable tie DB65-10088B Cable clamp DB65-10074D Optional M4x16 Tapped Screw 6002-000474 Bottom hook DB73-00320A User’s manual DB98-27317A Installation manual DB98-27315A Samsung Electronics 2-13 NS090SDXEA_E_SM_33623A(1)_1.indd 13 2011-04-08 10:54:36...
-
Page 19: Disassembly And Reassembly
3. Disassembly and Reassembly Necessary Tools Item Remarks +SCREW DRIVER Adjustable Wrench (8mm, 10mm, 13mm) Samsung Electronics NS090SDXEA_E_SM_33623A(1)_1.indd 1 2011-04-08 10:54:36... -
Page 20: Indoor Unit
(Use +Screw Driver) 2) Detach from Ass'y Control In the capacitor connection wire between the Motor Fan and housing connector. 3) After disassembling 2 places indicating screws, detach the 2 Fan Case. (Use +Screw Driver) Samsung Electronics NS090SDXEA_E_SM_33623A(1)_1.indd 2 2011-04-08 10:54:37... - Page 21 Fan Motor and Blower from the set. Control In 1) After disassembling 1 Indicating screw, detach the Cover control. (Use +Screw Driver) 2) Detach the Motor-Fan and Sensor Connector from the PCB. Samsung Electronics NS090SDXEA_E_SM_33623A(1)_1.indd 3 2011-04-08 10:54:38...
- Page 22 3) Disassemble 4 indicating screws and detach Control In from the set. Drain Pan Work is possible when Disassembling the Ass'y Cabi Bottom Blower. 1) Disassemble 7 indicating screws and detach Ass'y Cabi Bottom Drain.. Samsung Electronics NS090SDXEA_E_SM_33623A(1)_1.indd 4 2011-04-08 10:54:39...
- Page 23 Drain Pan. (Use +Screw Driver) (2 screws each at left and right side). Evap Work is possible when Disassembling the Ass'y Drain Pan. 1) Disassemble 5 indicating screws to detach Cover Pipe. (Use +Screw Driver) Samsung Electronics NS090SDXEA_E_SM_33623A(1)_1.indd 5 2011-04-08 10:54:40...
- Page 24 2) Disassemble Sensor on the Evap. 3) Disassemble 4 indicating screws which are in the near of Hanger Plate to detach the Evap. (Use +Screw Driver) (2 screws each at left and right side) It needs 2 peoples.. Samsung Electronics NS090SDXEA_E_SM_33623A(1)_1.indd 6 2011-04-08 10:54:41...
-
Page 25: Outdoor Unit
Cabinet Front RH. (Use +Screw Driver) Cabi Top 1) Unscrew and remove 9 screws on each side of the Cabinet-Top. (Use +Screw Driver) Cabi Install Front 1) Unscrew and remove 1 screw in the Cabinet-Install Front. (Use +Screw Driver) Samsung Electronics NS090SDXEA_E_SM_33623A(1)_1.indd 7 2011-04-08 10:54:41... - Page 26 Guard Cond. (Use +Screw Driver) Cabi Back RH 1) Pull the sensor from Cabi Back RH. 2) Unscrew and remove 4 screws on each side of the Cabinet Back RH. (Use +Screw Driver) Samsung Electronics NS090SDXEA_E_SM_33623A(1)_1.indd 8 2011-04-08 10:54:42...
- Page 27 Procedure Remark Cabi Install Back 1) Unscrew and remove 1 screw in the Cabinet-Install Back. (Use +Screw Driver) Cabi Front LF 1) Unscrew and remove 10 screws in the Cabinet-Front LF. (Use +Screw Driver) Samsung Electronics NS090SDXEA_E_SM_33623A(1)_1.indd 9 2011-04-08 10:54:42...
- Page 28 Disassembly and Reassembly Parts Procedure Remark 1) Turn 2 mounting nuts as shown in the picture and remove it. (Use Adjustable Wrench) Samsung Electronics 3-10 NS090SDXEA_E_SM_33623A(1)_1.indd 10 2011-04-08 10:54:42...
- Page 29 2) Unscrew and remove the 8 Motor mounting screws. (Use +Screw Driver) 3) Disconnect the Motor wire From Ass'y Control Out. Bracket Motor 1) Unscrew and remove 2 mounting screws in Bracket Motor. (Use +Screw Driver) 3-11 Samsung Electronics NS090SDXEA_E_SM_33623A(1)_1.indd 11 2011-04-08 10:54:43...
- Page 30 Disassembly and Reassembly Parts Procedure Remark Control Out 1) Disconnect 4 Connecters From Ass'y Control Out. 2) Unscrew and remove 1 mounting screw in Control Out. (Use +Screw Driver) 3) Separate Ass'y Control Out. Samsung Electronics 3-12 NS090SDXEA_E_SM_33623A(1)_1.indd 12 2011-04-08 10:54:44...
- Page 31 4) Separate the pipe from the Entrance/Exit using a welder. When removing the compressor, Heat Exchanger, and Pipe, purge the Coolant inside the Compressor completely and remove the pipe with a welding flame. 3-13 Samsung Electronics NS090SDXEA_E_SM_33623A(1)_1.indd 13 2011-04-08 10:54:44...
- Page 32 Service Valve. (Use +Screw Driver) 2) Separate the pipe from the Entrance/Exit using a welder. Compressor 1) Unscrew and remove 1 mounting nut in Cover Terminal. (Use Adjustable Wrench) 2) Separate the Compressor Felt Sound. Samsung Electronics 3-14 NS090SDXEA_E_SM_33623A(1)_1.indd 14 2011-04-08 10:54:45...
- Page 33 3 mounting screws from the bottom. (Use Adjustable Wrench) Cond Out 1) Unscrew and remove 3 screws on each side of the Assy Cond Out. (Use +Screw Driver) 2) Separate the Compressor Felt Sound. 3-15 Samsung Electronics NS090SDXEA_E_SM_33623A(1)_1.indd 15 2011-04-08 10:54:46...
- Page 34 Cabi Top 1) Unscrew and remove 9 screws on each side of the Cabinet-Top. (Use +Screw Driver) Cabi Install Front 1) Unscrew and remove 1 screw in the Cabinet-Install Front. (Use +Screw Driver) Samsung Electronics 3-16 NS090SDXEA_E_SM_33623A(1)_1.indd 16 2011-04-08 10:54:47...
- Page 35 Guard Cond. (Use +Screw Driver) Cabi Back RH 1) Pull the sensor from Cabi Back RH. 2) Unscrew and remove 4 screws on each side of the Cabinet Back RH. (Use +Screw Driver) 3-17 Samsung Electronics NS090SDXEA_E_SM_33623A(1)_1.indd 17 2011-04-08 10:54:48...
- Page 36 Remark Cabi Install Back 1) Unscrew and remove 1 screw in the Cabinet-Install Back. (Use +Screw Driver) Cabi Front LF 1) Unscrew and remove 10 screws in the Cabinet-Front LF. (Use +Screw Driver) Samsung Electronics 3-18 NS090SDXEA_E_SM_33623A(1)_1.indd 18 2011-04-08 10:54:49...
- Page 37 Disassembly and Reassembly Parts Procedure Remark 1) Turn 2 mounting nuts as shown in the picture and remove it. (Use Adjustable Wrench) 3-19 Samsung Electronics NS090SDXEA_E_SM_33623A(1)_1.indd 19 2011-04-08 10:54:49...
- Page 38 2) Unscrew and remove the 8 Motor mounting screws. (Use +Screw Driver) 3) Disconnect the Motor wire From Ass'y Control Out. Bracket Motor 1) Unscrew and remove 2 mounting screws in Bracket Motor. (Use +Screw Driver) Samsung Electronics 3-20 NS090SDXEA_E_SM_33623A(1)_1.indd 20 2011-04-08 10:54:50...
- Page 39 Disassembly and Reassembly Parts Procedure Remark Control Out 1) Disconnect 4 Connecters From Ass'y Control Out. 2) Unscrew and remove 1 mounting screw in Control Out. (Use +Screw Driver) 3) Separate Ass'y Control Out. 3-21 Samsung Electronics NS090SDXEA_E_SM_33623A(1)_1.indd 21 2011-04-08 10:54:51...
- Page 40 Ass;y EEV Valve 1) Unscrew and remove 2 mounting screws in Service Valve. (Use +Screw Driver) 2) Separate the pipe from the Entrance/Exit using a welder. Samsung Electronics 3-22 NS090SDXEA_E_SM_33623A(1)_1.indd 22 2011-04-08 10:54:52...
- Page 41 1) Unscrew and remove 1 mounting nut in Cover Terminal. (Use Adjustable Wrench) 2) Separate the Compressor Felt Sound. 3) As shown in the picture, unscrew and remove 3 mounting screws from the bottom. (Use Adjustable Wrench) 3-23 Samsung Electronics NS090SDXEA_E_SM_33623A(1)_1.indd 23 2011-04-08 10:54:53...
- Page 42 Disassembly and Reassembly Parts Procedure Remark Cond Out 1) Unscrew and remove 3 screws on each side of the Assy Cond Out. (Use +Screw Driver) Samsung Electronics 3-24 NS090SDXEA_E_SM_33623A(1)_1.indd 24 2011-04-08 10:54:54...
-
Page 43: Troubleshooting
◑ ◑ ◑ EEPROM option error ● : ON, ◑ : Flickering, X : OFF ※ If you turn off the air conditioner when the LED is flickering, the LED is also turned off. Samsung Electronics NS090SDXEA_E_SM_33623A(1)_1.indd 1 2011-04-08 10:54:54... -
Page 44: Wired Remocon Error Display(Com2)
Communication error between Indoor unit and wired remote control Communication error between Master and Slave wired remote control Wired remote control error COM1/COM2 Cross-installed error Error of setting option for wired remote control COM2 Samsung Electronics NS090SDXEA_E_SM_33623A(1)_1.indd 2 2011-04-08 10:54:56... -
Page 45: Outdoor Led Error Display And Check Method
Power ON reset(1sec) Capacity miss match Test Operation at Cooling Mode Test Operation at Heating Mode Off Blink On Samsung Electronics NS090SDXEA_E_SM_33623A(1)_1.indd 3 2011-04-08 10:54:58... -
Page 46: Setting Option Setup Method
Setting is not required if you must Every time you push the button, the display panel reads . . . a volue which has a default. repeatedly. Samsung Electronics NS090SDXEA_E_SM_33623A(1)_1.indd 4 2011-04-08 10:55:05... - Page 47 If all lamps of indoor unit are flickering, Plug out, plug in power plug again and press ON/OFF key to retry. If the unit is not working properly or all lamps are continuously flickering after setting the option code, see if the correct option code is set up for its model. Samsung Electronics NS090SDXEA_E_SM_33623A(1)_1.indd 5 2011-04-08...
-
Page 48: Type B(Setting Option Setup Method)
Input the second digit of option code by pressing the High Temp button. example) 021E311422852A311439421F Result) If 2 is displayed, go to the step 4 (whenver pressing the button, 1~9, A,B,C,D,E,F are lit in order.) Samsung Electronics NS090SDXEA_E_SM_33623A(1)_1.indd 6 2011-04-08 10:55:15... - Page 49 If E is displayed, go to the step 6. ■Step 6 Method) Input the third digit of option code by pressing the On Timer button. example) 021E311422852A311439421F Result) If 3 is displayed, go to the step 6. Samsung Electronics NS090SDXEA_E_SM_33623A(1)_1.indd 7 2011-04-08 10:55:16...
- Page 50 0. ■Step 9 Method) Input the eighth digit by pressing the High Temp button. example) 021E311422852A311439421F Result) If 4 is displayed, go to the step 10. Samsung Electronics NS090SDXEA_E_SM_33623A(1)_1.indd 8 2011-04-08 10:55:17...
- Page 51 If 2 is displayed, go to the step 12. ■Step 12 Method) Input the 11st digit by pressing the On Timer button. example) 021E311422852A311439421F Result) If 8 is displayed, go to the step 13. Samsung Electronics NS090SDXEA_E_SM_33623A(1)_1.indd 9 2011-04-08 10:55:18...
- Page 52 (Check the option code correctly. At the time, if the same error continues to occur, the option code is out of input range. Check the option code again and repeat the step 1~14. Samsung Electronics 4-10 NS090SDXEA_E_SM_33623A(1)_1.indd 10 2011-04-08 10:55:18...
- Page 53 If 3 is displayed, go to the step 17. ■Step 17 Method) Input the 16th digit by pressing the High Fan button. example) 021E311422852A311439421F Result) If 1 is displayed, go to the step 18. 4-11 Samsung Electronics NS090SDXEA_E_SM_33623A(1)_1.indd 11 2011-04-08 10:55:19...
- Page 54 ② If the first number is 3 at the time, it is correct. So go to step 22. • If wanting to see previous screen, press the mode button repeatedly to make the first digit to with digit. Samsung Electronics 4-12 NS090SDXEA_E_SM_33623A(1)_1.indd 12 2011-04-08 10:55:20...
- Page 55 If 4 is displayed, go to the step 23. ■Step 23 Method) Input the 22th digit by pressing the High Fan button. example) 021E311422852A311439421F Result) If 2 is displayed, go to the step 24. 4-13 Samsung Electronics NS090SDXEA_E_SM_33623A(1)_1.indd 13 2011-04-08 10:55:21...
- Page 56 (Check the option code correctly. At the time, if the same error continues to occur, the option code is out of input range. Check the option code again and repeat the step 1~26. Samsung Electronics 4-14 NS090SDXEA_E_SM_33623A(1)_1.indd 14 2011-04-08 10:55:21...
- Page 57 (Use Fahrenheit + Sound mute + Mixed operation control : 1 + 2 + 4 = 7) Ex) 044217-1d00e6-200000-300000When using Sound mute : 044217-1d00e6-200002-300000 When using high ceiling kit for 4way and mixed operation error preventing function : 044217-1d00e6-200014-300000 4-15 Samsung Electronics NS090SDXEA_E_SM_33623A(1)_1.indd 15 2011-04-08 10:55:22...
-
Page 58: Option Code For Each Model
Troubleshooting 4-3-3 Option code for each model Model SEG1 SEG2 SEG3 SEG4 SEG5 SEG6 SEG7 SEG8 SEG9 SEG10 SEG11 SEG12 Remocon display NS100SSXEA NS090SDXEA NS090SSXEA NS090SSXEX NS125SDXEA NS140SDXEA Model SEG13 SEG14 SEG15 SEG16 SEG17 SEG18 SEG19 SEG20 SEG21 SEG22 SEG23... -
Page 59: Items To Be Checked First
Indoor fan and outdoor fan stop operation remove exterior ice in a HEAT mode, and intermittently in a HEAT mode. indoor fan and outdoor fan do not operate intermittently for within 20% of the total heater operation. 4-17 Samsung Electronics NS090SDXEA_E_SM_33623A(1)_1.indd 17 2011-04-08 10:55:29... -
Page 60: Fault Diagnosis By Symptom
Check DIP SW in the wired remote controller Set DIP SW correctly. Is there any error display on the wired Check each item according to error code list. remote controller Check the setting temperature Samsung Electronics 4-18 NS090SDXEA_E_SM_33623A(1)_1.indd 18 2011-04-08 10:55:29... -
Page 61: The Outdoor Unit Power Supply Error
#1 and #3 Are wire and socket connected Check and correct the wiring Error 469 display Error 469 display correctly? CN05,06,07 TAB (Table No. 19) (Table No. 19) terminal(EMI PCB), CN20(INVERTER PCB) Check the M/C 4-19 Samsung Electronics NS090SDXEA_E_SM_33623A(1)_1.indd 19 2011-04-08 10:55:29... -
Page 62: The Outdoor Unit Fan Error
Exchange INVERTER PCB high(4-5V) and low(0-1V) in case ofmaking manual rotation slowly? Is the Pin voltage #7 - #3 of CN40 and 41 low(0-1V) in Exchange the FAN motor normal rotation? Exchange the FAN motor Samsung Electronics 4-20 NS090SDXEA_E_SM_33623A(1)_1.indd 20 2011-04-08 10:55:29... -
Page 63: Total Current Trip Error
Does the compressor rotate normally? Exchange the compressor Open valve screw to the end Are the service valves full opened? Is AC power voltage normal during Check AC power source thecompressor in operation? Exchange INVERTER PCB 4-21 Samsung Electronics NS090SDXEA_E_SM_33623A(1)_1.indd 21 2011-04-08 10:55:29... -
Page 64: In Case Of Heating At The Cooling Mode Or Cooling At The Heating Mode
4-WAY valve coil error valve coil Dose thevoltage of AC220V apply to the Exchangethe outdoor PCB connector of 4-WAY valve coil during the operation? Go to the next page 4-WAY valve main body error Samsung Electronics 4-22 NS090SDXEA_E_SM_33623A(1)_1.indd 22 2011-04-08 10:55:30... - Page 65 Load estimation error of compressor? Is theoutdoor fan Connect the connector connectedcorrectly? Check the resistance value of Outdoor fan error outdoor fan Is theoutdoor fan Check the motor wire connectedcorrectly? Outdoor PCB error 4-23 Samsung Electronics NS090SDXEA_E_SM_33623A(1)_1.indd 23 2011-04-08 10:55:30...
-
Page 66: Outdoor Temperature Sensor Error
(Refer to the R/T TABLE) Exchange the sensor Is the resistance valueof sensor connection pull_up 18K? Exchange the PCB Exchange the PCB Normal operation Exit 400.0 350.0 300.0 250.0 200.0 150.0 100.0 50.0 Samsung Electronics 4-24 NS090SDXEA_E_SM_33623A(1)_1.indd 24 2011-04-08 10:55:30... -
Page 67: Discharge Temperature Sensor Error
(Refer to the R/T TABLE) Exchange the sensor Is the resistance valueof sensor connection pull_up 24K? Exchange the PCB Exchange the PCB Normal operation Exit 600.0 500.0 400.0 300.0 200.0 100.0 4-25 Samsung Electronics NS090SDXEA_E_SM_33623A(1)_1.indd 25 2011-04-08 10:55:30... -
Page 68: Coil Temperature Sensor Error
(Refer to the R/T TABLE) Exchange the sensor Is the resistance valueof sensor connection pull_up 18.2K? Exchange the PCB Exchange the PCB Normal operation Exit 400.0 350.0 300.0 250.0 200.0 150.0 100.0 50.0 Samsung Electronics 4-26 NS090SDXEA_E_SM_33623A(1)_1.indd 26 2011-04-08 10:55:31... -
Page 69: Fan Error
Isn't the Fan locked? Remove the Fan lock Is the connector connected correctly? Connect the connector Is the color of Fan wire matched correctly? Exchange the Fan Exchange the PCB Normal operation Exit 4-27 Samsung Electronics NS090SDXEA_E_SM_33623A(1)_1.indd 27 2011-04-08 10:55:31... -
Page 70: Dc-Link Voltage Sensor Error
2) Are Relay RY21 and R200 on the INVERTER PCB mounted normally? 2. Troubleshooting procedure Are connection of the wire from INVERTER PBA to Check and correct the wire connection EMI PBA normal? Exchange INVERTER PCB Samsung Electronics 4-28 NS090SDXEA_E_SM_33623A(1)_1.indd 28 2011-04-08 10:55:31... -
Page 71: Over Current) Error
Exchange the compressor terminal and body normal? Exchange the compressor Does the compressor rotate normally? Did AC power voltage interruption happen during Check AC power source the compressor in operation? Exchange INVERTER PCB 4-29 Samsung Electronics NS090SDXEA_E_SM_33623A(1)_1.indd 29 2011-04-08 10:55:31... -
Page 72: Communication Error
Is the connection of communication cable normal? Correct the compressor wire connection Is insuration resistance between each compressor Correct the connection of communication cable terminal and body normal? Exchange the outdoor unit PCB Samsung Electronics 4-30 NS090SDXEA_E_SM_33623A(1)_1.indd 30 2011-04-08 10:55:31... -
Page 73: Compressor Start Error
(u v, v w, w u) normal? Is the compressor body and interphase Exchange the compressor resistance insulated? Is the connection cable for thecompressor and Correct the cable connection power terminal normal? Exchange the PCB 4-31 Samsung Electronics NS090SDXEA_E_SM_33623A(1)_1.indd 31 2011-04-08 10:55:31... -
Page 74: Compressor Lock Error
(u v, v w, w u) normal? Is the compressor body and interphase Exchange the compressor resistance insulated? Is the connection cable for the compressor and Correct the cable connection power terminal normal? Exchange the outdoor unit PCB Samsung Electronics 4-32 NS090SDXEA_E_SM_33623A(1)_1.indd 32 2011-04-08 10:55:31... -
Page 75: Dc Link Over Voltage/Low Voltage Error
Is each contact resistance normal? (less than 0.1ohm) Exchange INVERTER PCB Does the error reappear frequently The cause of this error may be power source trouble as like power interruption.Check the power source 4-33 Samsung Electronics NS090SDXEA_E_SM_33623A(1)_1.indd 33 2011-04-08 10:55:31... -
Page 76: Pcb Inspection Method
FAN operation checking 1) Is the FAN motor running? Press the ON/OFF button. 2) Is the connection of CN73 normal? the fan motor •Connector trouble of CN73 1. FAN Speed[HIGH] 2. FAN mode Samsung Electronics 4-34 NS090SDXEA_E_SM_33623A(1)_1.indd 34 2011-04-08 10:55:31... -
Page 77: Outdoor Detailed Inspection Procedure
'~' marking pins 2) Is DC Link voltage 450-510V? Check IGBT module pins marking voltage near C70 Check BLDC fan 1) See 12-2-3 The Outdoor unit Fan error (Fault Diagnosis) 4-35 Samsung Electronics NS090SDXEA_E_SM_33623A(1)_1.indd 35 2011-04-08 10:55:31... -
Page 78: Main Part Inspection Method
ORANGE - BLACK 10KΩ ~ 50KΩ reverse Abnormal ∞,0Ω...Open or Short Outdoor Unit 4way Valve Solenoid Measure sensor resistance with a multimeter Normal At the normal temperature(10˚C~30˚C) 1.6KΩ±15% Abnormal ∞,0Ω...Open or Short Samsung Electronics 4-36 NS090SDXEA_E_SM_33623A(1)_1.indd 36 2011-04-08 10:55:31... -
Page 79: Exploded Views And Parts List
5. Exploded Views and Parts List 5-1 Indoor Unit ■ NS090SDXEA 15-3 15-2 15-6 15-5 15-1 15-4 15-7 15-8 Samsung Electronics NS090SDXEA_E_SM_33623A(1)_2.indd 1 2011-04-08 11:02:08... - Page 80 DB91-00346A ASS'Y DRAIN PAN ASS'Y DB61-02331A BRACKET MOTOR SGCC-M,T2.0 DB31-00355B MOTOR FAN YSK140-200-4,DC42GTVA,0.71/1.4A,50HZ DB61-02332A CASE BLOWER-UPPER ABS,T2.0 DB61-02333A CASE BLOWER-BOTTOM ABS,T2.0 DB67-00583B BLOWER-D DB97-03751A ASS'Y-BAND MOTOR ASS'Y DB32-00142B THERMISTOR-IN 10Kohm,103AT,-20~+100 DB95-01987B ASS'Y THERMISTORIN ASS’Y Samsung Electronics NS090SDXEA_E_SM_33623A(1)_2.indd 2 2011-04-08 11:02:09...
- Page 81 Exploded Views and Parts List ■ NS140SDXEA/NS100SDXEA/S125SDXEA 17-9 17-6 17-10 17-8 17-1 17-3 17-4 17-5 17-2 17-7 18-3 18-2 18-6 18-5 18-1 18-4 18-7 18-8 Samsung Electronics NS090SDXEA_E_SM_33623A(1)_2.indd 3 2011-04-08 11:02:09...
- Page 82 DB65-00105M TERMINAL BLOCK 6P 250V,20A 18-7 DB65-00105L TERMINAL BLOCK 6P 250V,20A 18-8 DB61-00250A HOLDER-WIRE CLAMP NYLON DB63-01296A COVER CONTROL ASS'Y,SGCC-M T0.8 DB00-00000A ASS'Y PCB MAIN DH140EAV DB32-00142B THERMISTOR-ASS'Y 103AT,103FW DB95-01987B ASS'Y THERMISTOR IN ASS'Y Samsung Electronics NS090SDXEA_E_SM_33623A(1)_2.indd 4 2011-04-08 11:02:09...
- Page 83 Exploded Views and Parts List ■ NS090SSXEA/NS090SSXEX/NS100SSXEA/NS100SSXEX 14-7 14-4 14-8 14-6 14-3 14-1 15-3 15-2 14-2 15-6 14-5 15-5 15-4 15-7 15-1 15-8 Samsung Electronics NS090SDXEA_E_SM_33623A(1)_2.indd 5 2011-04-08 11:02:11...
- Page 84 Exploded Views and Parts List ▒ Parts List Q'TY SA/SNA Code No. Description Specification NS090SSXEA NS100SSXEX NS090SSXEX NS100SSXEA DB90-02927B ASS'Y CABINET-TOP MA0 PJT,SSEC DB90-02405C ASS'Y CABINET-BOTTOM BLOWERMA1,SSEC DB90-02409D ASS'Y CABINET-BOTTOM DRAIN MA1,SSEC DB90-02929A ASS'Y CABINET-SIDE RH MA0 PJT,SSEC DB61-01282A HOLDER-SIDE CABI ADC6000TG,SGCC-M,T3.0...
-
Page 85: Outdoor Unit
5-2 Outdoor Unit ■ RC090DHXEA/RC090SHXEA/RC100SHXEA/RC100DHXEA/RC100DHXGA 23-1 23-3 23-2 Samsung Electronics NS090SDXEA_E_SM_33623A(1)_2.indd 7 2011-04-08 11:03:07... - Page 86 ASS'Y, 1Ø DB96-15476B ASS'Y VALVE ASS'Y, 3Ø 23-1 DB90-05874B ASS'Y BRACKET VALVE ASS'Y 23-2 DB96-14880A ASS'Y VALVE 4WAY RC100DHXEA, R410A, 1Ø DB96-14886A ASS'Y VALVE 4WAY RC100DHXGA, R410A, 3Ø 23-3 DB96-14885A ASS'Y TUBE EEV RC100DHXEA, R410A Samsung Electronics NS090SDXEA_E_SM_33623A(1)_2.indd 8 2011-04-08 11:03:08...
- Page 87 Exploded Views and Parts List ■ RC125DHXEB/RC125DHXGA/RC140DHXEB/RC140DHXGA 23-1 23-2 23-3 Samsung Electronics NS090SDXEA_E_SM_33623A(1)_2.indd 9 2011-04-08 11:04:29...
- Page 88 ASS'Y, 1Ø UG5T450FUFJXSG COMPRESSOR ASS'Y, 3Ø DB90-02316E ASS'Y HOLDER-PLATE COND ASS'Y DB96-14661A ASS'Y COND OUT ASS'Y DB96-14898A ASS'Y-VALVE ASS'Y 23-1 DB90-05874A ASS'Y BRACKET-VALVE RC100PHXEA,ManU 23-2 DB96-14488A ASS'Y-VALVE 4WAY RC100PHXEA,R410A 23-3 DB96-14510A ASS'Y TUBE-EEV RC100PHXEA,R410A Samsung Electronics 5-10 NS090SDXEA_E_SM_33623A(1)_2.indd 10 2011-04-08 11:04:30...
-
Page 89: Ass'y Control Out
5-3 ASS'Y CONTROL OUT ■ RC125DHXEB/RC125DHXGA/RC140DHXEB/RC140DHXGA 12-3 12-4 12-1 12-2 5-11 Samsung Electronics NS090SDXEA_E_SM_33623A(1)_2.indd 11 2011-04-08 11:04:32... - Page 90 ASS'Y, TERMIANL TO MAIN DB93-11112A ASS'Y PCB MAIN-INVERTER Inverter Platform #4, 1Ø DB93-11114A ASS'Y PCB MAIN-INVERTER Inverter Platform #6, 3Ø DB93-10864A ASS'Y CONNECTOR WIRE RST AWG #14 DB93-11241A ASS'Y CONNECTOR WIRE REATOR AWG #12 Samsung Electronics 5-12 NS090SDXEA_E_SM_33623A(1)_2.indd 12 2011-04-08 11:04:32...
-
Page 91: Indoor Unit
Indoor Option S/W Heater Discharge : SMW250-02(YEL) Indoor Fan(TAP) : YW396-09AV(WHT) Temperature Sensor : SMW250-02(YEL) Ventilator : YW396-03AV(BLK) Samsung Electronics Wired Remote Controller Power : YW396-02(WHT) Drain Pump : YW396-03AV(YEL) External Control(S/W Part) : SMW250-02(RED) Hot Coil : YW396-03AV(RED) EEV : SMW250-05(BLU) : SMW250-05(BLU) -
Page 92: Samsung Electronics
External Control(Display Part) : SMW250-04(RED) Transformer Out : YW396-03AV(WHT) HALL IC : SMW250-03(BLU) Main Power In : YW396-03AV(BLU) MICOM Download : SMW200-10(WHT) Power : YW396-03AV(BLU) Indoor/Outdoor Communication : YW396-02(RED) Transformer In : SMW250-03(RED) Samsung Electronics Samsung Electronics NS090SDXEA_E_SM_33623A(1)_2.indd 2 2011-04-08 11:04:33... -
Page 93: Outdoor Unit Pcb
PCB Diagram 6-1-2 Outdoor Unit PCB ■ Main PCB Samsung Electronics NS090SDXEA_E_SM_33623A(1)_2.indd 3 2011-04-08 11:04:44... - Page 94 #1 : DC 12V #1 : COM1 #1 : DC 12V #3 : GND #2 : GND #2 : COM2 #2 : GND #4 : DC 5V #3 : DC 5V #4 : COM1 #5 : COM2 Samsung Electronics NS090SDXEA_E_SM_33623A(1)_2.indd 4 2011-04-08 11:04:45...
- Page 95 #3 : GND #3 : GND #3 : COMP. U-phase(YEL) #4 : DC 15V #4 : DC 15V #5 : FAN RPM #5 : FAN RPM #6 : FAN RPM feedback #6 : FAN RPM feedback Samsung Electronics NS090SDXEA_E_SM_33623A(1)_2.indd 5 2011-04-08 11:04:46...
- Page 96 #3 : GND, #4 : DC 15V #2 : COMP. V-phase(BLU) #5 : FAN RPM, #6 : FAN RPM feedback #5 : FAN RPM, #6 : FAN RPM feedback #3 : COMP. U-phase(YEL) ⑨ CN600-REACTOR #1-#2 : DCL Reactor Samsung Electronics NS090SDXEA_E_SM_33623A(1)_2.indd 6 2011-04-08 11:04:59...
- Page 97 (cont.) ■ EMI PCB : 1Phase - RC *** XE * ① ② ③ L1-AC POWER L phase N1-AC POWER N phase CN01-AC POWER L1 : BRN N1 : SKY-BLU #1-#3 : AC 220~240V Samsung Electronics NS090SDXEA_E_SM_33623A(1)_2.indd 7 2011-04-08 11:05:08...
- Page 98 ■ EMI PCB : 3Phase - RC *** XGA ① ② RST-AC POWER 3phase CN100-AC POWER #R : AC 380~400V : WHT #1-#3 : AC 220~240V #S : AC 380~400V : BRN #T : AC 380~400V : BLK Samsung Electronics NS090SDXEA_E_SM_33623A(1)_2.indd 8 2011-04-08 11:05:17...
-
Page 99: Wiring Diagram
7. Wiring Diagram 7-1 Indoor Unit This Document can not be used without Samsung’s authorization. Samsung Electronics NS090SDXEA_E_SM_33623A(1)_2.indd 1 2011-04-08 11:05:18... -
Page 100: Outdoor Unit
Wiring Diagram 7-2 Outdoor Unit Outdoor Unit : RC *** XE * This Document can not be used without Samsung’s authorization. Samsung Electronics NS090SDXEA_E_SM_33623A(1)_2.indd 2 2011-04-08 11:05:20... - Page 101 Outdoor Unit (cont.) Outdoor Unit : RC *** XGA This Document can not be used without Samsung’s authorization. Samsung Electronics NS090SDXEA_E_SM_33623A(1)_2.indd 3 2011-04-08 11:05:23...
- Page 102 MEMO Samsung Electronics NS090SDXEA_E_SM_33623A(1)_2.indd 4 2011-04-08 11:05:23...
-
Page 103: Schematic Diagram
8. Schematic Diagram 8-1 Indoor Unit 8-1-1 MAIN PCB This Document can not be used without Samsung’s authorization. Samsung Electronics NS090SDXEA_E_SM_33623A(1)_2.indd 1-2 2011-04-08 11:09:12... - Page 104 Schematic Diagram Schematic Diagram 8-1-2 OUtDOOr UNIt PCB ■ MAIN PCB This Document can not be used without Samsung’s authorization. Samsung Electronics NS090SDXEA_E_SM_33623A(1)_2.indd 3-4 2011-04-08 11:09:34...
-
Page 105: Outdoor Unit Pcb
Schematic Diagram Schematic Diagram OUtDOOr UNIt PCB (cont.) ■ Inverter PCB : 1Phase I - rC *** HXE * This Document can not be used without Samsung’s authorization. Samsung Electronics NS090SDXEA_E_SM_33623A(1)_2.indd 5-6 2011-04-08 11:09:38... - Page 106 Schematic Diagram Schematic Diagram OUtDOOr UNIt PCB (cont.) ■ EMI PCB : 1Phase - rC *** XE * This Document can not be used without Samsung’s authorization. Samsung Electronics 8-10 NS090SDXEA_E_SM_33623A(1)_2.indd 7-8 2011-04-08 11:09:38...
- Page 107 Schematic Diagram Schematic Diagram OUtDOOr UNIt PCB (cont.) ▒ EMI PCB : 3Phase - rC *** XGA This Document can not be used without Samsung’s authorization. Samsung Electronics 8-11 NS090SDXEA_E_SM_33623A(1)_2.indd 9-10 2011-04-08 11:09:38...
-
Page 108: Reference Sheet
Ceiling Console Conv Floor type FAC & Mid/Large Size Mont Blanc Vivace Neo Forte (EEV) Neo-Forte Korean market Crystal ※ "/" can be removed from the buyer card if there are not enough digits. Samsung Electronics NS090SDXEA_E_SM_33623A(1)_2.indd 1 2011-04-08 11:06:05... -
Page 109: Index For Model Name
Change point Ice box (export/foreign market) Mode TROPICAL C/O TROPICAL H/P Refrigerant R-22 R410A ★ ※ MCD: Dummy mock-up model ※ “/” can be removed from the buyer card if there are not enough digits. Samsung Electronics NS090SDXEA_E_SM_33623A(1)_2.indd 2 2011-04-08 11:06:05... -
Page 110: Refrigerating Cycle Diagram
You can open the valve by turning the need valve counterclockwise using hex wrench, and it is used for vacuum, gas purging, coolant injection, coolant purging, and indoor-outdoor unit connection. ▒ ACCUMULATOR Accumulator prevents the flow of liquid-state coolant into the compressor. (Liquid-state coolant flowing into the compressor will overload the compressor.) Samsung Electronics NS090SDXEA_E_SM_33623A(1)_2.indd 3 2011-04-08 11:06:06... -
Page 111: Pressure Graph
Outdoor(°C) 18.5 16.7 15.9 15.7 14.7 13.4 15.2 14.3 13.6 Outdoor Temp.(°C) Heating ▒ Heating Indoor (°C) 28/18 27/19 20/15 Outdoor(°C) 33.6 33.3 30.1 27.9 23.5 24.2 23.9 19.9 22.5 22.2 17.9 Outdoor Temp.(°C) Samsung Electronics NS090SDXEA_E_SM_33623A(1)_2.indd 4 2011-04-08 11:06:06... -
Page 112: Ns100Ssxea_E_33623A(1)_Co.indd
Mideast & Africa http://mea.samsungportal.com © Samsung Electronics Co., Ltd. Apr. 2011. This Service Manual is a property of Samsung Electronics Co., Ltd. Printed in Korea. Any unauthorized use of Manual can be punished under applicable International and/or domestic law.