
Related Manuals for Panasonic BL-WV10


Summary of Contents for Panasonic BL-WV10
-
Page 1: Operating Instructions
Operating Instructions Wireless Camera Monitoring System BL-WV10 Model No. Please read this manual before using and save this manual for future reference. -
Page 2: Main Features
TV. Wireless cameras such as the BL-C30 can be connected as well, meaning you won't have to worry about running cables from the BL-WV10 to each camera. Pan/Tilt Feature Aim the camera wherever you want by simply pressing the navigator keys on the included remote control. - Page 3 We cannot be held responsible in the event of such incidents. • If you are using a wireless router, connect the BL-WV10 to the router using an Ethernet cable. Wireless connection to the router is not supported. •...
- Page 4 How to Use This Documentation The following documentation is included: Getting Started Provides basic instructions for connecting your cameras to the BL-WV10, as well as error and troubleshooting information. Operating Instructions (this document) Provides detailed instructions on BL-WV10 operations, configuration, features, etc.
- Page 5 BL-WV10, make sure the camera's IPsec feature is disabled. For C series camera users In order to use a C series camera with the BL-WV10, set the [Access Level] of the [General User] to [Level 3]. For more information, refer to the operating instructions provided with your C series camera.
-
Page 6: Important Safety Instructions
The AC cord is used as the main disconnect device. Ensure that the AC outlet is located/installed near the product and is easily accessible. Use only the included Panasonic AC adaptor and AC cord. The AC adaptor must remain connected at all times. (It is normal for the adaptor to feel warm during use.) - Page 7 Use only non-rechargeable AA batteries. When replacing the batteries, we recommend using the same type of Panasonic batteries that are included with this product. See the Getting Started for more information. Notice Regarding Wireless Communications To avoid wireless communication interference and instability, do not use this product near the following devices.
- Page 8 Contact: Panasonic Services Europe GmbH Panasonic Testing Centre Winsbergring 15, 22525 Hamburg, F.R. Germany 0682 1999/5/EC Important Safety Information: Use only the included Panasonic AC adaptor (model no. PQLV202; order no. PQLV202X) and AC cord.
-
Page 9: Table Of Contents
Table of Contents Names and Locations ..........12 Main Unit ..................12 Remote Control ................15 Setup ................20 Setup Overview ................20 Connection Examples ..............20 Local and Remote Cameras............21 When Using a Router ..............22 2.4.1 Initial Connections (When Using a Router)..........22 2.4.2 Easy Network Setup (When Using a Router) .......... 23 2.4.3 Quick Setup (When Using a Router) ............ - Page 10 Recording Images............54 SD Memory Cards................55 4.1.1 SD Memory Card Capacity ..............57 Standard Recording ..............59 Snapshot Recording..............60 Timer Recording ................60 4.4.1 Setup for Timer Recording ...............60 4.4.2 Setup for Continuous Sensor Recording..........65 4.4.3 Changing the Record Mode ..............67 Confirming, Changing, and Erasing Recording Programs....68 Viewing Movies and Pictures ........
- Page 11 When Two Events Occur Simultaneously........124 10 Resetting the BL-WV10..........125 11 Adding Cameras............126 12 Changing the Camera's User Name ......128 13 Default Settings for the BL-WV10 ......129 14 Specifications ............130 15 When the Remote Control is Missing......133 15.1 Sequential Display Mode............133 16 Appendix ..............135...
-
Page 12: Names And Locations
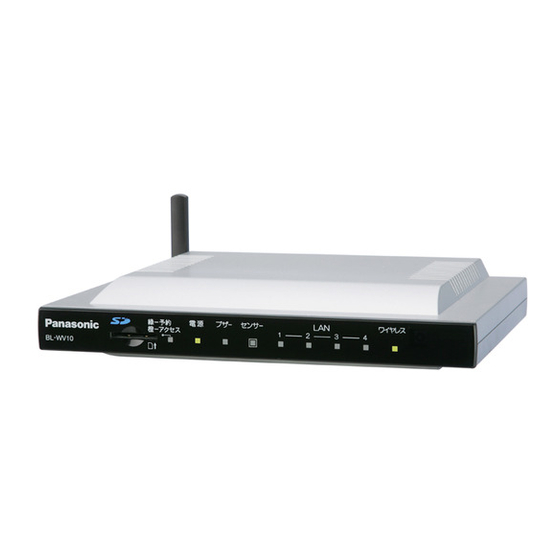
1 Names and Locations Names and Locations 1Table of Contents Main Unit Front Panel (3) (4) (5) SD Memory Card port (see page 55) Timer/Busy indicator (see page 13) Power indicator (see page 13) Alert indicator (see page 13) Sensor indicator (see page 13) LAN indicators (see page 13) Wireless indicator (see page 14) Remote control sensor (see page 16) - Page 13 1 Names and Locations Indicators The indicators display the status of the BL-WV10 and network conditions. Indicator Color Description Timer/Busy Green Timer/Sensor recording has been set. Turn off by pressing TIMER on the remote control. Green (flashing) Timer/Sensor recording cannot be turned on because the SD memory card is full.
- Page 14 1 Names and Locations Indicator Color Description Wireless Green The unit is connected to a wireless camera. During Quick Setup: Quick Setup is in progress. Green (flashing) During Quick Setup: Quick Setup has been completed for a camera.
-
Page 15: Remote Control
1 Names and Locations Remote Control (10) (11) (12) (13) (14) POWER and INPUT SELECT: You can program the remote control to turn your TV on and off when the POWER button is pressed, and to change the TV's video input. You must first program your TV's manufacturer code (see page 18). - Page 16 1 Names and Locations Navigator keys: Used to select on-screen items or aim the camera in a different direction. ENTER: Depending on the current screen, selects the highlighted setting or item, saves the current setting, or aims the camera at the home position (see page 41).
- Page 17 To clean, wipe the remote control sensor and transmitter with a clean dry cloth. • If the BL-WV10 is placed in a cabinet, the thickness and/or color of the glass doors of the cabinet may decrease the effective range of the remote control.
- Page 18 1 Names and Locations Programming the remote control If you have a Panasonic television, the remote control can be used to turn the television on and off, and to switch the television’s video input selection. You must first set the manufacturer’s code for the remote control. While holding down POWER, enter the 2-digit code found in the chart below.
- Page 19 1 Names and Locations Using the remote control Below is an example of how the remote control is used to navigate through on-screen menus. Example: Press ENTER to enter the [Camera List] screen. ENTER Navigator keys Operation hints are shown here. Remote control buttons and keys that can be used are shown here.
-
Page 20: Setup
2 Setup Setup Setup Overview The following steps briefly describe the setup procedure required before you can use the BL-WV10 to view camera images. Detailed procedures can be found in this document. Note • Up to 8 cameras can be registered to the BL-WV10. -
Page 21: Local And Remote Cameras
2 Setup Local and Remote Cameras Cameras accessed by the BL-WV10 are referred to as either “local” or “remote” cameras, based on the way in which they are configured. Local cameras allow you to not only monitor images, but can be used in conjunction with the various features of the BL-WV10. -
Page 22: When Using A Router
Make sure your router's DHCP feature is turned on. Refer to the operating instructions included with your router for more information. • If you are using a wireless router, connect the BL-WV10 to the router using an Ethernet cable. Wireless connection to the router is not supported. 2.4.1... -
Page 23: Easy Network Setup (When Using A Router)
2.4.2 Easy Network Setup (When Using a Router) After the BL-WV10 starts up for the first time, the [Easy Network Setup] screen is displayed. Here you can set the administrator user name and password, and select whether access from the Internet is configured automatically or manually. -
Page 24: Quick Setup (When Using A Router)
BL-WV10's Quick Setup utility to configure the cameras. 2.4.3 Quick Setup (When Using a Router) To use the BL-WV10 with your cameras and a router, you will need to configure the BL-WV10 and each device. The BL-WV10's Quick Setup utility can help you configure the devices easily. -
Page 25: Rear Panel
To configure a wireless camera with a wired/wireless switch, such as the BL-C30, set the switch to WIRED during Quick Setup. Connect the camera to the power outlet. Rear panel of LAN jacks BL-WV10 Rear panel Ethernet cable of camera power... -
Page 26: Viewing Camera Images (When Using A Router)
2 Setup To register another camera, connect the camera to one of the LAN jacks of the BL-WV10 or the router, then turn the camera on by connecting it to the power outlet. When you have finished registering all cameras, set the BL-WV10's mode switch to NORMAL and disconnect the DC cord from the rear of the unit. -
Page 27: Placing Cameras (When Using A Router)
Refer to page 7 as well as the operating instructions included with your cameras for proper placement. Connect all wired cameras to the BL-WV10. Confirm that mode switch on the back of the BL-WV10 is set to NORMAL, and turn in on. Turn on all cameras. -
Page 28: When Not Using A Router
Connect the AC cord to the AC adaptor and to the power outlet. Turn on the BL-WV10 by connecting the DC cord to the unit. • The startup screen appears on the TV screen. You are now ready to use the BL-WV10's Easy Network Setup utility to configure the BL-WV10. -
Page 29: Easy Network Setup (When Not Using A Router)
2.5.2 Easy Network Setup (When Not Using a Router) After the BL-WV10 starts up for the first time, the [Easy Network Setup] screen is displayed. Here you can set the administrator user name and password. Confirm that the [Easy Network Setup] screen is displayed. -
Page 30: Quick Setup (When Not Using A Router)
2 Setup 2.5.3 Quick Setup (When Not Using a Router) To use the BL-WV10 with your cameras, you will need to configure the BL-WV10 and your cameras. The BL-WV10's Quick Setup utility can help you configure the devices easily. Wait while the Quick Setup utility scans for network settings. -
Page 31: Rear Panel
To register another camera, connect the camera to one of the LAN jacks of the BL-WV10, then turn the camera on by connecting it to the power outlet. When you have finished registering all cameras, set the BL-WV10's mode switch to NORMAL and disconnect the DC cord from the rear of the unit. -
Page 32: Viewing Camera Images (When Not Using A Router)
Note • If the BL-WV10 does not receive date and time information from any of the connected cameras, the [Date and Time] screen will appear. Select the current date and time using the navigator keys on the remote control, and press ENTER when finished. -
Page 33: Placing Cameras (When Not Using A Router)
Refer to page 7 as well as the operating instructions included with your cameras for proper placement. Connect all wired cameras to the BL-WV10. Confirm that mode switch on the back of the BL-WV10 is set to NORMAL, and turn in on. Turn on all cameras. -
Page 34: Re-Registering A Remote Camera As A Local Camera
(For definitions of local and remote cameras, see page 21.) Access the camera with a computer and change its user name and password to match the administrator user name and password for the BL-WV10 that you set during Basic Setup. -
Page 35: Viewing Camera Images
For HCM series cameras, a maximum of 30 fps in LOW quality and 12 fps in HIGH quality is possible (see page 117). • Network speed may decrease while the BL-WV10 is turned on and connected to cameras. • The display size and brightness of the monitoring screen can be adjusted... - Page 36 • If remote cameras are registered in camera list 1 and those cameras are set to not save passwords (see page 101), the BL-WV10 will display a password input screen. After entering the camera’s user name and password and pressing [OK], the monitoring screen will appear.
-
Page 37: Displaying The Menu Screen
When a camera’s built-in sensor detects a change in temperature, this feature can automatically display the image from the camera (see page 50). Setup: Manages the time settings, the initial settings for the BL-WV10, camera settings and SD memory cards (see page 79). Note •... -
Page 38: Panning/Tilting
Note • If another user accesses the camera using a computer and pans or tilts the camera lens, the image displayed by the BL-WV10 will change accordingly. • If the camera lens is panned or tilted to its maximum viewing angle, notification appears on screen briefly. - Page 39 3 Viewing Camera Images For example, [Right End] is displayed when the camera is panned to the rightmost limit of the lens. [Setting Cameras from the Computer] • If the camera has been set to disable pan and tilt control, you will be unable to use panning and tilting functions.
-
Page 40: Zooming
When viewing images from a camera that has an optical zoom, if another user accesses the camera using a computer and zooms in or out, the image displayed by the BL-WV10 will change accordingly. • If the camera is zoomed in or out to its maximum viewing depth, notification appears on screen briefly. -
Page 41: Home Position/Sensor Position/Preset Keys
3 Viewing Camera Images Home Position/Sensor Position/Preset Keys The camera’s home position, sensor position and preset keys can be registered, allowing to aim the camera at a predetermined location easily. If the camera does not feature a pan/tilt lens, such as the BL-C20, these features are not available. - Page 42 3 Viewing Camera Images Registering the Home Position/Sensor Position Using the navigator keys, pan and tilt the lens and aim it at the desired home position. To register the current position as the home position, hold ENTER for about 5 seconds.
- Page 43 3 Viewing Camera Images Registering the Preset Keys The camera’s display positions can be registered to correspond to numbers of the remote control's number keys. Using the navigator keys, pan and tilt the lens and aim it at the position you would like to register to a preset key.
- Page 44 3 Viewing Camera Images Viewing the home position Press ENTER while monitoring a camera. • The lens moves to the home position. • [Home Position] is displayed in the upper left corner of the screen for about 4 seconds. Viewing the sensor position Press 9 while monitoring a camera.
- Page 45 3 Viewing Camera Images Viewing a preset position Press one of the registered number keys (1 to 8) while monitoring a camera. • The lens moves to the preset position. • For certain camera models, keys 1 to 4 are registered at the factory and aim the camera to the upper left, upper right, lower left, and lower right positions, respectively.
-
Page 46: Choosing A Camera From The Camera List
3 Viewing Camera Images Choosing a Camera from the Camera List Press MENU. • The menu is displayed. Select [Camera List] and press ENTER. • The Camera List appears. Note • When you select a camera from the list, its monitoring screen appears in the background. -
Page 47: Displaying The Multi-Camera Screen
3 Viewing Camera Images Displaying the Multi-Camera Screen Press 0 while monitoring a camera to display the multi-camera screen. • When either the Camera List or Multi-Camera Screens are visible, use the navigator keys to select a camera, then press ENTER to monitor a single camera. - Page 48 3 Viewing Camera Images Multi-Cam View Images will not be displayed from remote cameras which have [Password Save] set to [Off]. When camera “Remote1” is selected. Enter the camera's user name and password in order to view the camera. • While the Camera List is displayed, you can press STOP, PLAY/PAUSE, or REC to sequentially display each camera.
-
Page 49: Viewing Camera Images From A Mobile Phone Or Computer
3 Viewing Camera Images Viewing Camera Images from a Mobile Phone or Computer If you are using a router, and if the router is configured to allow access from the Internet, you can view camera images from a mobile phone or computer when you are out of the house. -
Page 50: Sensor Alert Mode
3 Viewing Camera Images Sensor Alert Mode Sensor Alert uses the camera sensor functionality to automatically switch monitoring cameras with sensor cameras. Note • The connected camera's built-in sensor, external sensor, and motion detection feature can be used to trigger Sensor Alert. The camera must have at least one of these features in order to use the camera for Sensor Alert. - Page 51 To activate Sensor Alert, you will need to first turn on a sensor for at least 1 camera on the [Camera Sensors] screen. Select [Change Display] and press ENTER. To have the BL-WV10 display the image from the camera when it is triggered, use the navigator keys to select [On], then press ENTER. •...
- Page 52 If a camera's sensor triggers Sensor Alert mode, the camera's image will not be displayed if: - The TV's video input is not set to the input which the BL-WV10 is connected to - You are currently recording a camera image (using standard recording) - You are accessing the [Sensor Alert] or [Setup] screen.
- Page 53 3 Viewing Camera Images • If you have hidden the camera's image (see page 37), the camera's image will be displayed if the sensor is triggered. Turning the alarm on Alert indicator Press ALERT to turn the alarm on. • The alert indicator will turn green.
-
Page 54: Recording Images
4 Recording Images Recording Images There are 3 ways to record images: standard recording, snapshot recording and timer recording. Standard Recording: Pressing REC while monitoring a camera will record the images as a movie (see page 59). Snapshot Recording: Pressing SNAPSHOT while monitoring a camera will record a picture (see page 60). -
Page 55: Sd Memory Cards
Press the FACTORY DEFAULT RESET button. Doing so can result in corrupted data on the SD memory card. If this occurs, the card cannot be used and you will need to reformat the card with the BL-WV10. All data on the card will be erased. - Page 56 • There are no guarantees for recorded content. Issues with either the BL-WV10 or a card that result in a loss of images cannot be compensated for by Panasonic. • During standard recording (I.e., pressing the REC button on the remote...
-
Page 57: Sd Memory Card Capacity
4 Recording Images 4.1.1 SD Memory Card Capacity The length of time or the number of frames/pictures that can be recorded onto an SD memory card is as indicated below. Those figures were calculated for maximum image size. Image size and content may affect recording time or the number of frames/pictures. - Page 58 4 Recording Images Picture Storage No. of Pictures Capacity HIGH 32 MB 64 MB 1930 1290 128 MB 3900 2600 256 MB 7780 5190 512 MB 15680 10460 1 GB 30170 20120 2 GB 61340 40920...
-
Page 59: Standard Recording
Note • Neither remove an SD memory card nor turn off the BL-WV10 while it is in ordinary recording mode. Doing so will cancel the recording and may corrupt the data on the card. If this occurs, you will need to reformat the card with the BL-WV10 (see page 106). -
Page 60: Snapshot Recording
(see page 47). Timer Recording Note • If the BL-WV10’s date and time setting (page 80) is set to use Daylight Saving Time (i.e., if [DST] is turned on), actual recording time will be based on Daylight Saving Time. •... - Page 61 4 Recording Images Select [Recorder] and press ENTER. • The Recorder screen appears. • See page 67 for more information on changing recording modes. If [Sensor] is selected, select [Trigger Type] and press ENTER. • The Trigger Type screen appears. •...
- Page 62 4 Recording Images Select [New] and press ENTER. • The settings screen for timer recording appears. Remaining SD memory card capacity (in minutes) Current date and time Set the timer recording content. • A maximum of 5 intervals can be recorded with timer recording. Setting Content Day of the Week...
- Page 63 To record images from the Monitoring Screen to a video deck or a DVD/HDD recorder, select [—]. Use a video cable to connect the video output port on the BL-WV10 to the video input jack on a video deck or DVD/HDD recorder, setting the time for recording on the video deck or DVD/HDD recorder to match that of the BL-WV10.
- Page 64 • Timer recording will take place using the time as set on the BL-WV10. Be sure to confirm the current time as it is displayed, and if wrong, set the time Date and Time screen (see page 80).
-
Page 65: Setup For Continuous Sensor Recording
The functionality is similar to that of an answering machine, activated by a single button. Insert an SD memory card into the BL-WV10. • An SD memory card is not needed if you are not recording to one (see page 63). - Page 66 4 Recording Images • The continuous sensor recording [Recorder] screen appears. Note • To record from remote cameras using sensor activation, confirm that the cameras are set for sensor use (see page 102). Select the camera. Press RETURN. • Confirm the name of the selected camera, and continuous sensor recording is now set.
-
Page 67: Changing The Record Mode
4 Recording Images Note • If the power fails or is turned off during a continuous sensor recording, you may see an error result. If that occurs, erase the timer recording settings (see page 68). • During continuous sensor recording, when sensor activation is used to record images, the sensor indicator will begin flashing once the camera’s sensor is activated. -
Page 68: Confirming, Changing, And Erasing Recording Programs
4 Recording Images • The content of sensor recording is different for local and remote cameras. Local cameras capture 5 frames both before and after sensor activation. In addition, sensor response timing may lead to fewer recorded frames for each response. Remote cameras record the image at time of activation. •... - Page 69 There is no SD memory card inserted. Insert an SD memory card. Other error Do not remove or insert SD memory cards during timer recording. The camera could not be accessed previously. The BL-WV10 will try again to record images from this camera.
- Page 70 4 Recording Images Changing Timer Recording Programs In the [Recorder] screen for timer recording, select the timer recording program you wish to change and press ENTER. • The Timer screen appears. Change the settings and press ENTER. • The timer recording program is changed. Erasing a Timer Recording Program In the [Recorder] screen for timer recording, select the recording program to erase and press 1.
- Page 71 4 Recording Images Erasing Continuous Sensor Recording Programs In the [Recorder] screen for continuous sensor recording, press 1. • The continuous sensor recording settings are erased and the camera name appears as [None]. [When Errors Occur] If an error occurs during continuous sensor recording, an error icon appears (see page 69).
-
Page 72: Viewing Movies And Pictures
There are 2 ways to play recorded movies: press PLAY/PAUSE on the remote control or select the movie in the image list. Pressing the PLAY Key Insert an SD memory card containing movies into the BL-WV10. When the Monitoring Screen is visible, press PLAY/PAUSE. •... -
Page 73: Useful Tips For Movie Playback
5 Viewing Movies and Pictures • Press DISPLAY while the movie is playing to display information (see page 119). Note • You can also select any of the images (in thumbnail view) from the list in the movies screen. Useful Tips for Movie Playback Pausing Playback When the movie is playing, press PLAY/PAUSE to pause playback. - Page 74 5 Viewing Movies and Pictures Viewing Movie Information Select a movie on the [Movies] screen and press 3 to view information on the movie. The recording mode (HIGH, LOW, LONG, or -) will be displayed. Movies recorded manually while monitoring the camera image will be recorded at the monitoring resolution and displayed as-.
-
Page 75: Erasing Recorded Movies
5 Viewing Movies and Pictures Erasing Recorded Movies Erasing Movies Select the movie to be erased in the [Movies] screen and press 1. • The Confirm Deletion Screen appears. Select [Erase] and press ENTER. • The selected image is erased. Erasing All Movies Press 2 in the [Movies] screen. -
Page 76: Viewing Pictures
5 Viewing Movies and Pictures Viewing Pictures View pictures recorded as snapshots. Insert an SD memory card with pictures into the BL-WV10. Press MENU. • The menu is displayed. Select [Images] and press ENTER. Select [Pictures] and press ENTER. •... -
Page 77: Useful Tips For Viewing Pictures
5 Viewing Movies and Pictures Useful Tips for Viewing Pictures View a Slideshow Select 3 in the Picture screen, and each individual picture will be displayed sequentially. Pictures are displayed in the order they were captured. Press DISPLAY to view different information about the picture. - Page 78 5 Viewing Movies and Pictures Erasing All Pictures Press 2 in the [Pictures] screen. • The Confirm Deletion Screen appears. Select [Yes] and press ENTER. • All recorded pictures are erased.
-
Page 79: Setup Menu
6 Setup Menu Setup Menu The Setup menu can be used to set the clock for the BL-WV10, perform its initial setup, configure cameras, start Easy Network Setup, and manage SD memory cards. Press MENU. • The menu is displayed. -
Page 80: Date And Time
Note • The BL-WV10 will be unable to receive time data if no cameras are connected when it starts up. In that instance, set the clock manually. • If [DST] is turned on, the BL-WV10 will automatically adjust its clock for Daylight Saving Time. -
Page 81: General Setup
6 Setup Menu General Setup Select [General Setup] from the [Setup] screen (see page 79) and press ENTER. • The security screen appears. Enter the security code. • The default code is 9999. • The [General Setup] screen appears. Select the category of settings you wish to change, then press ENTER. •... - Page 82 6 Setup Menu When your changes are complete, press RETURN to return to the previous menu. General Settings Change the settings for the BL-WV10's security code, alarm volume, and language. Setting Description Security Set the security code needed for [General Setup] and [Camera Code Setup].
- Page 83 If you forget the security code, you will be unable to enter the Setup screen, and you will need to reset the BL-WV10. Doing so, however, will reset all of your settings to their defaults, and sever the connections to the cameras.
- Page 84 6 Setup Menu Note • If the BL-WV10 will not be connected to a network (the BL-WV10 will only be connected to cameras), these settings can be ignored. • Please be aware that when you make changes to values set during Quick Setup, you may lose access to the network.
- Page 85 The communications channel to be used can be chosen from either AUTO or a number between 1 and 13. Choosing AUTO will allow the BL-WV10 to automatically detect an available channel at launch. If the quality of the connection is not good, you can manually choose another channel as well.
- Page 86 6 —> 7 8 —> 9 A —> B C —> D E —> F For example, if the MAC address for the BL-C30 is 00:80:F0:54:C0:C4, you should specify 00:80:F0:54:C0:C4 and 00:80:F0:54:C0:C5. Certain changes may require the BL-WV10 to restart.
- Page 87 Restart tab Select the [Restart] tab and the [Restart] button will appear. Press the [Restart] button, and the Restart Confirmation screen will appear. Select [Yes] and press ENTER to restart the BL-WV10. Note • Please be aware that when you make changes to values set during Quick...
- Page 88 6 Setup Menu Sensor Settings The BL-WV10 displays an account name and password for its FTP server in order to receive sensor-detected images from the cameras. Setting Description FTP User Name Set the account name to log on to the FTP server within the BL-WV10.
-
Page 89: Registering A Camera Manually
6 Setup Menu Status Display Allows you to confirm the status of the BL-WV10. Setting Description Version Displays information on the BL-WV10 firmware and the wireless firmware. Network Displays the IP address, subnet mask, DNS servers, proxy server, proxy port and MAC address values. - Page 90 6 Setup Menu • The Camera Setup screen appears. Note • Local cameras are designated with the word [Local] in the right-hand column. Select [–] from the list of registered cameras and press ENTER. • The New Camera Registration screen appears. Enter the appropriate settings.
- Page 91 6 Setup Menu Setting Description Proxy Server Turns the use of a proxy server on or off. Turn this setting on if a proxy server is needed to access the camera's URL or IP address. Also, enter the proxy server and port indicated in the [General Setup] screen (see page 83).
-
Page 92: Camera Setup
6 Setup Menu Camera Setup You can change camera settings. You can also erase a camera from the list or change its position in the list. Select [Camera Setup] from the [Setup] screen (see page 79) and press ENTER. Select the camera whose settings you wish to change and press ENTER. •... -
Page 93: Camera Setup For Local Cameras
6 Setup Menu Note • When you select a local camera using the privacy mode feature, the Disable Privacy Mode screen will appear. To change camera settings, select [Yes] to disable the privacy mode feature. Enter the appropriate settings. • For local cameras, see page 93. - Page 94 6 Setup Menu Setting Description Auto Return Available only for cameras that feature a pan/tilt lens. Choose either none or a duration between 1 and 30 minutes. For the camera in question, if no operation occurs during the specified time, the sensor position will move to the lens direction. It can be set to automatically move to the lens direction for Sensor Alert and sensor recording.
- Page 95 6 Setup Menu including HCM series cameras. Refer to the operating instructions included with your camera for more information. Lens PRIVACY button PRIVACY button lights in red when Privacy Mode is turned on Setting Description Privacy Choose to activate or deactivate the functionality of the camera's Button PRIVACY button.
- Page 96 6 Setup Menu Note • Cameras with privacy mode turned on will not appear on the Monitoring screen. • When you select a camera that has privacy mode turned on, the following screen will appear, and you will be unable to change any settings. To make changes, select [Yes] and turn off privacy mode.
- Page 97 6 Setup Menu Status Display Displays the camera settings. Setting Description Status Displays the following camera data: model information, application, CGI, IP address and MAC address. Image Confirmation Displays the camera's image for confirmation. Setting Description Confirm To confirm the camera image, select [Click here to confirm camera image.] and press ENTER.
- Page 98 [On]. See page 108 for related settings. Status of Camera Allows you to check the status of the camera. The status information provides support for troubleshooting. See the Panasonic Network Camera support website at http://panasonic.co.jp/pcc/products/en/netwkcam/ for details about status information. Note •...
- Page 99 6 Setup Menu User Information Change the camera's user name and password. Setting Description User Name Display and change the camera's user name. Select [User Name] and press ENTER to display the character input screen. (See page 114 for more information on text entry.) The user name must be between 6 and 15 alphanumeric characters in length.
-
Page 100: Camera Setup For Remote Cameras
6 Setup Menu 6.4.2 Camera Setup for Remote Cameras Camera Information Changes the camera name and address. Setting Description Camera Display and change the camera name. Select [Camera] and press ENTER to display the character input screen. (See page 114 for more information on text entry.) Address:Port Sets the IP address or URL and the port number for the... - Page 101 6 Setup Menu User Information Change the camera's user name and password and turn password saving on or off. Setting Description User Name Display and change the camera's user name. Select [User Name] and press ENTER to display the character input screen.
- Page 102 6 Setup Menu Image Confirmation Confirms settings on screen. Setting Description Confirm To confirm a set image on screen, select [Click here to confirm camera image.] and press ENTER. • The camera image will be displayed at low resolution. Using the Sensor Sets the use of the sensor.
- Page 103 6 Setup Menu Setting Description Sensor Choose to turn sensor use on or off. Turn sensor use on for sensor recording or Sensor Alert. • Sensor use cannot be turned on of password saving is turned off. To use sensors, turn password saving on (page 101).
-
Page 104: Erasing A Camera
6 Setup Menu Erasing a Camera Select [Camera Setup] from the [Setup] screen (see page 79) and press ENTER. Select the camera to be erased from the list and press 1. • The confirmation screen appears. Select [Yes] and press ENTER. •... -
Page 105: Changing The Order Of The Camera List
Select [Yes] when prompted, then press ENTER. • The [Easy Network Setup] screen appears. Refer to the procedure on page 23 if the BL-WV10 is connected to a router, or page 29 if the BL-WV10 is not connected to a router. -
Page 106: Viewing Sd Memory Card Information
6 Setup Menu Viewing SD Memory Card Information Select [SD Card Info] from the [Setup] screen (see page 79) and press ENTER. • The SD Memory Card Management screen appears. Formatting an SD Memory Card Select [Format] and press ENTER to initialize an SD memory card. Note •... -
Page 107: Accessing From A Mobile Or Computer
(I.e., access a camera over the internet), refer to the operating instructions included with your camera. • Certain mobile phones are not compatible with this product. See the Panasonic Network Camera support website at http://panasonic.co.jp/pcc/products/en/netwkcam/ for information on mobile phones that Panasonic has verified as being compatible with this product. -
Page 108: Displaying The Camera's Url
7 Accessing from a Mobile or Computer Mobile Access: Allows you to set the camera to be accessed from a mobile phone or computer over the Internet (see page 112). Sensor Notification: Allows you to set the camera to send notification by e-mail when the camera's sensor has been triggered (see page 112). - Page 109 7 Accessing from a Mobile or Computer Enter the security code. • The [Auto E-mail] screen appears. Select the desired tab, then enter the desired settings. When finished, press RETURN to return to the [Mobile Access] screen. Receiver's E-mail Address You can set up to 3 e-mail addresses to receive notification.
- Page 110 7 Accessing from a Mobile or Computer Setting Description Port No. The port number used by the mail server. In most cases this setting does not need to be changed. Outgoing Mail Server Authentication If the outgoing mail server requires authentication, enter the appropriate values here.
- Page 111 Allows you to confirm the status of the camera. Setting Description Address 1, 2, 3 Allows you to check the status of the camera. The status information provides support for troubleshooting. See the Panasonic Network Camera support website at http://panasonic.co.jp/pcc/products/en/netwkcam/ for details about status information.
-
Page 112: Allowing Access From Mobiles Or Computers
7 Accessing from a Mobile or Computer Allowing Access from Mobiles or Computers If the router is configured to allow access from the Internet, you can view camera images from a mobile phone or computer when you are out of the house. You can turn this feature on or off. - Page 113 7 Accessing from a Mobile or Computer Select [Sensor Notification] and press ENTER. Select [Start] or [Stop] to enable or disable sensor notification, respectively. [For Computer Users] When a camera is set to be used with the Sensor Notification by E-mail feature, the camera's Trigger No.
-
Page 114: Entering Characters
8 Entering Characters Entering Characters If you select a setting that requires you to enter characters (text), the character entry screen is displayed. The last character entered (the character to the left of the cursor) can be erased by pressing 1 or by selecting [ERASE] then pressing ENTER. Cursor The text entered can be registered by pressing STOP or by selecting [SET] then pressing ENTER. -
Page 115: Other Features
9 Other Features Other Features Displaying Information While Monitoring When you press DISPLAY while the monitoring screen is displayed, the following information is displayed sequentially: • Short display information • Long display information • Extended display information • Camera image only Short display information The camera's name and status are displayed. - Page 116 9 Other Features Long display information Displays the wireless and settings status of the camera being monitored. Long display information during camera monitoring Long display Antenna icon Alert (alarm) icon Timer icon Guidance Icon Description Timer Indicates timer recording status. Icon displayed: timer recording set No icon: no timer recording set Alert...
- Page 117 9 Other Features Extended display information The extended display information is comprised of several panels, controlling image quality (resolution), pan and tilt scanning, and image brightness. After selecting a panel and changing a setting, press ENTER to see apply the changes. Extended display Quality (resolution) panel Time display panel...
- Page 118 9 Other Features Setting Description Quality Controls the resolution of the monitored image. Setting the resolution to low will shrink the displayed image. High: 640x480 pixels Low: 320x240 pixels Scan Controls the panning and tilting scans of the camera. Control Pan: pans the camera from its left to right extremes and back to the original position Tilt: tilts the camera from its top to bottom extremes and back to...
-
Page 119: Displaying Movie Information
9 Other Features Displaying Movie Information If you press DISPLAY while playing a movie, the following information be displayed: • Short display information • Long display information • Camera image only Short display information Camera name and playback status are displayed. Long display information Elapsed playback time, total recording time, recording date, and recording time are displayed. -
Page 120: Displaying Picture Information
9 Other Features Displaying Picture Information If you press DISPLAY while viewing a picture, the following information be displayed: • Short display information • Long display information • Camera image only Short display information Camera name Long display information Camera name Picture date and sequential number Picture number/... -
Page 121: Displaying Information While Recording
9 Other Features Displaying Information While Recording If you press DISPLAY in standard or timer recording modes, the following information is displayed sequentially: • Short display information • Long display information • Camera image only. Short display information Recording indicator Camera name The recording mark that appears while recording is different based on recording mode. - Page 122 9 Other Features Long display information Elapsed recording time Remaining SD memory card capacity (in minutes) Displayed during standard recording only...
-
Page 123: Temporarily Disconnecting A Camera
The connection to displayed cameras is stopped, and the Menu screen's background turns blue. To reconnect a camera (and restart its video feed): • Press PLAY/PAUSE while the Menu screen is displayed. • Select the camera from the Camera List. If you restart the BL-WV10, the camera should automatically re-connect. -
Page 124: When Two Events Occur Simultaneously
9 Other Features When Two Events Occur Simultaneously While Camera A is Monitoring Setting Operation Camera B's sensor is The camera B monitoring screen appears. activated Camera B sensor recording The camera B monitoring screen appears and sensor recording begins. Camera B timer recording The camera B monitoring screen appears and timer recording begins. -
Page 125: Resetting The Bl-Wv10
3 seconds using a pointed object. Rear panel of BL-WV10 While the BL-WV10 is turned on, set the mode switch on the back to SETUP. Press and hold the FACTORY DEFAULT RESET button for 3 seconds and then release it. -
Page 126: Adding Cameras
Reset the camera to its default settings and perform Quick Setup. A maximum of 8 cameras can be connected. Set the mode switch on the back on the BL-WV10 to SETUP, turn the BL-WV10 off and then turn it back on again. - Page 127 2. Once all of the cameras have been registered as in step 2, set the mode switch on the back on the BL-WV10 to NORMAL, turn the BL-WV10 off and then turn it back on again.
-
Page 128: Changing The Camera's User Name
Set the user name and password on the [Camera] tab (see page 84). Move the mode switch on the BL-WV10 to Setup and turn the power on again. Reset the camera to its default settings and re-perform Quick Setup as when adding more cameras (see page 126). -
Page 129: Default Settings For The Bl-Wv10
13 Default Settings for the BL-WV10 13 Default Settings for the BL-WV10 Item Default Setting Date and Time JAN 01 SUN 2006 12:00 AM General Security Code 9999 Alarm Volume Language English Network IP address 192.168.0.250 Subnet Mask 255.255.255.0 Gateway 192.168.0.1... -
Page 130: Specifications
14 Specifications 14 Specifications LAN Interface Item Specification Number of ports 4 port Connector type 8-pin modular jack (RJ-45) Physical interface IEEE802.3 (10BASE-T) IEEE802.3u (100BASE-TX) MDI/MDI-X with auto-detect Wireless Interface Item Specification IEEE802.11g Transmission protocol OFDM (IEEE802.11g standard)/DS-SS (IEEE802.11b compatible), half duplex 54/48/36/24/18/12/9/6 Mbps (IEEE802.11g Transmission speed standard): automatic fallback... - Page 131 14 Specifications Video Output Item Specification Video format Output port Single port 1.0 Vp-p (75 Ω) Output level User Interface Item Specification FACTORY DEFAULT Restoration of default settings RESET button Mode switch Normal, Setup, Sequential Display Alarm Camera sensor notification Indicator displays Power (green/amber/red), Sensor (amber) Alert (green), SD Memory Card (green/amber)
- Page 132 Automated camera image recording at sensor input event Setup Item Specification Quick Setup Automatically performs necessary network and wireless settings for Panasonic cameras and routers Wireless Terminal Feature Item Specification Security WEP (64 bit/128 bit/152 bit), wireless stealth functionality (SSID suppression, connection...
-
Page 133: When The Remote Control Is Missing
15 When the Remote Control is Missing 15.1 Sequential Display Mode The BL-WV10 requires the remote control to operate. If you lose your remote control, contact your dealer to purchase a new one (order number EUR648057). Even without a remote control, however, setting the mode switch to SEQ. DISP. will allow you to view sequentially the screens from registered cameras. - Page 134 15 When the Remote Control is Missing...
-
Page 135: Appendix
16 Appendix... -
Page 136: Declaration Of Conformity
16.1 Declaration of Conformity... -
Page 138: Gnu General Public License
16.2 GNU General Public License Version 2, June 1991 Copyright (C) 1989, 1991 Free Software Foundation, Inc. 51 Franklin St, Fifth Floor, Boston, MA02110-1301USA Everyone is permitted to copy and distribute verbatim copies of this license document, but changing it is not allowed. Preamble The licenses for most software are designed to take away your freedom to share and change it.By contrast, the GNU General Public License is intended to... - Page 139 they have is not the original, so that any problems introduced by others will not reflect on the original authors' reputations. Finally, any free program is threatened constantly by software patents.We wish to avoid the danger that redistributors of a free program will individually obtain patent licenses, in effect making the program proprietary.To prevent this, we have made it clear that any patent must be licensed for everyone's free use or not licensed at all.
- Page 140 a You must cause the modified files to carry prominent notices stating that you changed the files and the date of any change. You must cause any work that you distribute or publish, that in whole or in part contains or is derived from the Program or any part thereof, to be licensed as a whole at no charge to all third parties under the terms of this License.
- Page 141 corresponding source code, to be distributed under the terms of Sections 1 and 2 above on a medium customarily used for software interchange; or, Accompany it with the information you received as to the offer to distribute corresponding source code.(This alternative is allowed only for noncommercial distribution and only if you received the program in object code or executable form with such an offer, in accord with Subsection b above.)
- Page 142 7. If, as a consequence of a court judgment or allegation of patent infringement or for any other reason (not limited to patent issues), conditions are imposed on you (whether by court order, agreement or otherwise) that contradict the conditions of this License, they do not excuse you from the conditions of this License.If you cannot distribute so as to satisfy simultaneously your obligations under this License and any other pertinent obligations, then as a consequence you may not...
- Page 143 a version number of this License, you may choose any version ever published by the Free Software Foundation. 10. If you wish to incorporate parts of the Program into other free programs whose distribution conditions are different, write to the author to ask for permission.For software which is copyrighted by the Free Software Foundation, write to the Free Software Foundation;...
- Page 144 How to Apply These Terms to Your New Programs If you develop a new program, and you want it to be of the greatest possible use to the public, the best way to achieve this is to make it free software which everyone can redistribute and change under these terms.
- Page 145 The hypothetical commands `show w' and `show c' should show the appropriate parts of the General Public License.Of course, the commands you use may be called something other than `show w' and `show c'; they could even be mouse-clicks or menu items--whatever suits your program. You should also get your employer (if you work as a programmer) or your school, if any, to sign a "copyright disclaimer"...
-
Page 146: Gnu Lesser General Public License
16.3 GNU Lesser General Public License Version 2.1, February 1999 Copyright (C) 1991, 1999 Free Software Foundation, Inc. 51 Franklin St, Fifth Floor, Boston, MA02110-1301USA Everyone is permitted to copy and distribute verbatim copies of this license document, but changing it is not allowed. [This is the first released version of the Lesser GPL.It also counts as the successor of the GNU Library Public License, version 2, hence the version number 2.1.] Preamble... - Page 147 We protect your rights with a two-step method: (1) we copyright the library, and (2) we offer you this license, which gives you legal permission to copy, distribute and/or modify the library. To protect each distributor, we want to make it very clear that there is no warranty for the free library.Also, if the library is modified by someone else and passed on, the recipients should know that what they have is not the original version, so that the original author's reputation will not be affected by problems that might be...
- Page 148 In other cases, permission to use a particular library in non-free programs enables a greater number of people to use a large body of free software.For example, permission to use the GNU C Library in non-free programs enables many more people to use the whole GNU operating system, as well as its variant, the GNU/Linux operating system.
- Page 149 is not restricted, and output from such a program is covered only if its contents constitute a work based on the Library (independent of the use of the Library in a tool for writing it).Whether that is true depends on what the Library does and what the program that uses the Library does.
- Page 150 whose permissions for other licensees extend to the entire whole, and thus to each and every part regardless of who wrote it. Thus, it is not the intent of this section to claim rights or contest your rights to work written entirely by you;...
- Page 151 Library), rather than a "work that uses the library".The executable is therefore covered by this License. Section 6 states terms for distribution of such executables. When a "work that uses the Library" uses material from a header file that is part of the Library, the object code for the work may be a derivative work of the Library even though the source code is not.
- Page 152 b Use a suitable shared library mechanism for linking with the Library.A suitable mechanism is one that (1) uses at run time a copy of the library already present on the user's computer system, rather than copying library functions into the executable, and (2) will operate properly with a modified version of the library, if the user installs one, as long as the modified version is interface-compatible with the version that the work was made with.
- Page 153 sublicense, link with, or distribute the Library is void, and will automatically terminate your rights under this License.However, parties who have received copies, or rights, from you under this License will not have their licenses terminated so long as such parties remain in full compliance. 9.
- Page 154 This section is intended to make thoroughly clear what is believed to be a consequence of the rest of this License. 12. If the distribution and/or use of the Library is restricted in certain countries either by patents or by copyrighted interfaces, the original copyright holder who places the Library under this License may add an explicit geographical distribution limitation excluding those countries, so that distribution is permitted only in or among countries not thus excluded.In such case, this License incorporates the...
- Page 155 MAY MODIFY AND/OR REDISTRIBUTE THE LIBRARY AS PERMITTED ABOVE, BE LIABLE TO YOU FOR DAMAGES, INCLUDING ANY GENERAL, SPECIAL, INCIDENTAL OR CONSEQUENTIAL DAMAGES ARISING OUT OF THE USE OR INABILITY TO USE THE LIBRARY (INCLUDING BUT NOT LIMITED TO LOSS OF DATA OR DATA BEING RENDERED INACCURATE OR LOSSES SUSTAINED BY YOU OR THIRD PARTIES OR A FAILURE OF THE LIBRARY TO OPERATE WITH ANY OTHER SOFTWARE), EVEN IF SUCH HOLDER OR OTHER PARTY HAS...
- Page 156 How to Apply These Terms to Your New Libraries If you develop a new library, and you want it to be of the greatest possible use to the public, we recommend making it free software that everyone can redistribute and change.You can do so by permitting redistribution under these terms (or, alternatively, under the terms of the ordinary General Public License).
-
Page 157: Index
Index... - Page 158 Auto E-mail (E-mail Notification) 108 FACTORY DEFAULT RESET Button 125 Auto Return 94 Focus 40 FTP Password 88 FTP User Name 88 Battery Safety 7 BL-WV10 Default Settings List 129 General Settings 82 Specifications 130 General Setup 81 Brightness 118 Image Quality 94...
- Page 159 Sequential Display Mode (SEQ. DISP.) Setup Menu 79 Snapshot Recording 60 Quick Setup Specifications 130 When Not Using a Router 30 SSID 85 When Using a Router 24 Starting Address 84 Status BL-WV10 89 Local Camera 97 Record Mode 67...
- Page 160 Tilting/Panning 38 Timer Recording 60 Trigger Type 61 User Name 84 Video output port 12 Viewing Camera Images 35 White Balance 93 Wireless Channel 85 Communications 7 Format 85 Mode 85 Settings 85 Zoom 40...
- Page 164 1-62, 4-chome, Minoshima, Hakata-ku, Fukuoka 812-8531, Japan Copyright: This material is copyrighted by Panasonic Communications Co., Ltd., and may be reproduced for internal use only. All other reproduction, in whole or in part, is prohibited without the written consent of Panasonic Communications Co., Ltd.
Need help?
Do you have a question about the BL-WV10 and is the answer not in the manual?
Questions and answers