Miele PUR 68 W Operating And Installation Instructions
Hide thumbs
Also See for PUR 68 W:
- Operating and installation instructions (40 pages) ,
- Operating and installation instructions (40 pages) ,
- Operating and installation instructions (40 pages)

Related Manuals for Miele PUR 68 W


Summary of Contents for Miele PUR 68 W
- Page 1 Operating and installation instructions Cooker hood To prevent the risk of accidents or damage to the appliance, it is essen- tial to read these instructions before it is installed and used for the first time. en-GB M.-Nr. 10 480 140...
-
Page 2: Table Of Contents
Contents Warning and Safety instructions................ 4 Caring for the environment ................ 13 Guide to the appliance .................. 14 Modes of operation ..................... 16 Operation...................... 17 To switch the fan on ....................17 To select a power level ..................17 Switching the fan off ..................... 17 Switching the hob lighting on/off ................ - Page 3 Contents Technical data...................... 36...
-
Page 4: Warning And Safety Instructions
They contain important notes on the safety, installation, use and maintenance of the appliance. Miele cannot be held liable for non- compliance with these instructions. Keep these instructions in a safe place and ensure that all users are familiar with the contents. - Page 5 Warning and Safety instructions The cooker hood can only be used by people with reduced phys- ical, sensory or mental capabilities, or lack of experience and know- ledge, if they are supervised whilst using it, or have been shown how to use it in a safe way and recognise and understand the con- sequences of incorrect operation.
-
Page 6: Technical Safety
Unauthorised installation, maintenance and repairs can cause considerable danger for the user. Installation, maintenance and re- pairs must only be carried out by a Miele authorised technician. A damaged appliance can be dangerous. Check it for visible signs of damage. - Page 7 The manufacturer's warranty will be invalidated if the appliance is not repaired by a Miele approved service technician. Miele can only guarantee the safety of the appliance when genu- ine original Miele replacement parts are used. Faulty components must only be replaced by Miele spare parts.
- Page 8 Warning and Safety instructions Using at the same time as other heating appliances that depend on the air from the room Warning - danger of toxic fumes Great care should be taken when using the cooker hood at the same time and in the same room or area of the house as another heating appliance which depends on the air in the room.
- Page 9 Warning and Safety instructions In order to ensure safe operation, and to prevent gases given off by the heating appliances from being drawn back into the room when the cooker hood and the heater are in operation simultan- eously, an underpressure in the room of 0.04 mbar (4 pa) is the maximum permissible.
-
Page 10: Correct Use
Warning and Safety instructions Correct use Never use a naked flame beneath the cooker hood. To avoid the danger of fire, do not flambé or grill over a naked flame. When switched on, the cooker hood could draw flames into the filter. Fat deposits could ignite, presenting a fire hazard. -
Page 11: Correct Installation
Warning and Safety instructions Do not use the cooker hood without the filters in place. This way you will avoid the risk of grease and dirt getting into the appliance and hindering its smooth operation. There is a risk of fire if the cooker hood is not cleaned as de- scribed in these operating instructions. - Page 12 Warning and Safety instructions Exhaust ducting must be of non-inflammable material. Suitable material is available from Miele specialist dealers or the Miele Spares Dept. The appliance must not be connected to a chimney or flue which is in use. Neither should it be connected to ducting which ventilates rooms with fireplaces.
-
Page 13: Caring For The Environment
Caring for the environment Disposal of the packing mater- Disposal of your old appliance Electrical and electronic appliances of- ten contain valuable materials. They The packaging is designed to protect also contain materials which, if handled the appliance from damage during or disposed of incorrectly, could be po- transportation. -
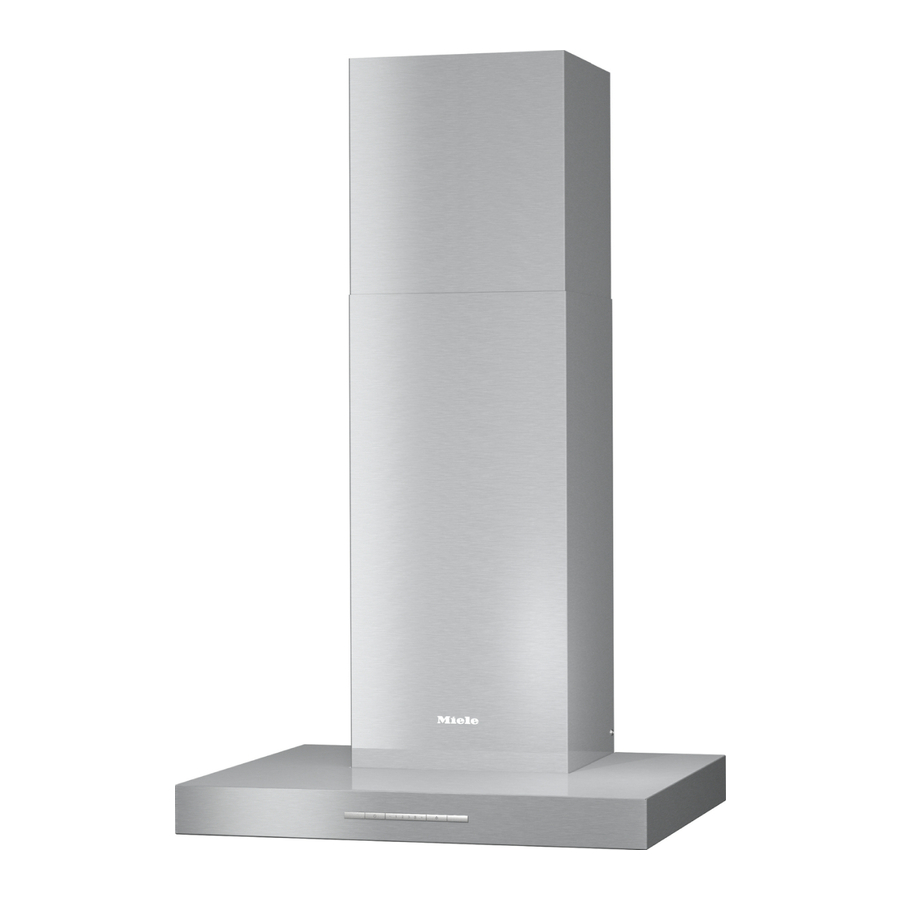
Page 14: Guide To The Appliance
Guide to the appliance... - Page 15 Guide to the appliance a Telescopic extension piece b Tower c Canopy d Controls e Grease filter(s) * f Recirculation grilles (only for recirculation mode) g Hob lighting h Charcoal filter (special accessory for recirculation mode) i On/Off control for the fan j Controls to select the fan power level k On/Off control for the hob lighting *Your cooker hood is supplied with one or more grease filters depending on model.
-
Page 16: Modes Of Operation
Modes of operation Depending on the model of the cooker Recirculation mode hood, the following options are avail- (recirculation mode cooker hoods re- able: quire a conversion kit and charcoal filter (available as optional accessories): see Extraction mode "Technical Data") The air is drawn in and cleaned by the The air is drawn in and cleaned first by grease filters and directed outside. -
Page 17: Operation
Operation To switch the fan on Switching the hob lighting on/ Press the On/Off control . The hob lighting can be switched on The fan will switch on at level 2. The and off independently of the fan. symbol and 2 will light up in the power level display. -
Page 18: Switching Power Management On/Off
Operation Switching Power management on/off You can deactivate Power manage- ment. This can result in increased electricity consumption. To set this option, both the fan and the hob lighting must be switched off. Press the "" and "" controls at the same time for approx. -
Page 19: Energy Saving Tips
Energy saving tips This cooker hood operates very effi- ciently and economically. The following will help you to save even more energy when using it: – Ensure that there is sufficient ventila- tion in the kitchen when cooking. In extraction mode, if there is insuffi- cient air flow the cooker hood cannot operate efficiently and this causes in- creased operating noise levels. -
Page 20: Cleaning And Care
To help prevent re-soiling, a propriet- be cleaned using hot water with a ary conditioning agent for stainless small amount of washing-up liquid steel (available from Miele) can also applied with a well wrung-out soft be used. sponge or cloth. -
Page 21: Grease Filters
Cleaning and care Important for the controls Grease filters The re-usable metal grease filters in the Do not leave soiling on the controls appliance remove solid particles for any length of time. (grease, dust, etc.) from the kitchen va- Otherwise they may suffer discolour- pours, preventing soiling of the cooker ation or damage. - Page 22 Cleaning and care Cleaning the grease filters by hand After cleaning Clean the filters with a soft nylon After cleaning, leave the filters to dry brush in a mild solution of hot water on an absorbent surface before repla- and a small amount of washing-up li- cing them.
-
Page 23: Charcoal Filter
It is supplied with its own installation and usage instructions which must be observed. Charcoal filters are available to order via the Miele Webshop, the Miele Spare Parts Department (see end of this book- let for contact details) or from your Miele dealer. -
Page 24: Changing A Lamp
Lamp type ........GU10 Specification........ 11427 Wattage ........... 3 W Insert the lever supplied into the gap These lamps are available from Miele or between the lamp and the lamp from specialist retailers. holder. The lamp will then drop downwards. -
Page 25: Installation
Installation Before installation Dismantling Should the appliance ever need to be Before installation, it is important dismantled, follow the installation in- to read the information given on the structions in reverse order as described following pages as well as the on the installation sheet. -
Page 26: Assembly Parts
Installation Assembly parts... - Page 27 Installation a 3 protective sheets for use when fitting the tower. b 1 exhaust socket 2 x M 6 self-tapping nuts for securing the canopy for exhaust ducting 150 mm. c 1 reducing collar for exhaust ducting 125 mm. 2 screws 3.9 x 7.5 mm d 1 non-return flap for securing the tower.
-
Page 28: Appliance Dimensions
Installation Appliance dimensions The diagram is not drawn to scale. -
Page 29: Safety Distance Between Hob And Cooker Hood (S)
Installation a Extraction b Recirculation c Ventilation grille positioned at the top for recirculation de (Only d is required for recirculation mode cooker hoods). The shaded area represents the wall or ceiling area for the ducting cut-out and for the connec- tion socket. -
Page 30: Installation Recommendations
Installation Installation recommendations Drilling diagram for wall mounting – When deciding on the safety distance between the hob and cooker hood, Please follow the directions given in please note that a distance of 650 the installation instructions supplied mm above electric cookers/hobs may for drilling. -
Page 31: Connection For Air Extraction
Connection for air extraction If the exhaust is ducted through an If the cooker hood is used at the outside wall, a telescopic wall vent or same time as a heating appliance a roof vent (available as an optional that relies on oxygen from the same accessory) is recommended. -
Page 32: Condensate Trap
Connection for air extraction Condensate trap Silencer To achieve even further reductions in noise levels, a special silencer (optional accessory) can be fitted in the ducting system. In addition to insulating the exhaust ducting, we recommend that a suitable Extraction mode condensate trap is also installed to col- lect and evaporate any condensate which may occur. - Page 33 Connection for air extraction Recirculation mode The silencer needs to be positioned between the exhaust socket and the directional unit . Ensure there is ad- equate space for fitting it.
-
Page 34: Electrical Connection
Electrical connection If the switch is not accessible after in- All electrical work should be under- stallation (depending on country), an taken by a suitably qualified and additional means of disconnection must competent person in strict accord- be provided for all poles. ance with current national and local For extra safety it is advisable to protect safety regulations (BS 7671 in the... -
Page 35: After Sales / Guarantee
In the event of a fault which you cannot tests" leaflet. remedy yourself, please contact your The latest version of this leaflet can be Miele dealer or the Miele Service De- ordered by email from: partment. – testinfomiele.de Contact details for Miele are given at Please quote your postal address, as the end of this booklet. -
Page 36: Technical Data
AC 230 V, 50 Hz Fuse rating Mains connection cable length 1.5 m Weight PUR 68 W 21 kg PUR 98 W 25 kg Accessories required for recirculation mode DUW 20 kit to convert from extraction mode to recirculation mode and charcoal fil-... - Page 37 Data sheet for household cooker hoods In acc. with delegated regulation (EU) No. 65/2014 and regulation (EU) No. 66/2014 MIELE Model name / identifier PUR 68 W Annual Energy Consumption (AEC 47,0 kWh/year hood Energy efficiency class A+ (most efficient) to F (least efficient)
- Page 38 Technical data Data sheet for household cooker hoods In acc. with delegated regulation (EU) No. 65/2014 and regulation (EU) No. 66/2014 MIELE Model name / identifier PUR 98 W Annual Energy Consumption (AEC 49,7 kWh/year hood Energy efficiency class A+ (most efficient) to F (least efficient)
- Page 39 Citywest Business Campus, Dublin 24 Dubai Tel: (01) 461 07 10, Fax: (01) 461 07 97 Tel: +971-4-341 84 44 E-Mail: info@miele.ie, Internet: www.miele.ie Fax: +971-4-341 88 52 Manufacturer: Miele & Cie. KG E-Mail: info@miele.ae Internet: www.miele.ae Carl-Miele-Straße 29, 33332 Gütersloh, Germany...
- Page 40 PUR 68 W PUR 98 W en-GB M.-Nr. 10 480 140 / 00...
Need help?
Do you have a question about the PUR 68 W and is the answer not in the manual?
Questions and answers